Initial settings
To start working in the platform, we need to log in as a super administrator. To do this, you must enter the Login: [email protected] and the password: dg2Ew#hga8Q.
Creating a group of accounts
Accounts are divided into groups so that two independent organizations can work simultaneously in one system. Users from different account groups will not interact with each other. There can be an unlimited number of accounts in one account group.
Create a group of accounts:
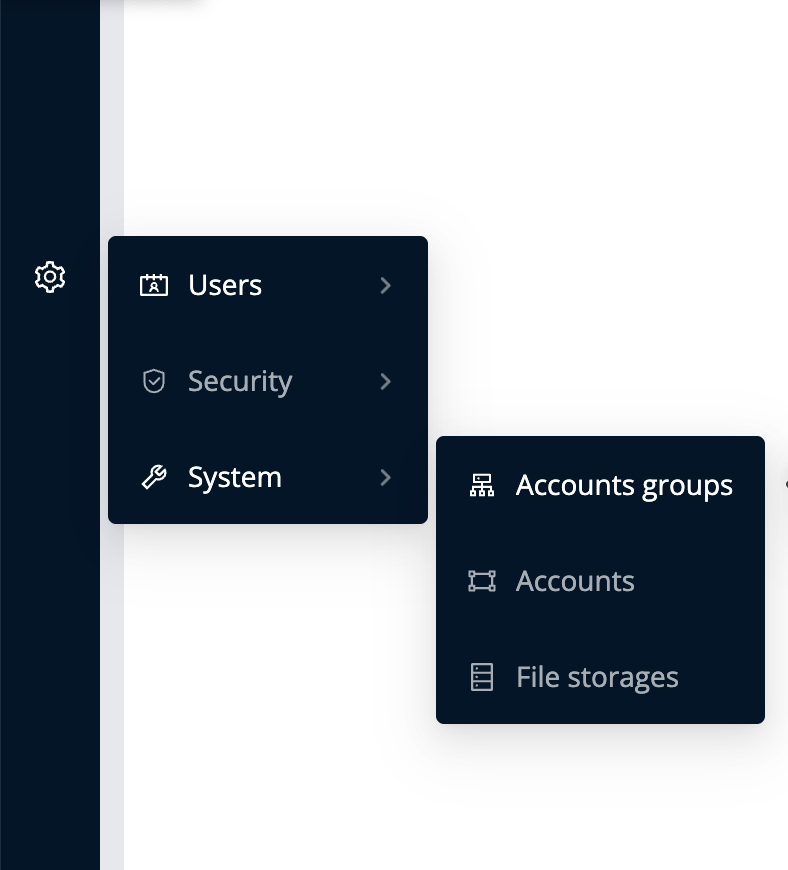
Place the cursor on

Open the section [Admin page]—[System]—[Account groups]
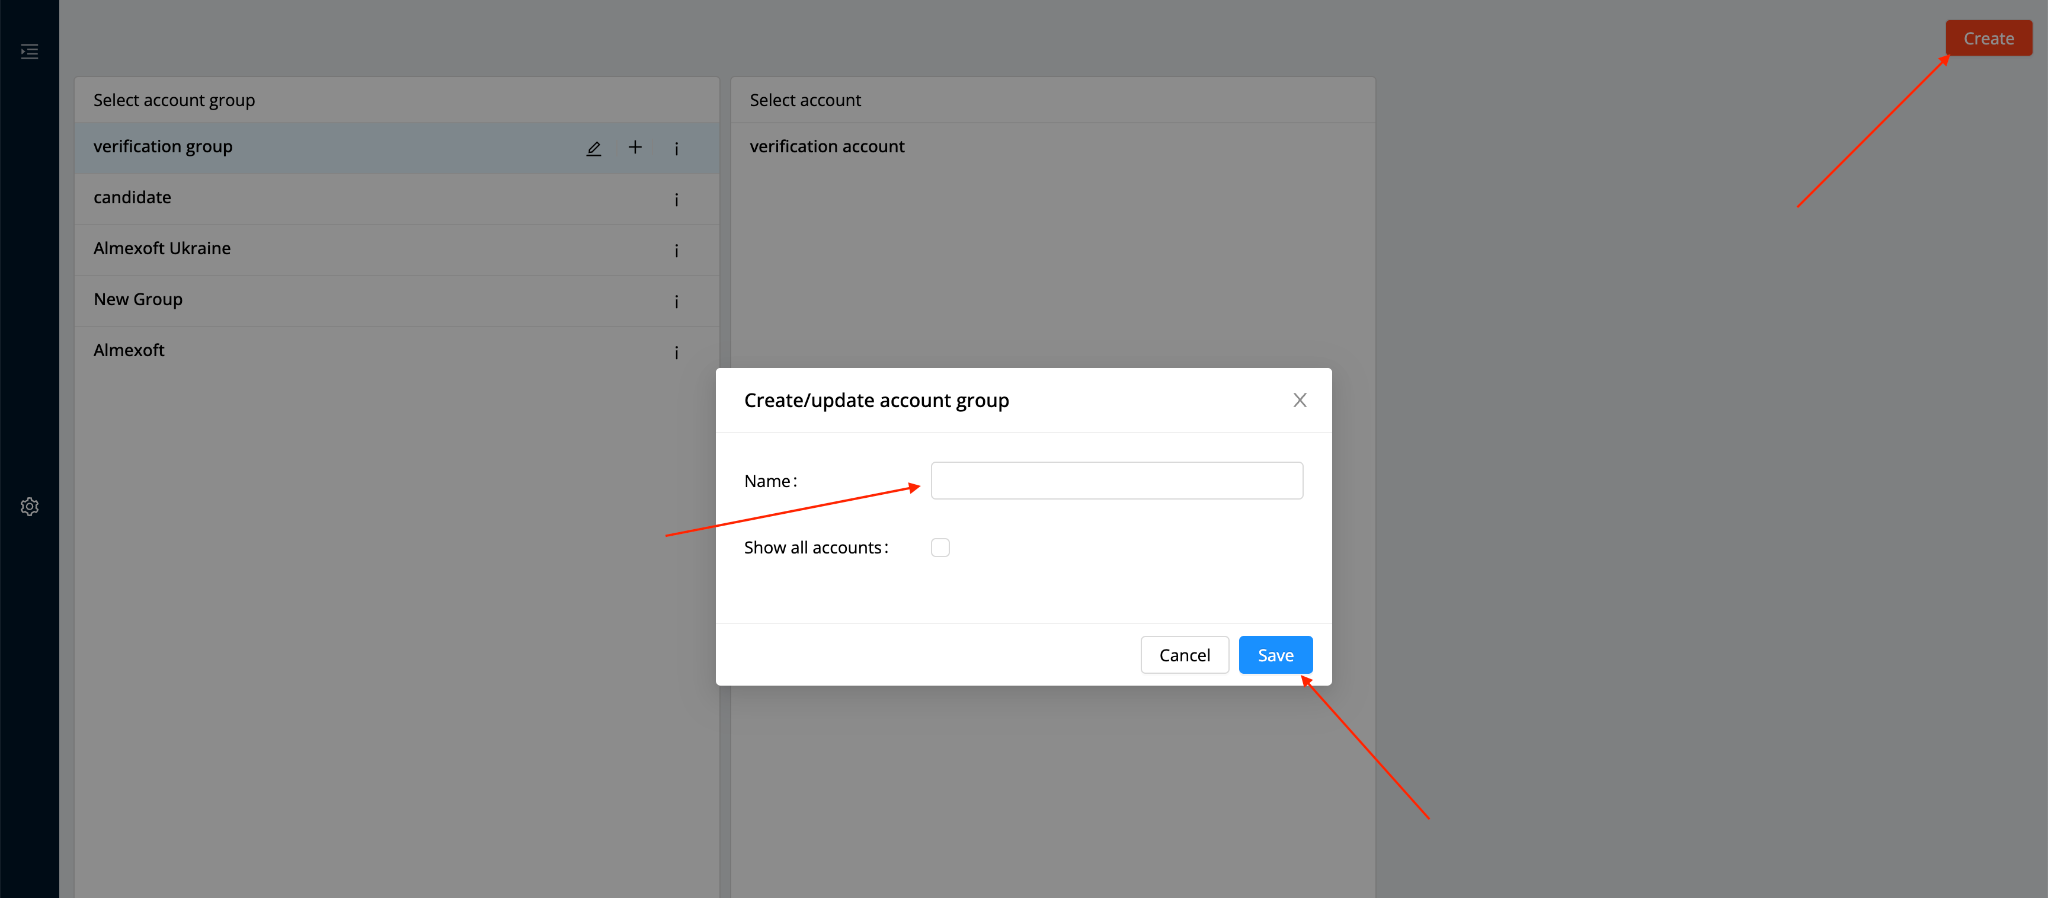
In the account group settings section, click on

and fill in the required data in the fields.
Create an account
To create an account in the system, you need:
Click on a group of accounts in the list
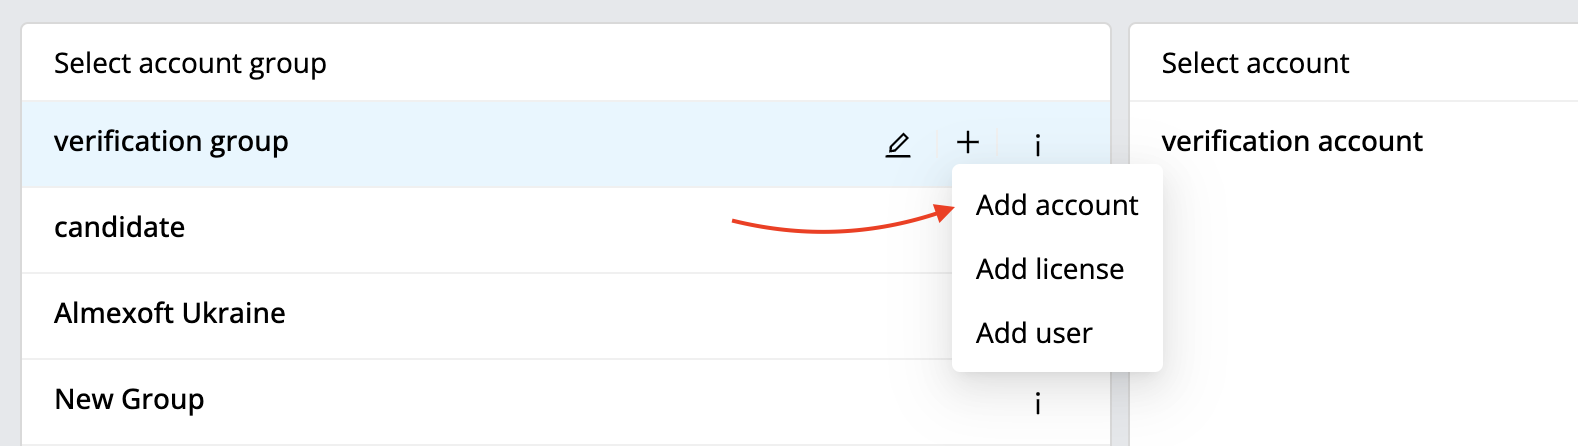
Click on

Select the add account option
Fill in all necessary fields of your account with information
Click on the [Save] button
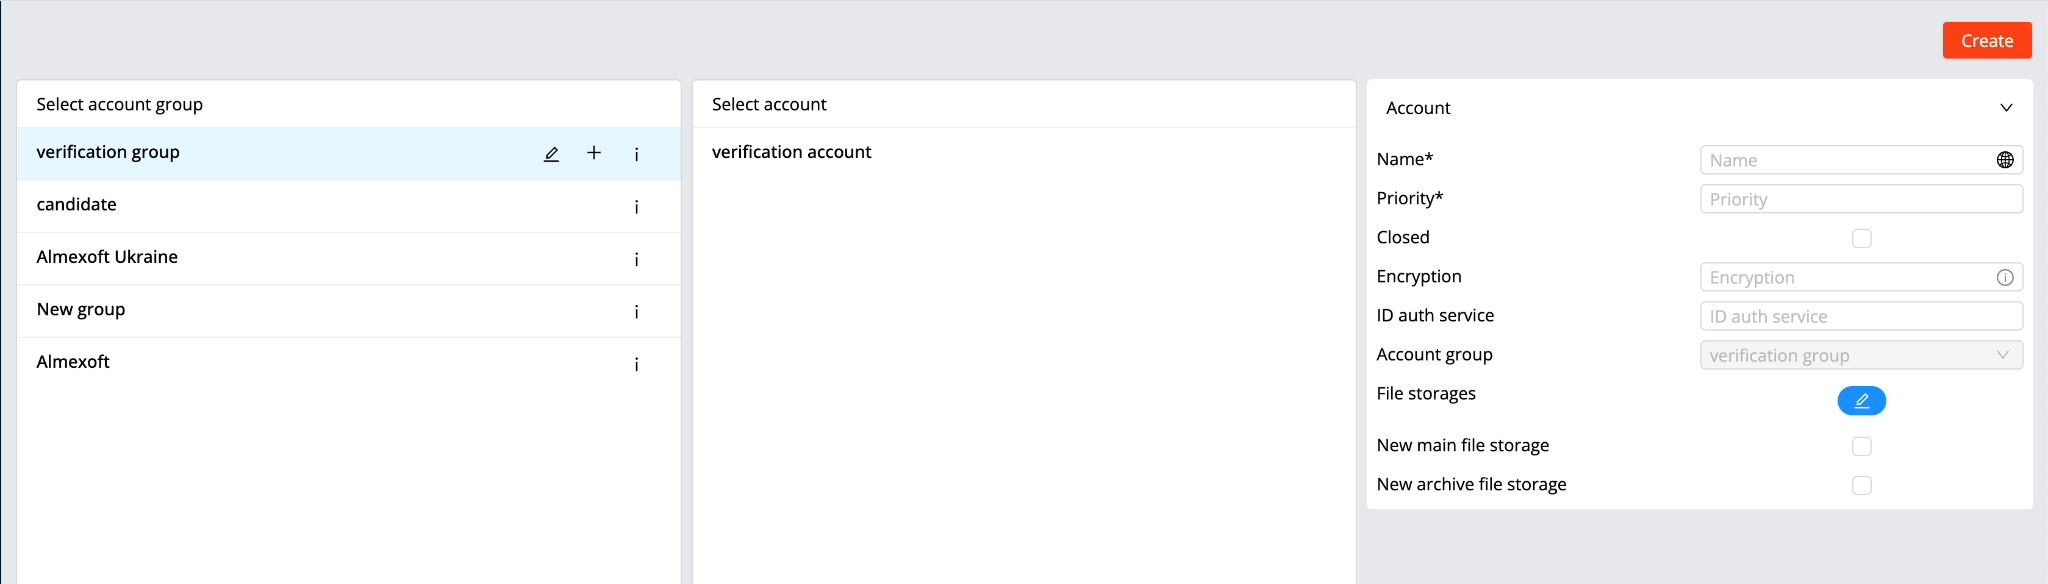
| Note 1: The link to the file store depends on your administrator who will configure the server and prepare it for system deployment. Usually they are like this: linux server - [file:///opt/filestorage/primary] & [file:///opt/filestorage/archive] Windows server - [file:///C:\data\primary] & [file:///C:\data\archive] |
|---|
| Note 2: In the [ID auth service] field, you need to write the id of the ldap connection, if it is configured on the server. While logging in, users will use their Active Directory password. |
|---|
Downloading licenses
To download licenses, you need:
Click on a group of accounts in the list
Click on
Select the option to add licenses
Upload the license file in the displayed window
Click the [Upload] button
An alternative option for uploading licenses
Place the cursor on
Go to the section [Admin page] - [Users] - [Licenses]
Select the required group of accounts in the upper left corner

Click on the button in the upper right corner
Upload the license file in the displayed window
Click the [Upload] button
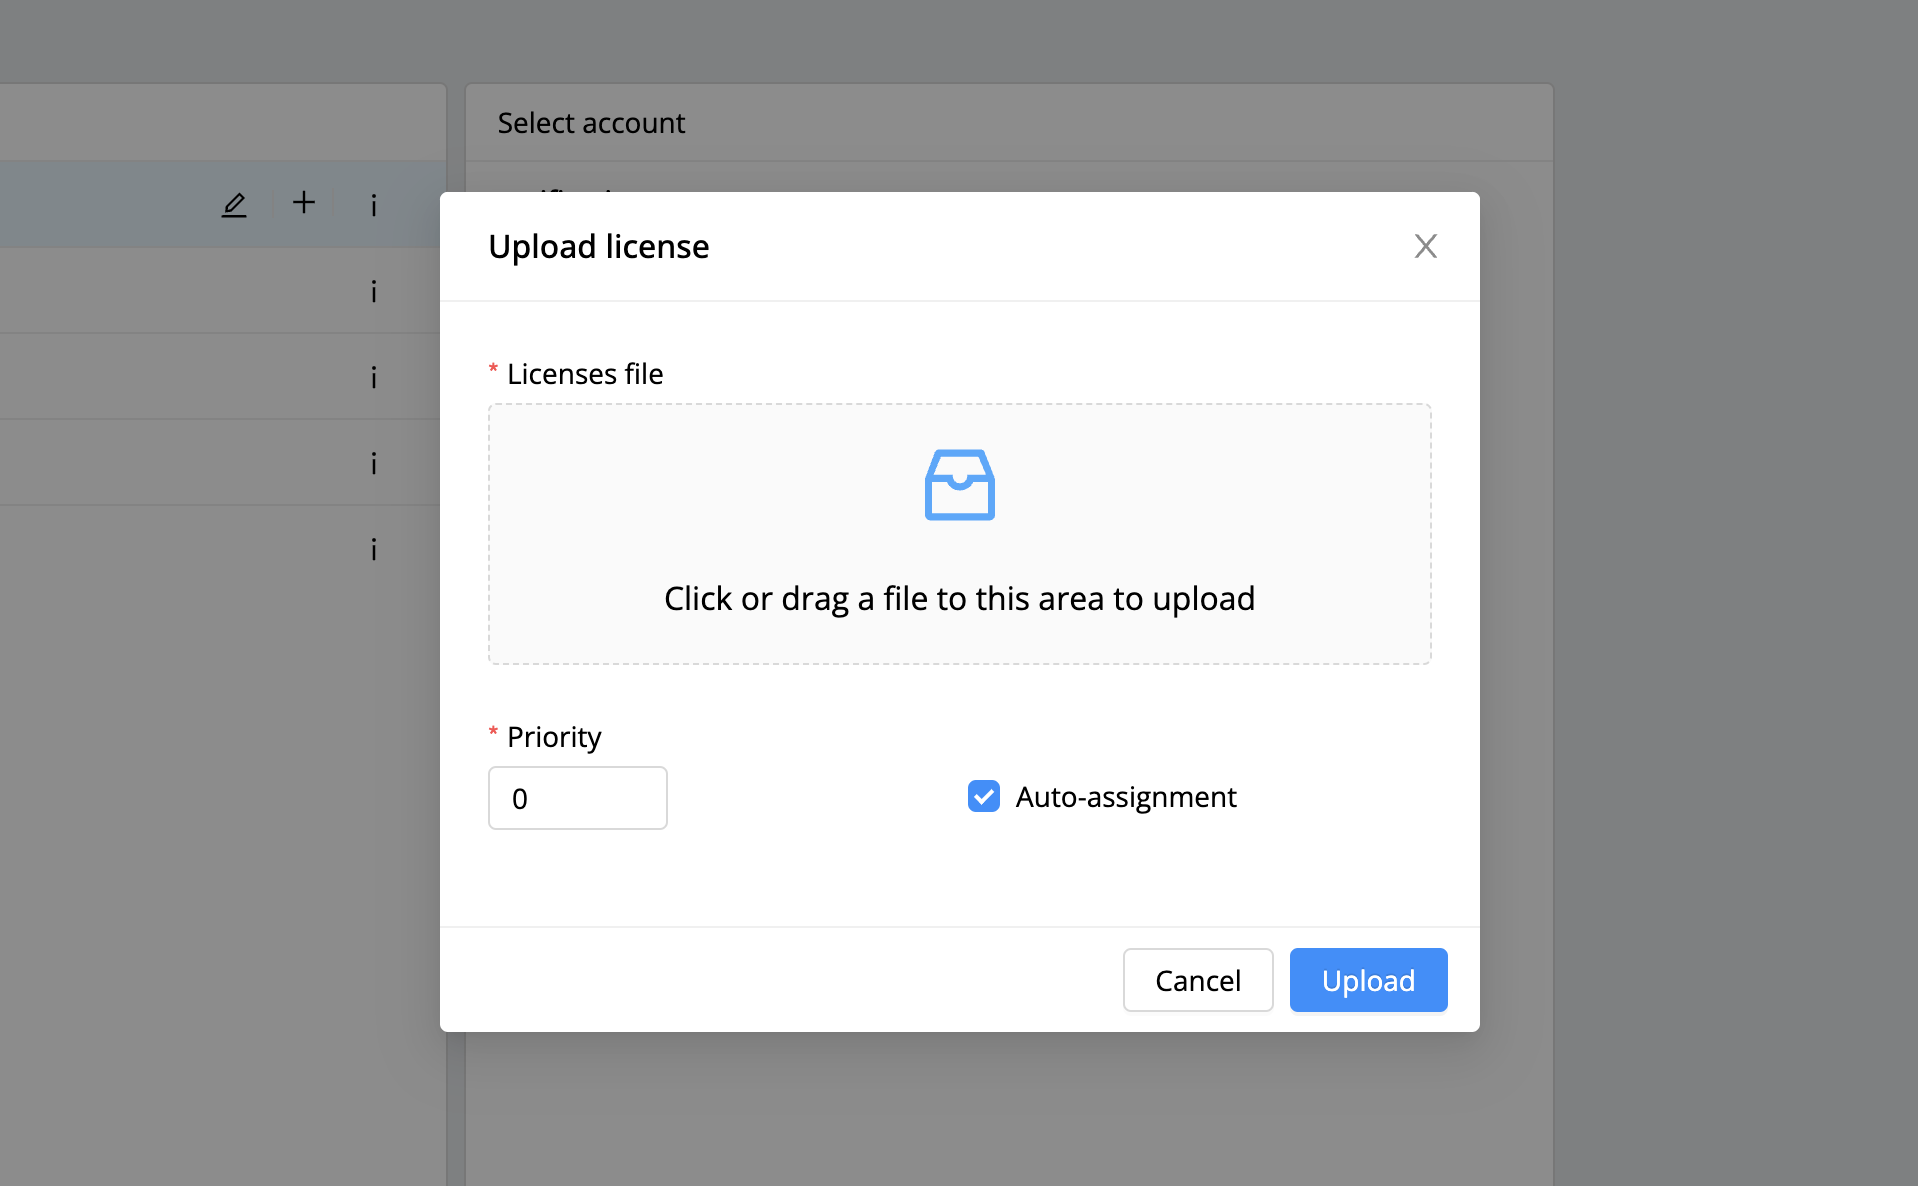
| Note: Licenses uploaded without the “Auto-assignment” setting will not be automatically assigned to the user after logging in, but must be manually assigned by the super-administrator if the license is non-exclusive (Named). |
|---|
Create users
Click on a group of accounts in the list
Click on
Select the option to add a user
Fill in all necessary fields with information
Click on the [Save] button
An alternative option for creating users
Place the cursor on
Go to [Admin page]—[Users]—[Users]
In the upper right corner, click on
Fill in all necessary fields with information
Click on the [Save] button
Important 1 Fill in all required fields*. In the "structure" section, select the main account. In the "access" section, give the necessary roles to the user. |
|---|
| Important 2 The authorization code from the link sent to the user's email after registration in the system and code is valid for 30 minutes. After the authorization code expires, you will need to inform the administrator so that the administrator can set the password manually. |
|---|
Interface elements
Authorization
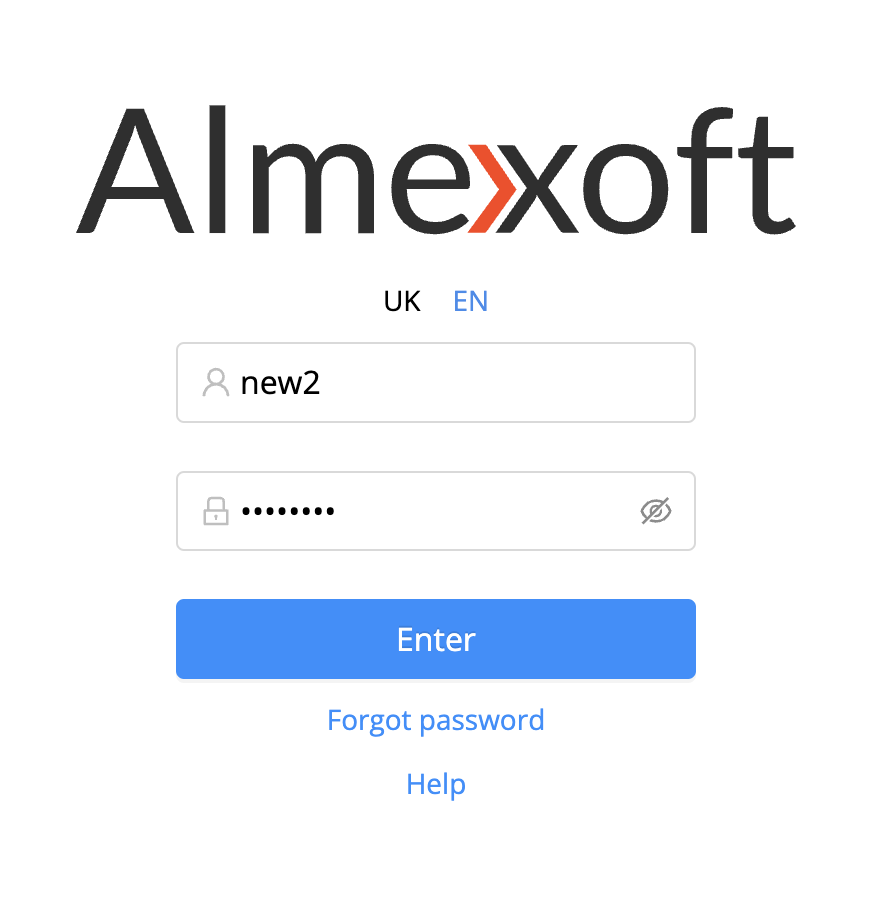
The authorization screen consists of the following elements:
Language selection — before logging in to the system, specify the language you will use.
Authorization form — login and password field, "Log in" button.
Forgot password – when selecting this item, the “Forgot password” window appears.
Help. The user can add any url to this button.
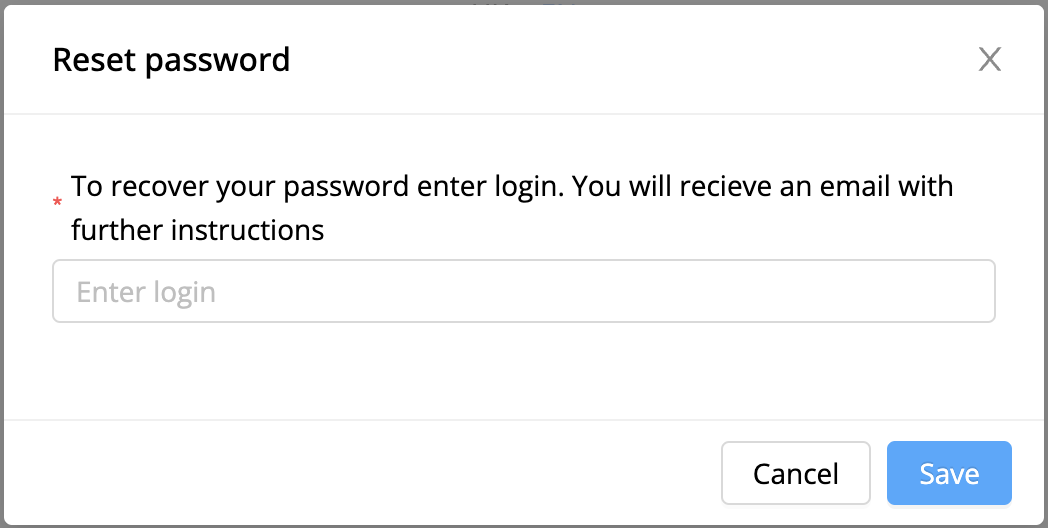
Note: The new password must not match the old password. |
|---|
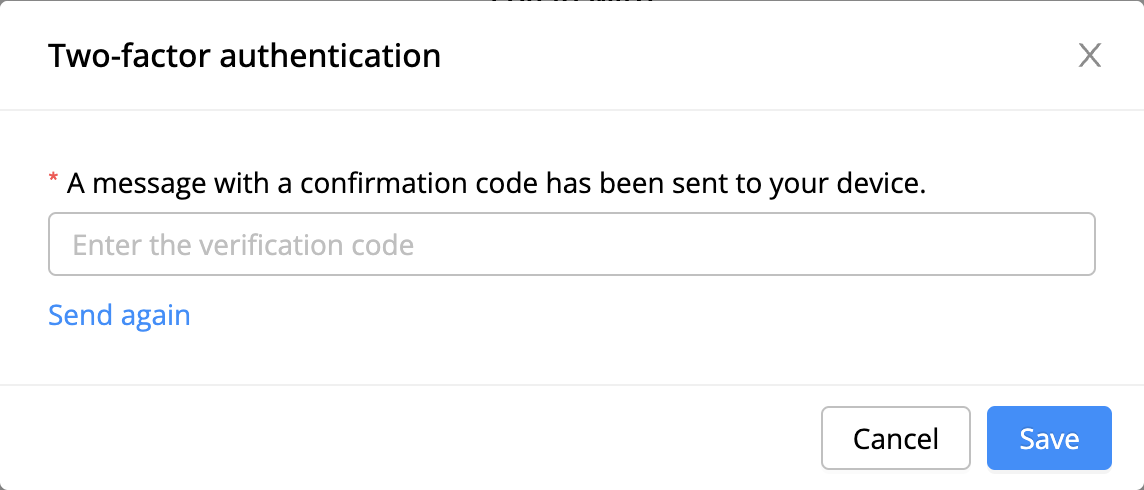
OTP authorization is also available in the system as a paid module.
Home page
After authorization, you will be on the home page of the platform. The home page screen displays such items as:
Dashboard.
News.
Calendar.
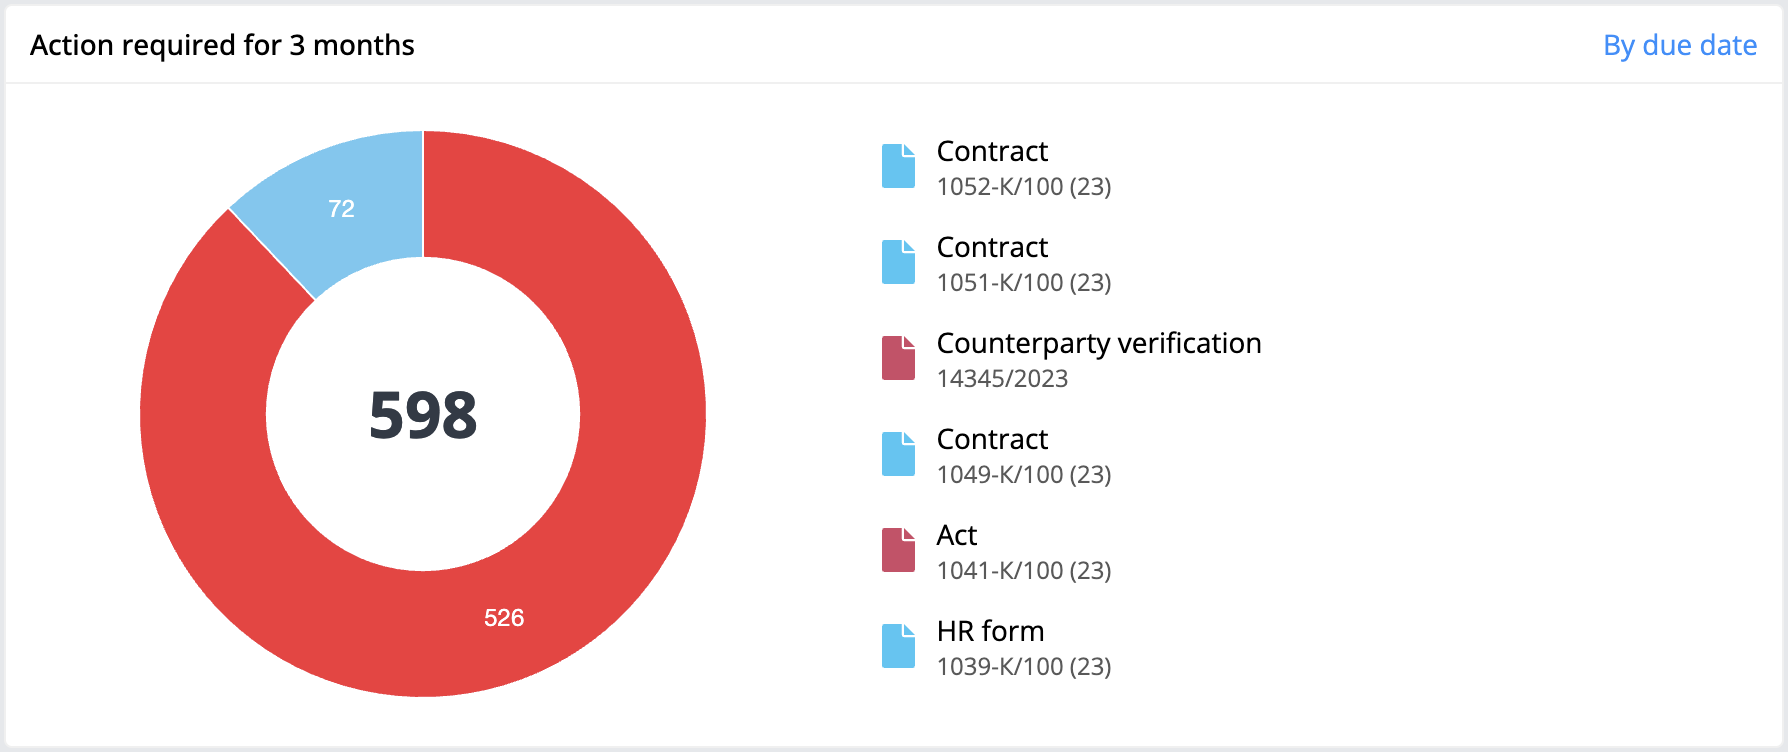
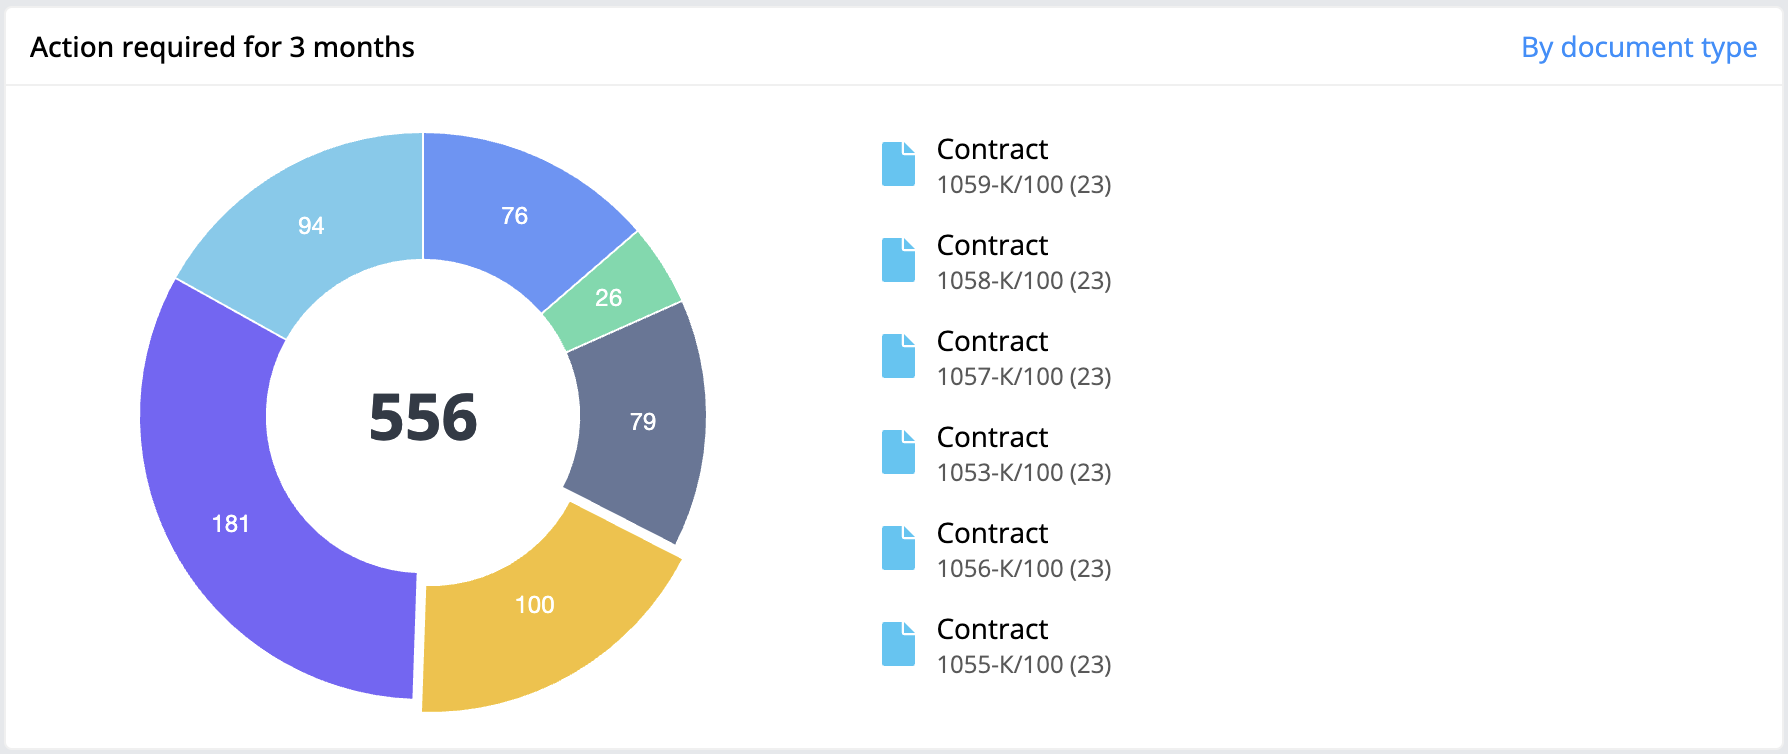
The circular diagram in the upper left corner displays documents: by due date and by document type. The chart is interactive, and it is possible to switch between filters.
By clicking on the filter by due date, we switch to displaying documents by document type.
By due date
By type of document
Your progress chart — shows the number of processed execution cards in documents for today in percentage ratios.
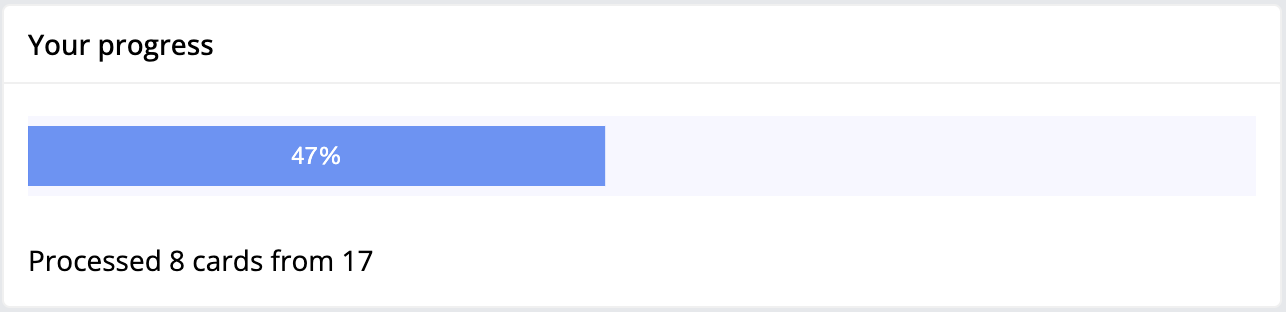
Note: A card is when a document is created and a user is a participant of a stage, then it is an open card. |
|---|
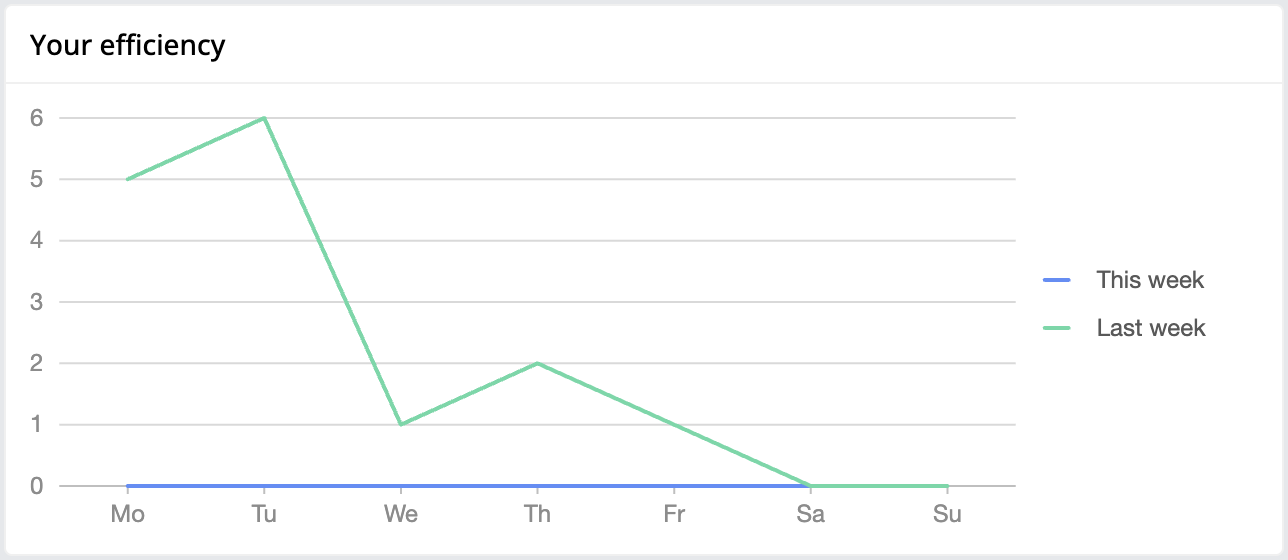
Your efficiency - Shows the user their performance in closing execution cards over the last 2 weeks so that the user can compare their performance.
The value from the Your Progress chart is displayed here.
News
The news section serves to distribute corporate information to employees.
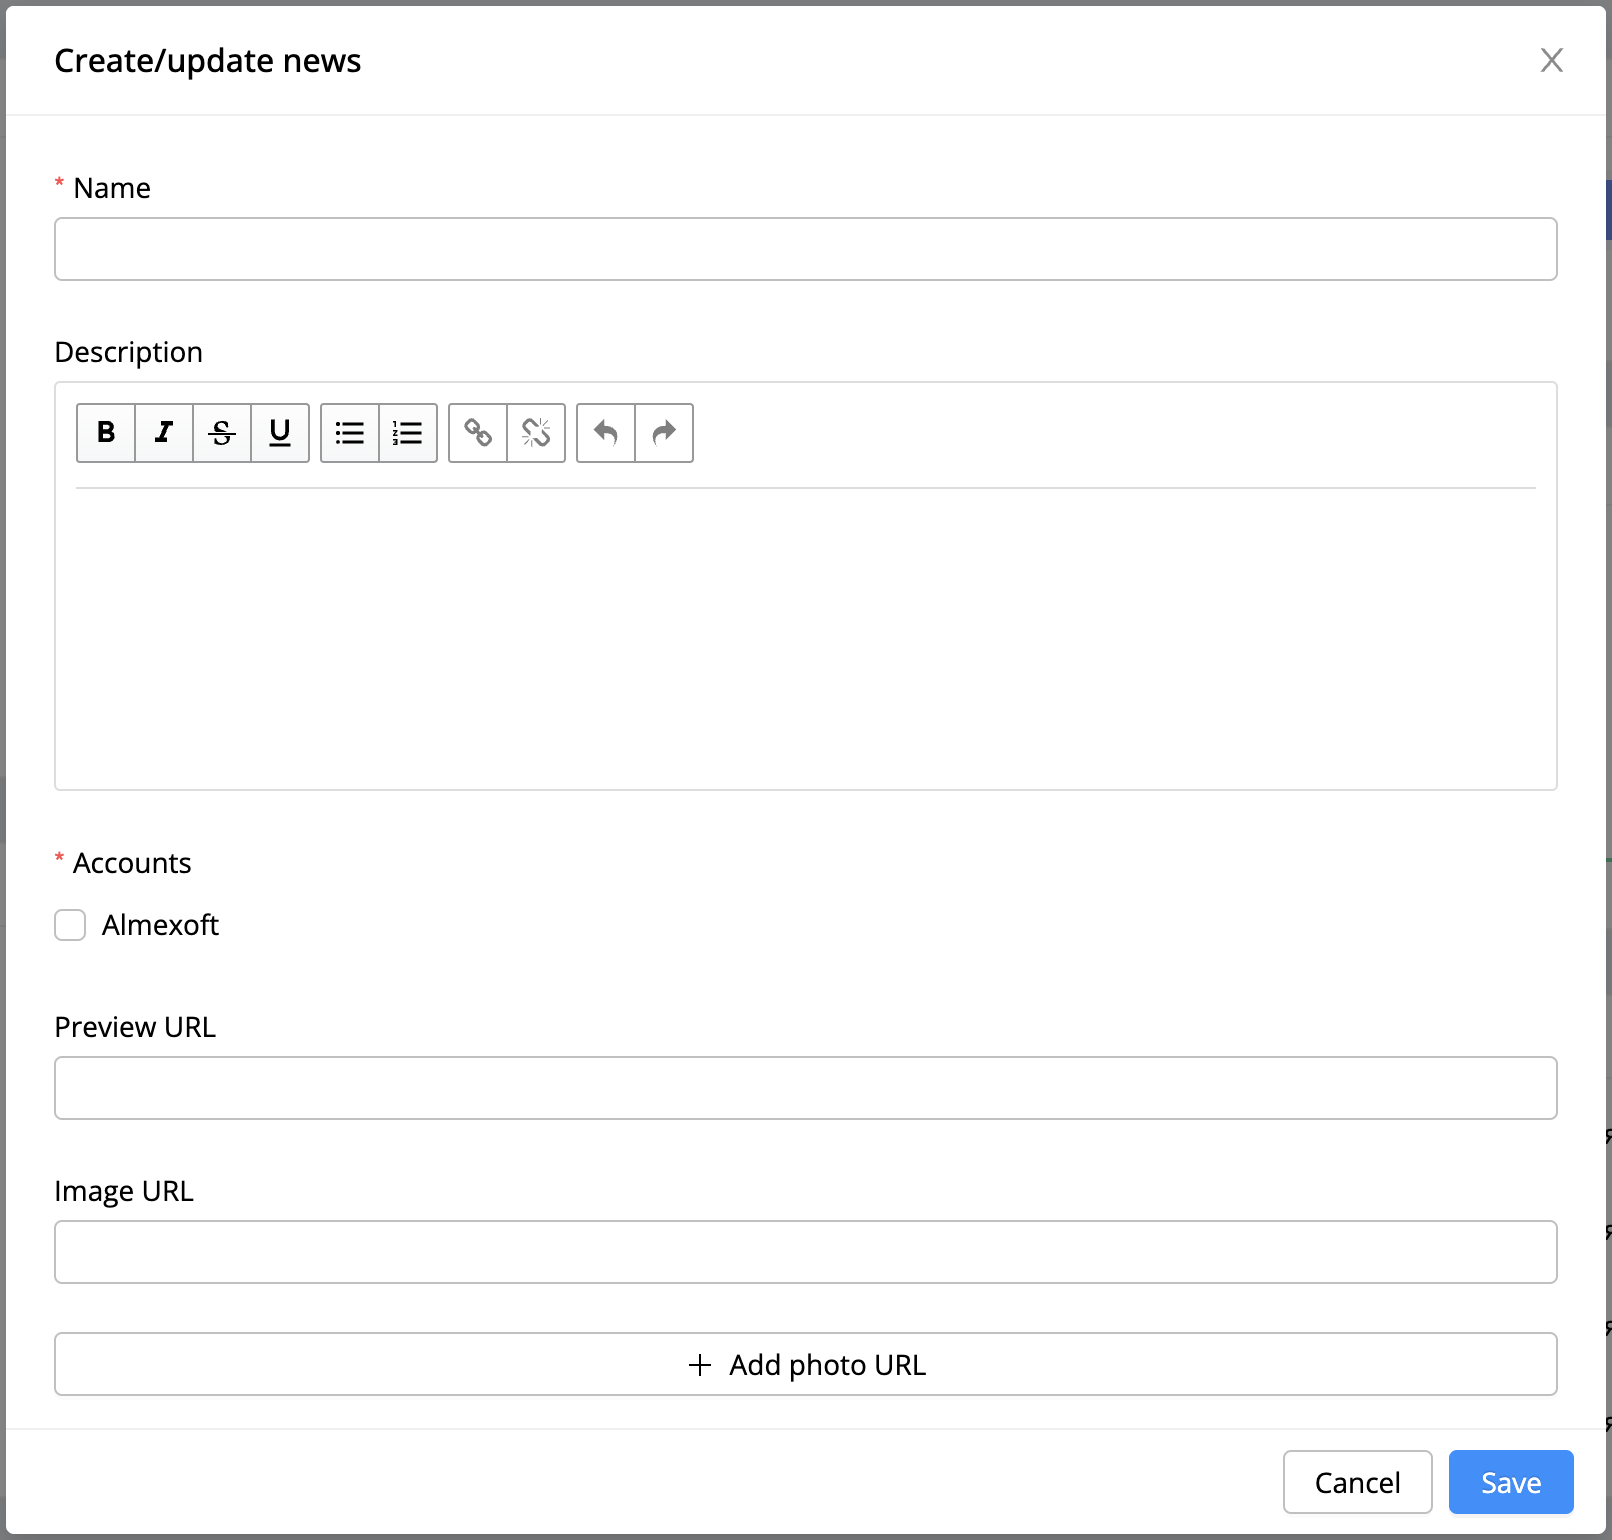
To create news, you need:
Press

Fill in all fields (mandatory and optional)
Click on

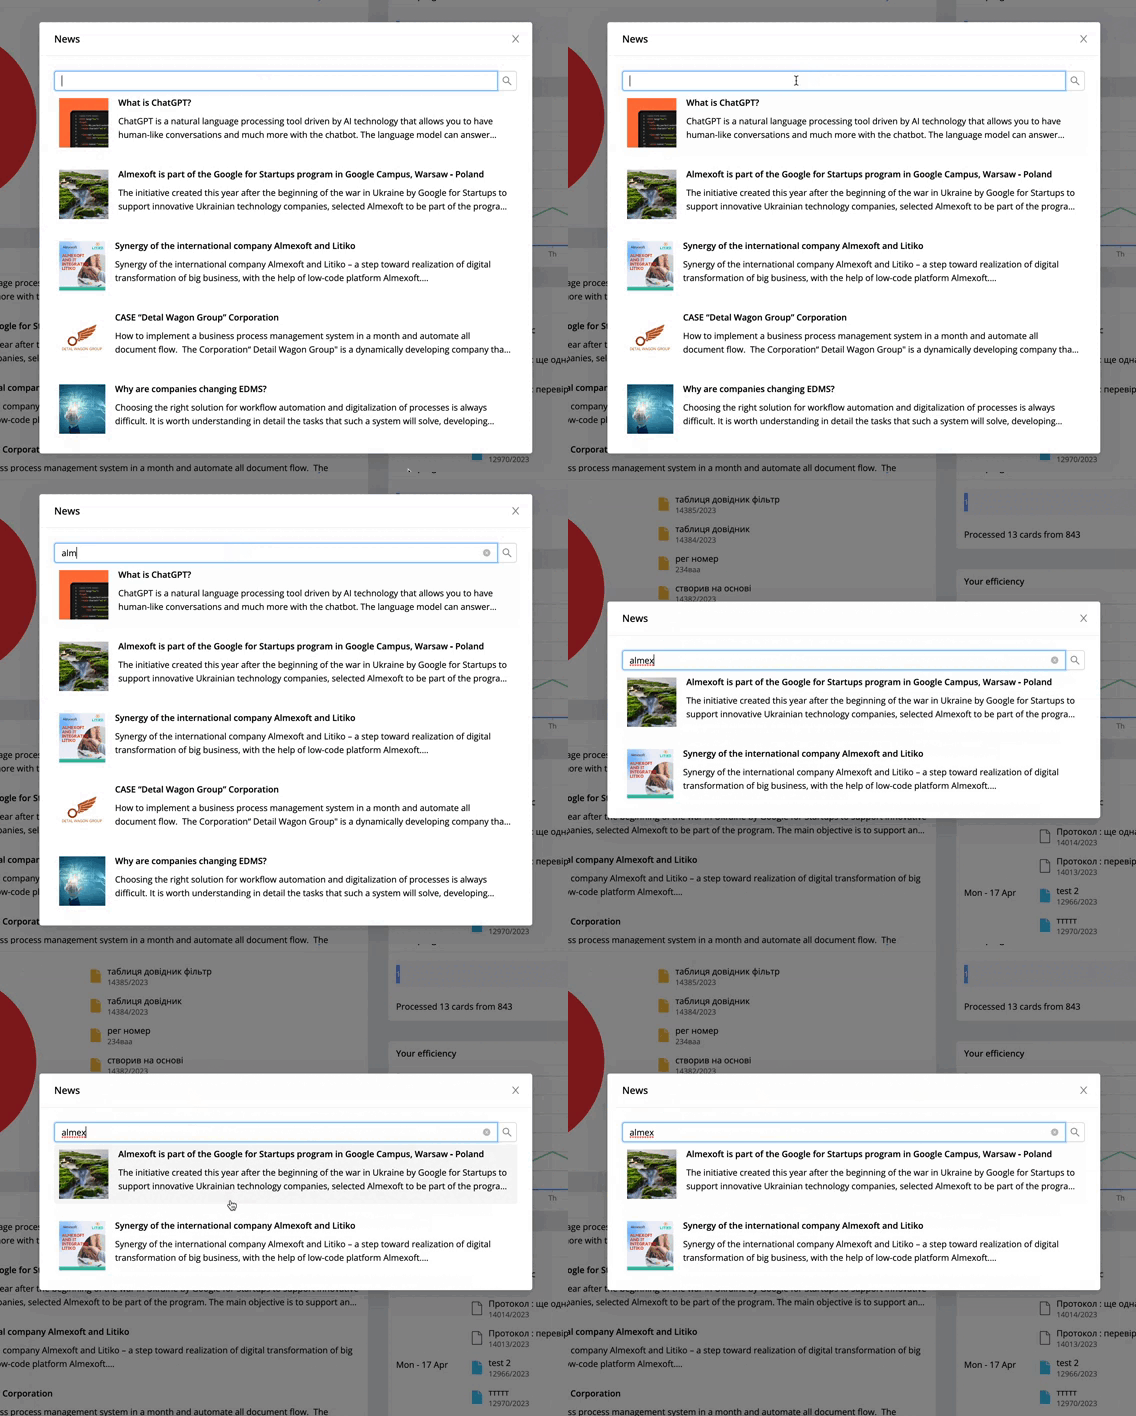
For news there are:
Advanced view when clicking on

Search for all available news by name in the full view
Displaying the full view and search
| Note 1: It is necessary to have a role - “ADMIN_NEWS_UPDATE” to display + icon in the news block. |
|---|
Note 2: Fields for pictures: [Preview URL] [Image URL] |
|---|
You can also upload the picture to your server (on which the system is deployed) in the folder where tomcat is located.
Steps to add a picture to the server:
You need to connect to your server via ssh (if it is a Linux server). For Windows server, connect via RPD or the method configured by your system administrator.
Go to the directory where Tomcat is deployed (on Linux this path is usually /opt/tomcat. For windows C:\temp\tomcat_version)
Open the "webapps" folder
Create a new folder in this directory (for a Linux server, press the F7 key on the keyboard)
Open the created folder
Upload the picture to the created folder (which we will use in the news)
An example of a URL to use when creating news:
https://dns_of_server:8443/folder_name/name_picture_with_extension
Calendar
The calendar is used to display a list of documents with direct access.
When clicking on the selected document, the user will be shown full information about the document, and will also be able to work with this document.
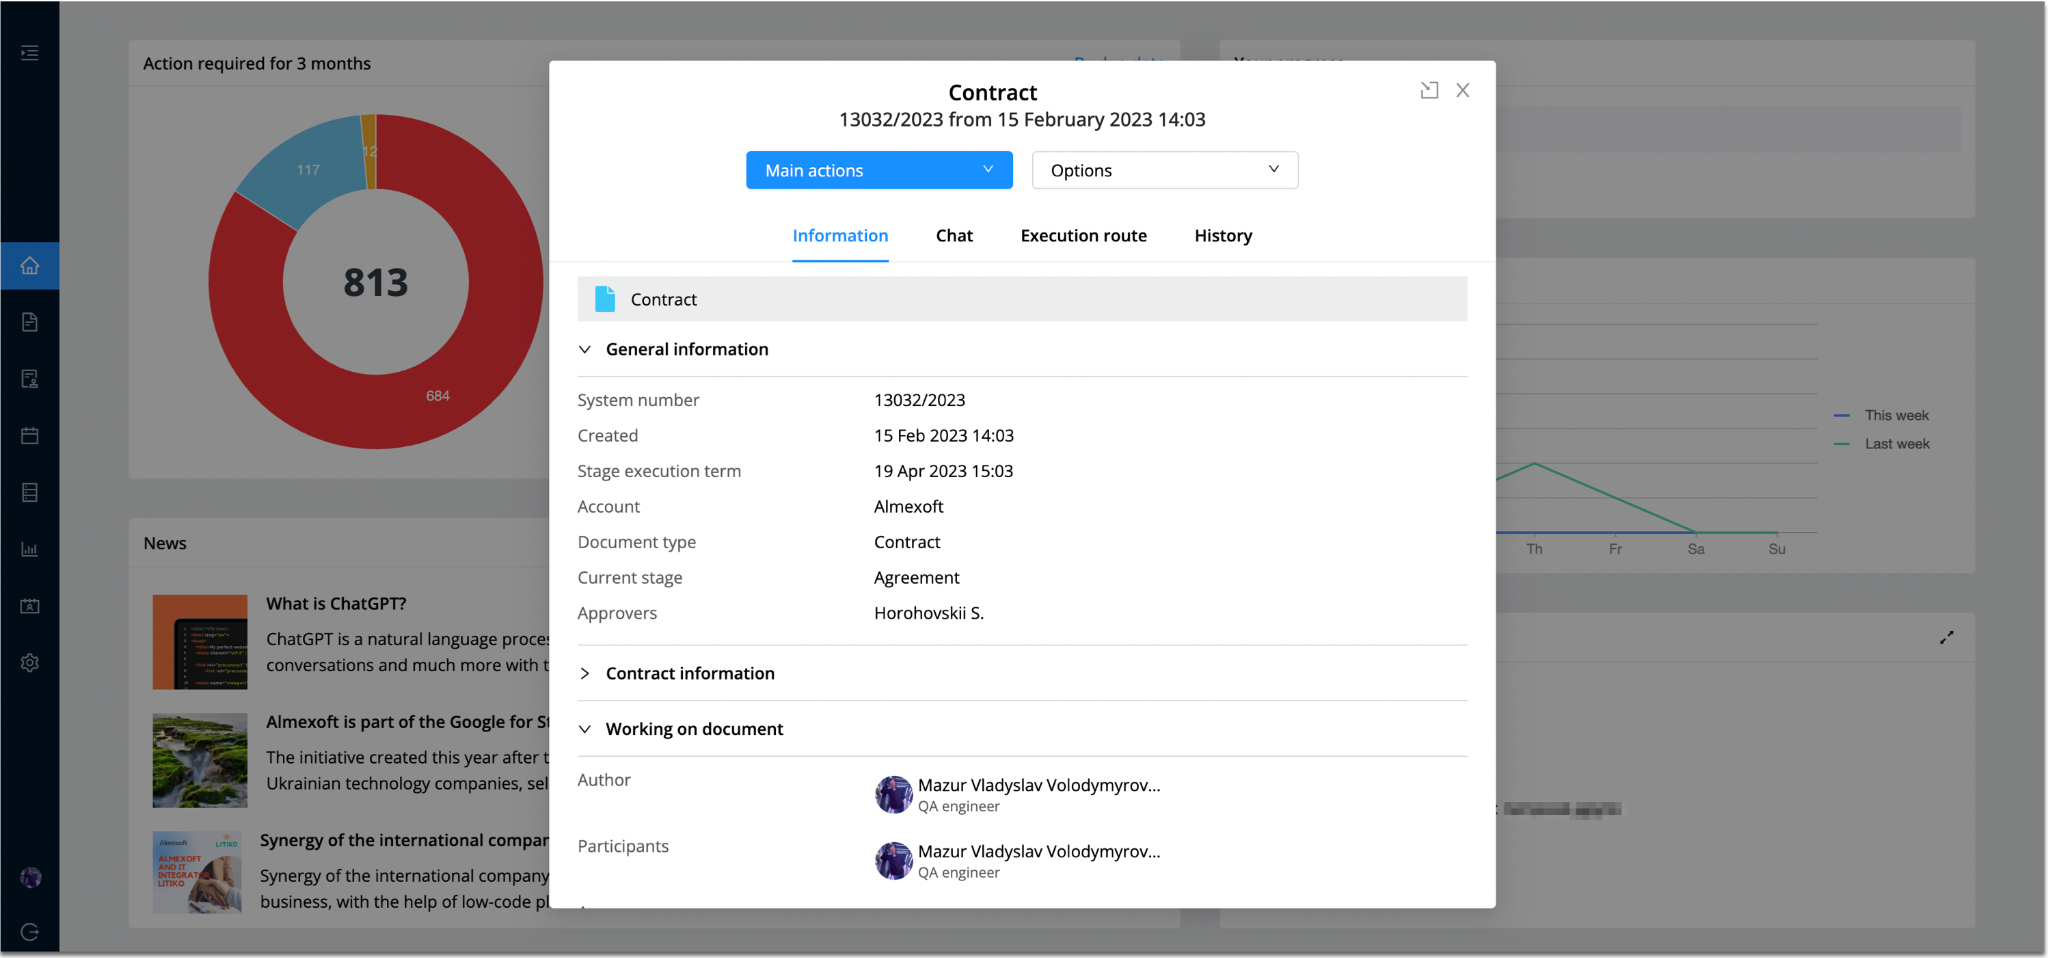
| Note! The calendar displays a list of documents by their due date. |
|---|
The user can also open an extended view of calendar documents by
clicking on the icon

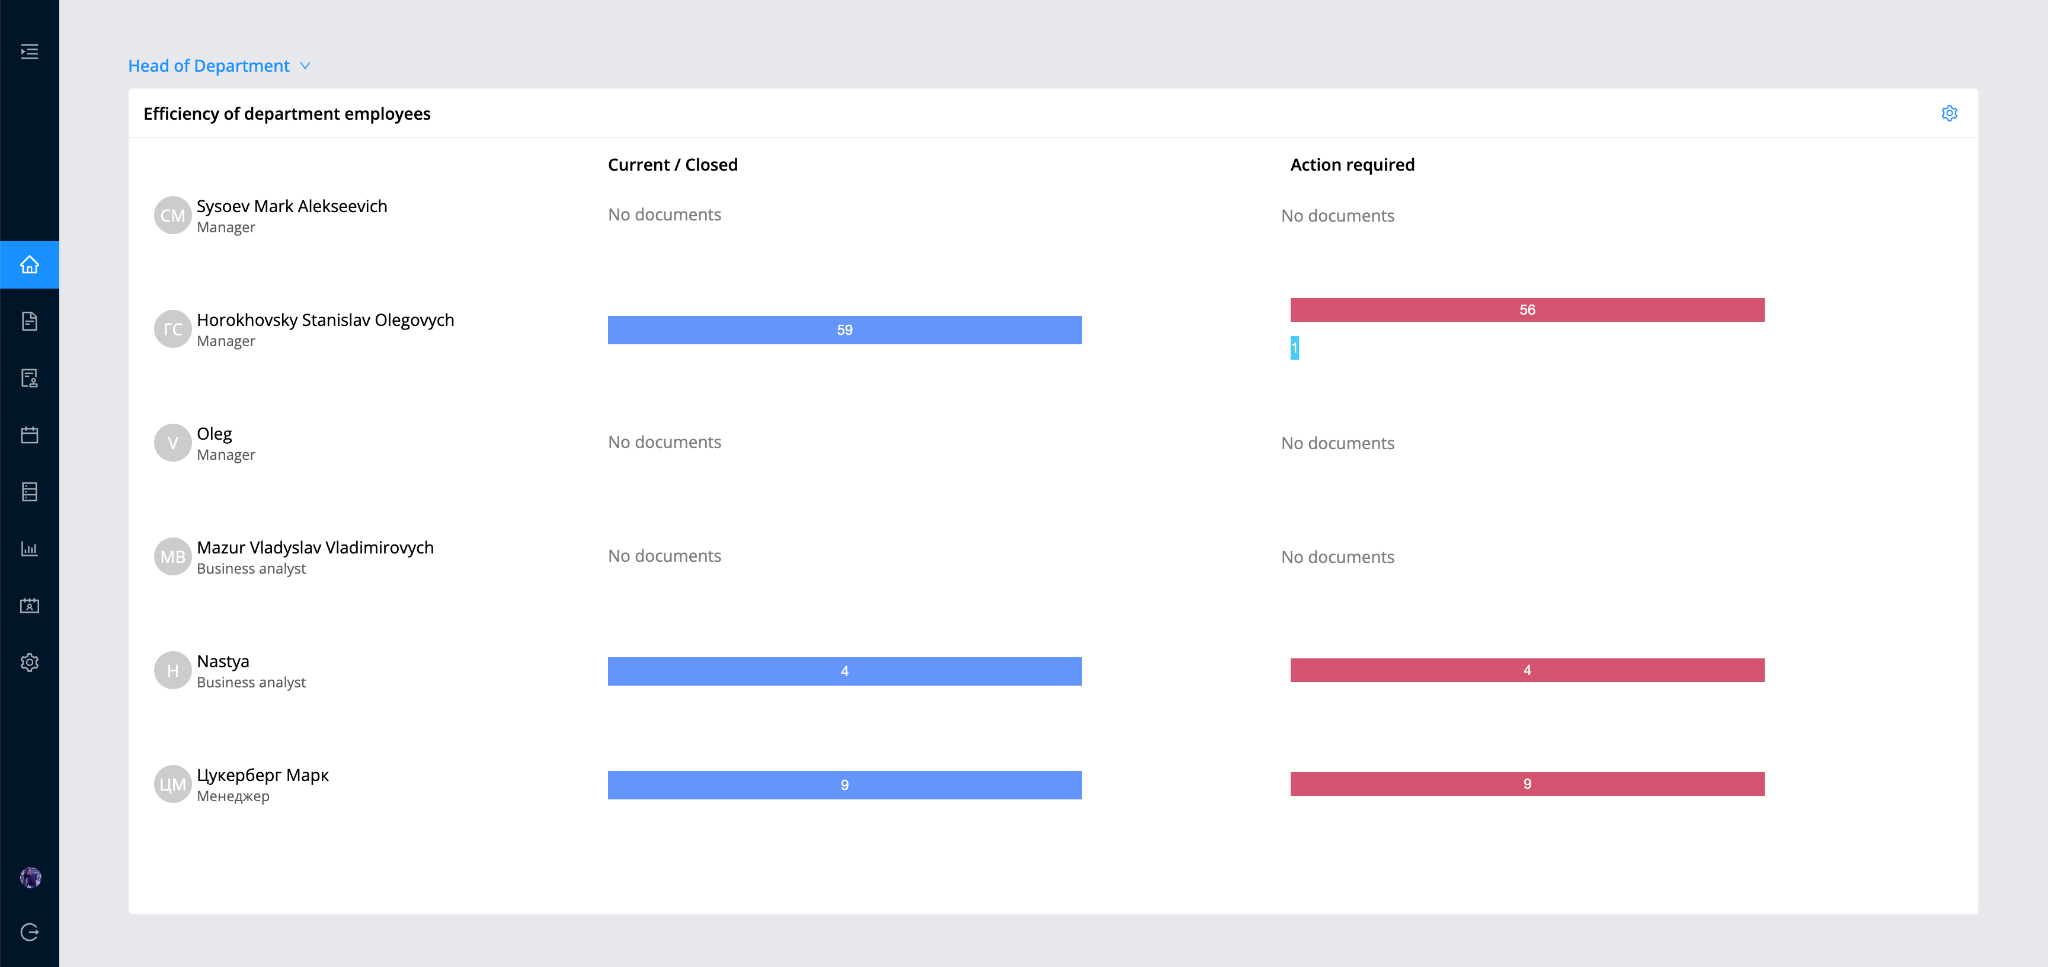
Head of department dashboard
The functionality of the platform includes a chief’s dashboard. This dashboard reflects the activity of subordinates within one department. To display the dashboard, the user must:
The user must have the manager type. More details [Admin page] - [Users] - [Users]
The user must have the role: USER_SUBORDINATES_DASHBOARD
The chief’s dashboard is enabled on the home page.
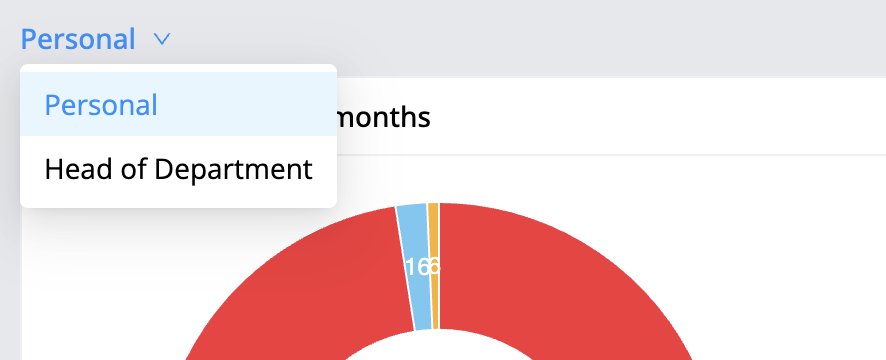
Chief’s dashboard
Documents
The documents section serves to work with user documents in the system.
The section allows:
Work with already created documents. More information.
Create new documents based on selected types of business process templates. More information.
Download the list of documents in XLSX format.
Note! It is necessary to have the role [USER_DOC_EXPORT_XLSX] to display an
icon |
|---|
 in the lower right
corner.
in the lower right
corner.Two types of view are available for the document:
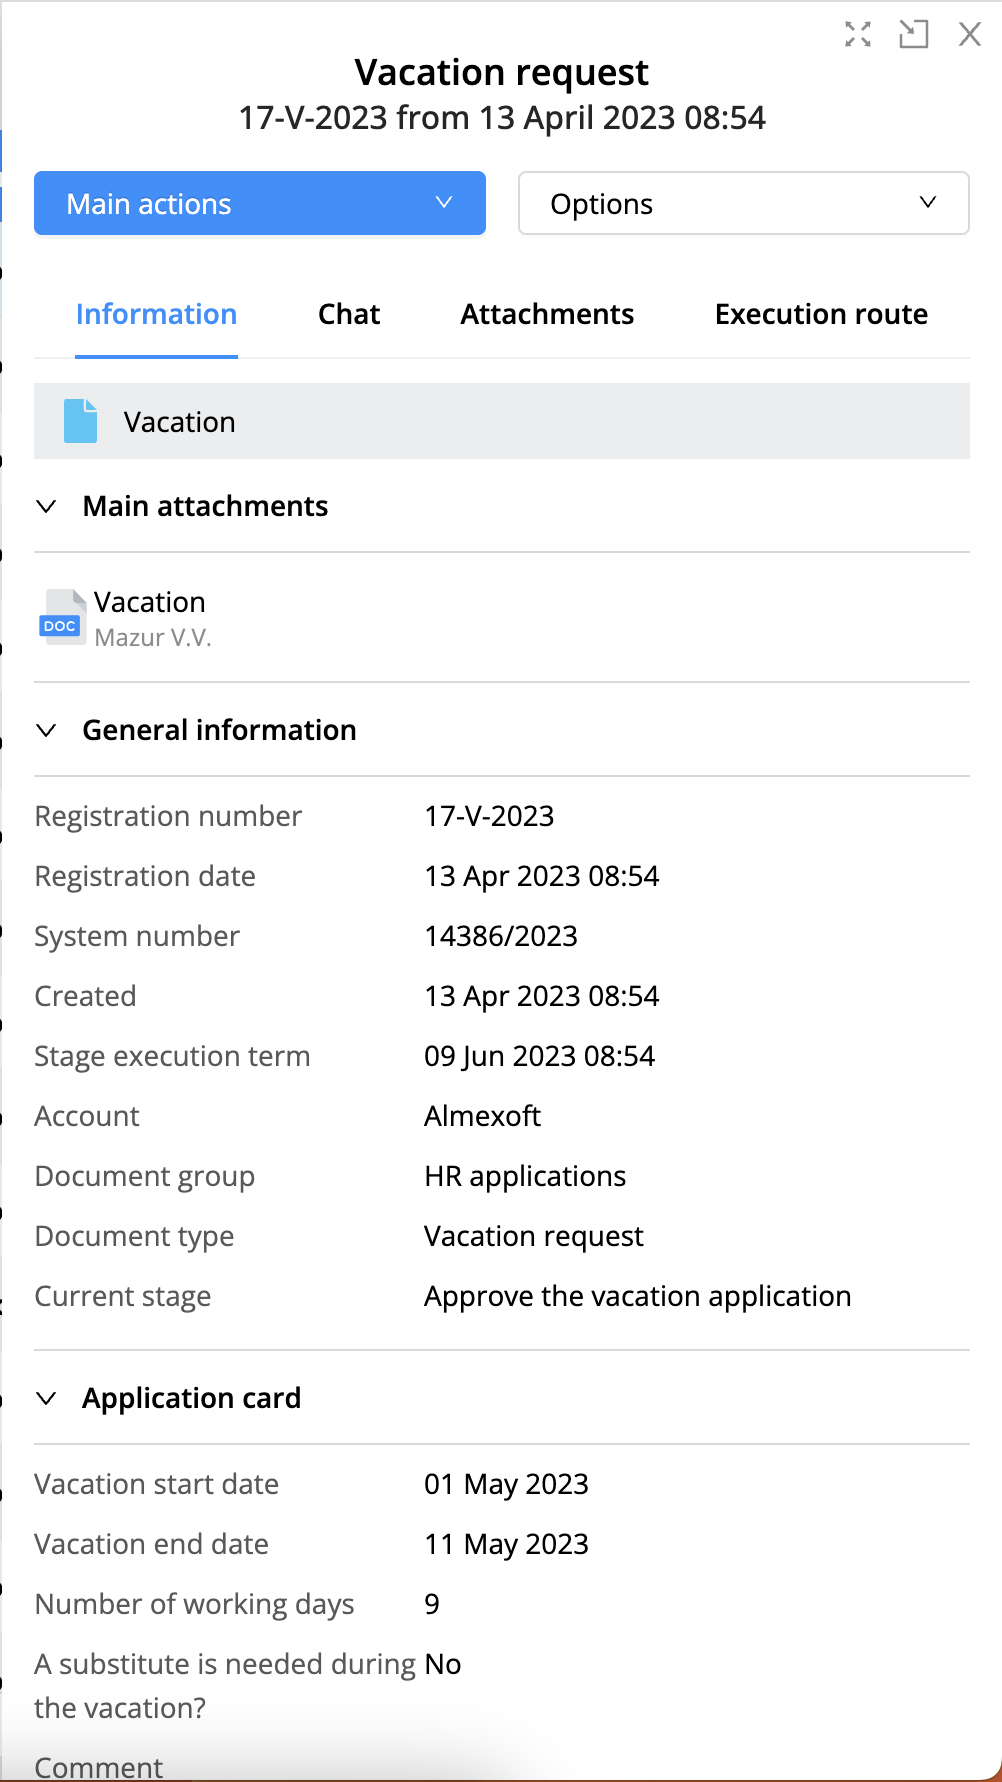
Information. By clicking on a document, information about the document opens on the right side of the screen.
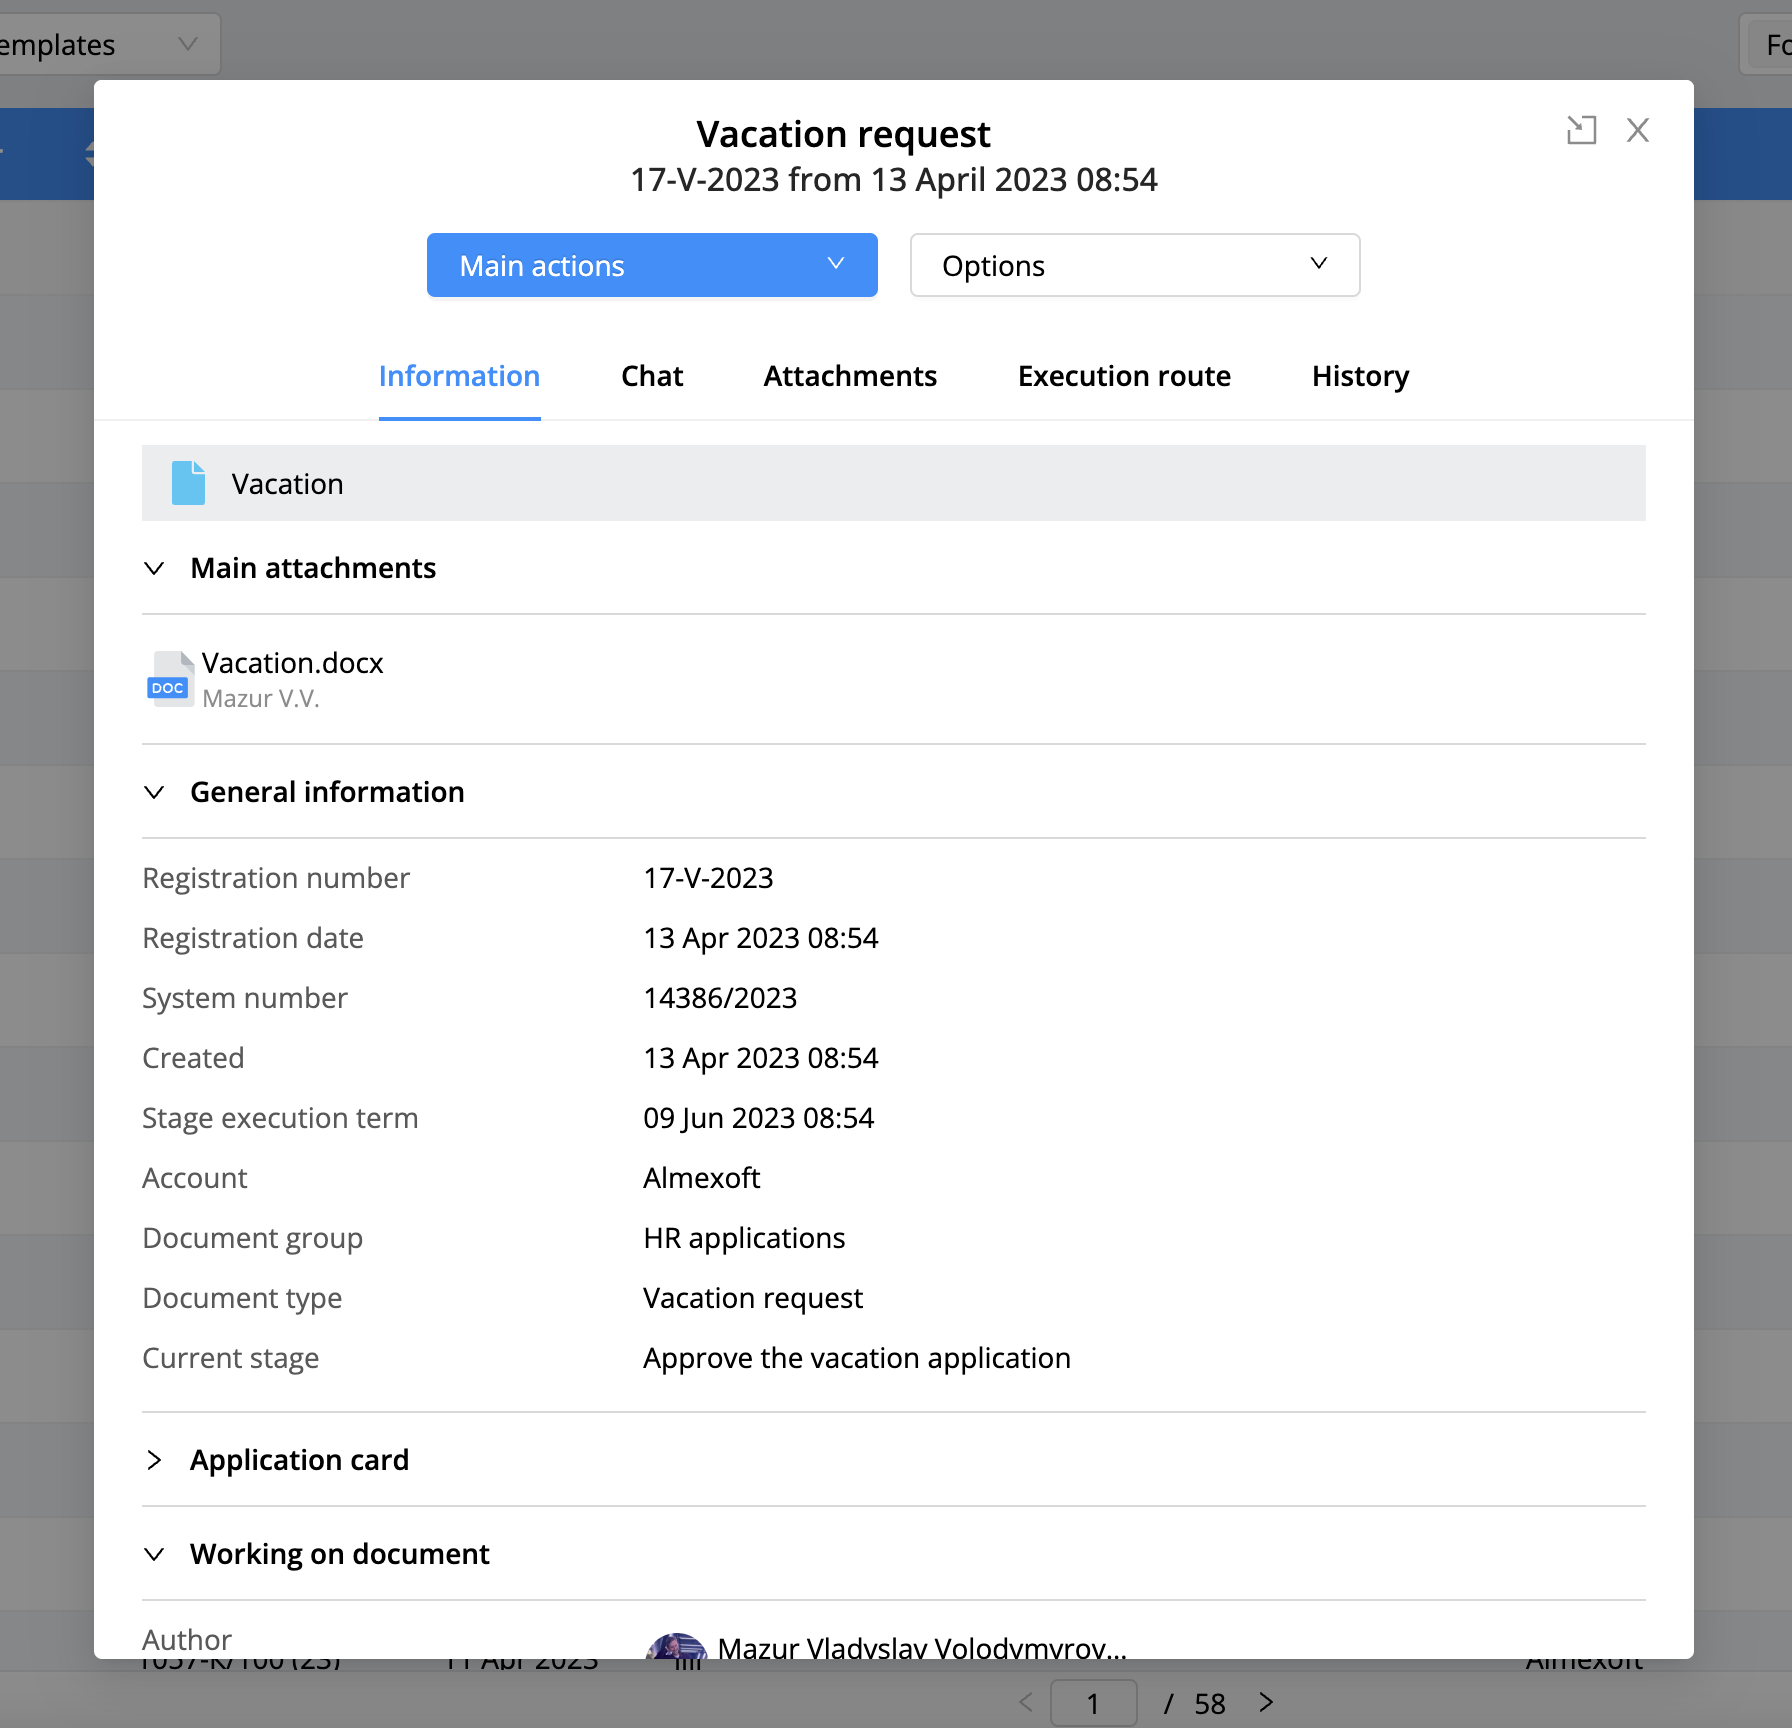
Full details. By clicking twice on the document in the list, or click on the icon in the information tab
 will be displayed full
details.
will be displayed full
details.
The user has the option to copy the link to the document.
By clicking on  , in the upper right
corner in the document details.
, in the upper right
corner in the document details.
The document has the following tabs with information:
Information. The main tab, which displays all information about the document. The following blocks of information are available:
Summary with status of the document.
Main Attachments. The first 3 main attachments are displayed, if there are more, a button → will be displayed that will take you to the main tab [Attachments].
General information. The block displays all basic information about the document (date of creation, system number, registration number, control date, signatory, approvers, account, group of documents, document type, current stage, Approval type).
Working on document. The block displays the author of the document, participants, responsible, additional approvers, shared users.
Related documents. The block displays all linked documents.
Tab with additional fields. The [business process design] section will describe the configuration of additional fields.
Note! In the full document details, the user can delete relationships with other documents if you have the ADMIN_DOC_RELATIONS_DELETE role |
|---|
Chat. A tab where you can see chat messages, send messages or create new chat rooms with individual members of the current stage.
| Note! Email messages do not come to users if someone wrote a message in the chat in the document. |
|---|
Attachments. All attachments added to the document are displayed. Different types of attachments are displayed in blocks:
Primary
Secondary
Card (attachment that are added to user cards).
In this tab, you can download all attachments at once by clicking on
or download each attachment separately by clicking on
The following options are also available for each attachment:
Download the original.
Download the pdf version.
Download without watermark.
Download p7s envelope.
Download ZIP.
Learn more about downloading at the section.
To download all attachments:
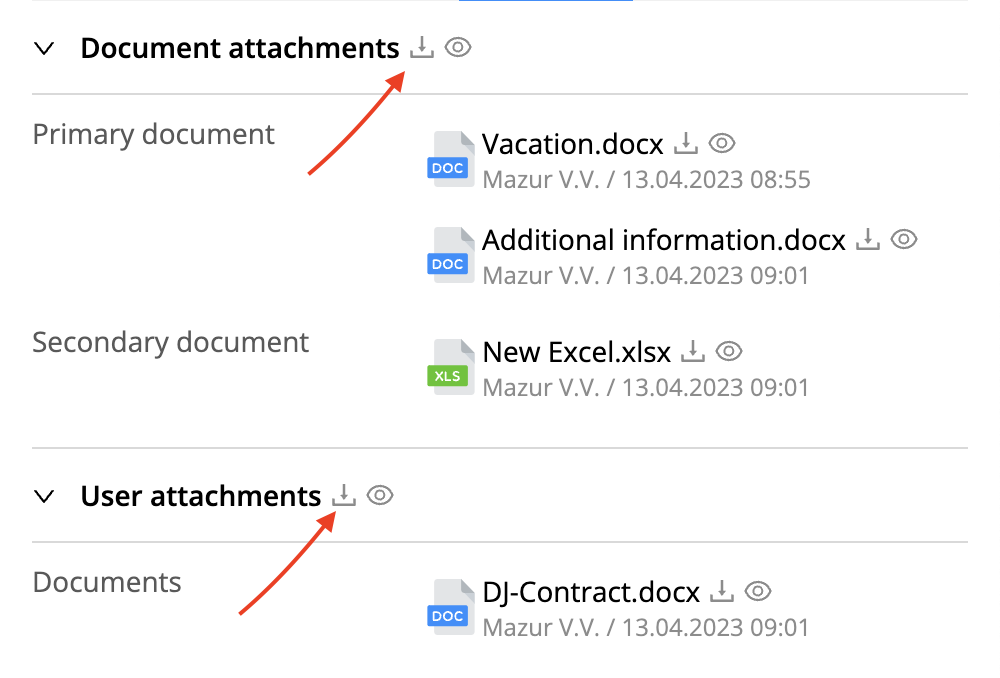
To download a separate attachment:
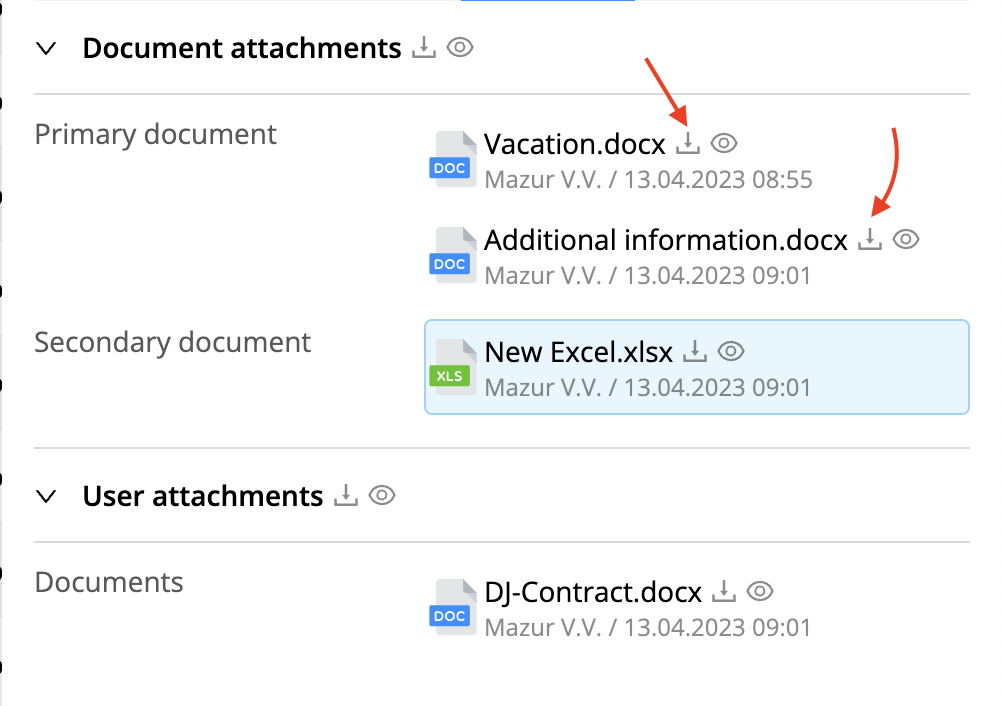
Note! Attachments can be hidden from view and users with the
ADMIN_HIDE_ATTACHMENT role will be able to see them. If the user wants
to hide attachments, then click on |
|---|
 near attachment.
Execution tree. All completed stages of the document are displayed. Available viewing:
Stage participants.
The participant decisions.
Comments, attachments to cards.
You can also hide closed stages by setting – [display stage after closing]. More information.
User card options are described in the corresponding section.
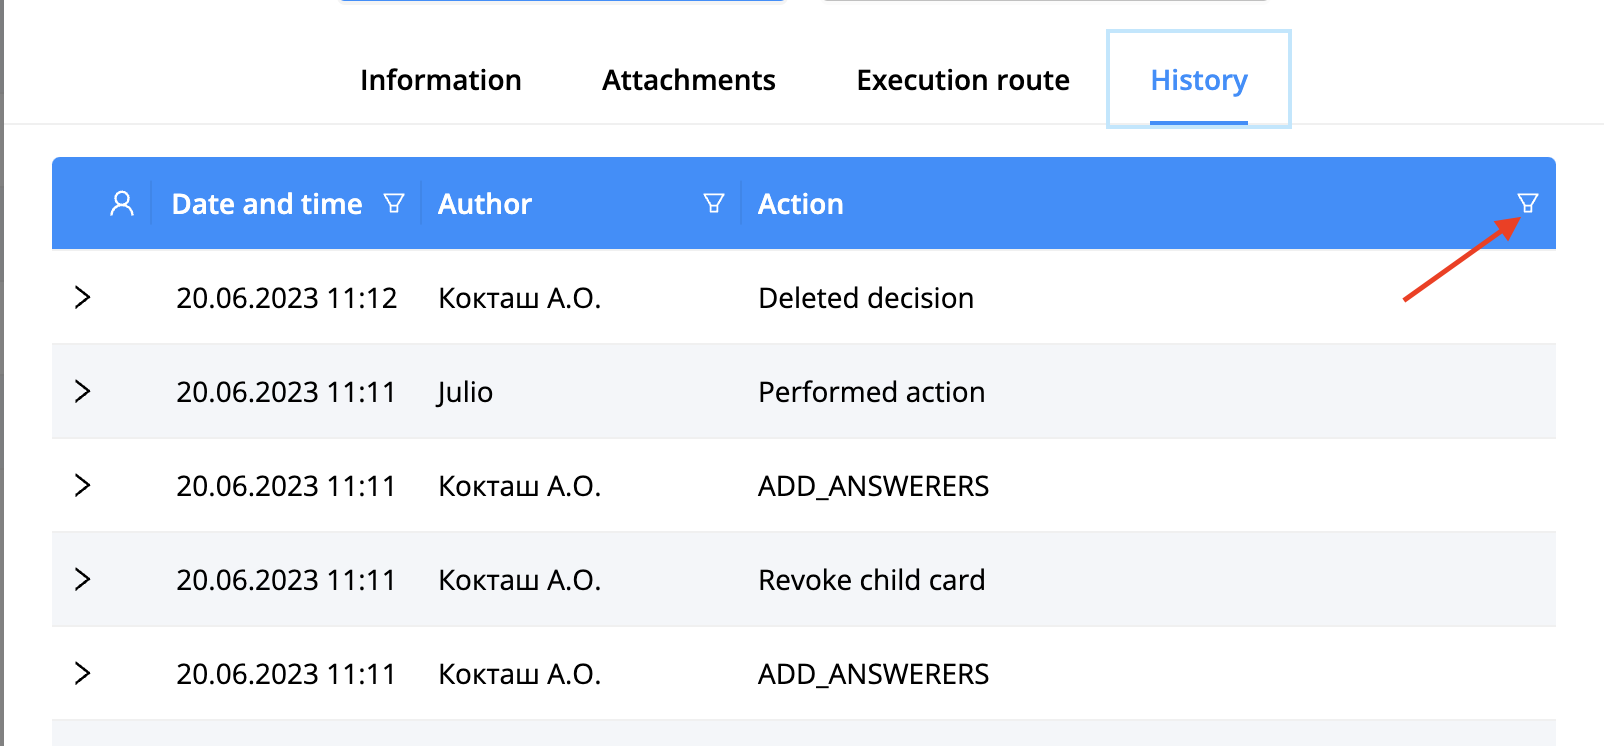
History. History of actions on the document. Displayed only in full document details.
The user can also search for all columns in the history.
Tab with fields. If the tab is configured as a separate tab. Only when viewing full information. More information.
Document statuses are described in Glossary.
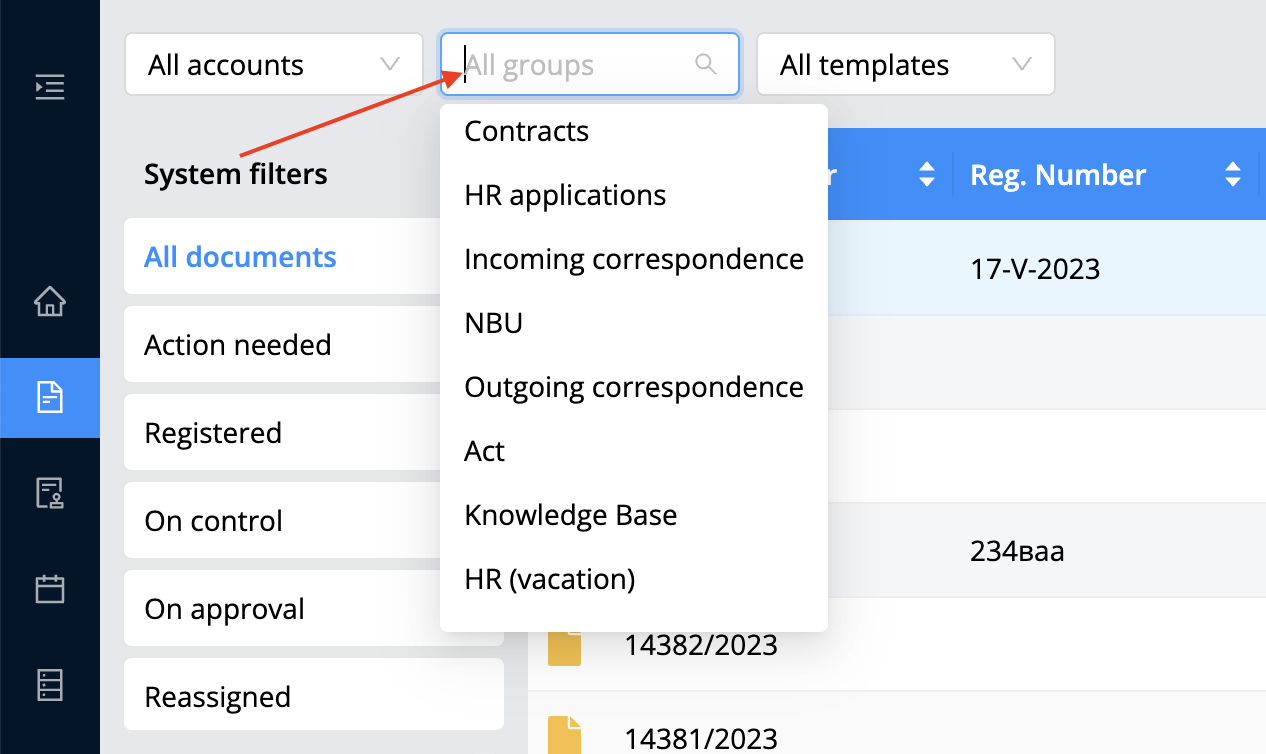
Filter by accounts, template groups, and templates.
In the documents section, you can filter documents by:
Account.
Template group.
Template.
Filters display all accounts, template groups, and templates available to the user.
Note! If a template has been deleted and at least one document had been created based on it, the name of the template will be displayed in the filter and will be available for selection. |
|---|
| Importantly! The template name will be displayed in the filter if the user is added to the Can Receive column in the BPM template in the Users tab. The template settings are described in more detail in the section BPM - process. |
|---|
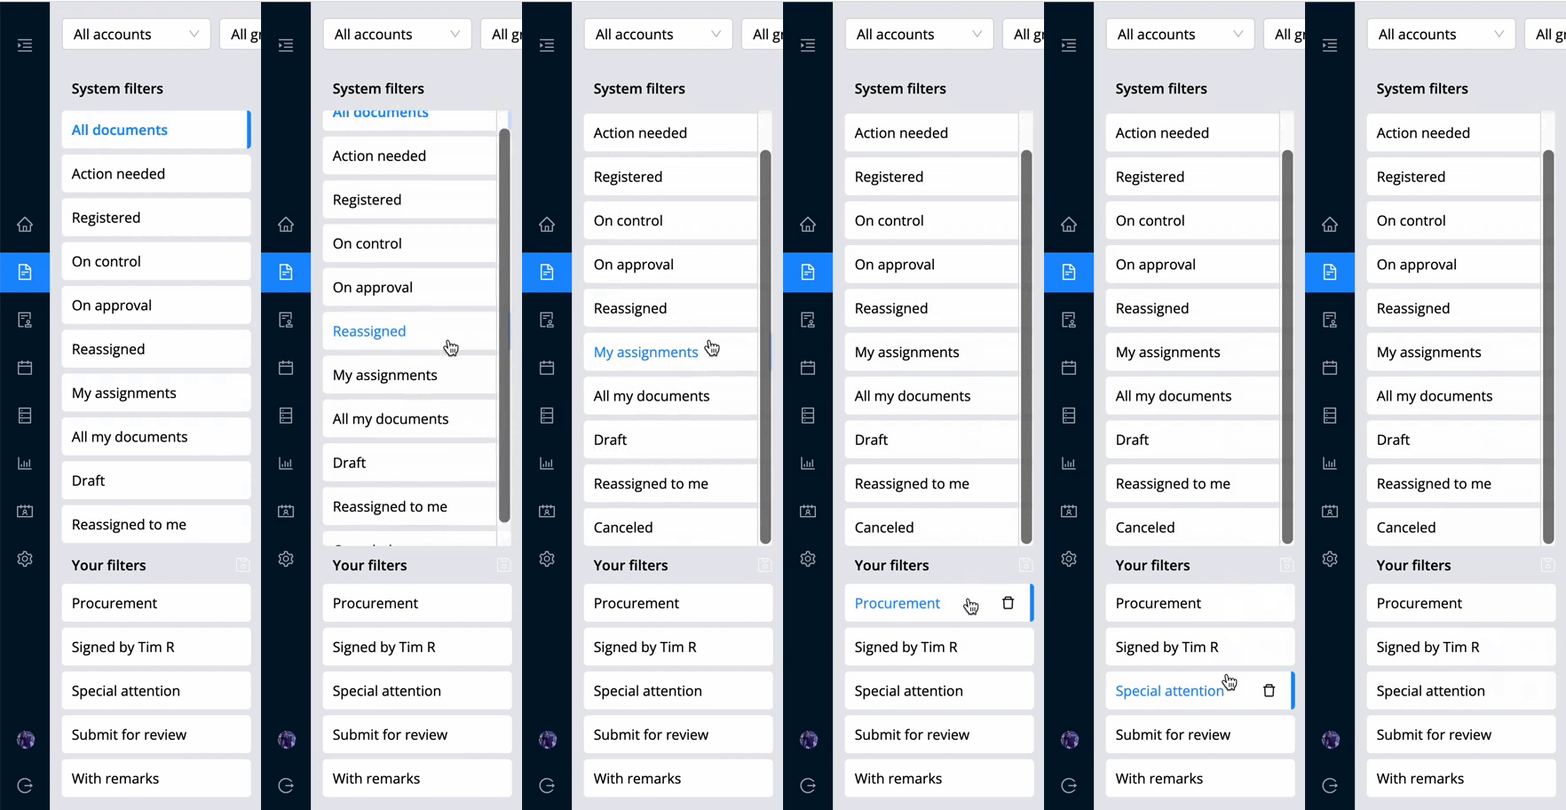
System filters
The system includes 20 system filters, they serve to filter the list of documents by:
Advanced stage status (on signature, on approval, on registration, in work)
According to the statuses of the document, such as:
Closed
Cancelled.
Documents that are at the draft stage.
List of all filters:
Shared — documents that were shared to the user.
Favorite — documents that the user has added to the list of favorites through the document option. More about document options.
On correction — documents that are at the stage with sub status – on correction.
Projects — documents with sub status [Project].
Archive — all documents added to the archive. Archiving is configured in the business process template and occurs automatically. Documents from the archive are not displayed in the general list of documents.
Registered — documents that have a registration number.
On registration – documents that have an extended status of [on registration].
Canceled — documents at the "END" stage with the sub status [Canceled].
On approval — documents that are at the stage with the sub status [On approval].
On signature — documents that are at the stage with the sub status [On signature].
Drafts — documents that are at the [Start] stage.
Entrusted to me — documents that have been sent to me on additional approval. Read more about [additional approval] in the section [Main actions]
Overdue — documents in which the status [Deadline for execution of document requiring your action has come] — the status icon in the list of documents
 .
.All my documents — documents in which the user is the author.
Control — documents that were marked as control. More details in the section Document options.
My assignments — Documents in which the user made an assignment to the other user. Read more in the section Document options.
My documents at work — documents in which the user is the author and the document has a sub status of [in work].
Executed — documents that have passed to the final stage - [End].
Requires action — all documents in which the user has opened execution card and the user is a participant in the stage and the user needs to make a decision.
All documents — absolutely all documents with all statuses except archived.
Displaying filters in the system.
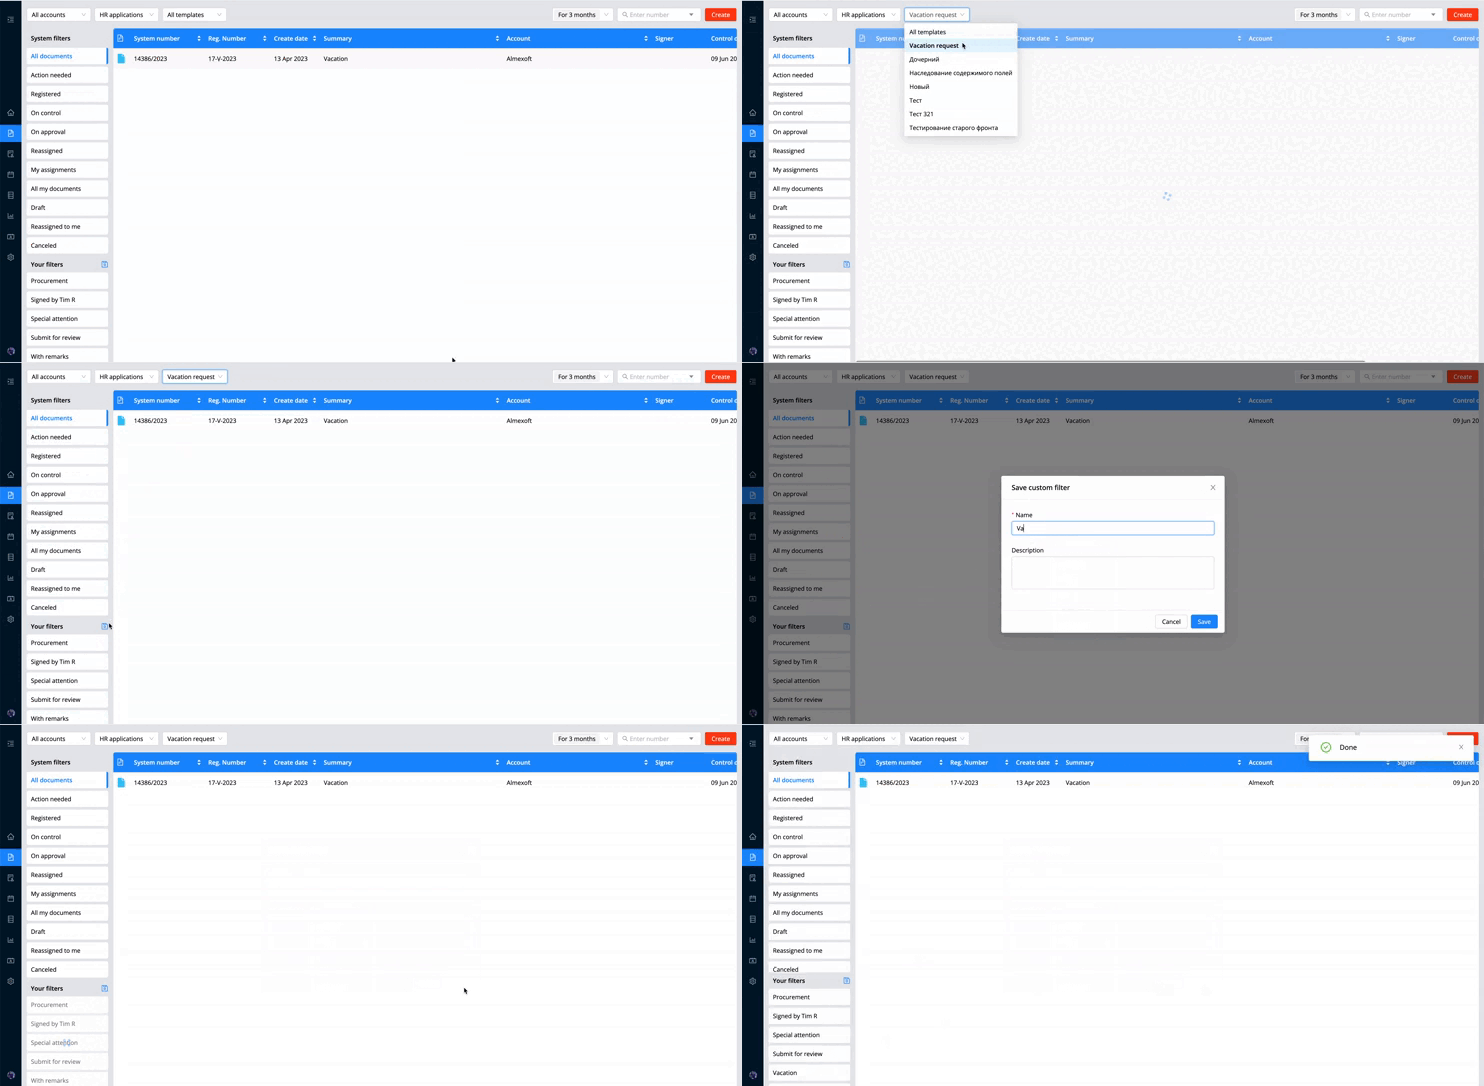
Your filters (custom filters)
In the "Documents" and "Registries" sections, the user can create and delete a pre-filled filter, which will consist of selected search and filtering parameters, and the filter must be given a short name and description when creating it.
The functionality allows you to reduce the time spent on the same type of search for the same documents in the system.
Note! More detailed information in the section Delegation. |
|---|
To create a custom filter, you need:
In the documents section, you need to choose any filter or search query.
Click on the button
 on the left side menu (under
system filters).
on the left side menu (under
system filters).Fill in the name of the filter.
Fill in the Description.

Click on the button
| Note! The button to create a custom filter is not clickable and is grayed out until the user selects a filter and/or a search query. |
|---|
Search for documents
In the system, document search is available according to the following parameters:
Search by number
Search by text
Search by date
Search by user
Search by handbook
Note! Search by document registration and system number is available by default. |
|---|
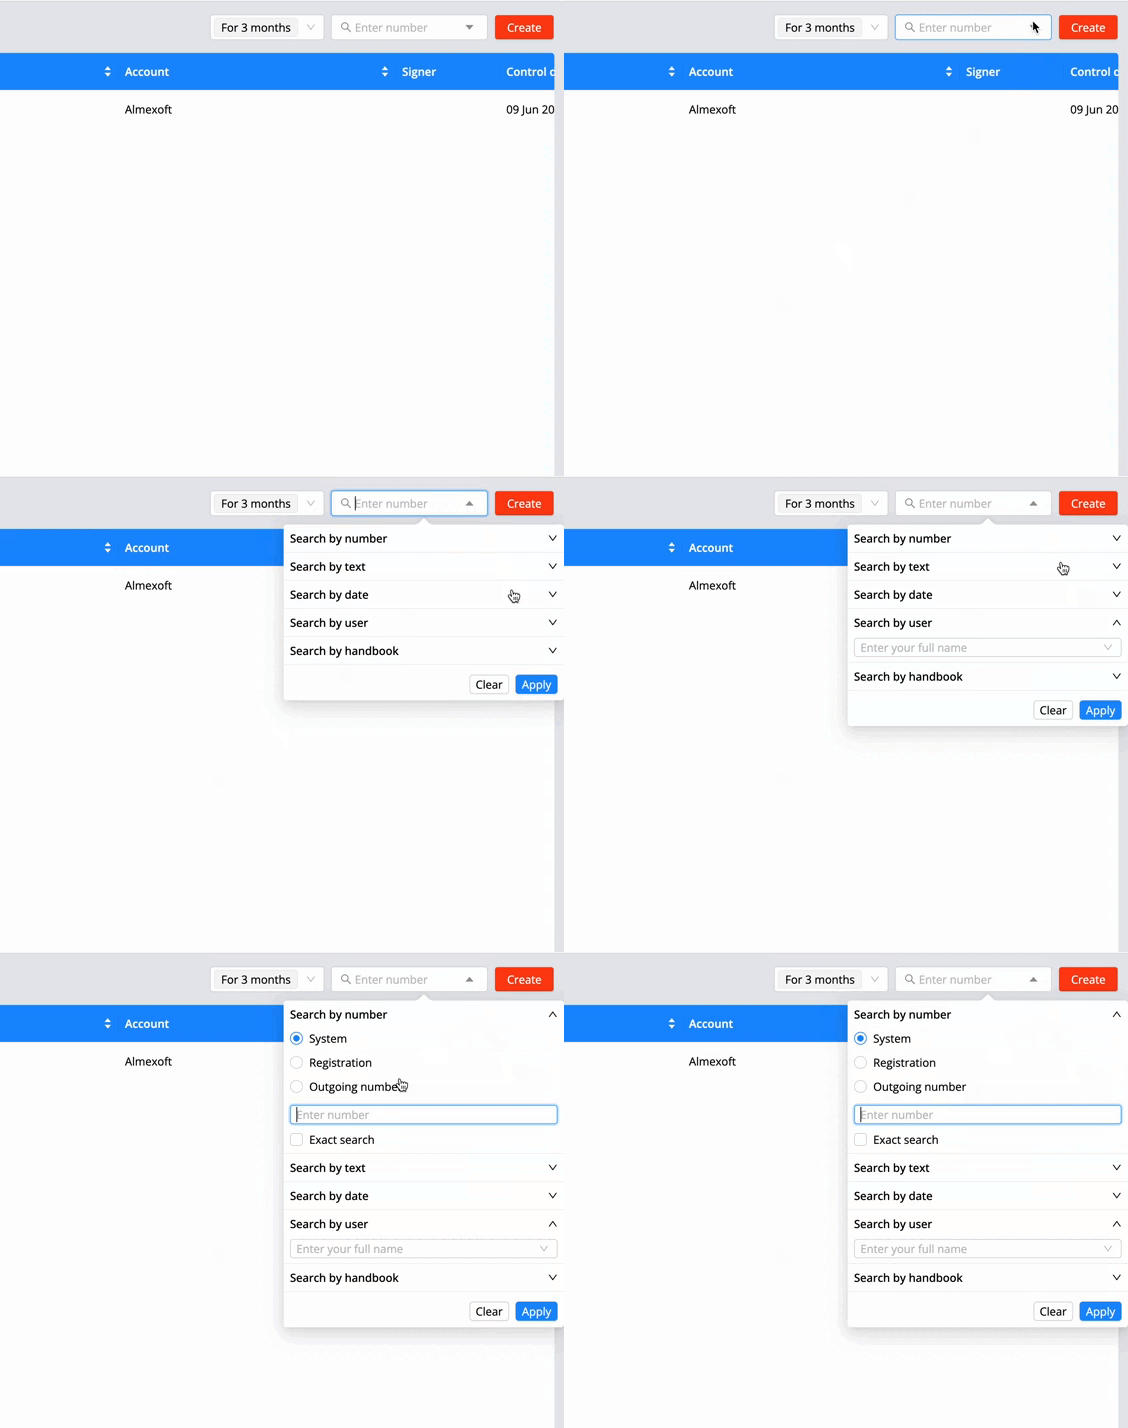
| Importantly! In order for the search type “Search by handbook” to be displayed, you need to enable the settings  at least for one column in
any handbook. More details in the section Handbooks. at least for one column in
any handbook. More details in the section Handbooks. |
|---|
Column settings in system
filters
The system has the possibility of personalized setting of system filters and their columns.
To configure system view and columns, you need:

Click on in the lower right corner
Click on the filter in the list on the left
Select available columns to display
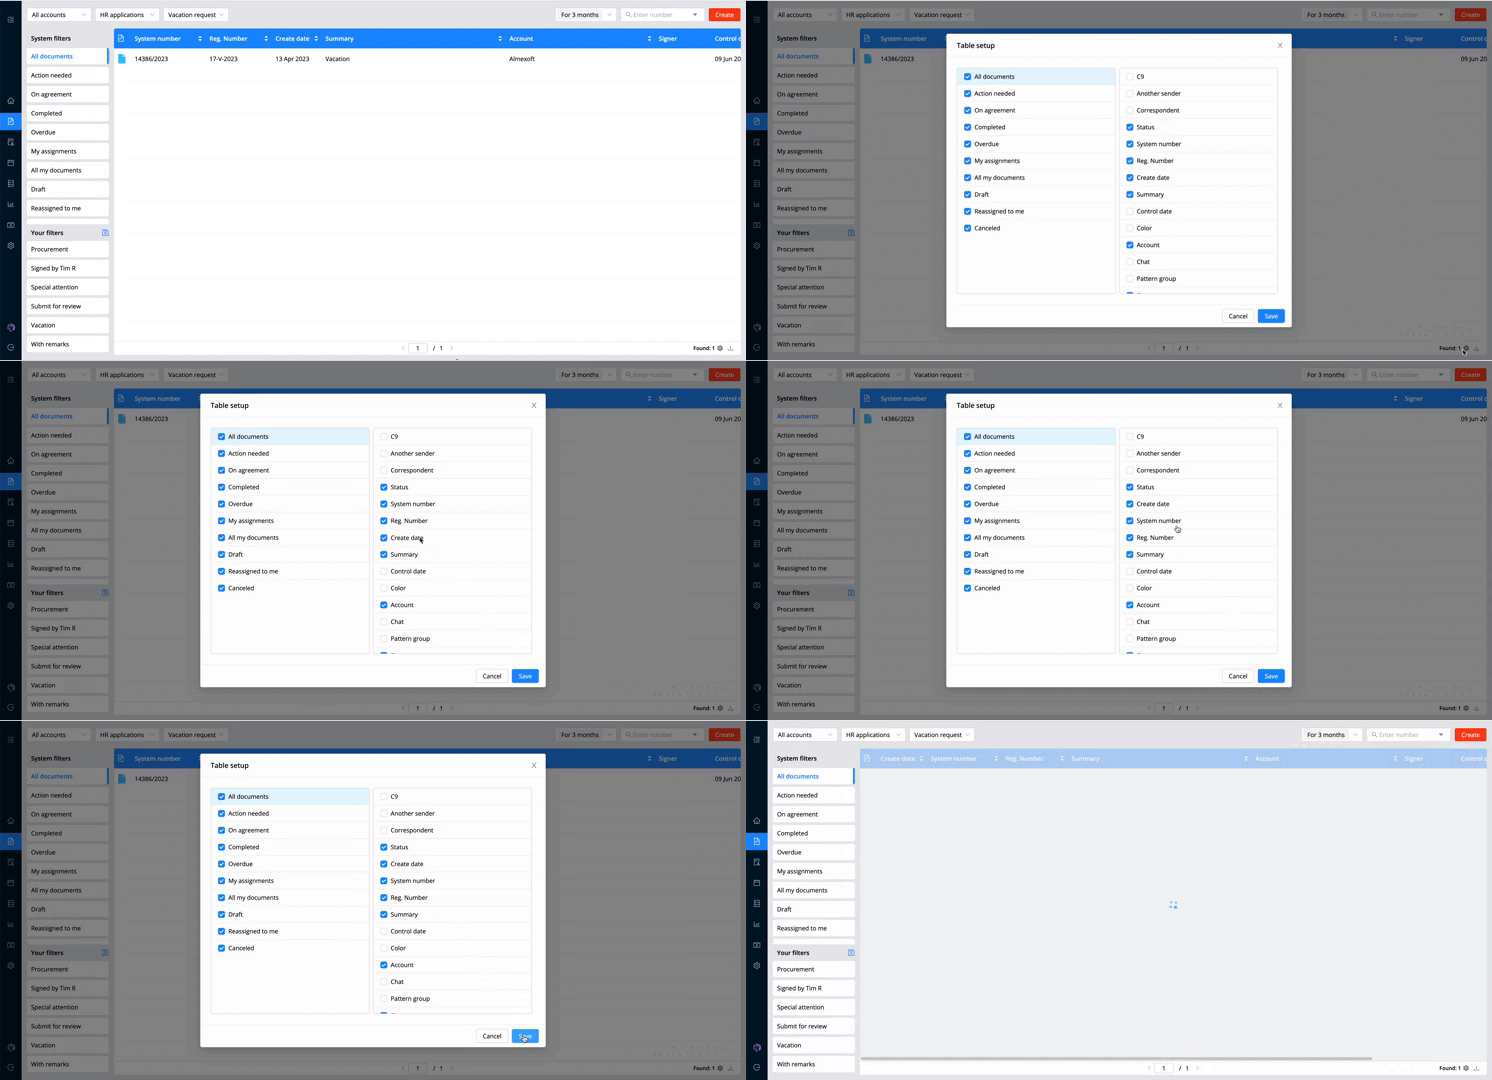
Note! By long-tap on the selected element in the right part of the table, the user can change the display order of the columns. |
|---|
Registers
Registries section has the same functionality as in the “Documents” section, except for creating a document.
Also, the section allows you to regulate user access to groups of documents within a specific account, template group and document template.
When creating the registry, the user needs to specify users and accounts which will have access to registers. More details in registry sections.
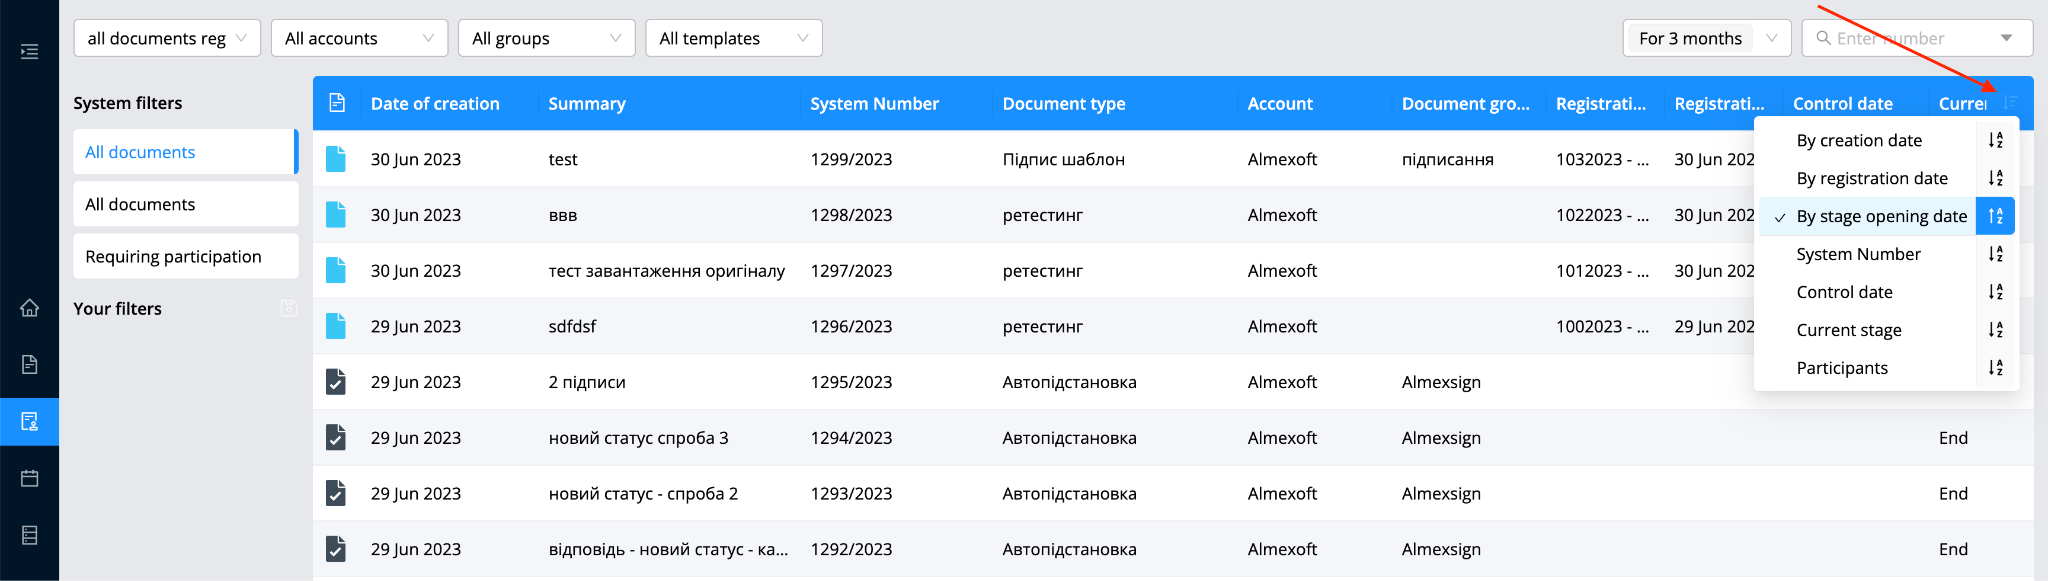
The register has the possibility of sorting documents, if the sorting is preconfigured in the [Admin page] - [Data] - [Fields] section. More details in the section [Admin page] - [Data] - [Fields].
Reports
The section serves to work with general reports in the system. There are two types of reports a user can work with:
General.
To the document.
Reports are created by the system administrator in the [Admin page] – [Data] – [Reports] section.
This section will be displayed to a user with the role [ADMIN_REPORT_UPDATE].
General reports are generated on the left side section [Reports]. This section is visible to all users and does not require additional roles.
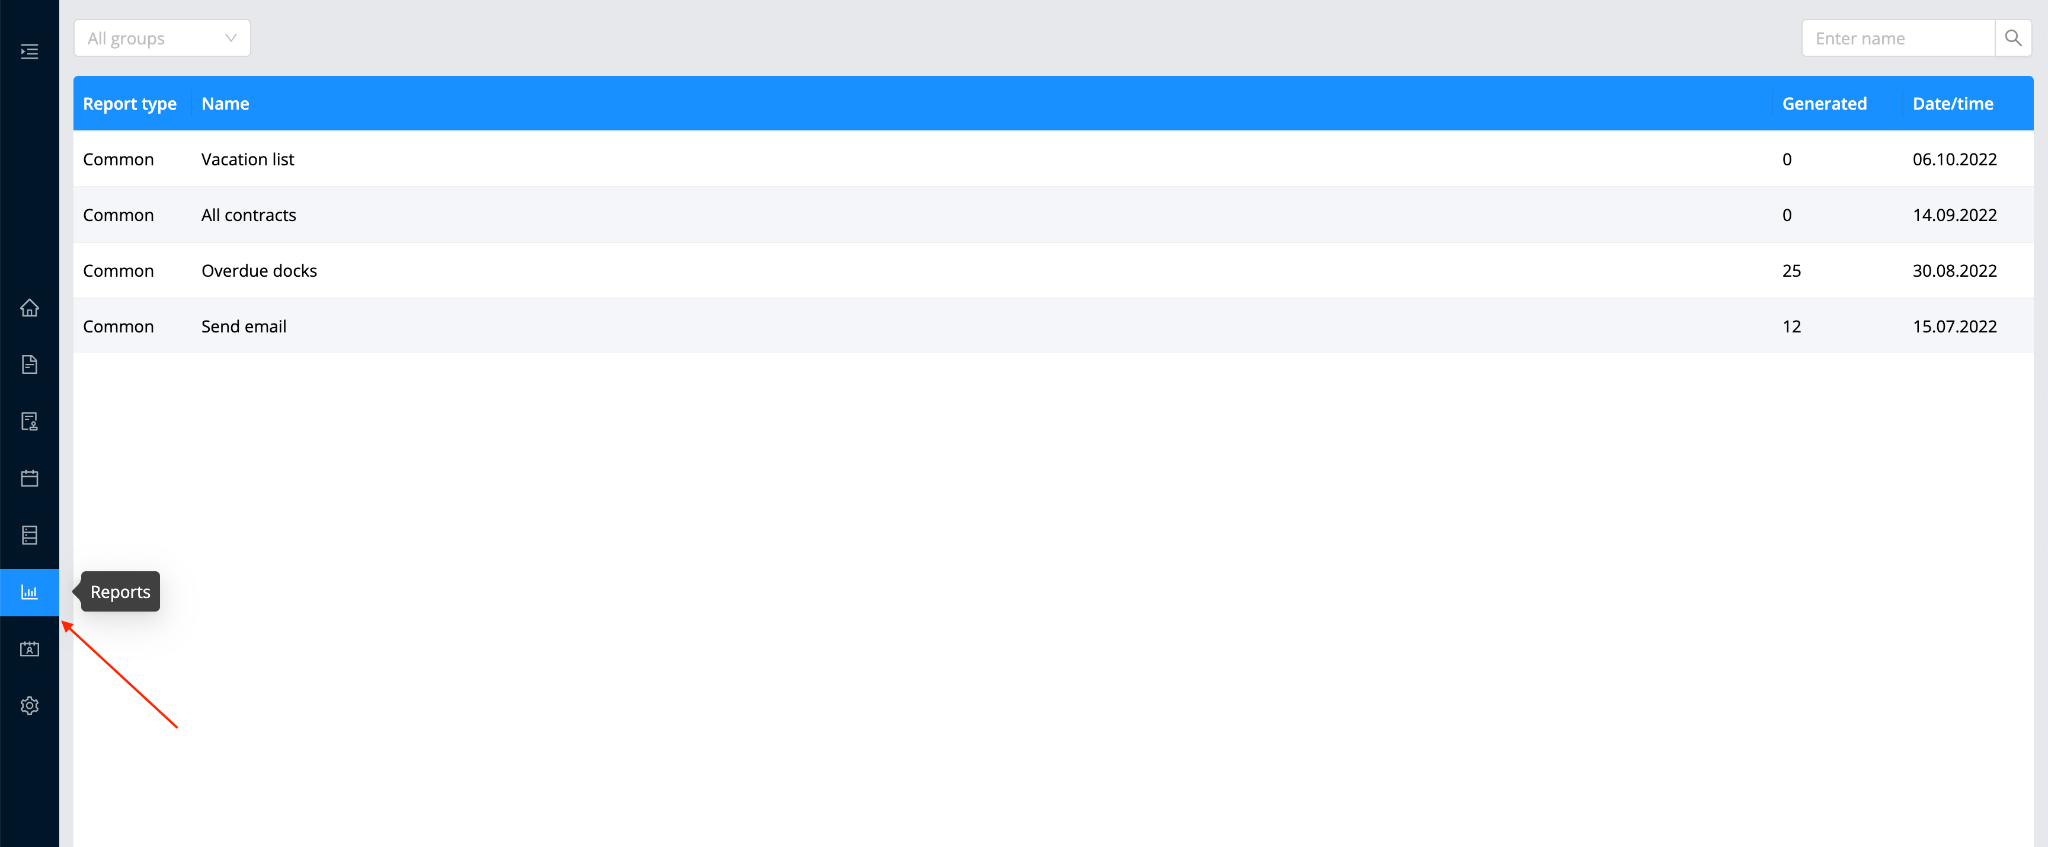
To generate a general report, a user needs to click on the desired
report in the list of reports, and it will be generated automatically,
if there are no mandatory parameters to fill in it. If there is, then
you need to click on
button 
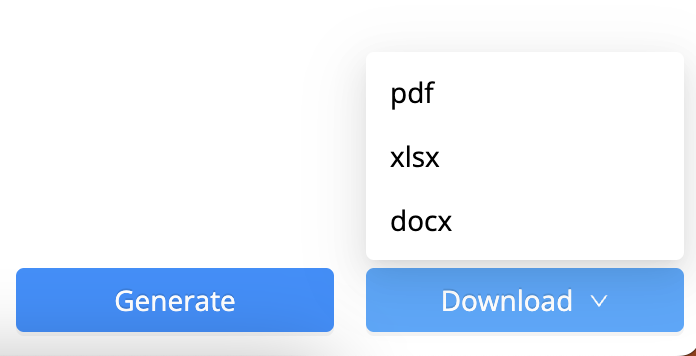
| Importantly! All reports are always generated in pdf format, but when creating a report, a user can choose other extensions, and they will be available for download in the report viewer in the lower right corner. |
|---|
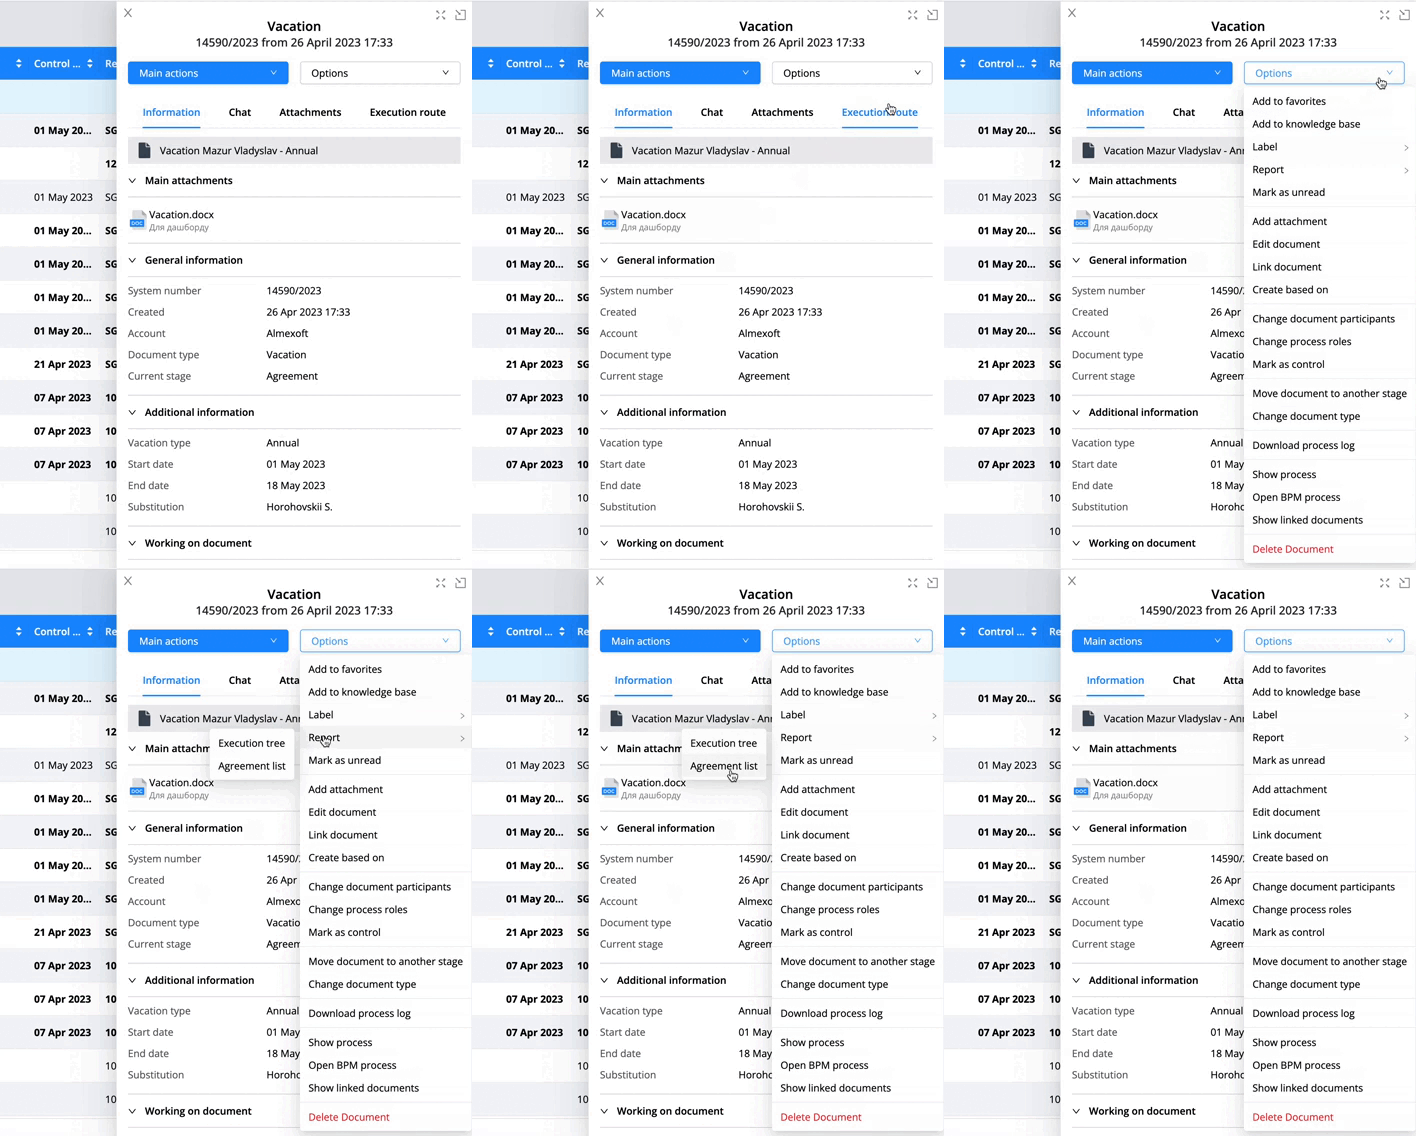
Document reports are generated via the document options, if this template (based on which the document was created) is added to the [Document templates] when creating/editing a report with type [to the document].
Note! General – it can be created on the left side menu “Reports”, if the user is added to the report. (The section itself is visible to all users) To the document—it can be created only in the document options in the general report section, it will not be available. More about document options. |
|---|
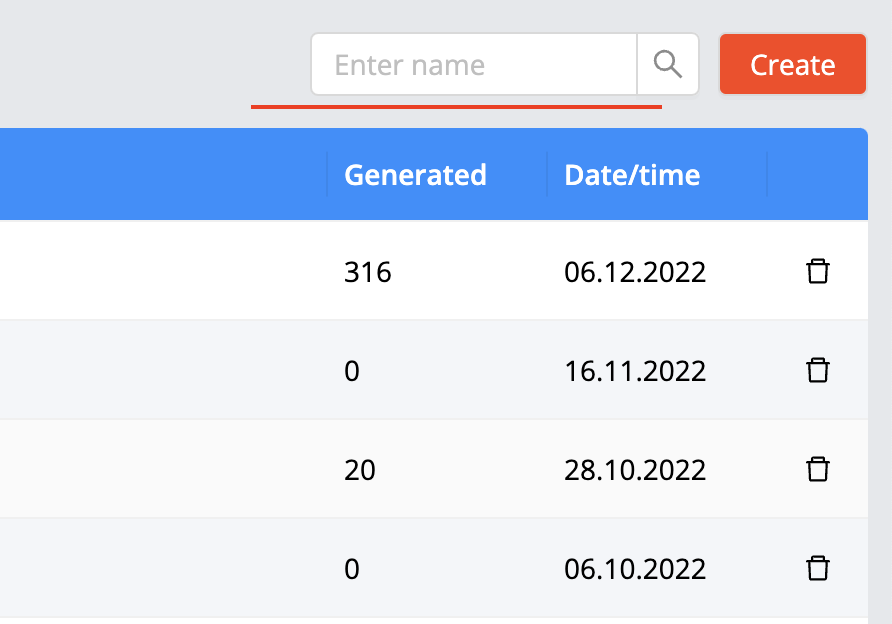
There is also a search by name in the reports section.
Users
This section serves to work with users in the system.
This section contains:
Displaying a list of users
User search. More details in the section search.
User filtering:
technical
imported
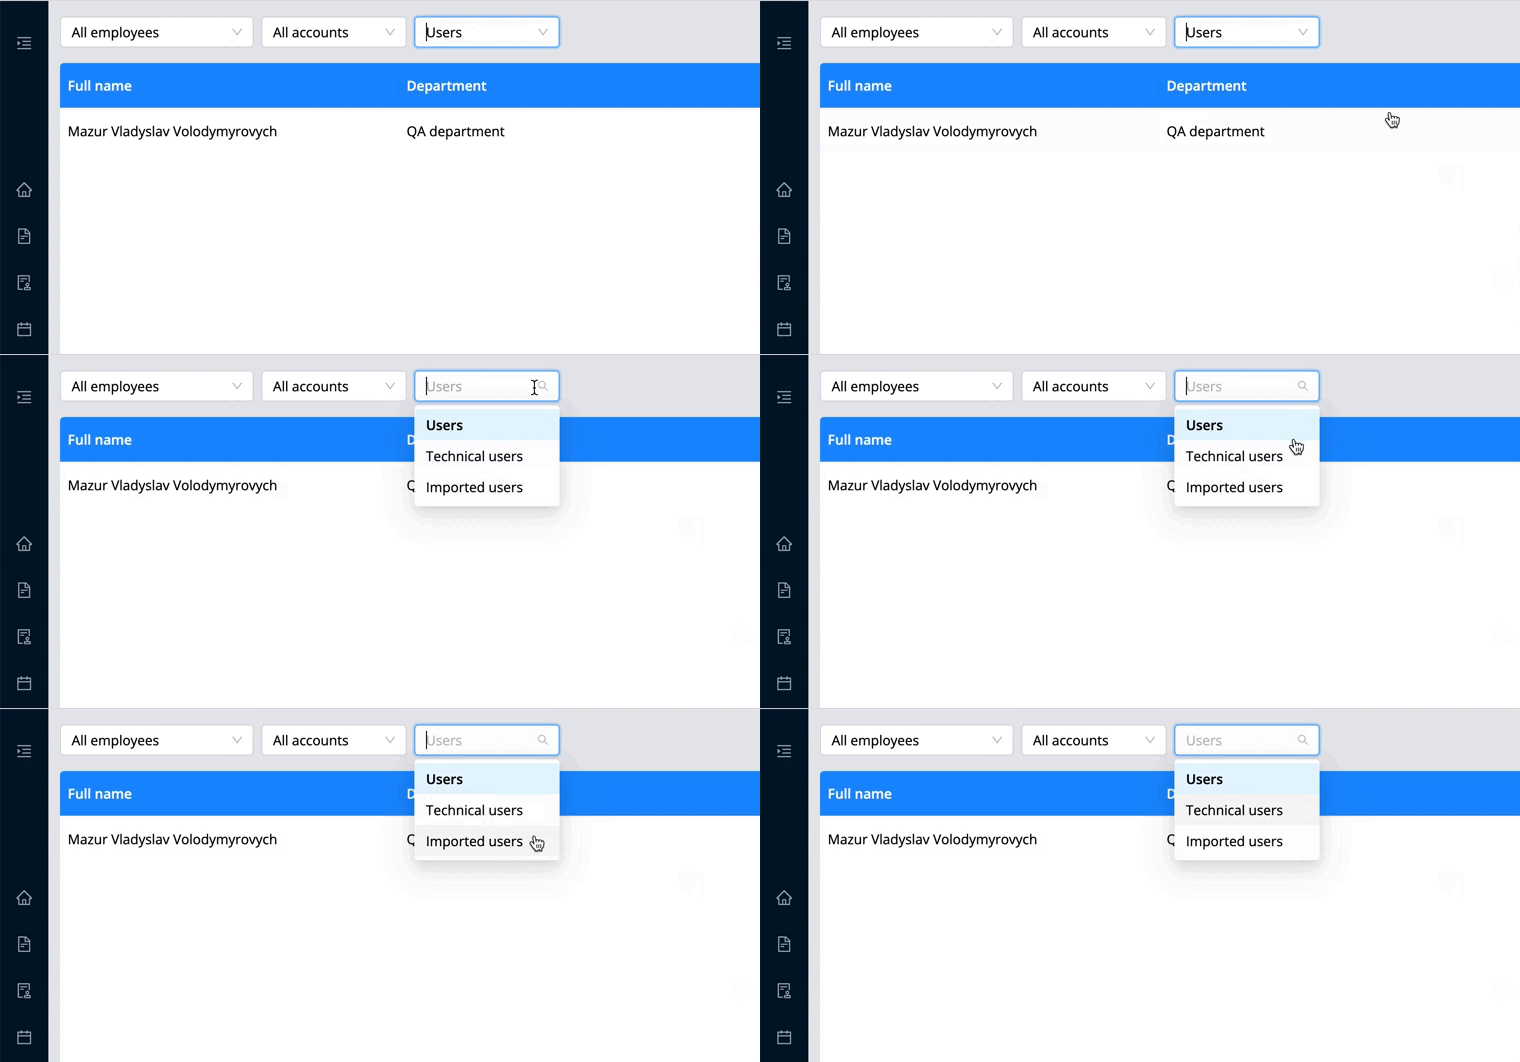
Filtering users by department
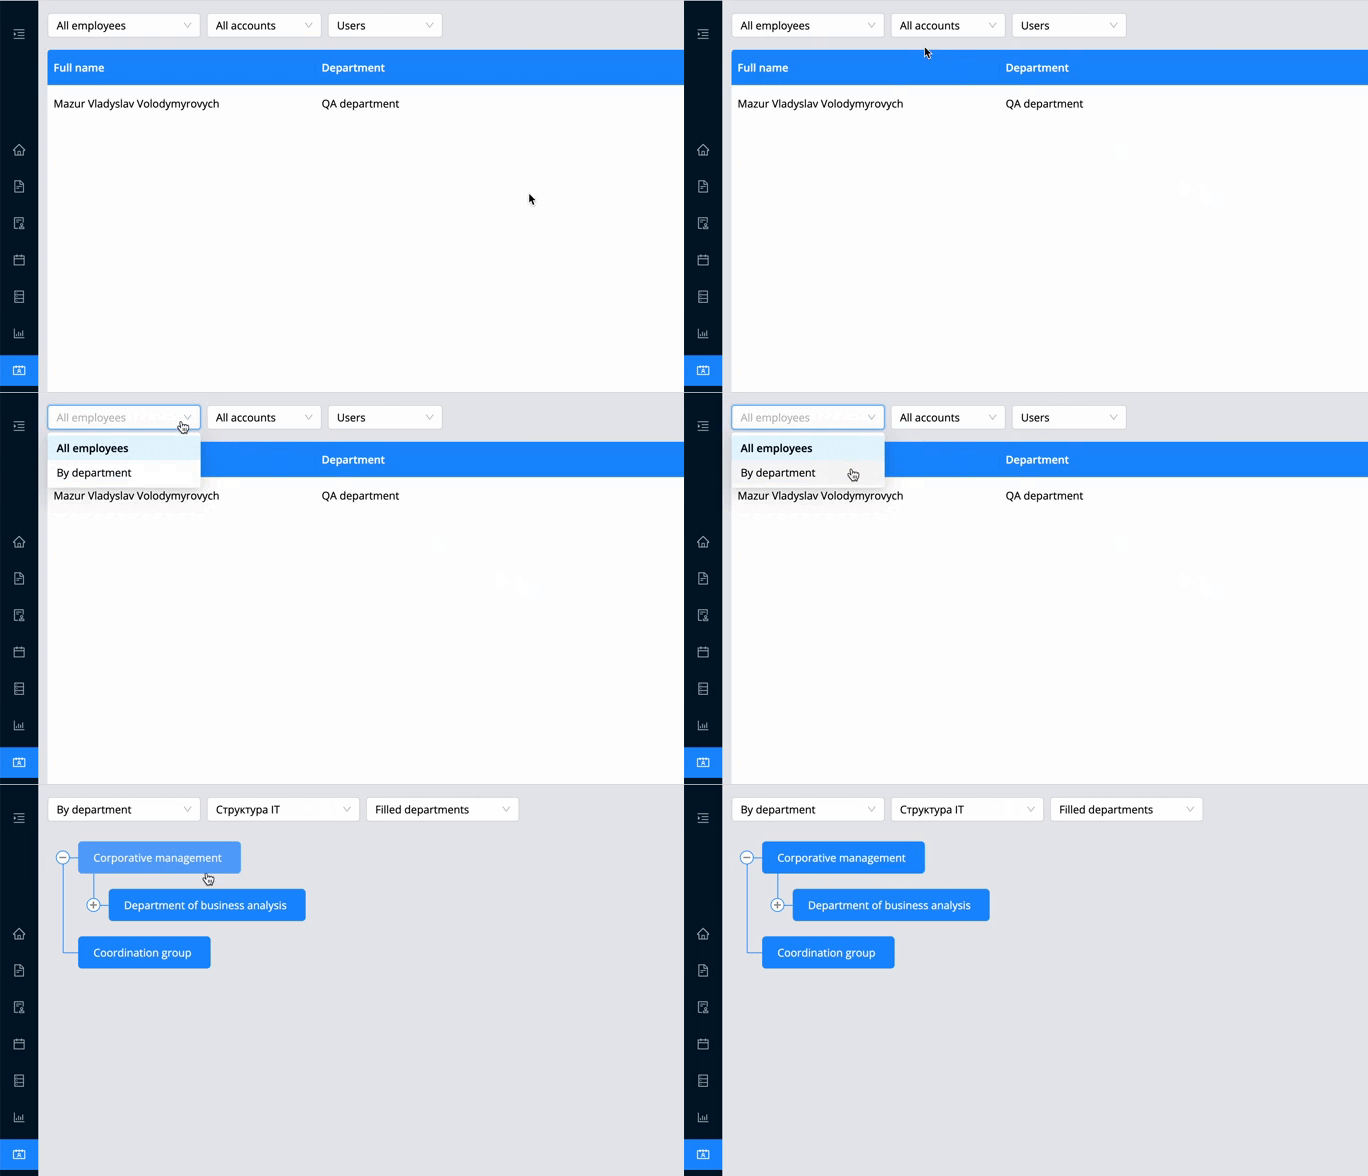
Note! A technical user can be created via the system interface, and when
creating it, it is not necessary to fill in the email field. |
|---|
Work with users.
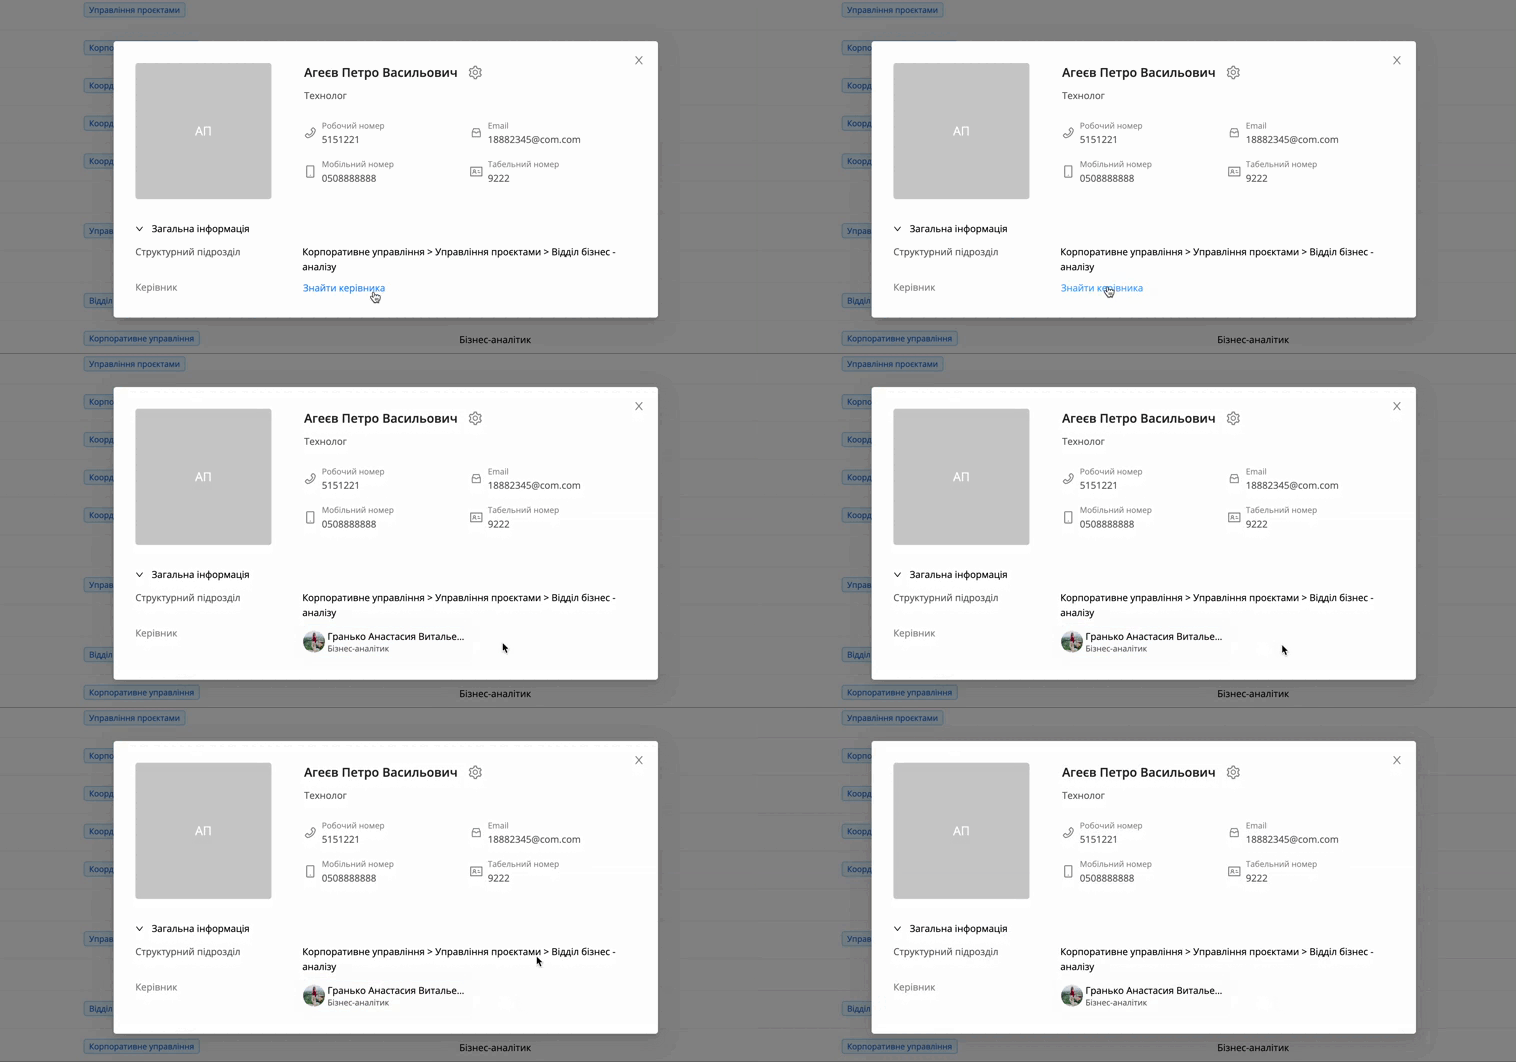
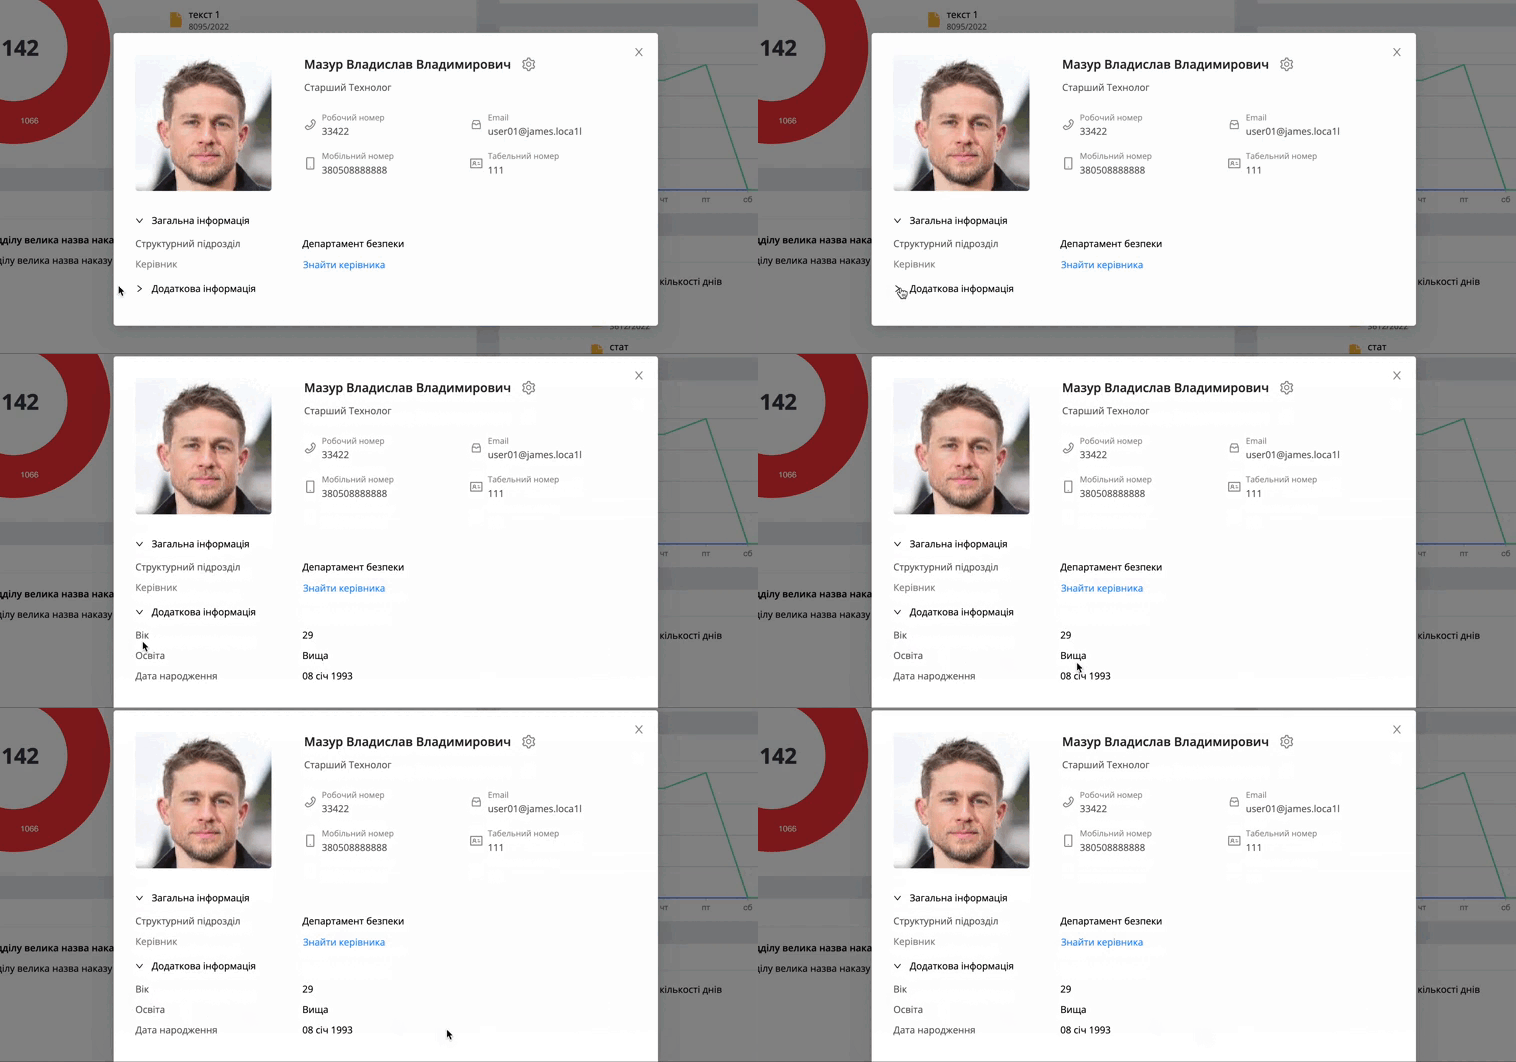
Clicking on a user's name will display information about the selected user:
First and last name
Email
Mobile and work phone numbers
Position
Personnel number
General information:
Structural department
Chief
Editing a created user. More about creation user
It is possible to add additional fields with the necessary information to the user profile. Learn more about working with user field.
Also, when opening your personal profile, the icon  will be available in
the “Users” section, if the user has one of these roles:
will be available in
the “Users” section, if the user has one of these roles:
USER_INFO_UPDATE
USER_NOTIF_UPDATE
USER_PASSWORD_UPDATE
USER_PUBLIC_KEY_UPDATE
After clicking on a user profile will
open with the ability to edit information. The availability of editing
tabs is controlled by the availability of the roles listed
above.
Role USER_INFO_UPDATE shows following tabs in the editing window:
Information. There are fields with name, email, mobile phone, roll number, position, note.
Additional Information. If additional fields are not configured, this tab will not be displayed. More about settings additional fields
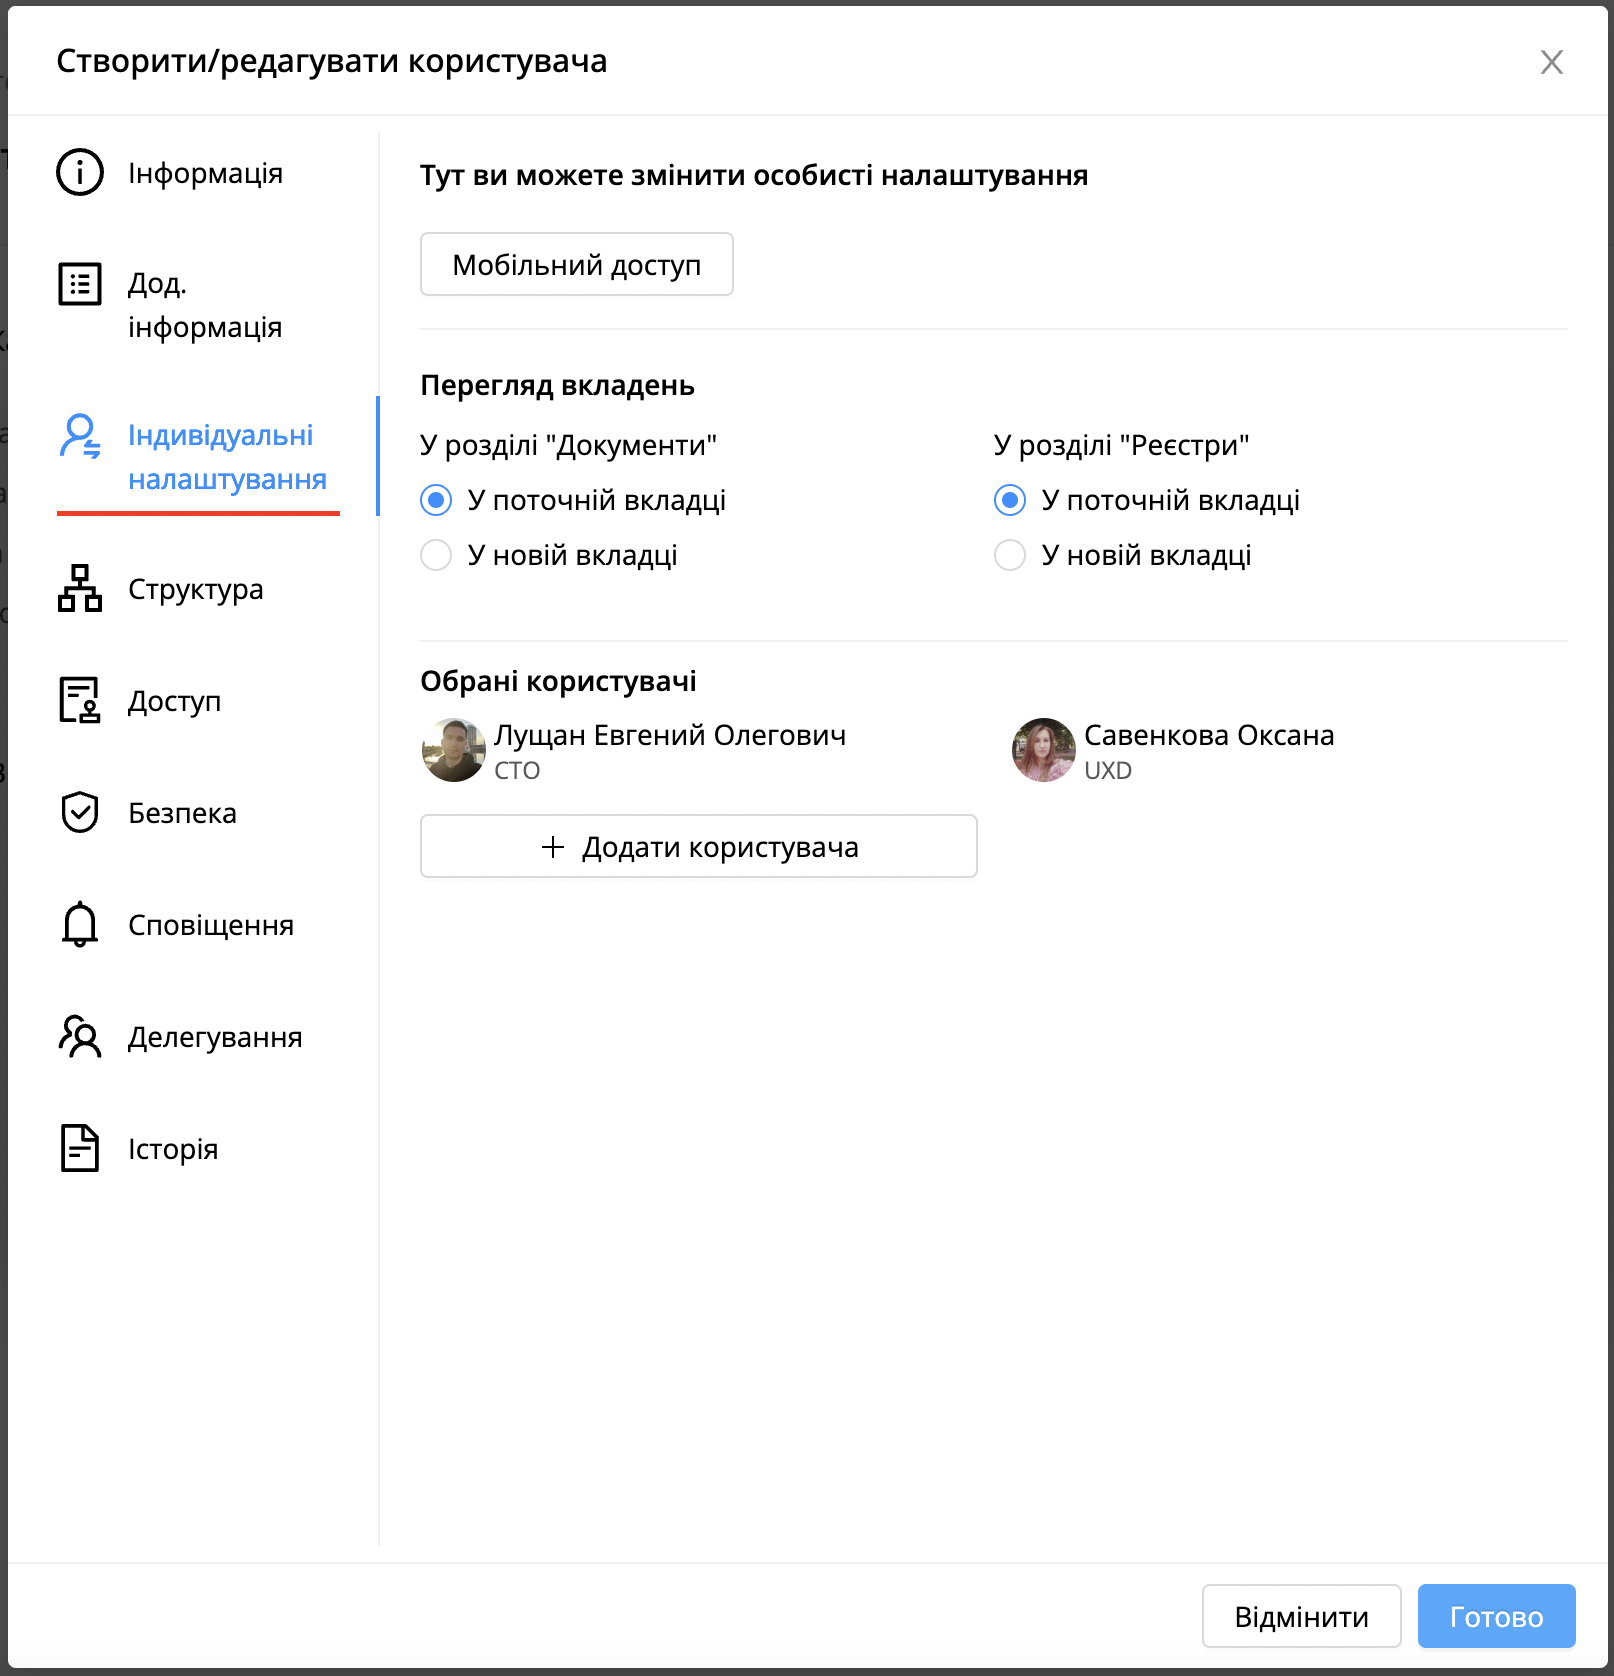
Individual settings.
In this tab, after clicking on the “Mobile access” button, a window with a QR code will be displayed, which can be scanned with a mobile application for login. More details about mobile applications in the corresponding instructions. A user can configure the option to open document attachments:
In the current tab
In a new tab.
A user can also add favorite users who will be displayed at the very top of the list when making an assignment in the document (more about the assignment in the section).
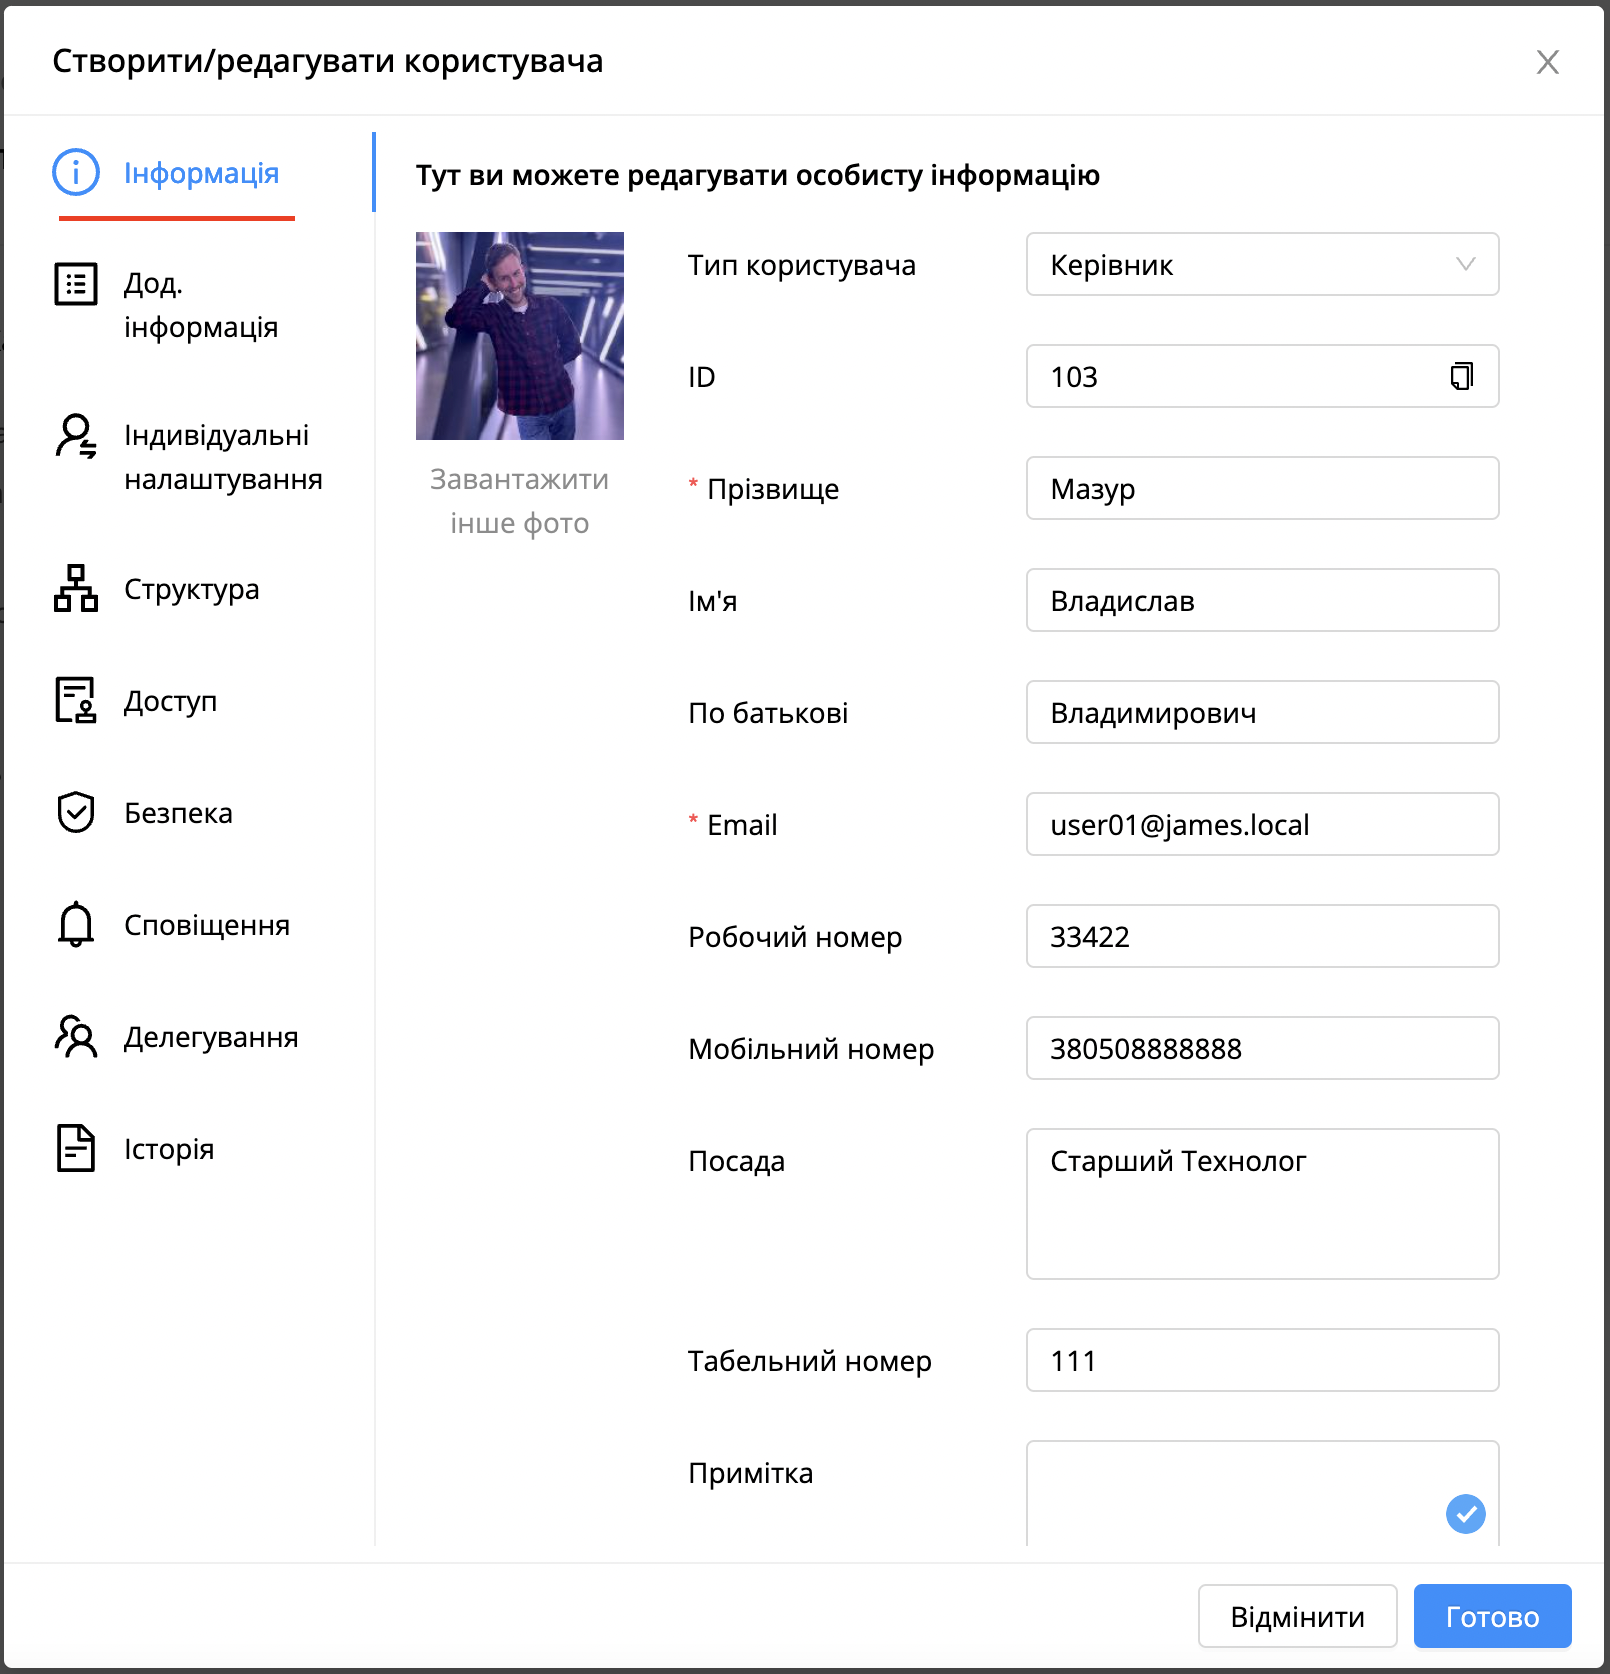
Role USER_NOTIF_UPDATE shows the “Notifications” tab in the editing window. A user can edit notifications that will be sent to the user email via the system.
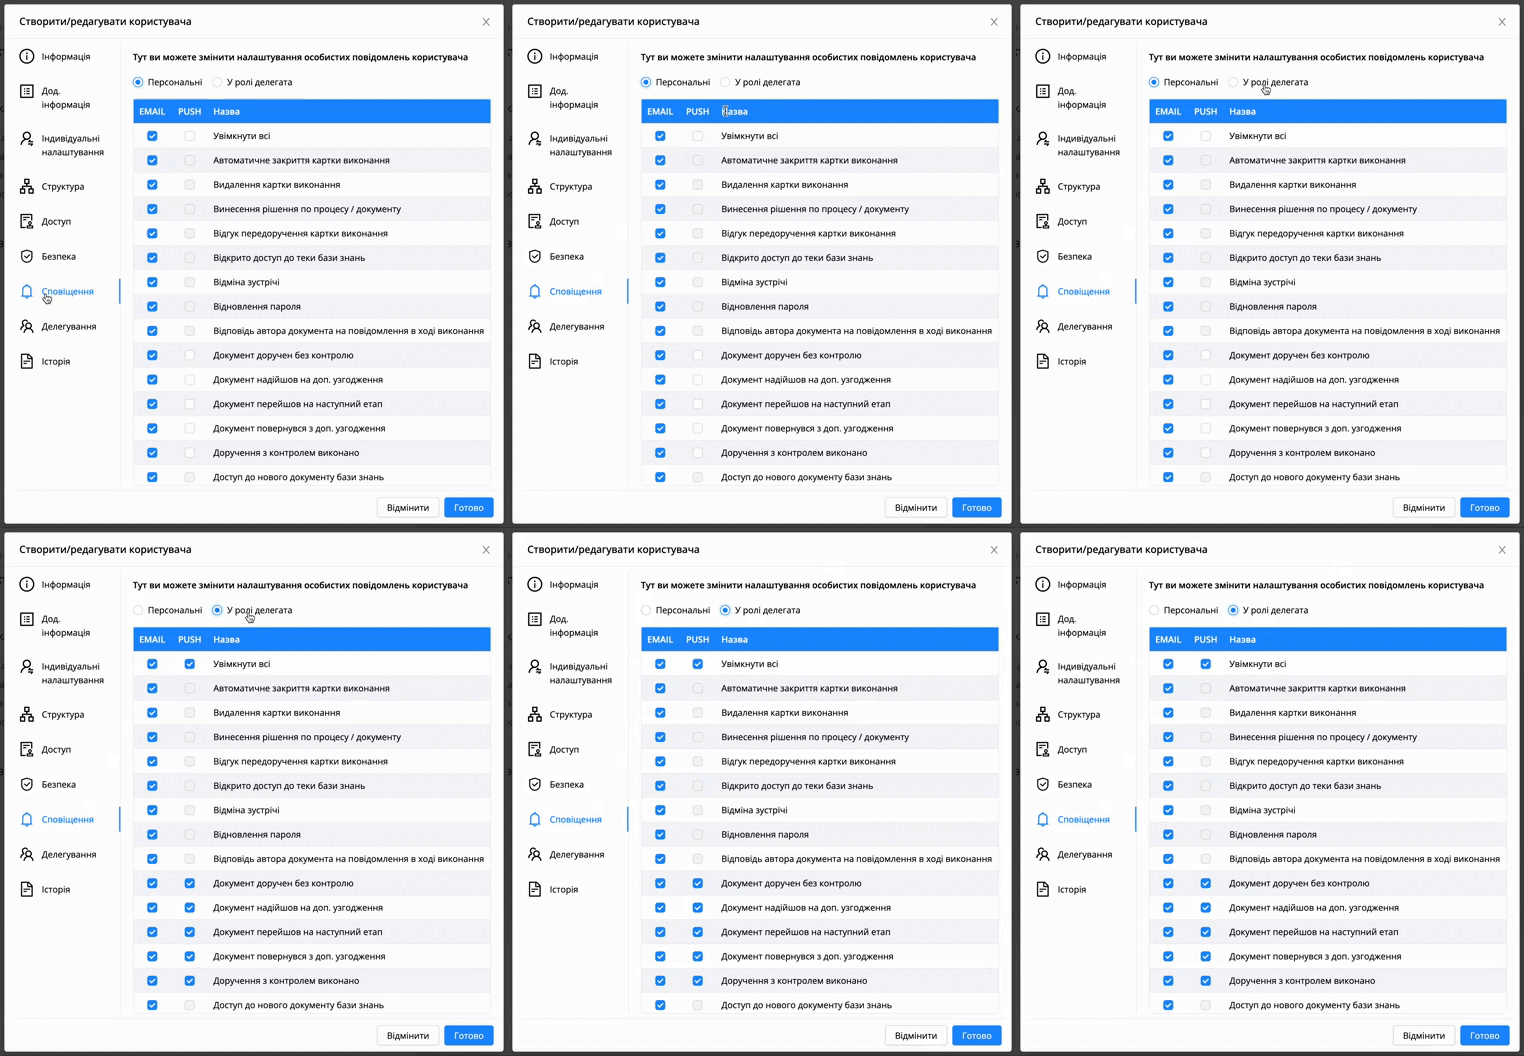
| Note! You can also edit personal notifications as a delegate. More about delegation. |
|---|
Role USER_PUBLIC_KEY_UPDATE shows the “Security” tab in the editing window, where a user can upload the EDS key, which can then be used to sign documents in the system.
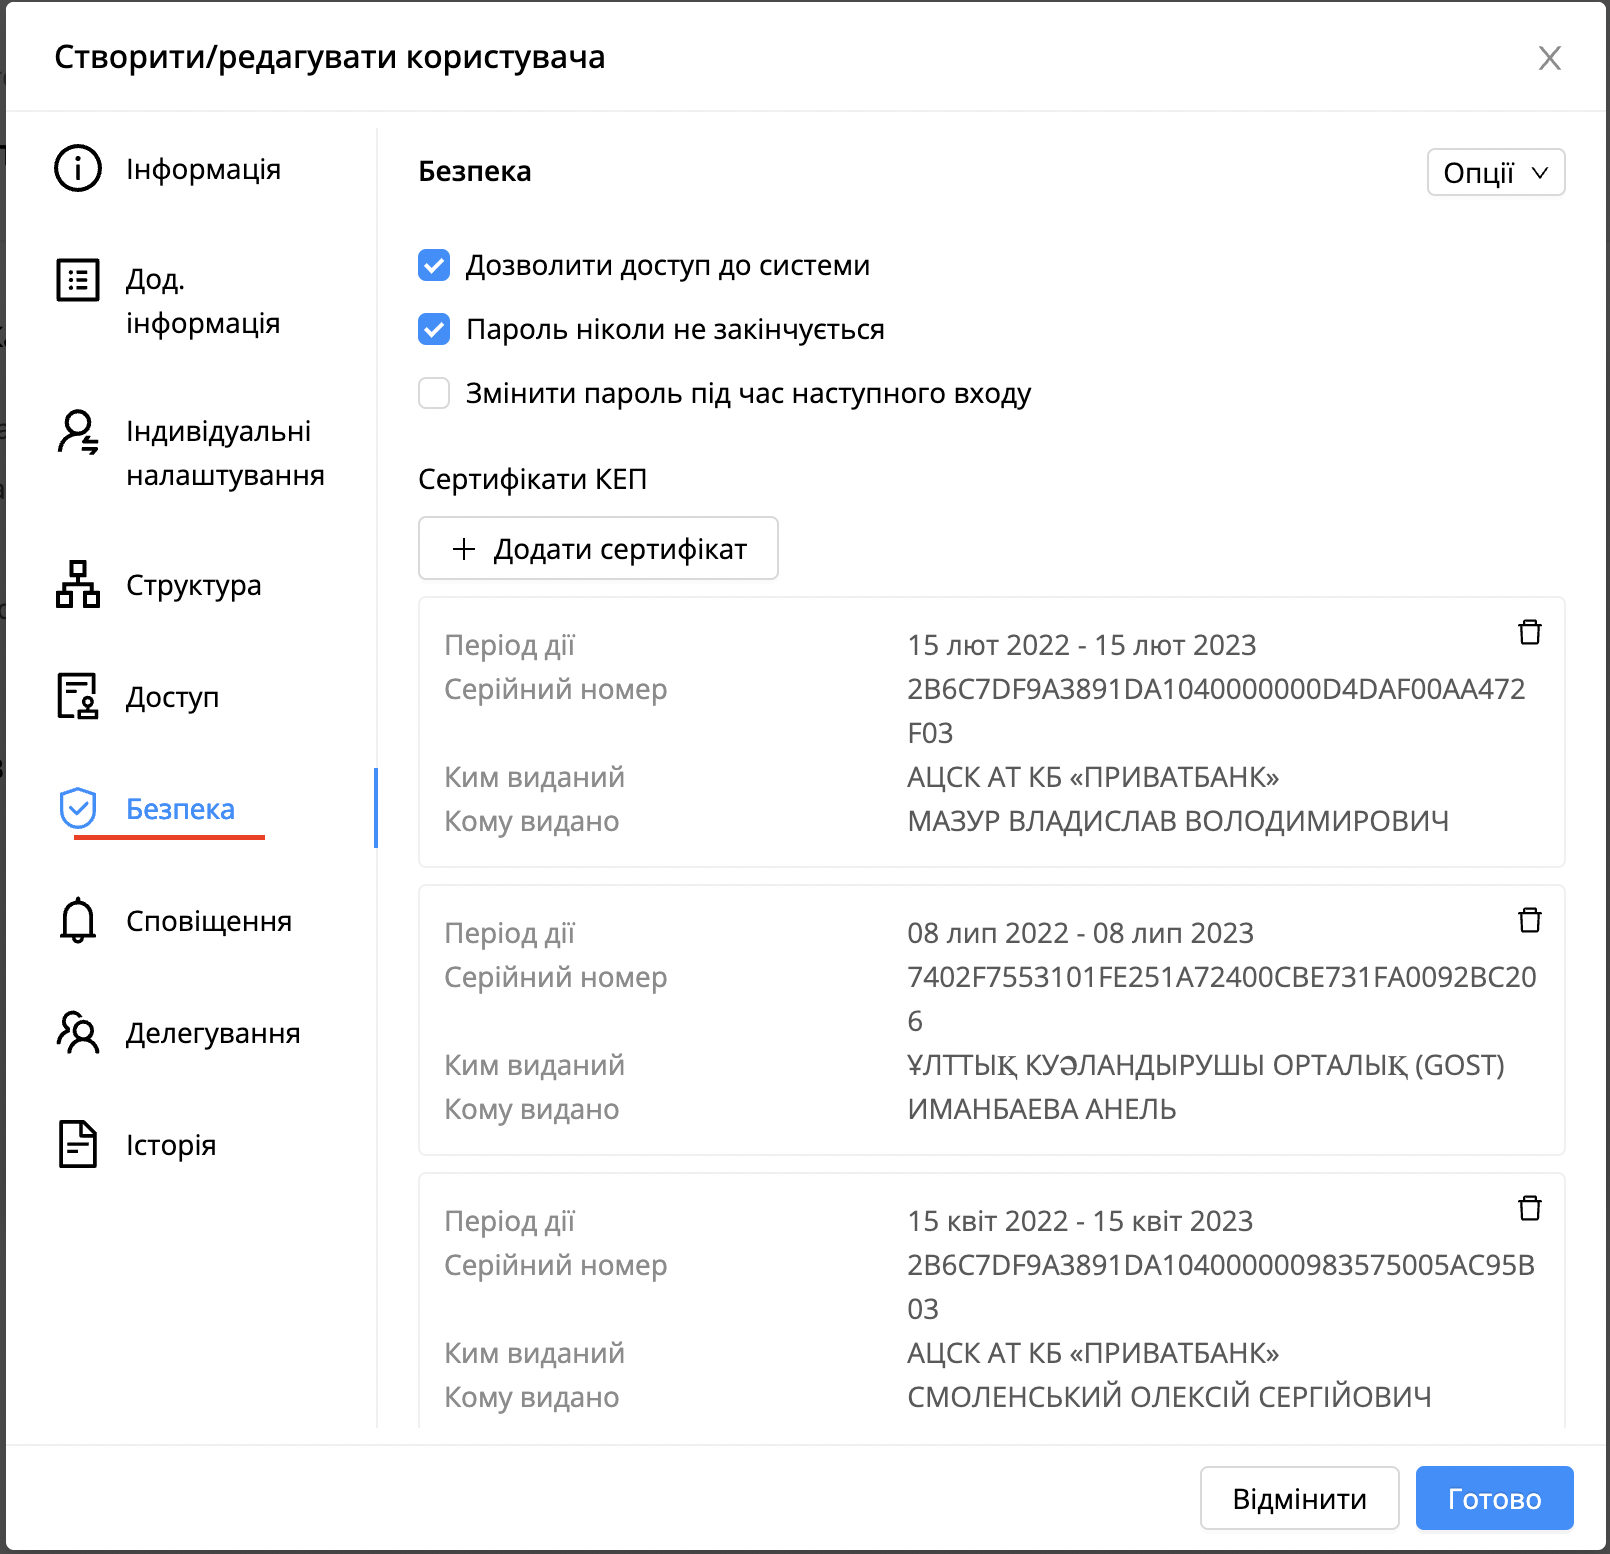
Steps to upload the EDS key:
Open user profile for editing
Go to the "Security" tab
Move the cursor
Click on one of the options: select file, upload to the secure storage
*** The secure storage option is paid and requires licensing
(in the first option, you will need to upload the EDS key every time when signing the attachment, in the second option, you will not need to upload, but only select from the storage)
Upload the key file
Enter the password for the EDS key
Click on the “Save” button
After that, the administrator will need to confirm your key in the appropriate section.
| Note! If a user does not have the USER_PUBLIC_KEY_UPDATE role, but has an already uploaded EDS key, then the tab will be displayed. |
|---|
Role USER_PASSWORD_UPDATE shows the "Security" tab in the editing window. In the upper right corner of the window, the [Options] button will be displayed and the option [Change password] will be available.
After clicking on this option, a window for changing the password will be displayed.
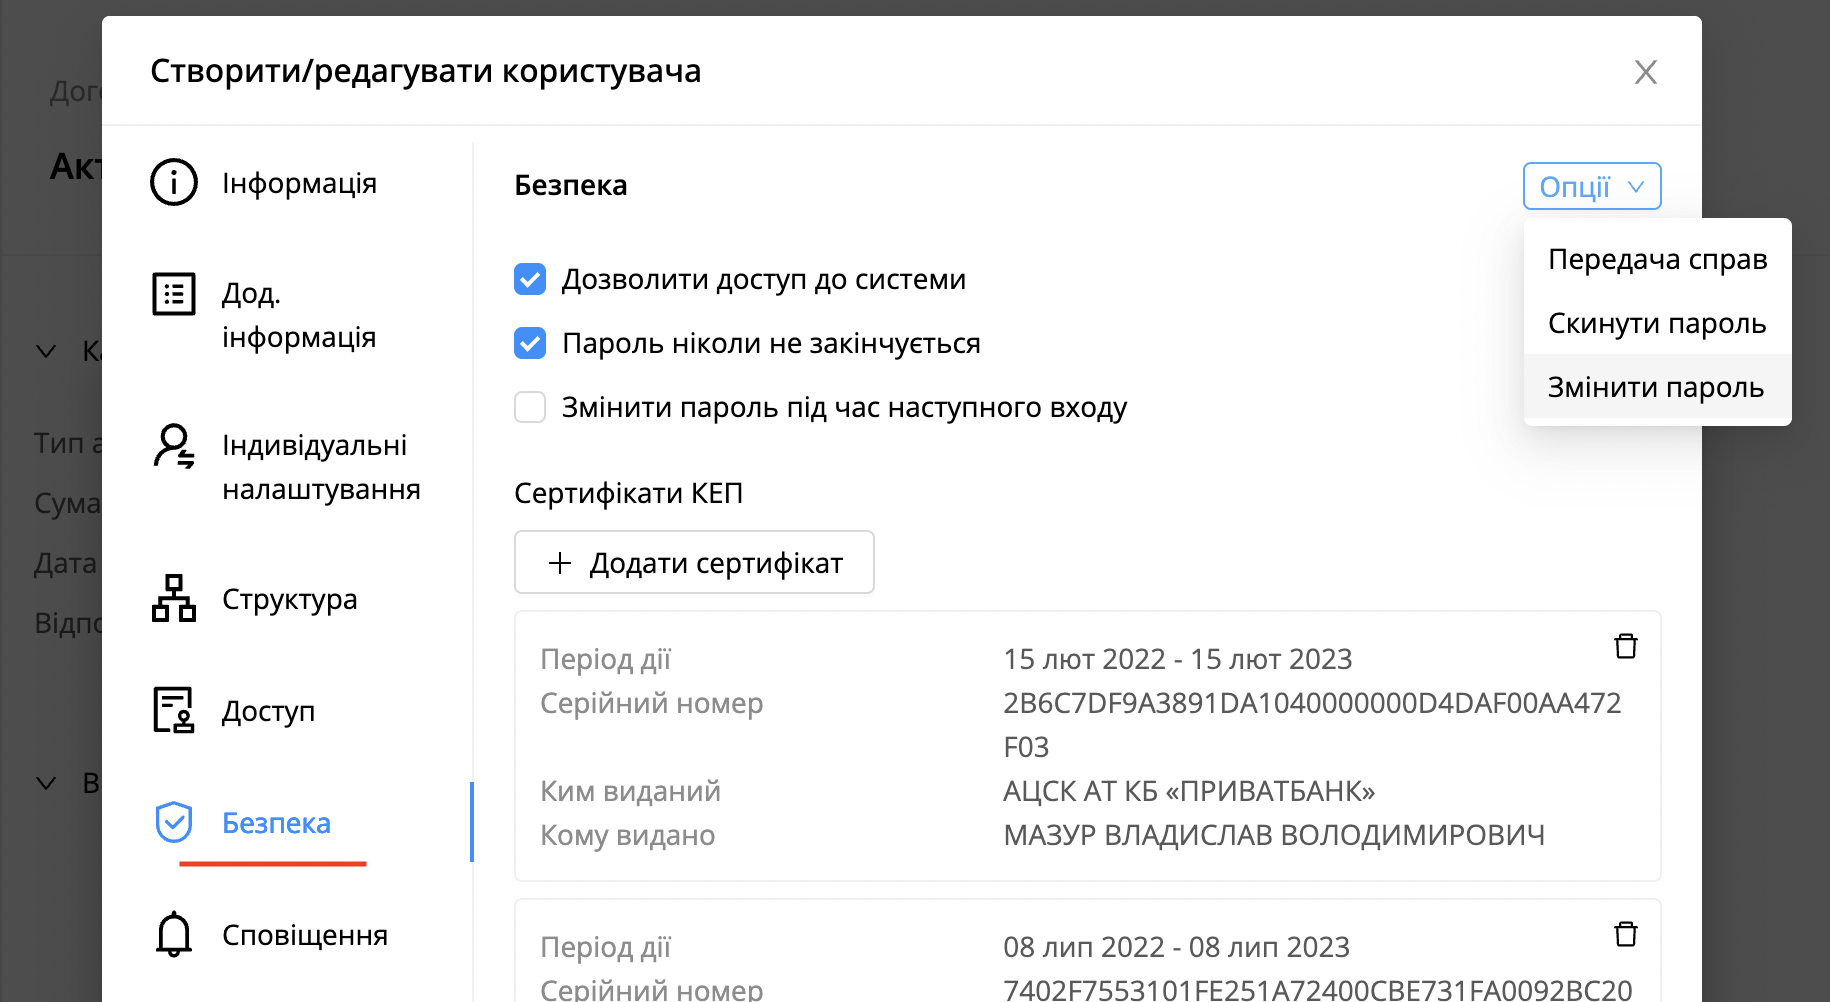
| Importantly! Everything described above is available with user access and only when opening your personal profile. If you have administrator rights, more information will be available for editing. More information. |
|---|
Admin page
[Admin page] - [Users] - [Users]
This section in the platform serves to work with system users.
In this section, the following functionality is available:
Create a user.
Editing a user.
Search for the required user in the section. More details in the section search.
User filtering.
Delegation. More details in the section delegation.
To create a user, you need:
Move the cursor on
Go to [Admin page] - [Users] - [Users].
In the upper right corner, click on
Fill in all necessary fields in all sections with information.
Click on the [Save] button.
Importantly! Fill in all required fields*. In the “structure” section, select the main account. In the “access” section, give the necessary roles to the user. |
|---|
To edit a user, you need:
Move the cursor on
Go to [Admin page] - [Users] - [Users].
Select a user you want to edit from the list of users.
To search for a user, you need:
Move the cursor on
Go to [Admin page] - [Users] - [Users].
In the search field

enter full name about a needed user.
Press [Enter] key or on button
More details in the search section.
User filtering
In the [Admin page] - [Users] section, filtering is available according to the following parameters:
By accounts.
By types of users.
Technical
Imported
Deleted
Deleted users can be restored if the role is available
ADMIN_USER_RESTORE
To restore the user, you need:
Go to section [Administration] [Users][Users]
Click on

Leave a comment
Click on the button
Delegation
The functionality of this section is intended for the process of delegation of powers.
Thanks to flexible settings and ease of use, it is possible to transfer user rights by the system administrator.
User profile settings
The user profile configuration settings available in this section are:
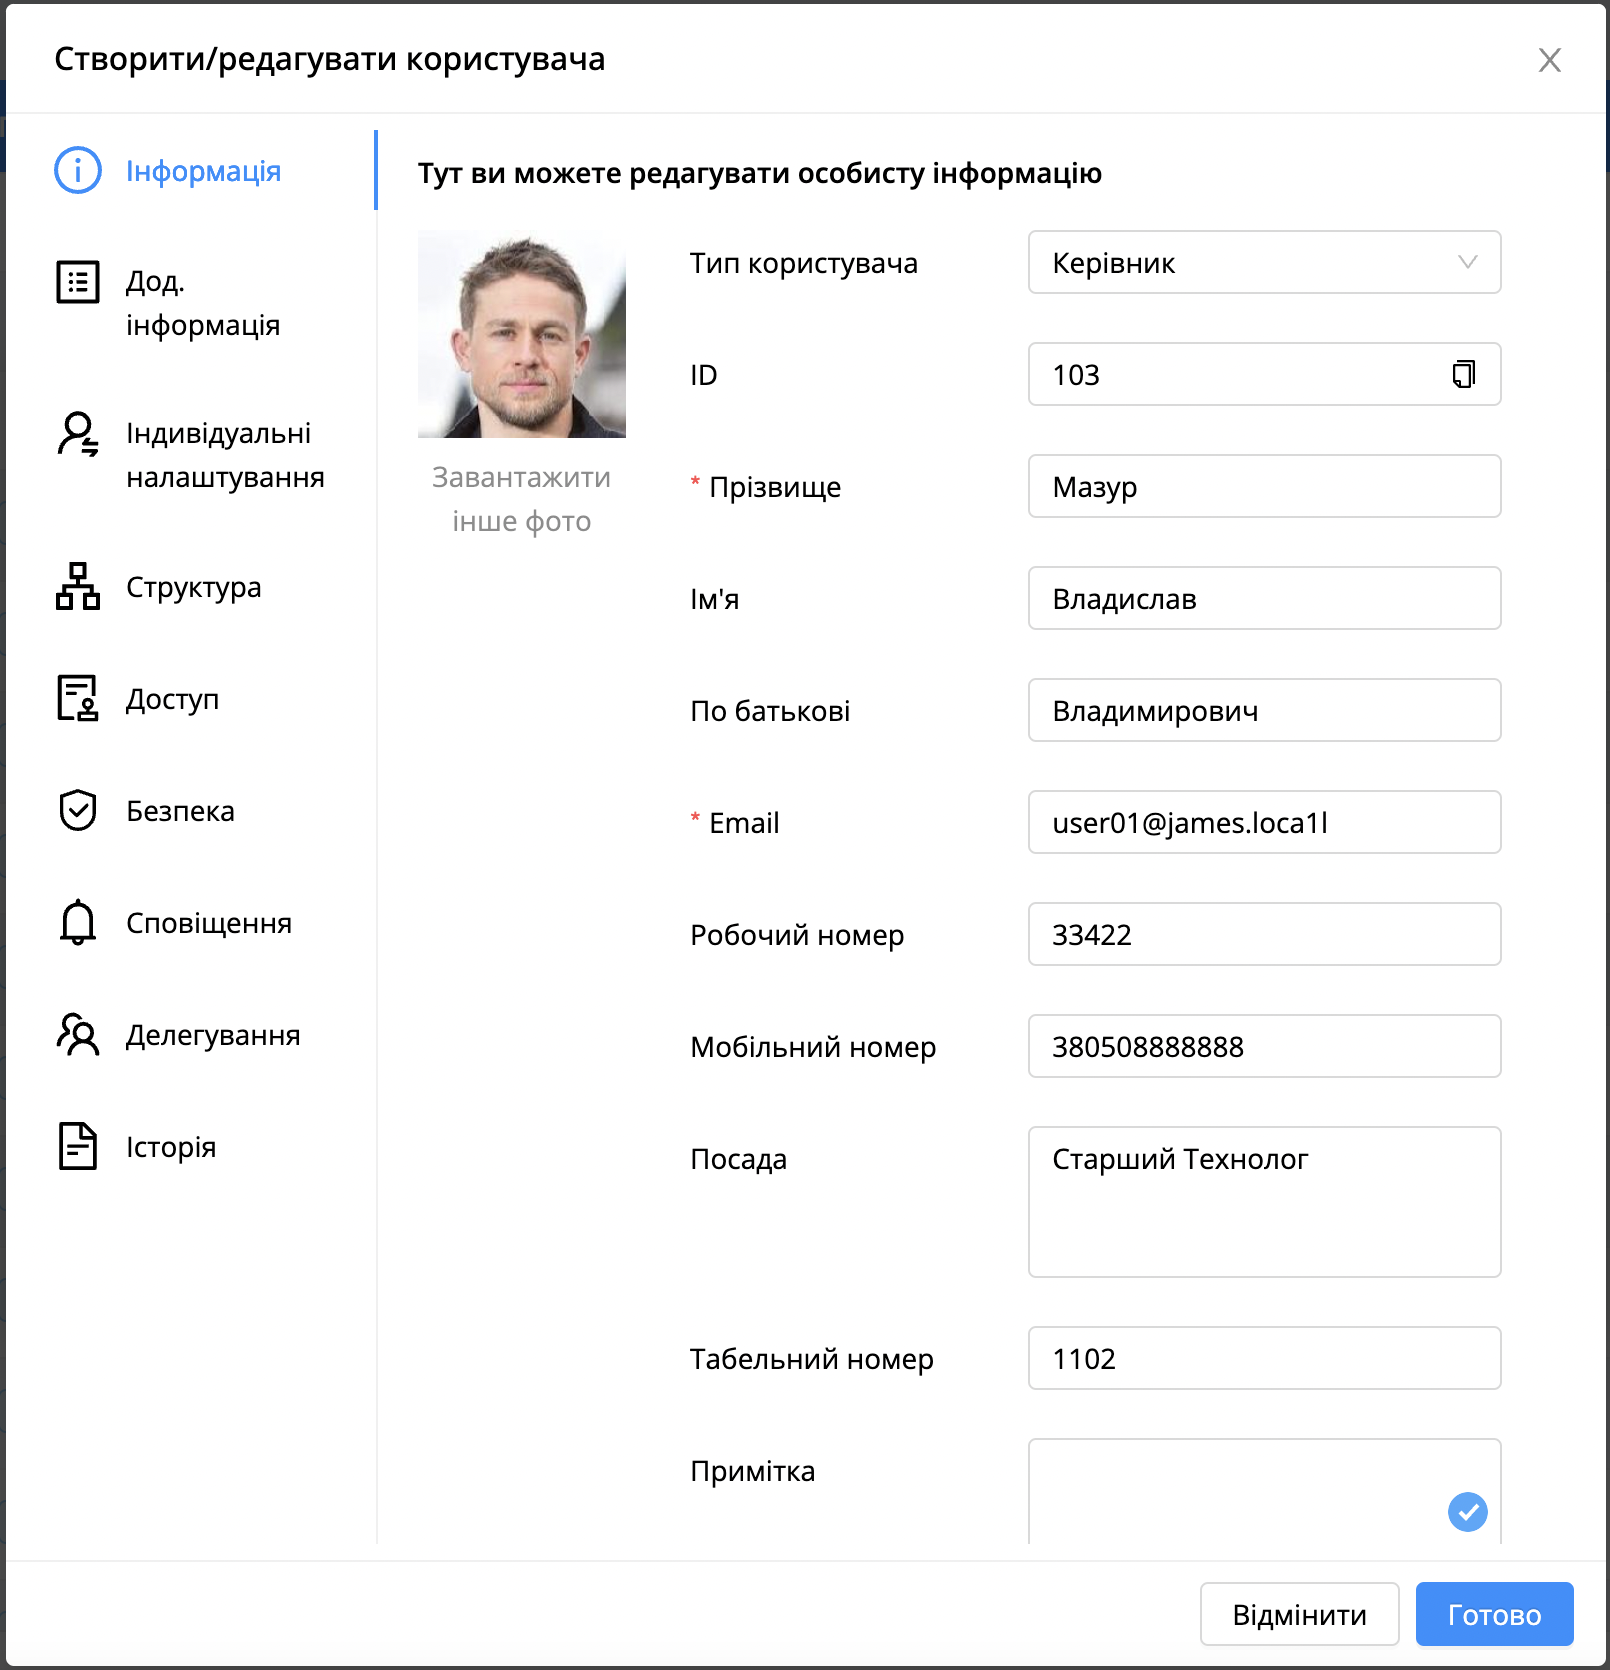
Information. A user can edit personal information (set the type to the user — chief, deputy, employee, technical. Used to search for a chief).
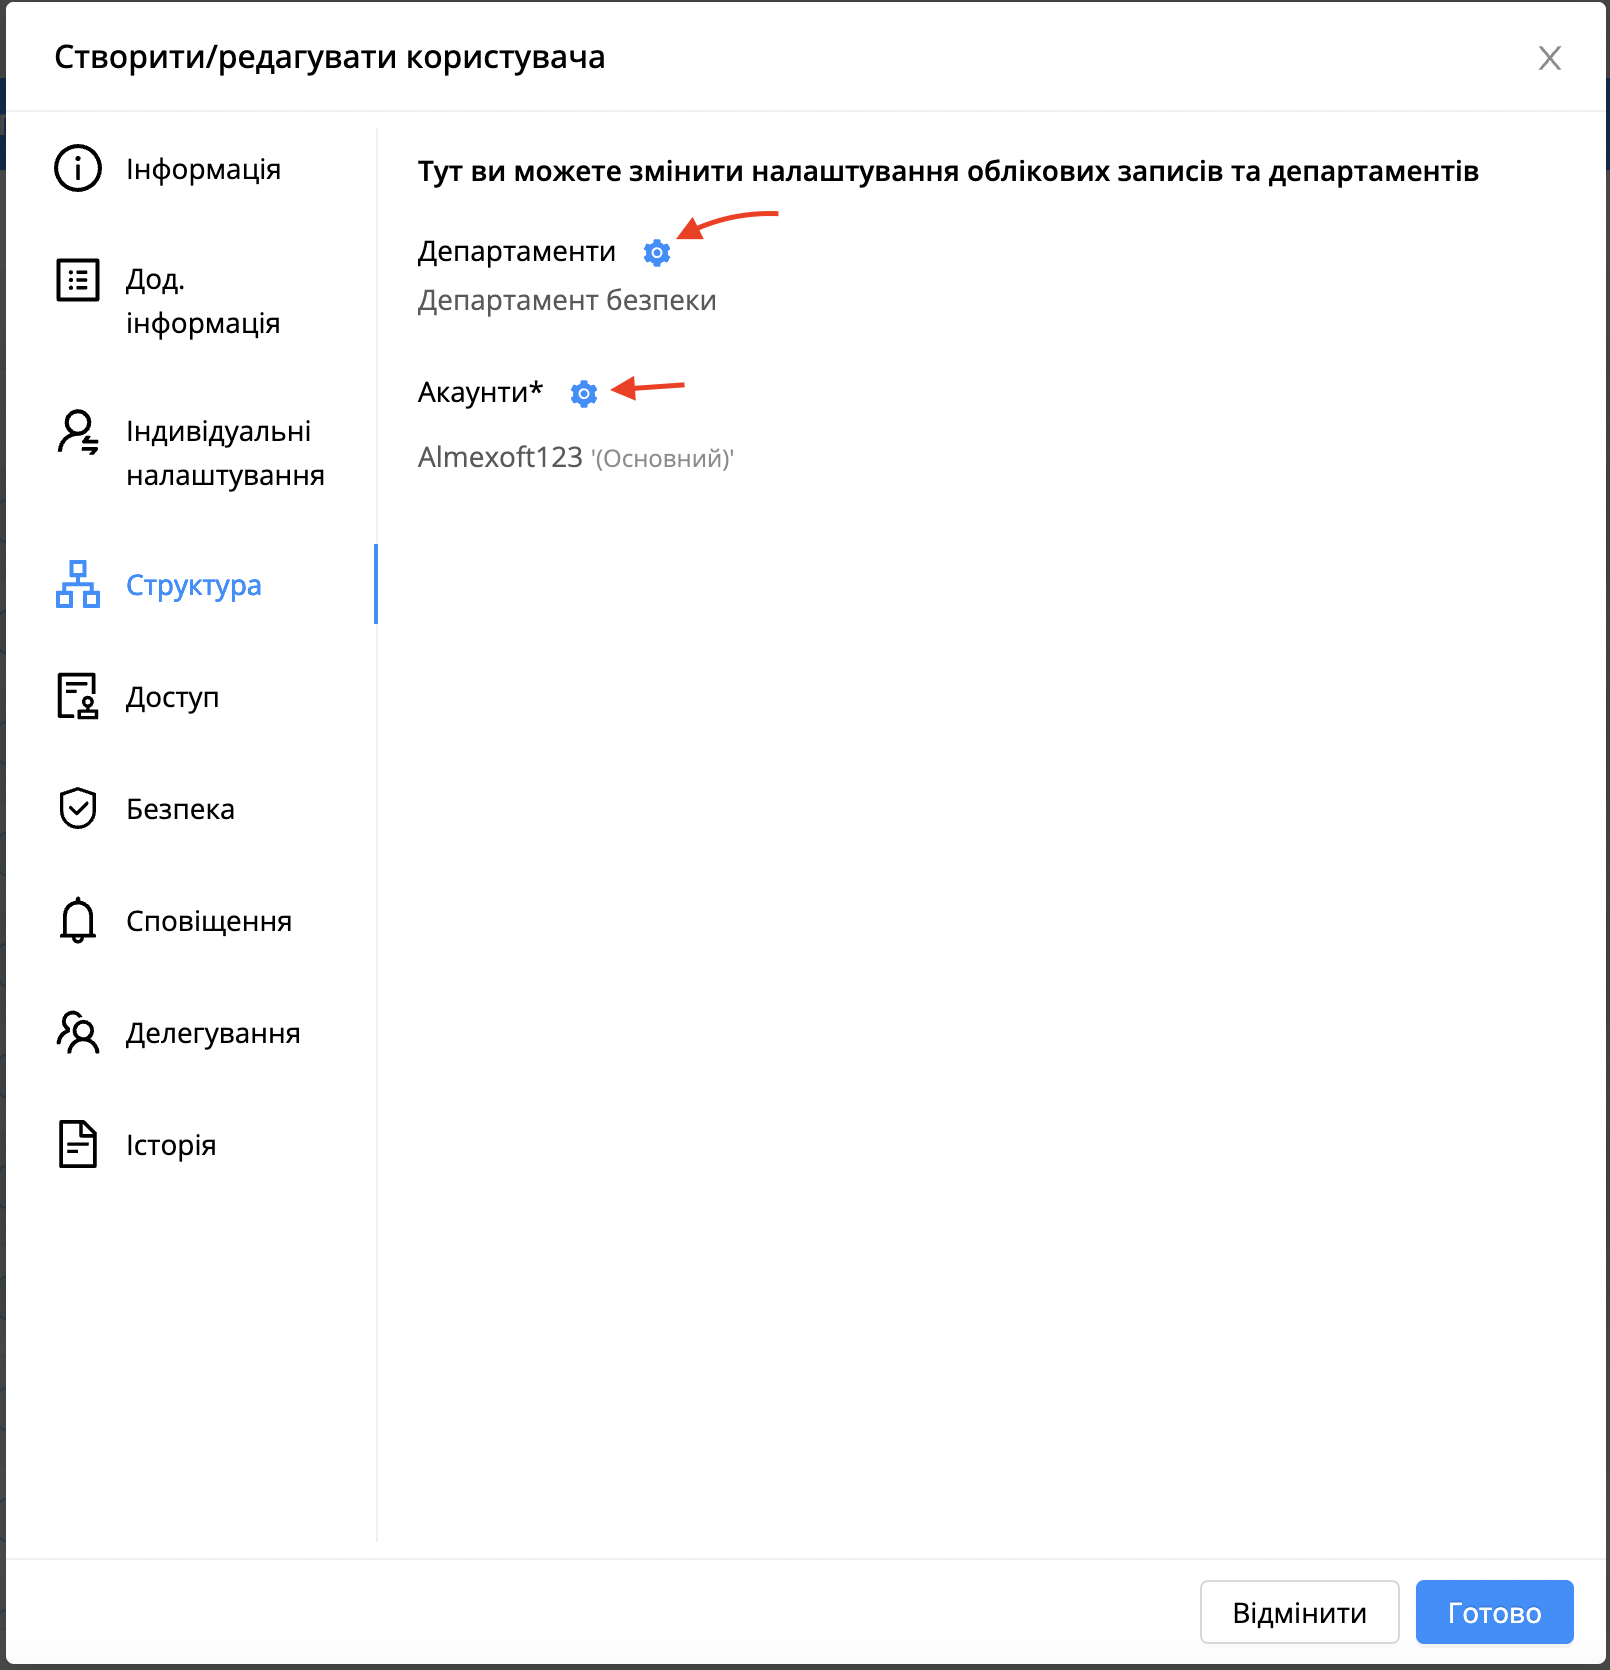
Structure. You can change the settings of accounts and departments.
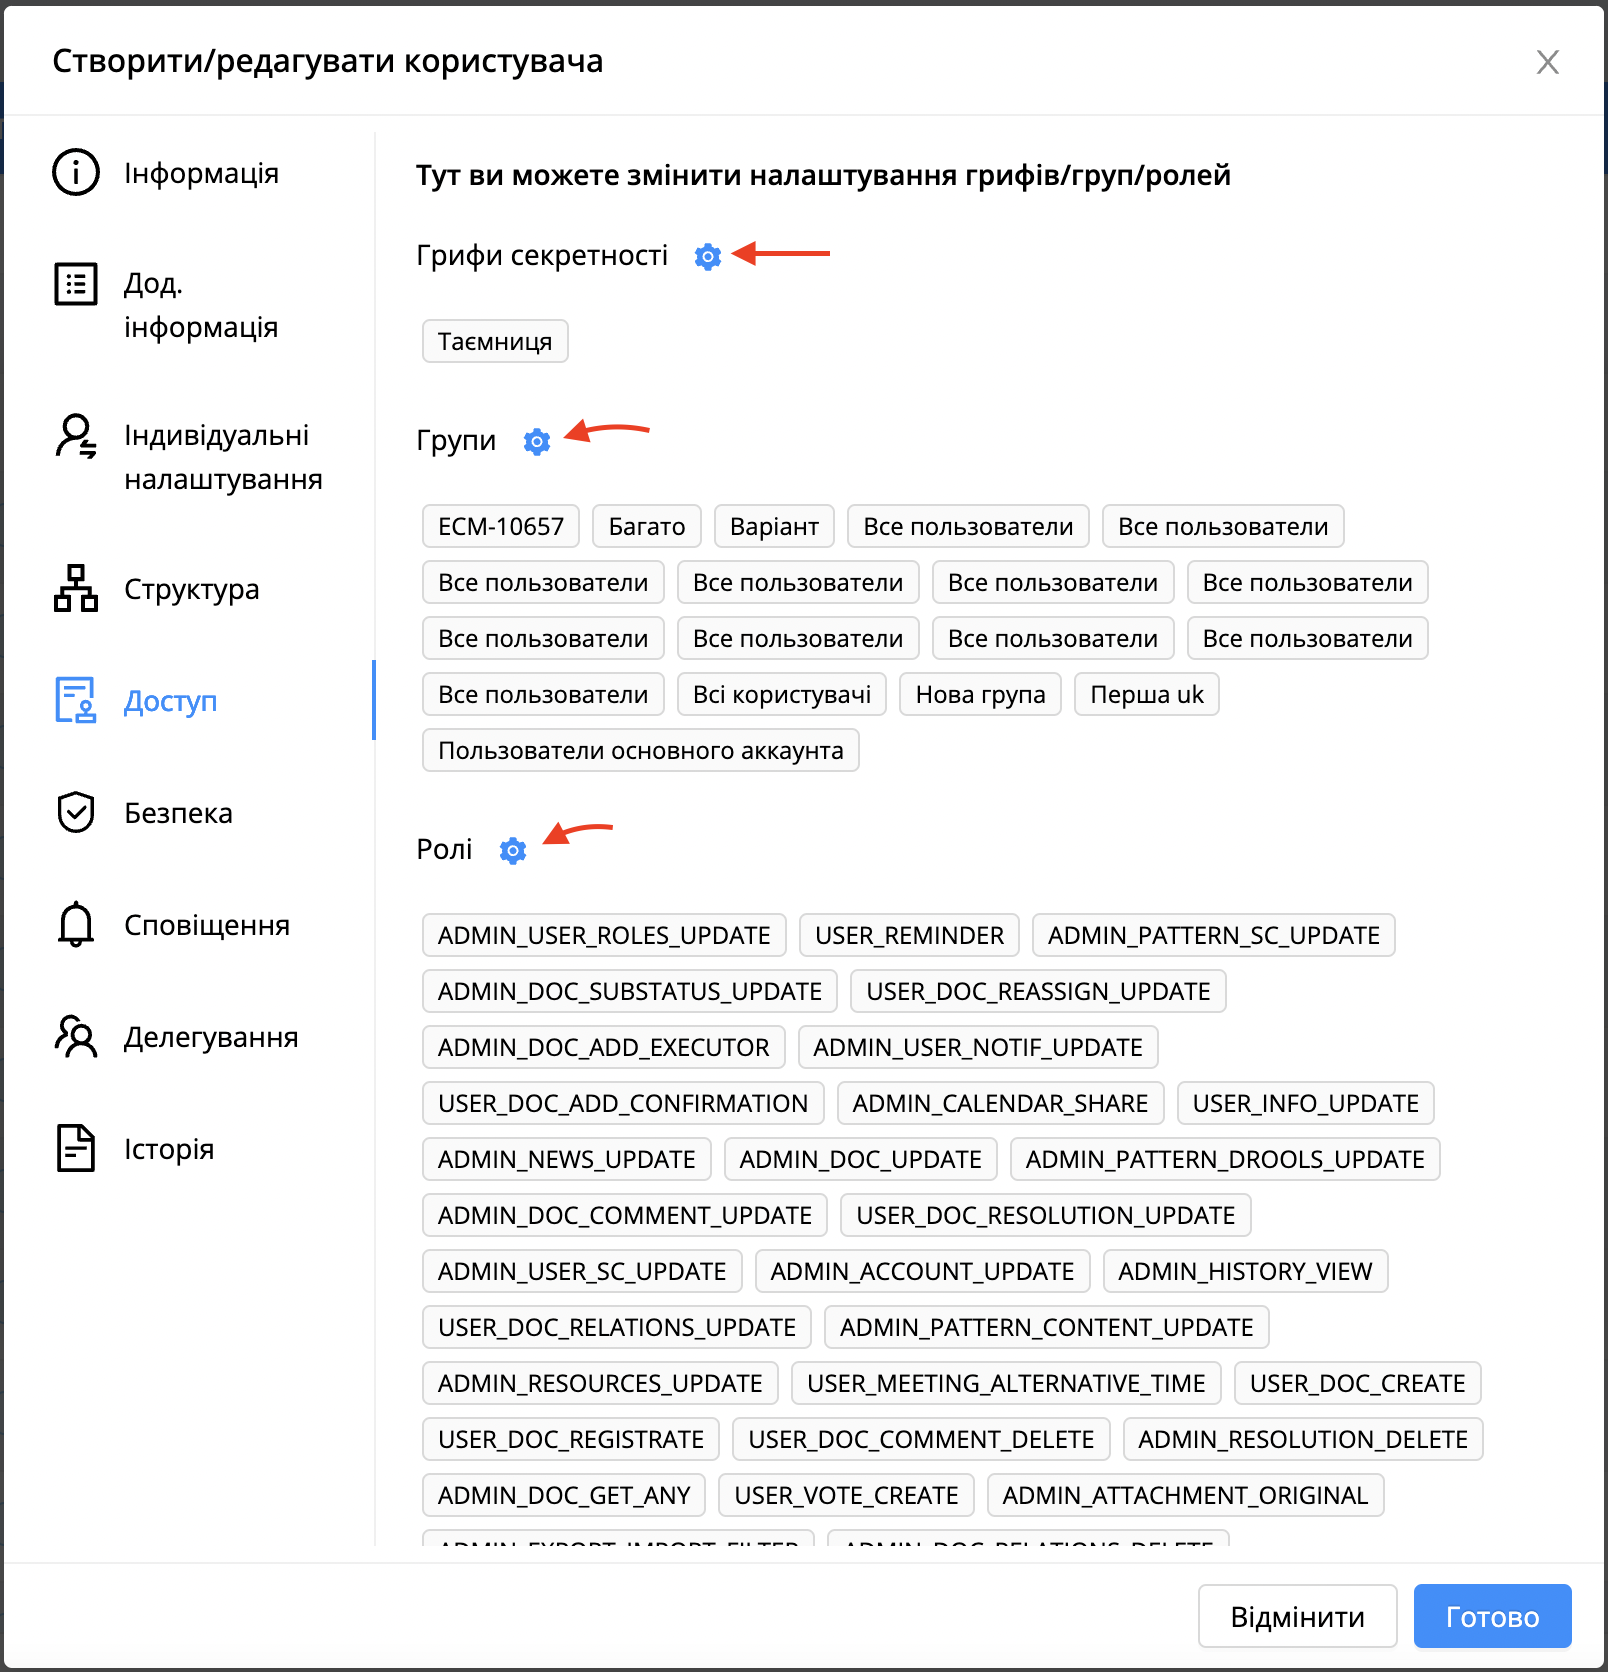
Access. You can change the settings of security stamps/groups/roles.
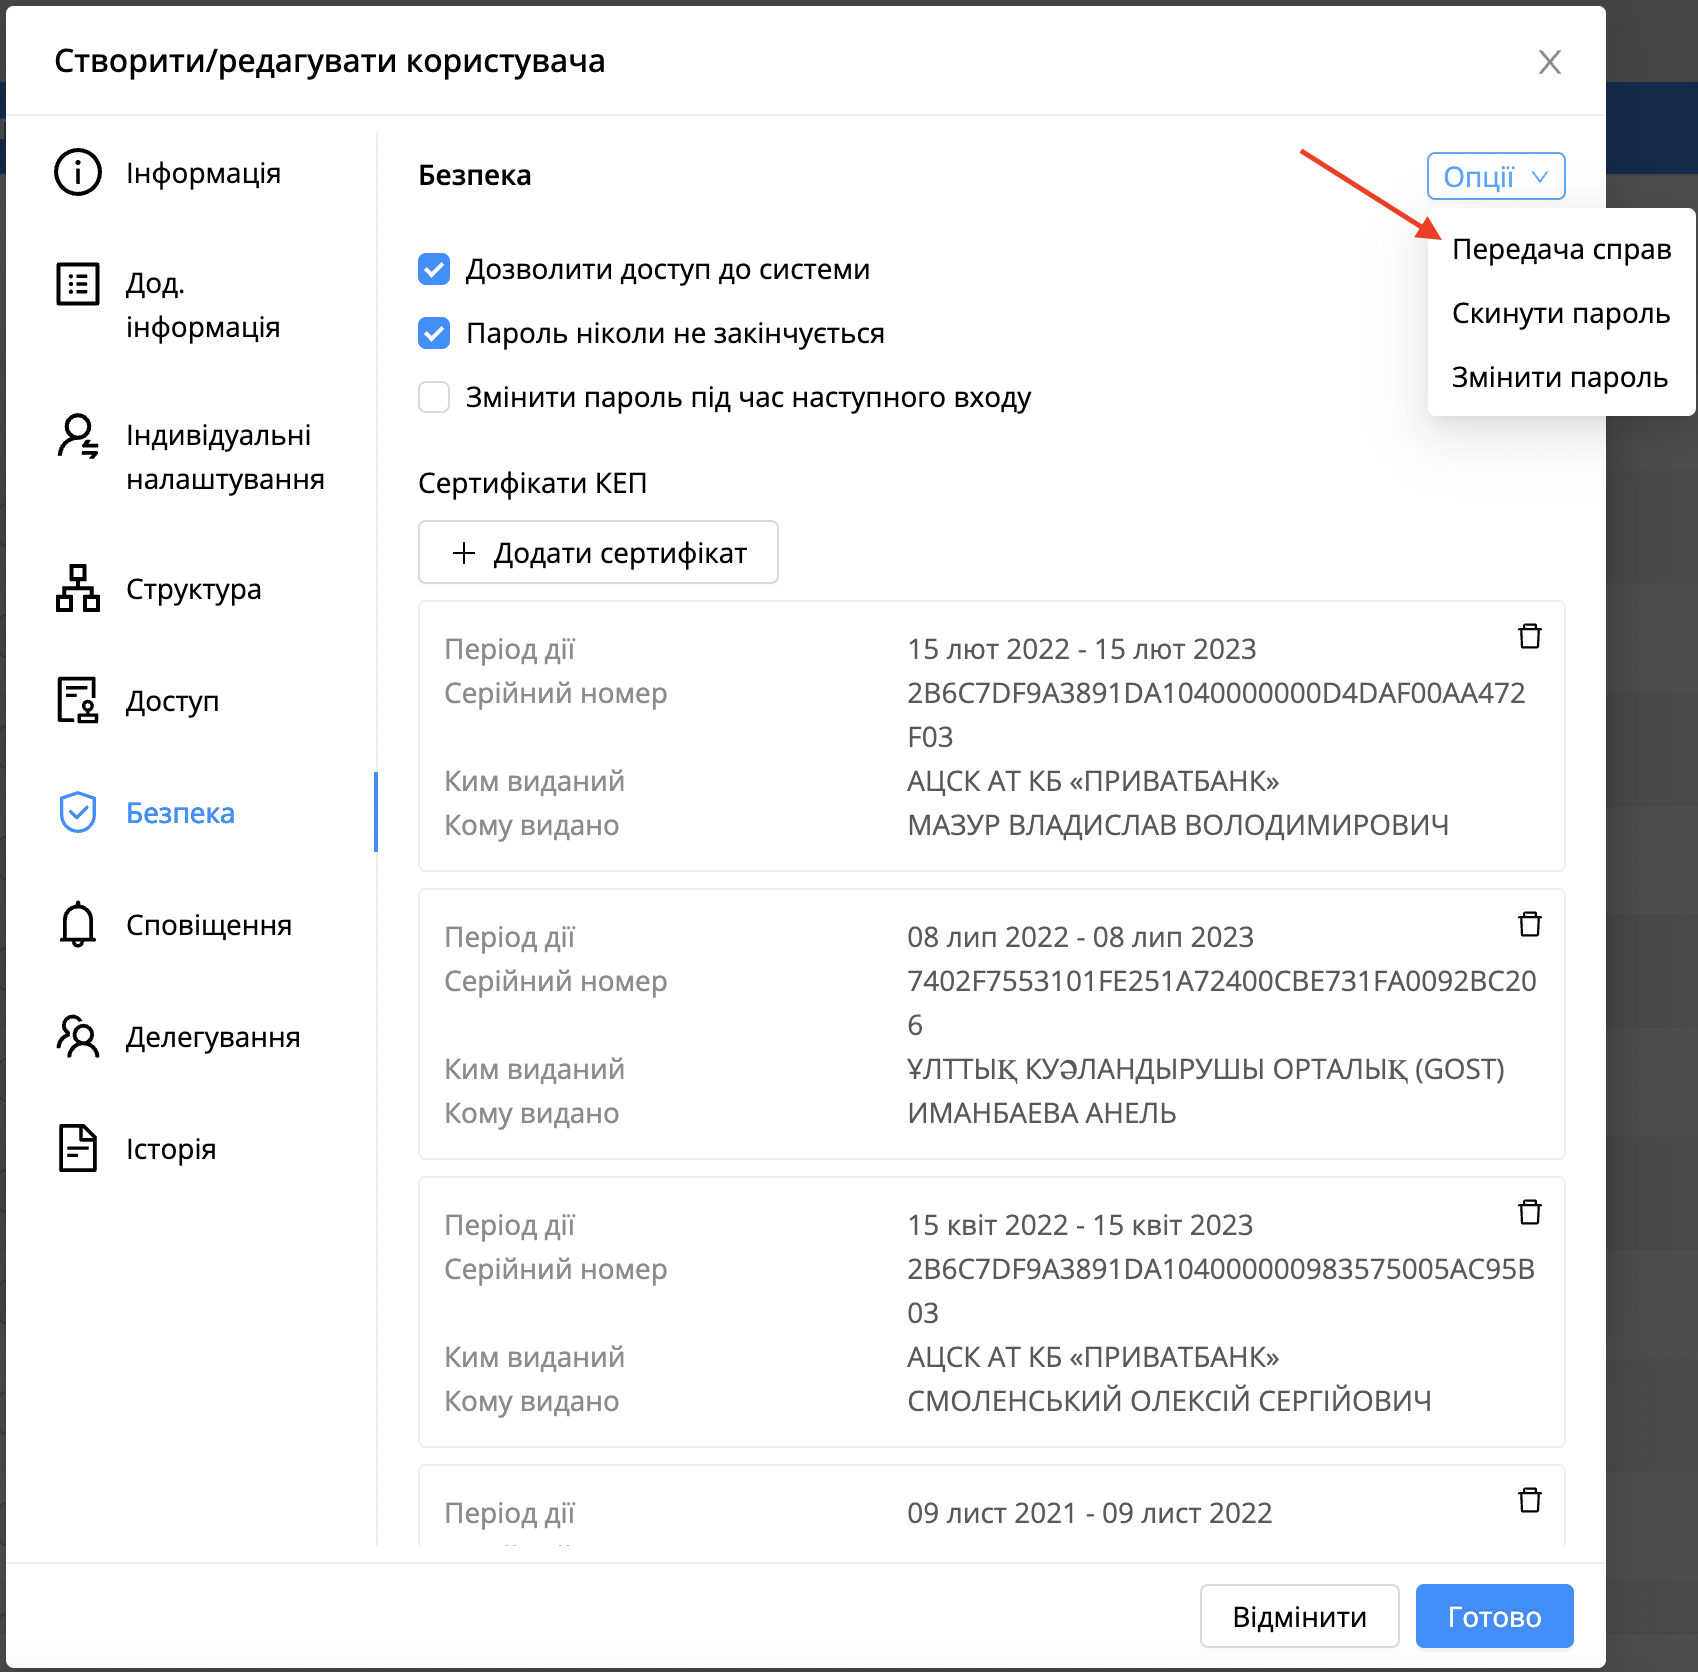
Security. A user can allow or deny access to the system, reset your password, and transfer cases. More details about the transfer of cases in the section Transfer cases.
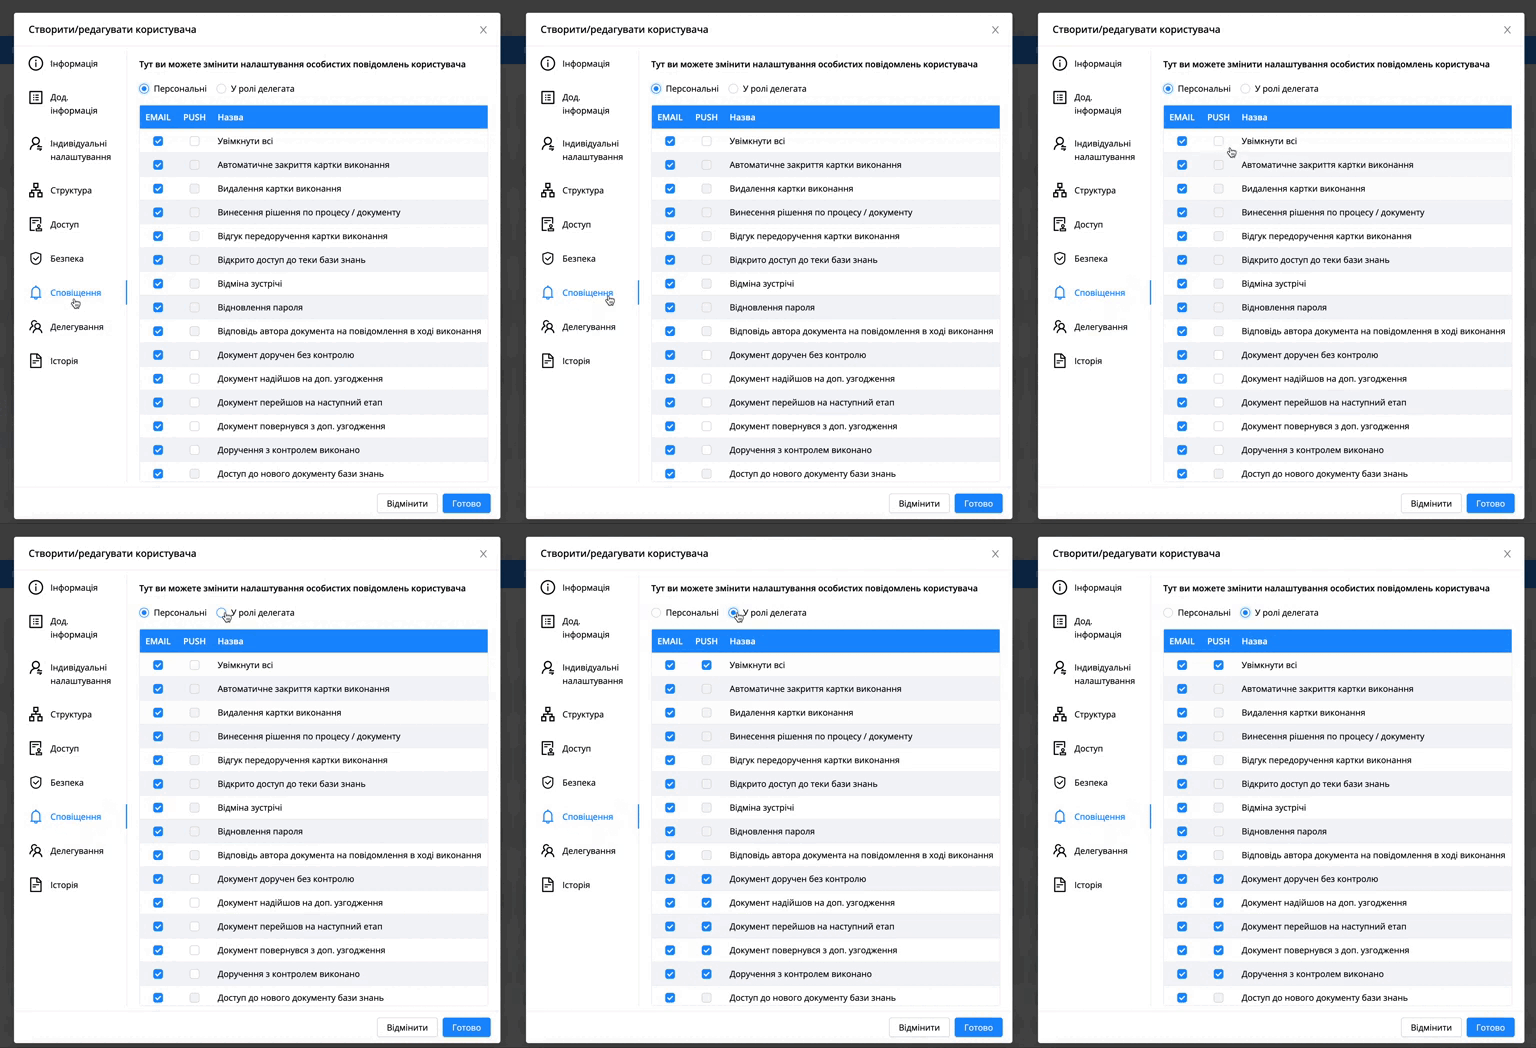
Notification. A user can change the user's personal message settings.
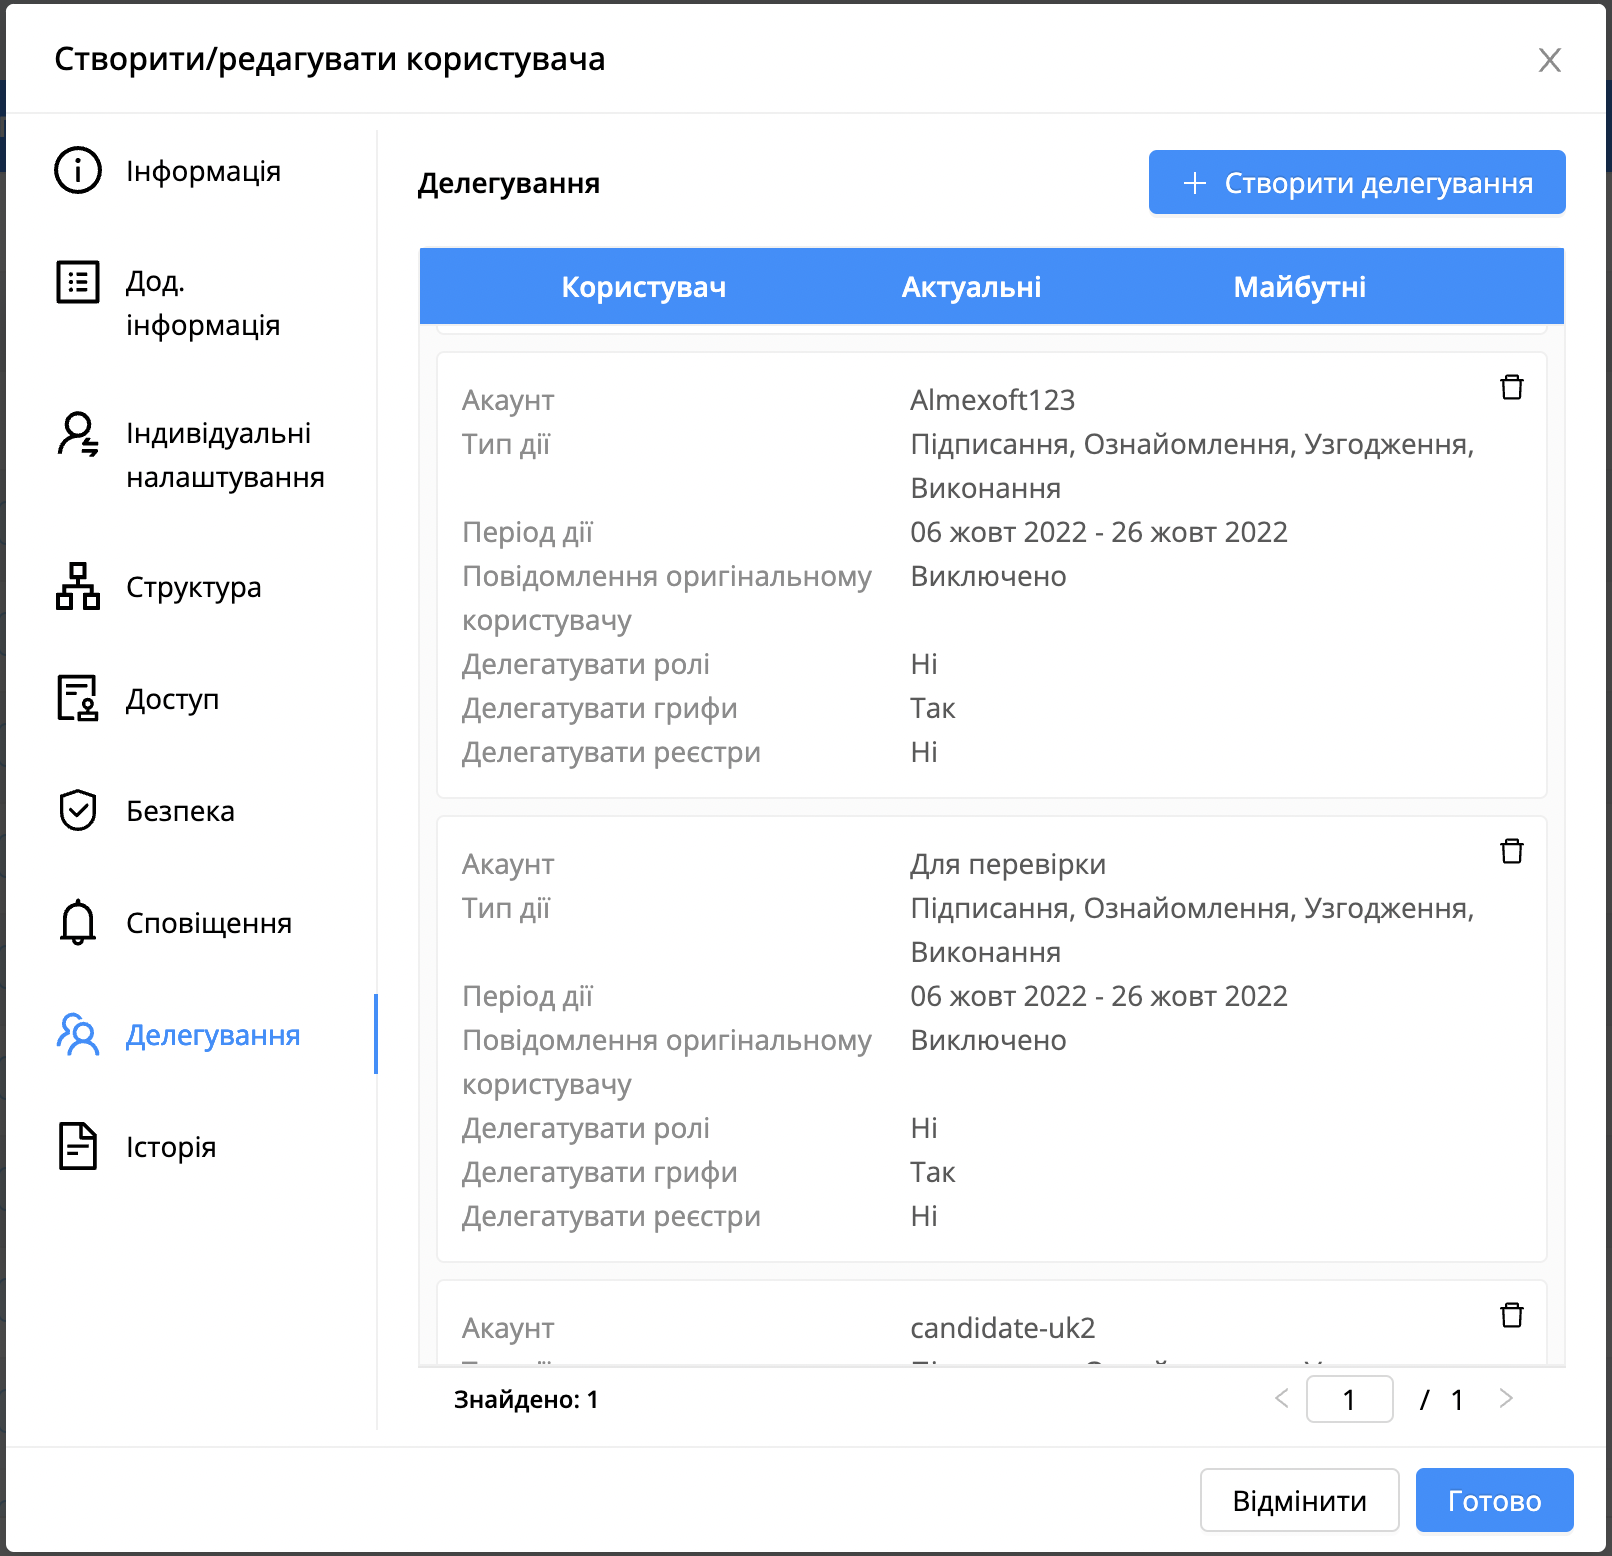
Delegation. A user can create a delegation to other user. More information.
History. A user can view the history of actions.
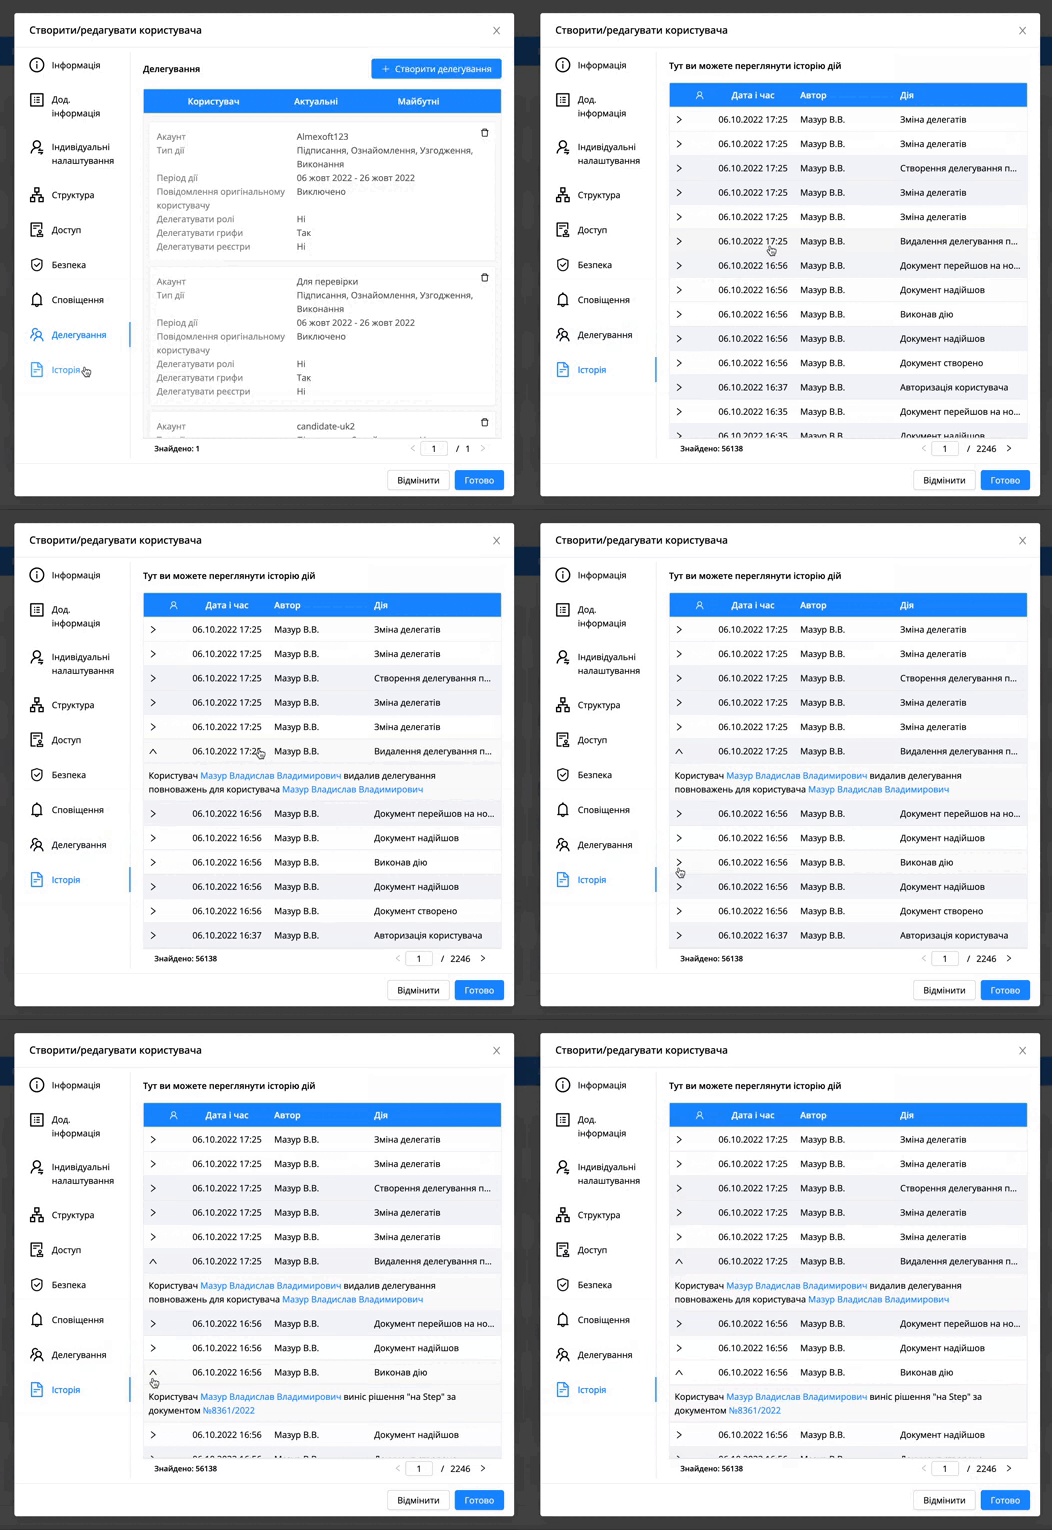
Importantly! If a user does not have the role [ADMIN_USER_UPDATE], then it will not be possible to edit something in the profile. This is a combination of roles. |
|---|
[Admin page] - [Users] - [Groups]
This section in the platform serves to work with user groups. Two user groups are created for each account automatically:
All users.
All users of the main account.
The “All users” group includes all users whose account is listed as “Available” in the user profile in the “Structure” tab (creating a user is described in the previous section).
The following settings are available for the group:
Information tab.
In this tab, the name of the group, description of the group, LDAP ID (you can write the id of the group that is configured in the active directory and thanks to this, after importing from AD, the corresponding user groups will be added to the user profile), the id of the group itself in the system.Access tab.
In this tab you can add: Security stamps, Roles. It is better to issue user roles via a group of users, it takes less time and is available to all users at once.Users tab.
It is in this tab that you can add and remove users.
A user with the ADMIN_USER_GROUPS_UPDATE role can add the required user in the business process template or in the document by double-clicking on the group.
| Importantly! It is forbidden to edit the list of users in system groups. |
|---|
To create a group, you need:
Move the cursor on
Go to [Admin page] - [Users] - [Groups].
Click on
Fill in all required fields.
Click on
In the section, a search by group name is available in the upper right corner.
You need to search:
Move the cursor on
Go to [Admin page] - [Users] - [Groups].
Click on

Enter the name of the group.
Click on

Filtering of groups by accounts is also available in the upper left corner of the section.
| Importantly! In order for the administrator to display the section [Admin page] - [Users] - [Groups], the administrator must have the role “ADMIN_USER_UPDATE” |
|---|
Add users:
Move the cursor on
Go to [Admin page] - [Users] - [Groups].
Open group
Click on

Select user
Select option
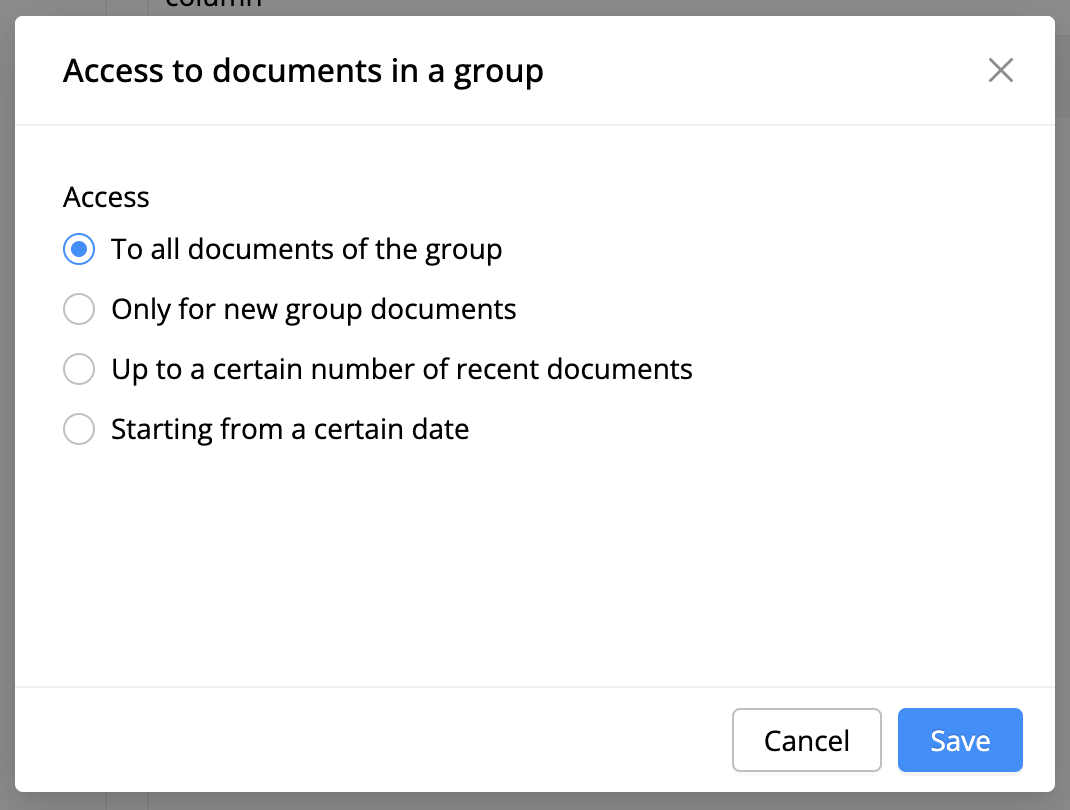
Click on save button
Description of settings:
To all documents in the group. Access will be granted to all documents in which the group was(active and closed documents).
Only for new documents in the group.
Up to a certain number of recent documents.
Starting from a certain date.
[Admin page] - [Users] - [Organizational structure]
In this section, the user can create and edit organizational structures. The user can create main and subsidiary departments. Set the organizational code for the department, which can then be used into the registration number by the corresponding key of the nomenclature number. More details in the corresponding section.
The organizational structure has a tree-like appearance.
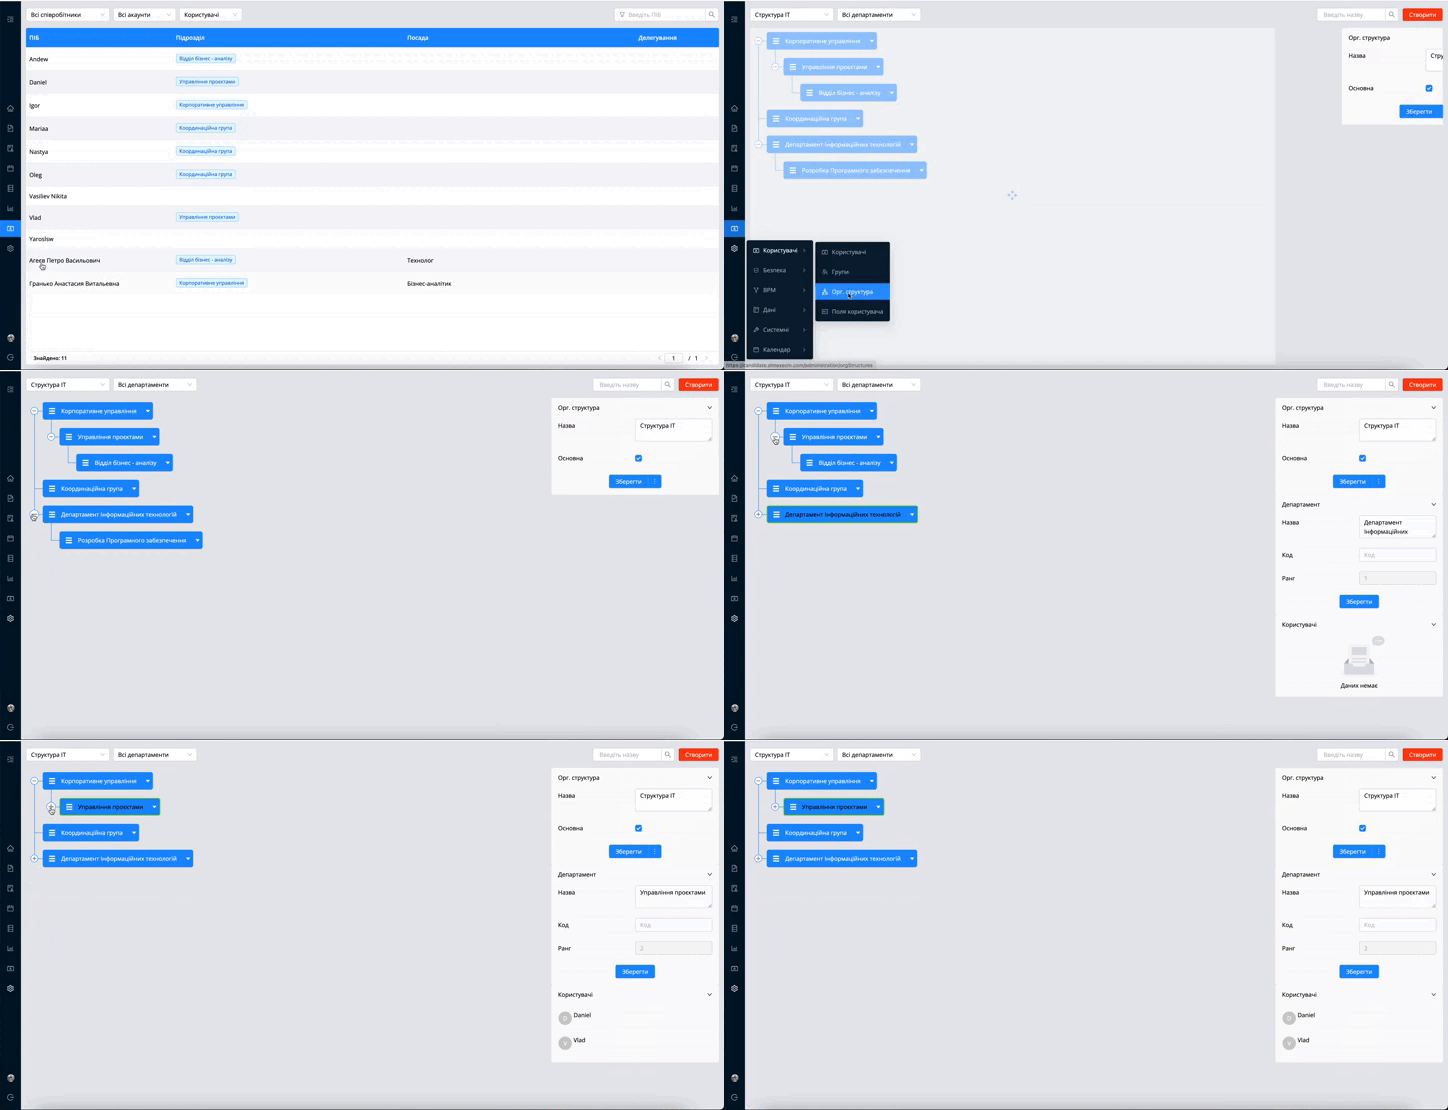
In this section, there is a filter by filled departments.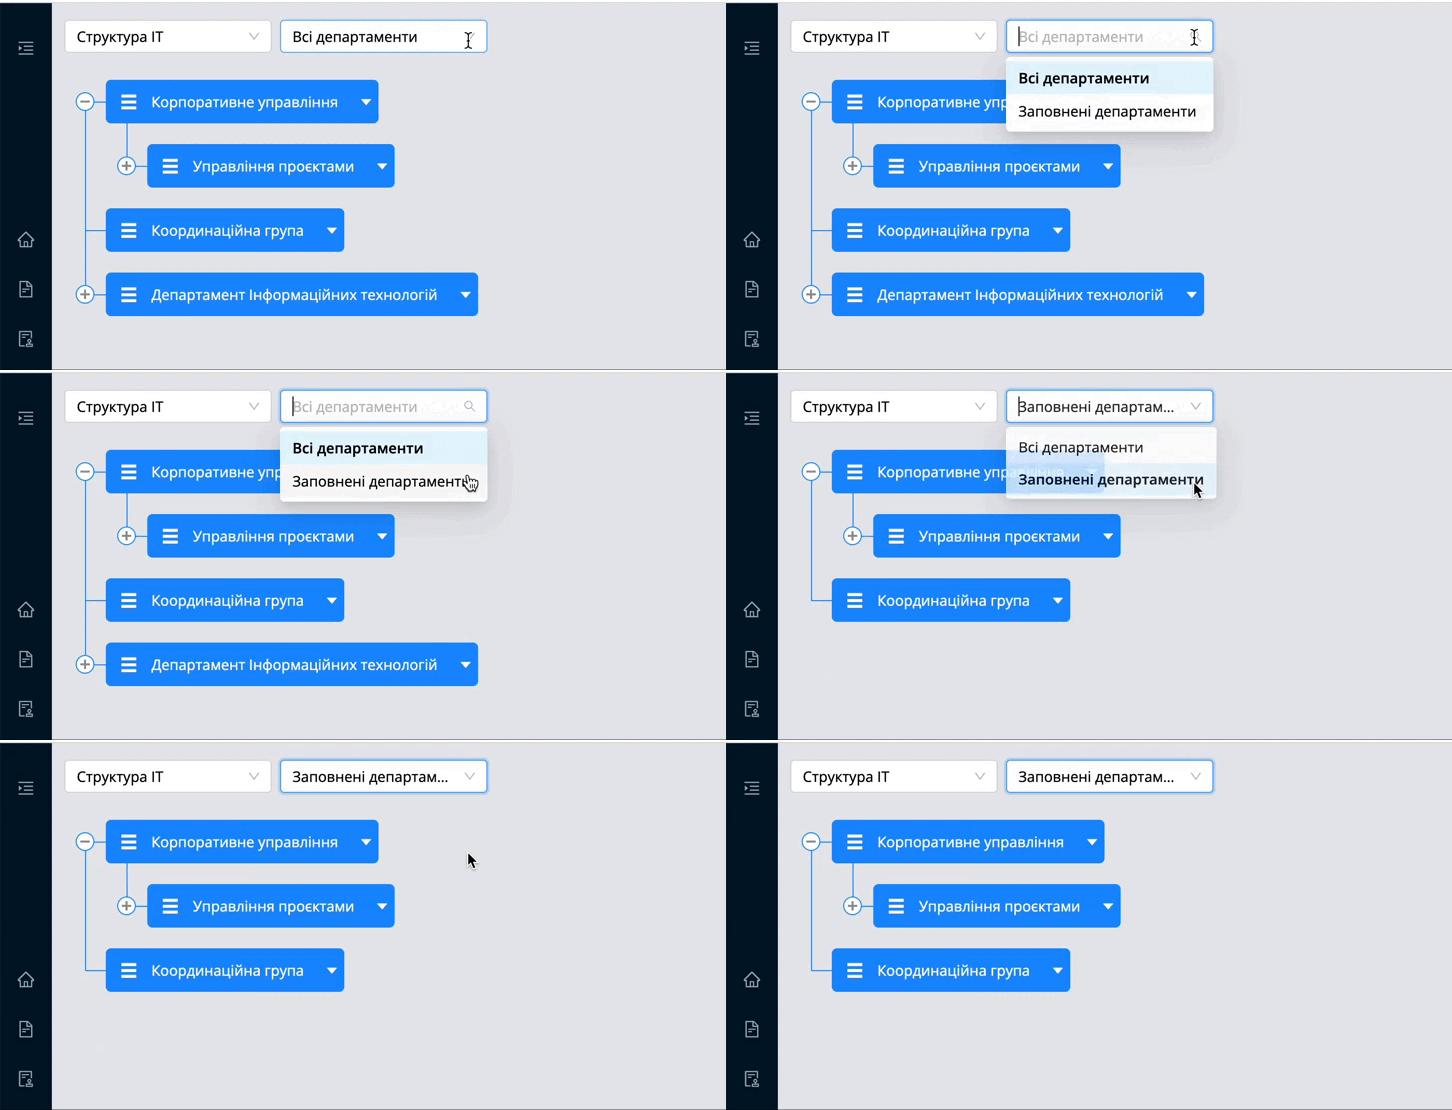
A search by department name is also available in the section. After the search, all closed branches of the departments will be opene.
To create an organizational structure, you need:
Move the cursor on
Go to the section [Admin page] - [Users] - [Organizational structure]
Click on
Fill in the name field
Click on the "Main" check box
Click on
Importantly! There can be only one basic organizational structure. If you create other organizational structure and enable the [Primary] setting, it will become the primary one, and this setting will be disabled for the previous one. |
|---|
To create a department, you need:
Move the cursor on
Go to the section [Admin page] - [Users] - [Organizational structure]
Click on the drop-down list with all organizational structures in the upper left corner.
Select the desired organizational structure (if it is one, it will be selected automatically after going to the section).

Click on in the upper right corner under the name organizational structures.
Click on the option [Add department].
Fill in the name of the department.
Fill in a short name
Click on the button
After saving, the department will appear in the left part of the display.
To create a subsidiary department, you need:
Move the cursor on
Go to the section [Admin page] - [users] - [Organizational structure]
Click on the drop-down list with all organizational structures in the upper left corner
Select the desired organizational structure (if it is one, it will be selected automatically after going to the section)

Click on near any department
Click on the option [Add department]
Fill in the name of the department on the right side of the screen
Click on
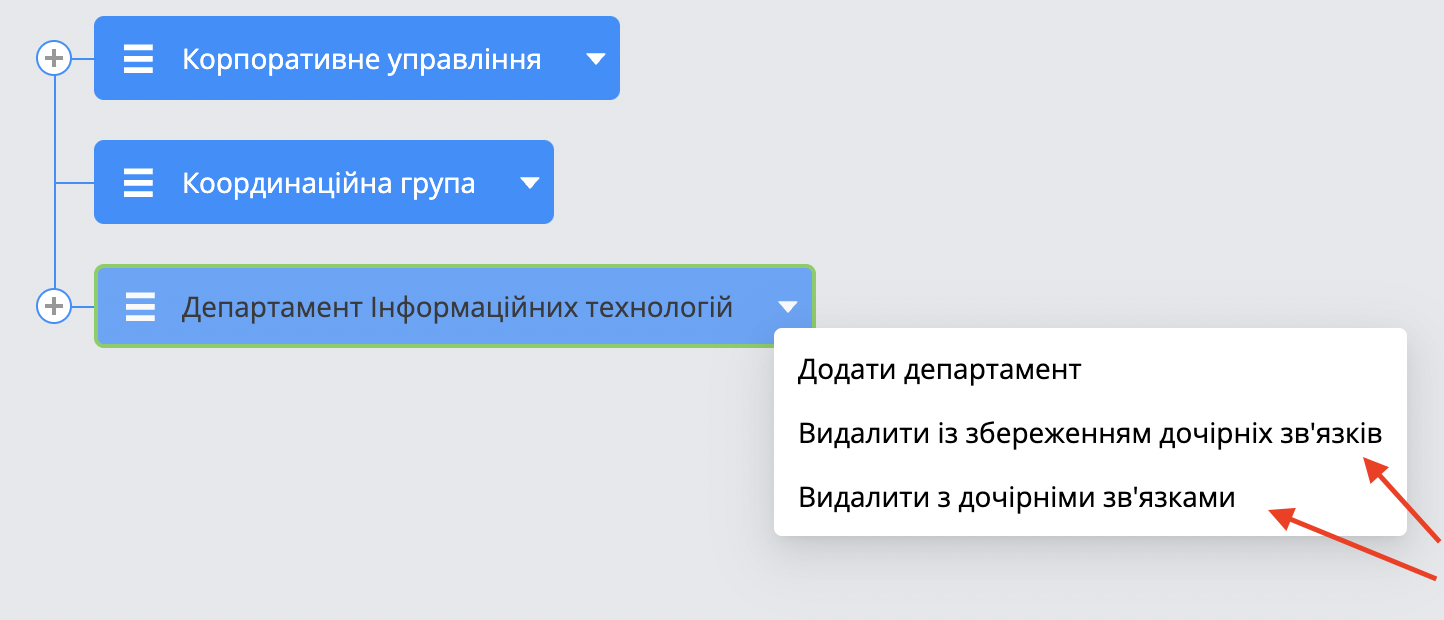
The following options are also available for the department:
Delete with preserving child links
Delete with child links
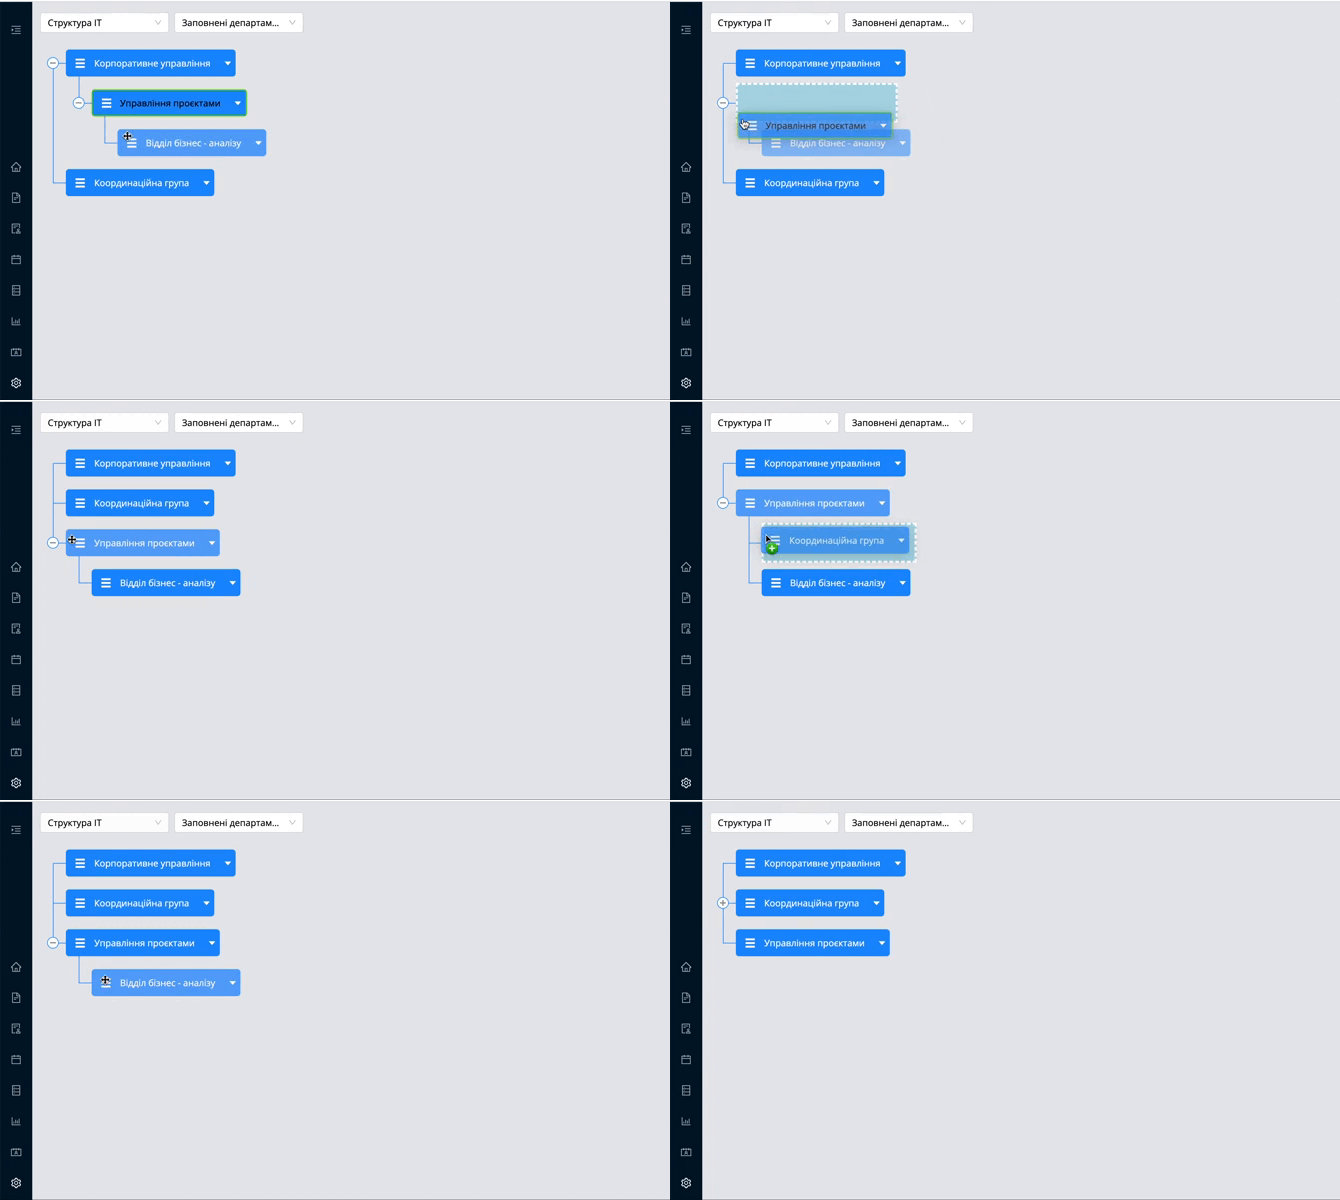
Links between departments can be changed by dragging them.
| Note! Thanks to the organizational structure, the search for the manager is carried out, which is located in the [Users] section. You must have a user with type [Chief] or [Deputy] in your department. |
|---|
Importantly! The manager search will only work if your organizational structure is [Main]. |
|---|
It is possible to edit the current number for the nomenclature number in user department. Nomenclature number pattern should have $num_ksp(author, receiver, sender).
The editing action is displayed in the department options:
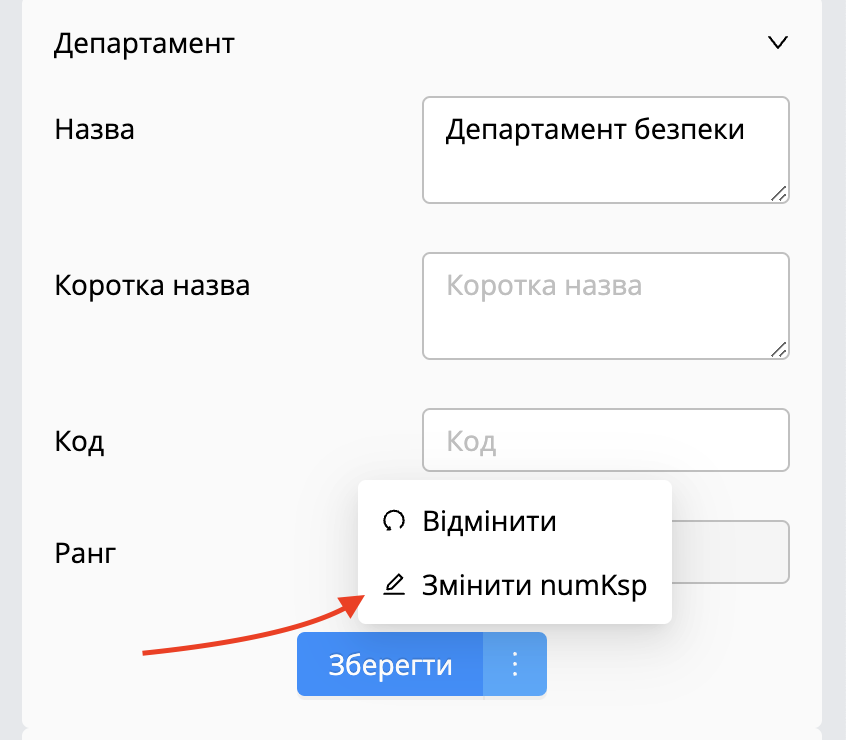
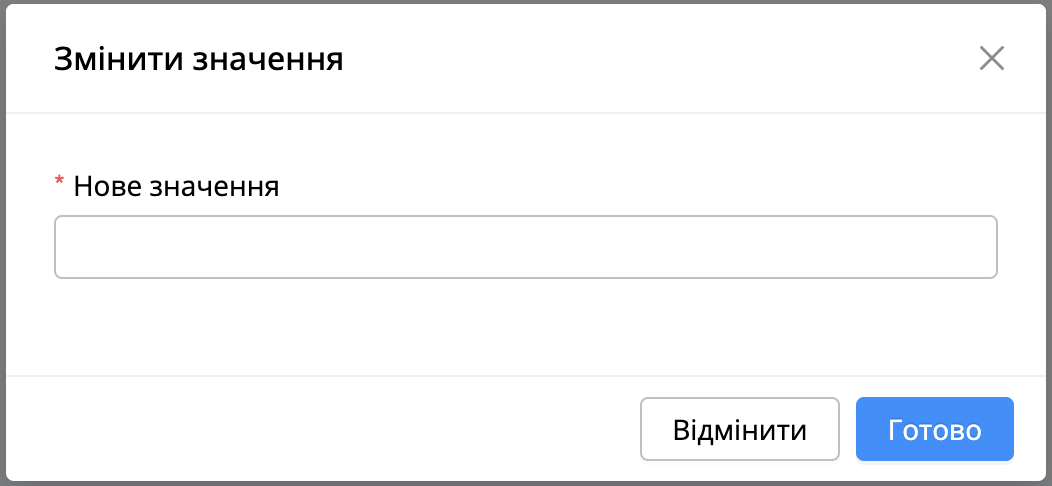
After clicking on the option, a standard template selection window is displayed. The user changes the numbering in the registration number for a specific pattern.
New number setting window:
[Admin page] - [Users] - [User Fields]
This section serves to create additional user fields that can be displayed in the profile if you need.
Common field types that can be used are:
Text field
Select list
Calendar
A detailed description of all types of fields in the corresponding section.
To create a field, you need:
Move the cursor on
Go to [Admin page] - [users] - [user fields]
Drag & drop the required fields to the field list
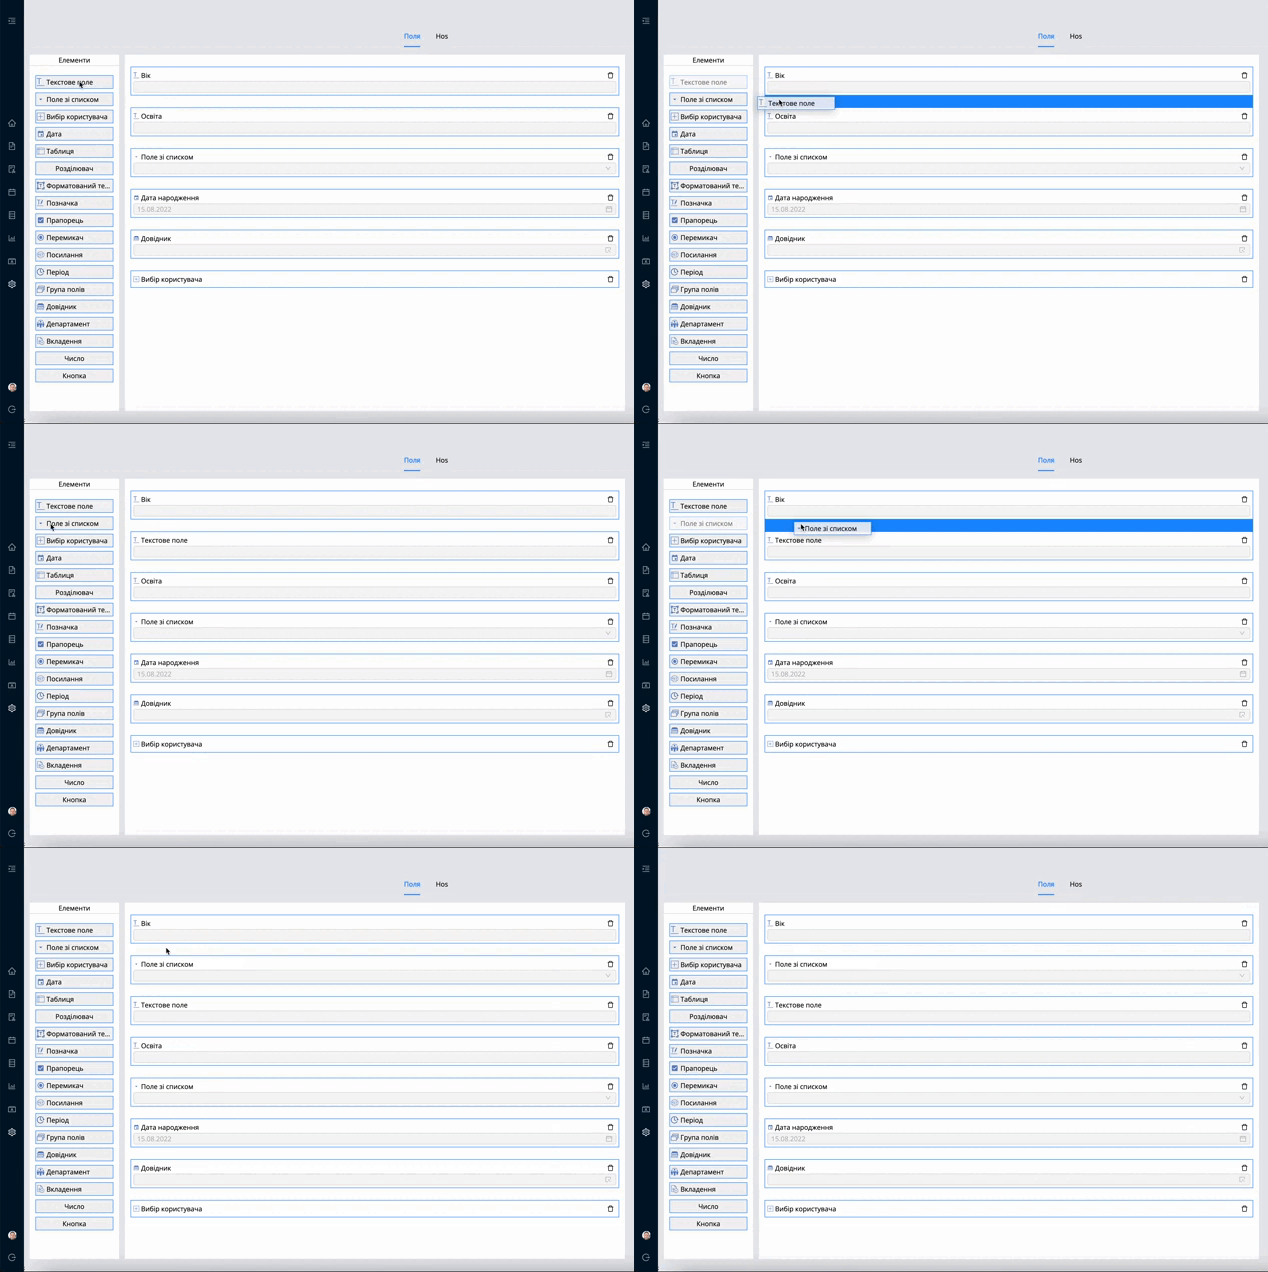
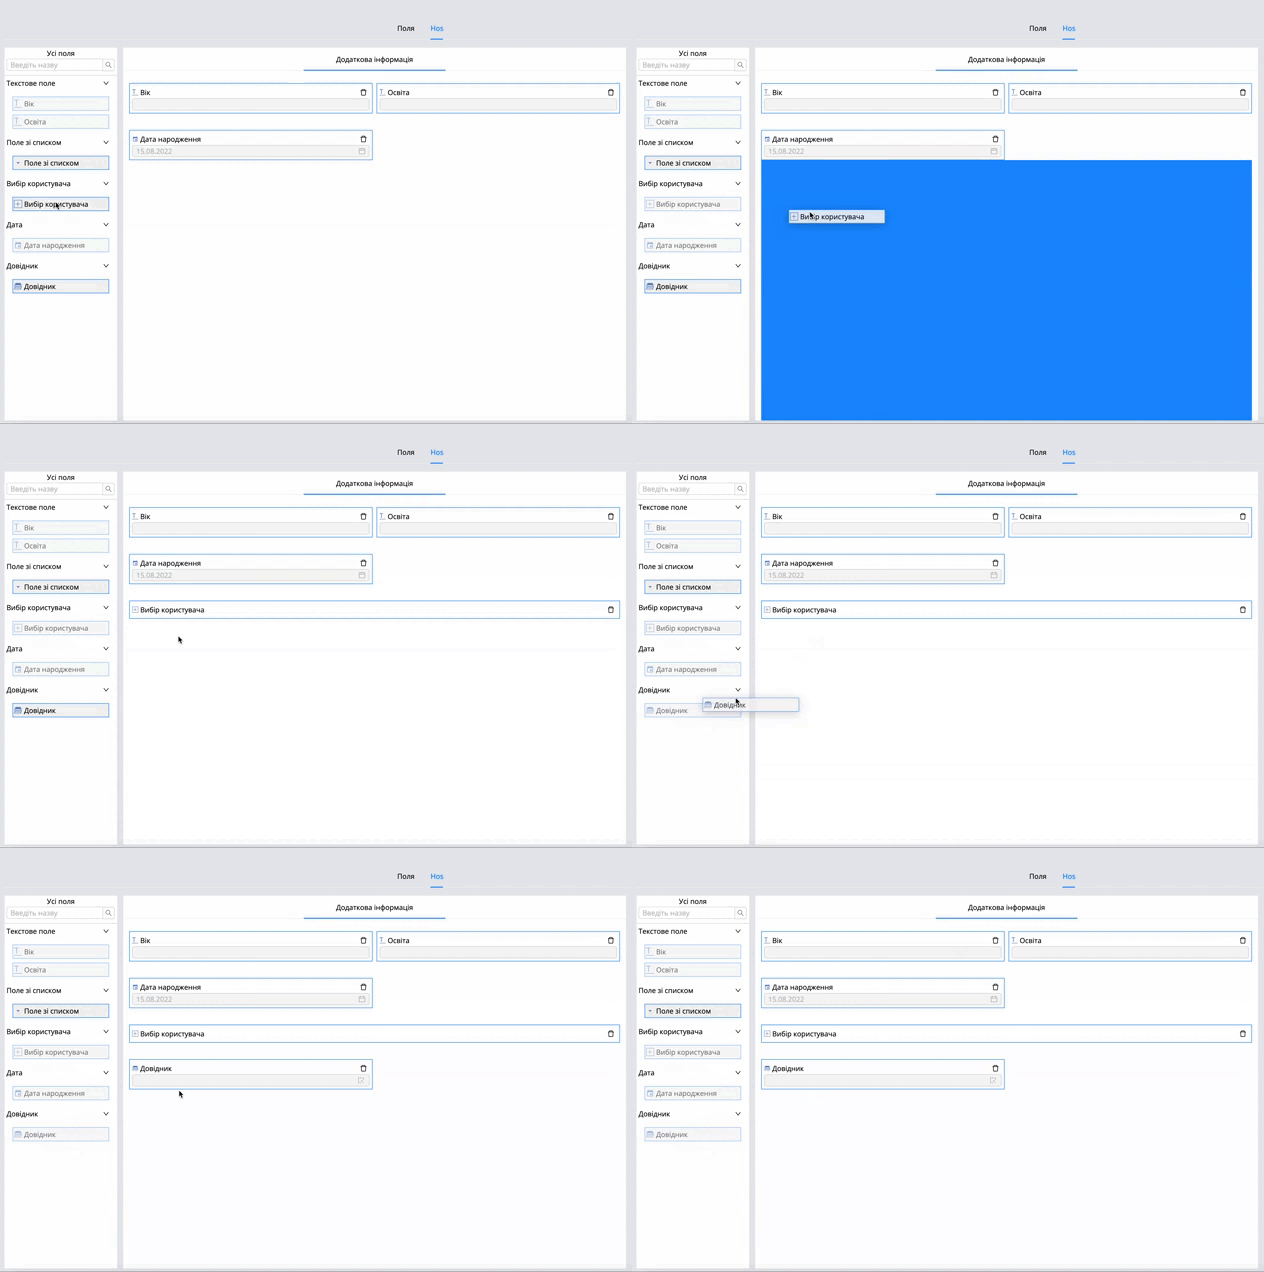
Go to the [Tabs] tab
Click on in the lower right corner
Click on the option [Create tab]
Fill in the name
Set order
Fill in the fields [Can read], [Can read and edit] Users who have been added to [Can read] will see additional fields for all users without editing rights (by opening their profile in the [Users] section) Users added to [Can read and edit] will see and have the right to edit/fill in additional fields for all users.
Click on
Click on the name of the created tab
Drag & drop all available fields to tab
Click on
[Admin page] - [Security] - [Logs]
This section in the platform displays system events and user actions, allows you to filter events:
By message types
By period.
Search by keywords and document number.
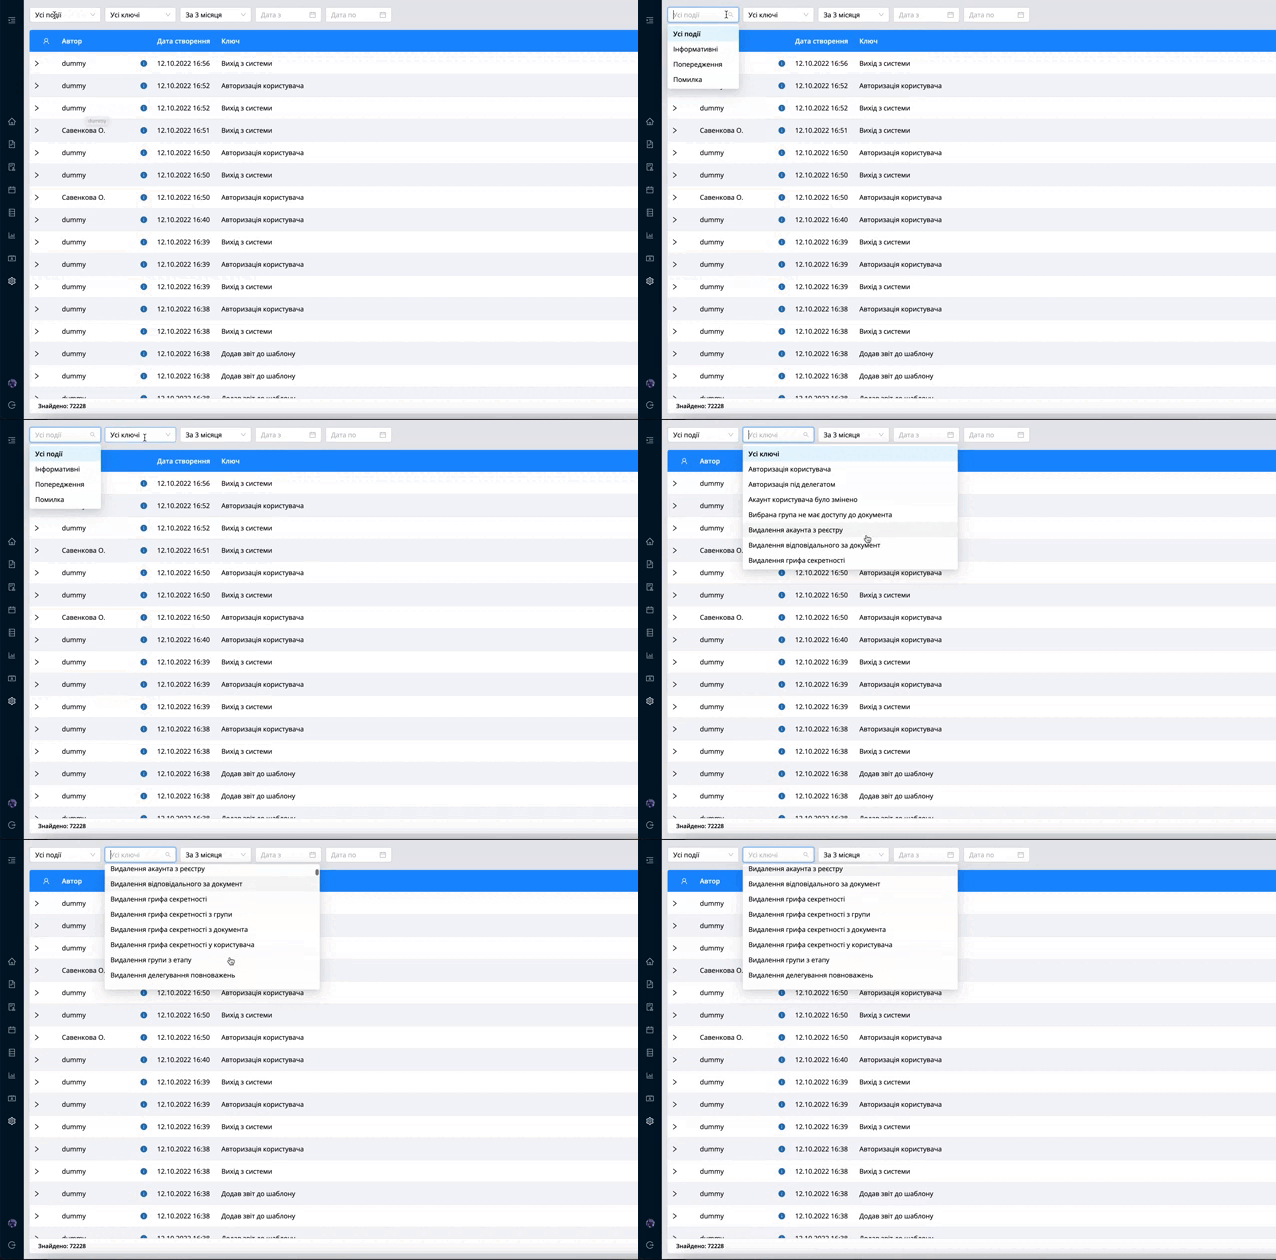
| Note! By default, the system displays the last 25 messages. |
|---|
Starting with version 3.31, there is a switch to technical logging.

[Admin page] - [Security] - [Secrecy stamps]
The section serves to manage the secrecy stamps of confidential document circulation. To create a new secrecy stamps, you need to fill in the following information:
1. Name. Displays the name of the secrecy stapms.
2. Description. Displays a description of the secrecy stapms and its limitations.
3. Group. Displays a secrecy stamps group for convenient operation with an array of secrecy stamps.
4. Document sharing. The ability to share the document even with secrecy stamps.
5. Related secrecy stamps. Indicates a dependency on other secrecy stamps.
To create a secrecy stamp, you need:
Click on
Fill in all necessary information and settings.
Importantly! The document must be created with this secrecy stamps. |
|---|
[Admin page] - [Security] - [Sessions]
The section serves to monitor user activity in the system, displays currently open sessions when selecting the "Active Sessions" feature. You can also disable the session in this section.
Sessions can be filtered:
By users
Session start and end date
You can also enable the display of already inactive sessions by
clicking on the settings
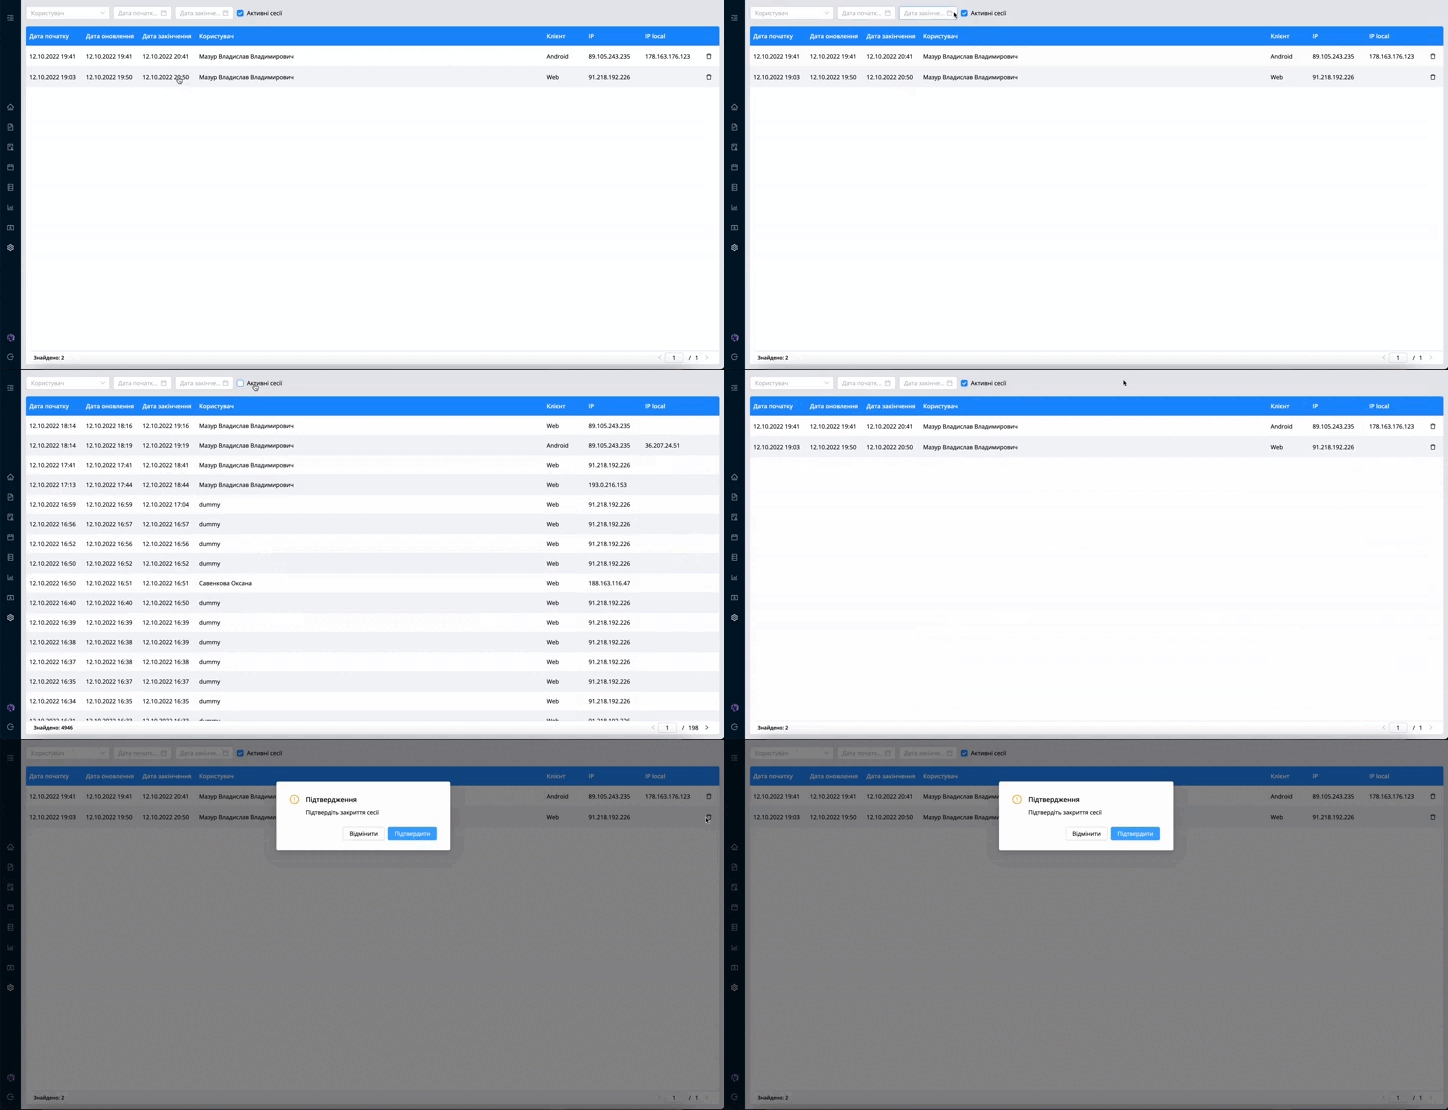

The section is sorted by the following columns:
Start date.
Update date.
End date.
[Admin page] - [Security] - [Keys]
The section serves to manage electronic digital signatures of users.
The system displays a list of all EDS in the system by status:
Uploaded.
Confirmed.
Forbidden.
No file.
Deleted
The administrator need to verify, accept or reject the new EDS key.
More details about uploading an electronic digital signature in the section users.
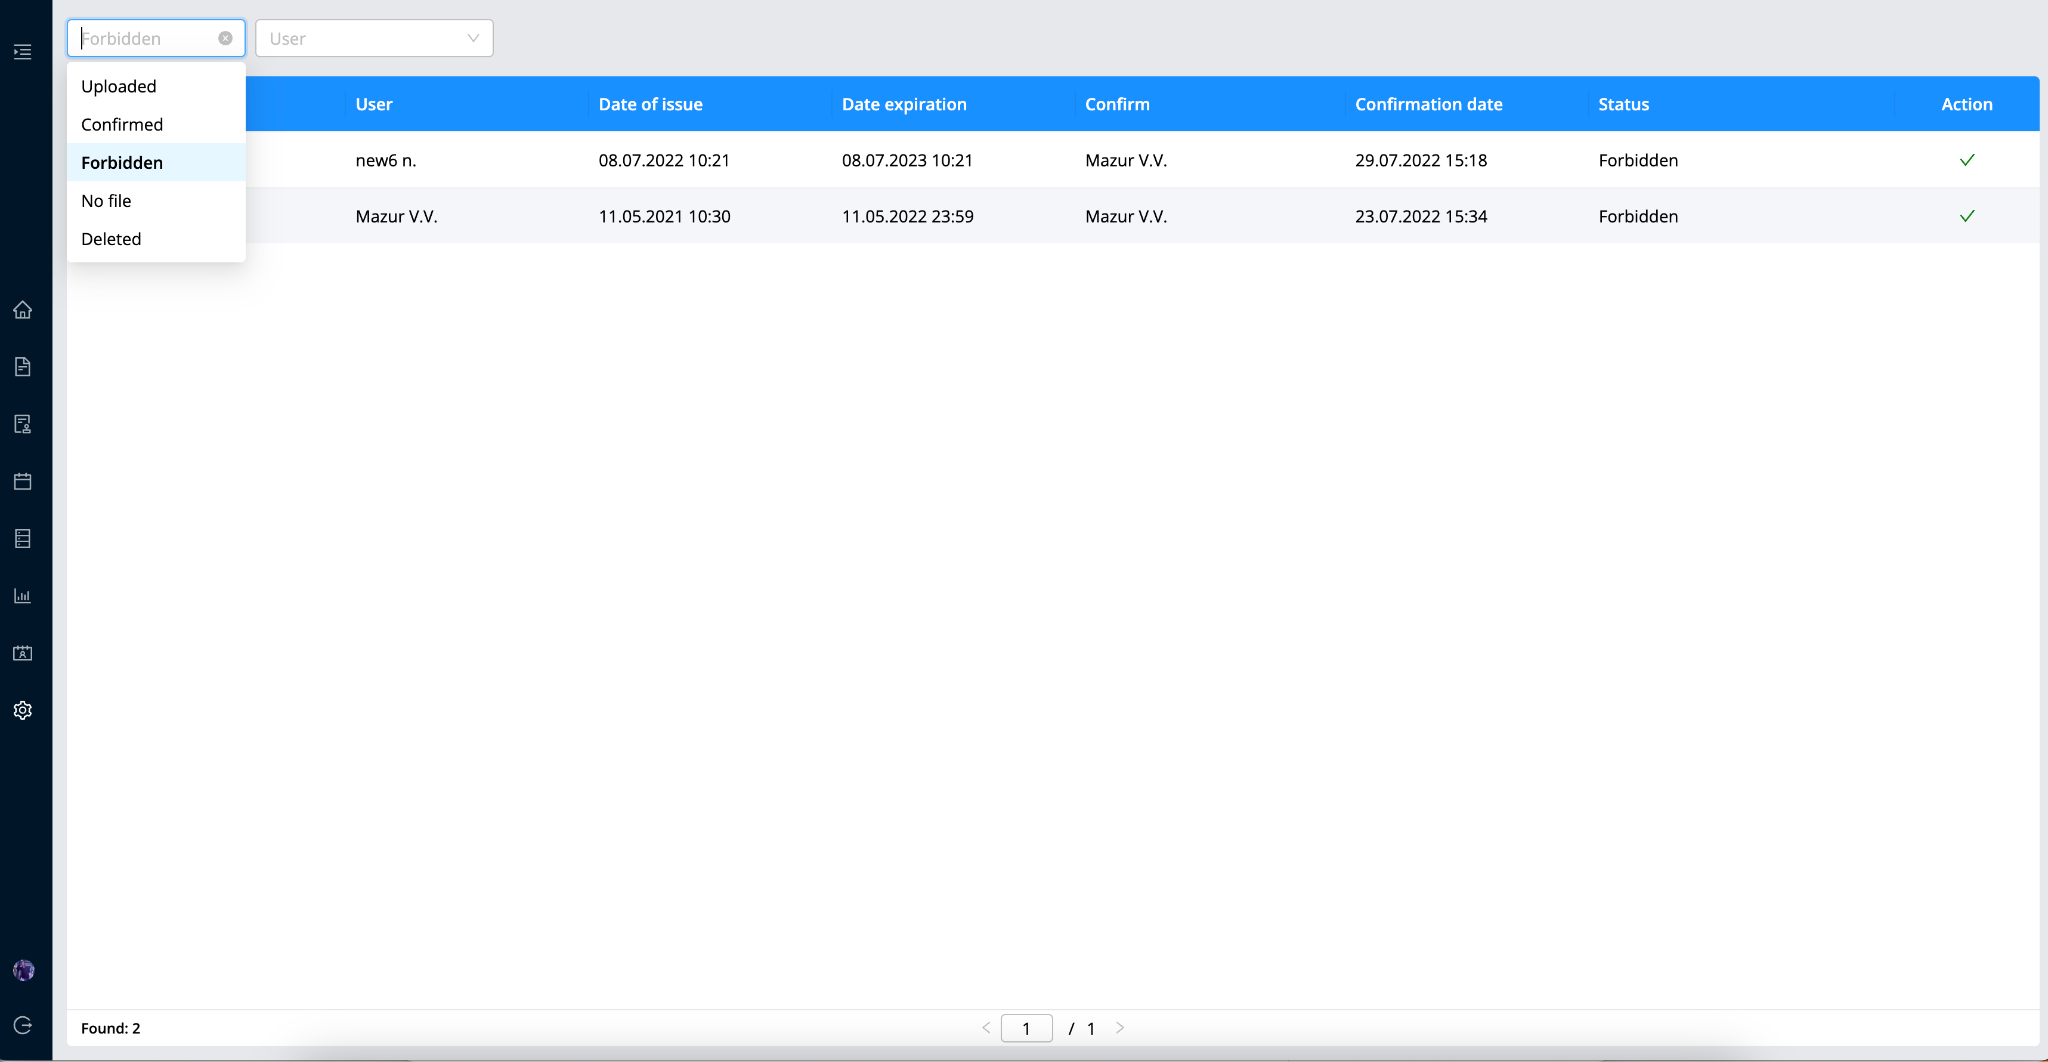
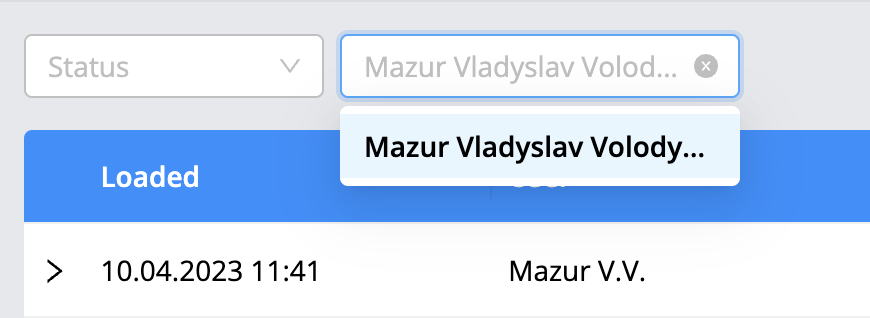
Note! In the section, the search for keys by user was added in the upper left corner. |
|---|
[Admin page] - [Security] - [Access Check]
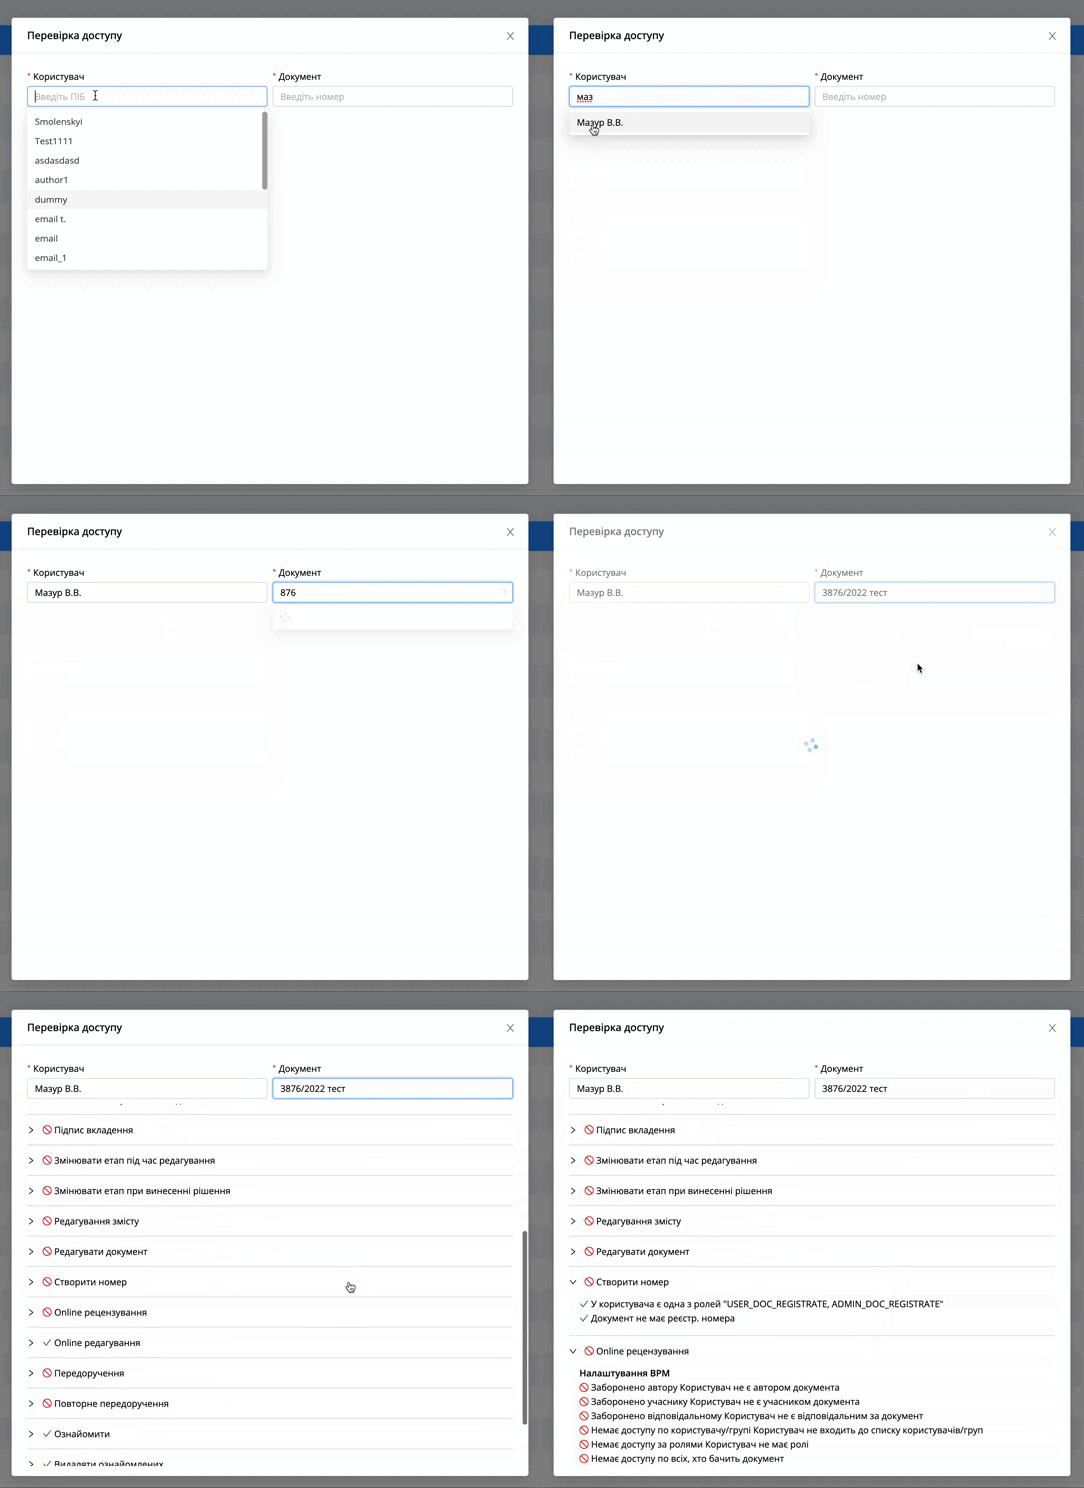
The section serves to check the user's access to the document, clearly demonstrates what permissions a particular user has when working with the document, to check access, you need:
Move the cursor on
Go to [Admin page] - [Security] - [Access Check]
Fill in the following field in the open search box:
Enter user’s full name
The number of the document
[Admin page] - [BPM] - [BPM Process]
The section serves to create and maintain business processes (document templates). More details in the section Business process design.
[Admin page] - [BPM] - [BPM Modules]
The system allows you to control external modules. Functionality is available for system developers.
[Admin page] - [BPM] - [Imported patterns]
This section serves for importing templates of business processes. While importing, if necessary, you can change the following parameters:
Unknown stages/modules are present
No matching user groups
Nomenclature number
No matching handbooks
No matching users
Unknown content items
After downloading the exported file, the templates that are ready for import are displayed in the list.
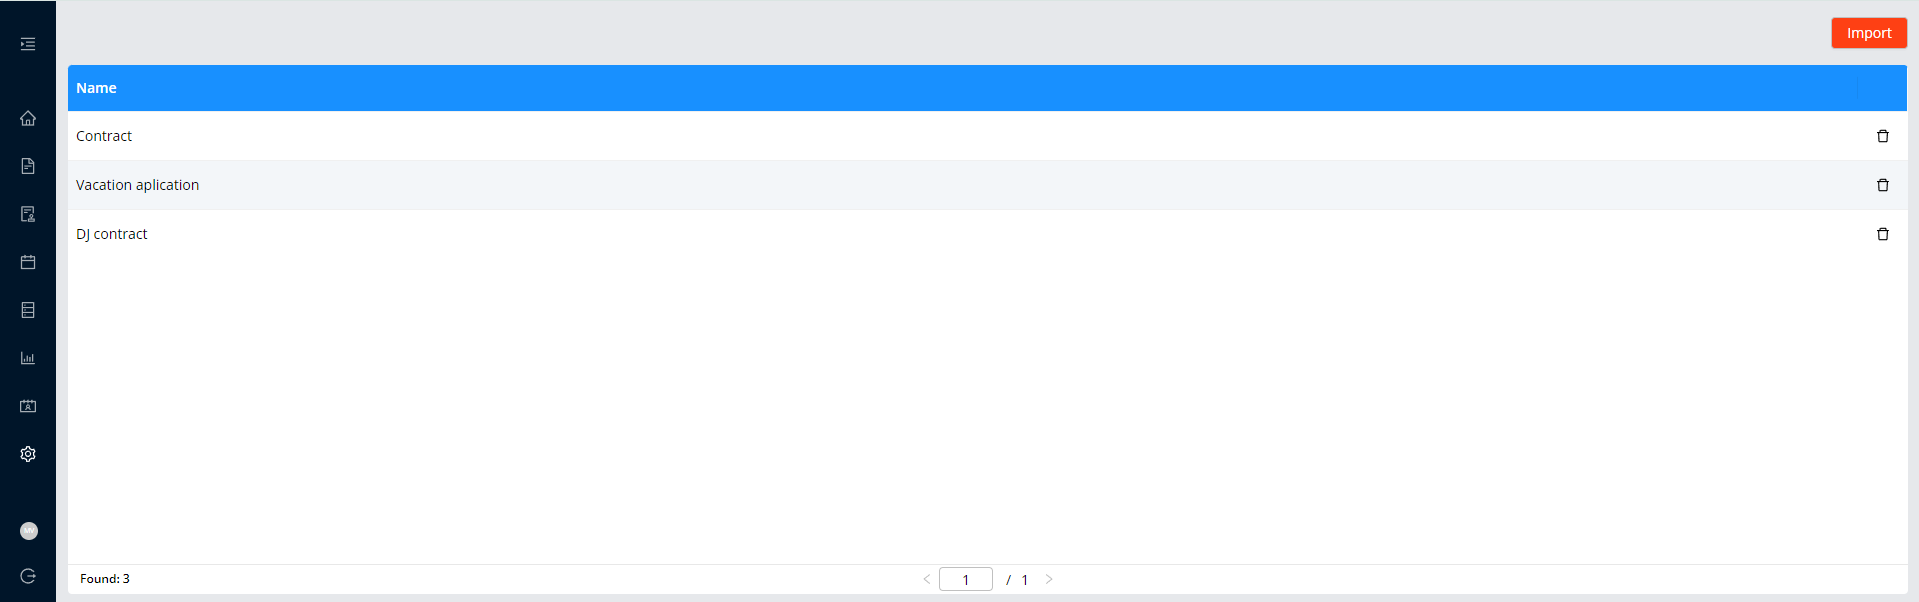
When opened, a map of the process and settings will be displayed.
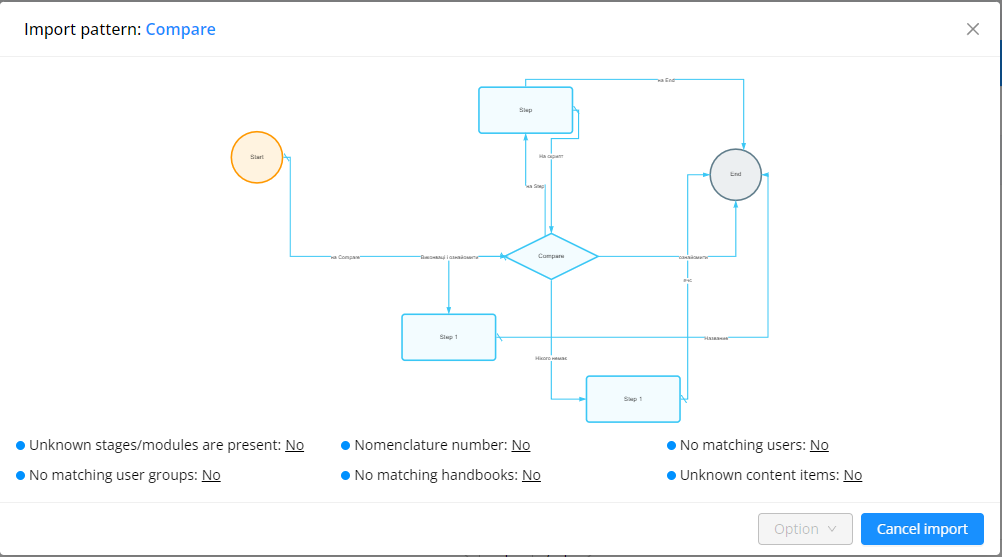
If no errors are detected during import, the system will display "no" for the settings.
Otherwise, the number of errors will be displayed.

When you click on a parameter with an error, a new window will be displayed in which it will be possible to change or delete this parameter.
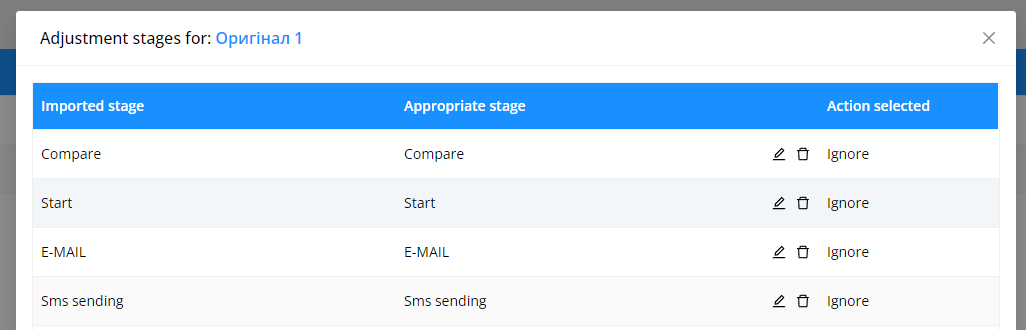
| Note! You can only delete content items with errors. |
|---|
Also, there are options in this window:
Save
Remove all mismatches
To main
The button  saves the changes made and moves
to the next settings window.
saves the changes made and moves
to the next settings window.
After correcting all errors, the [Finish Import] button will become active.
Detailed description of parameter replacement
Unknown stages/modules. The list displays all types of stages used in the process. If the template uses 5 “Step” stage standards, it will be displayed as 1 stage in the list. And when deleting/changing this stage, all will be deleted or replaced.
The parameter works similarly to other stages.
User groups. When you replace a user group in a template, it will change in the following places:
In stages.
Setting stages.
At transitions between stages.
Tabs.
If the group is deleted, the behavior is similar.
Nomenclature numbers. The nomenclature number in the template changes.
Handbooks. In handbooks, the user can change both the handbook field and the column. After the change, the new handbook will be applied in all fields where it is selected.
Users. When you replace users in a template, they will change in the following places:
In stages.
Setting stages.
At transitions between stages.
Tabs
[Admin page] - [Data] - [Fields]
The section allows you to add and modify view fields.
To create a new field, you need:
Go to the section [Admin page] - [Data] - [Fields]
Click on
Fill in all required fields
Name. Field name
Field. The function performed by the field.
Example of system functions:
nameDocument. A summary of the document will be displayed in this field.
status. Document status by color - gray, yellow, blue, red.
systemNumber. System number.
filledDocumentPattern.nameDocPattern. The name of the template on which the document was created.
getColumnItem(“C_AUTHOR”). The author of the document will be displayed.
Available parameters by document status can be found in more detail at the link: Glossary.
| Note! All these fields are created automatically when creating an account group and do not need to be created manually. |
|---|
The following settings fields are available for system fields:
Color. In this field, you can write code from HTML color.
Width. The width of the column in pixels.
Enable sorting. If the value is text, then the sorting is alphabetical, if the value is a number, then sorting from smaller to larger (according to the ascending/descending principle)
Show. Field display settings.
By default. It is used to display the field in the documents and registers sections.
| Importantly! Sorting works only for the following columns: Document number, Summary, Creation date, Control date, Registration date. |
|---|
[Admin page] - [Data] - [Views]
The section serves to manage the system filters of the document list.
To create a new view, you need:
Press
Fill in all fields and set all the necessary settings.
Name. The name of the view.
For documents. For registers. For mobile. In which place will this view be available.
Position. Display order in the list views.
Fields. User can add fields to the view that will be displayed when this view is selected in documents and registers. Even if a list of fields is configured for documents and registers.
All these system filters (views) are created automatically when creating a group of accounts and do not need to be created manually. The list of all system filters is described in section.
[Admin page] - [Data] - [Reports]
This is the administrative section of reports where the user can create, edit and delete reports.
To create a common report, you need:
Go to the section [Admin page] - [Data] - [Reports]
Click on in the upper right corner
Fill in the "Name*" field
In the "Report type" field, select "Common"
Select the desired extension
Set the setting "Watermark"(if you need). More about watermark.

Click on the icon and upload the report template file(JRXML extension).
Select the required users in the "Users/groups" field (These users will be able to create this report in the [Reports] section)
Select the desired account
Click on
To create a report for a document, you need:
Go to the section [Admin page] - [Data] - [Reports]
Click on in the upper right corner
Fill in the "Name*" field
In the "Report type" field, select "To document"
Select the desired extension
Set the setting "Watermark"(if you need). More about watermark.
Click on the icon and download a report template file with the JRXML extension
Set the templates in the Document Templates field.(In these teplates will be available this report)
Click on
Note! Common - it can be created in the left side menu "Reports", if the user is added to the report. (The section itself is displayed to all users) To document - it can be created only in the document options in the general report section, it will not be available. More about document options. |
|---|
The following types of options are available for the report:
Text field
Handbook
User choice
Calendar
Checkbox
Department
To create a parameter, you need:
Open your report in [Admin page] - [Data] - [Reports].

Click on the 3 dots next to the button in the lower right corner.
Click on the "Add parameter" option.
Click on the added parameter under the block with accounts.
Select the desired type for the parameter.
Fill in the name of the parameter (it will be displayed on the right side of the screen when generating the report).
Fill in the "Key*" field (this is the key of the parameter used inside the report request - jrxml file). The user that created the report can share a key with you.
Enable or disable the option “Required”.
| Note! Options can be used for common reports and for to document. |
|---|
Also, in the administrative section of reports, there is a search by the name of the report.
To view a report in the administrative section [Reports]:
Go to the section [Admin page] - [Data] - [Reports].
Click on a report in the list.

Click on in the lower right corner.
Click on the [View] option.
The report will be automatically generated if there are no mandatory parameters. If there are mandatory parameters, then the user need to fill in parameters and click on

[Admin page] - [Data] - [Registries]
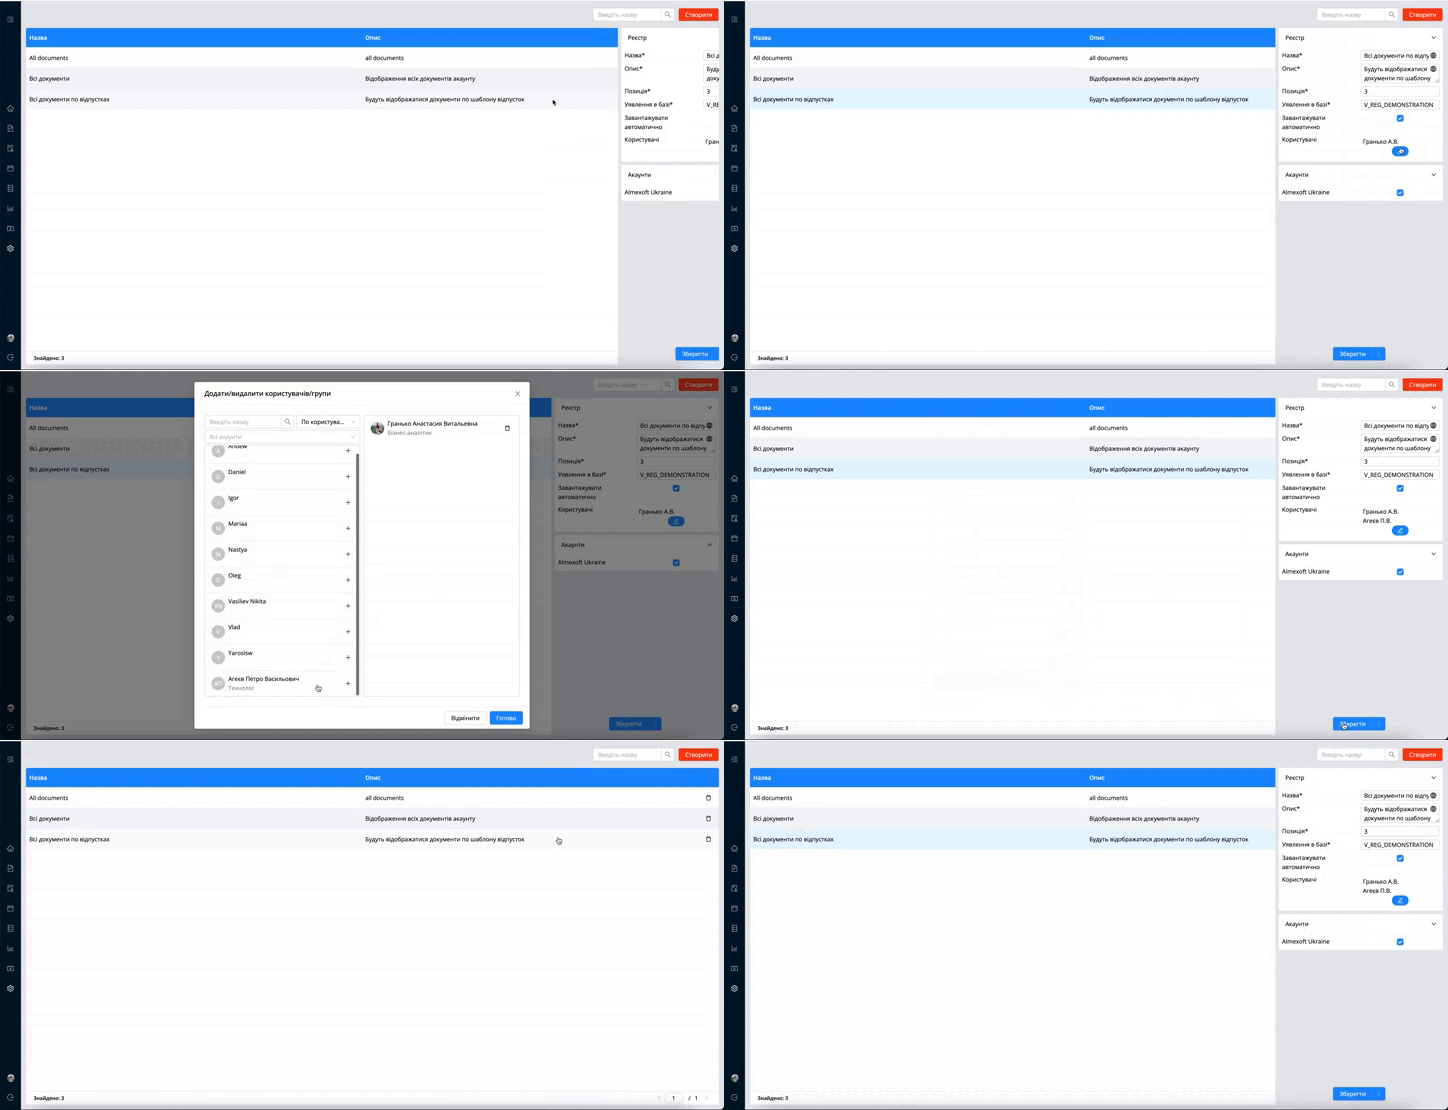
The section serves to regulate a user access to groups of documents within a specific account, group and document template. In the administrative part of the platform, the user can create and edit already existing registers. All registries are displayed in alphabetical order and have the following settings:
Name. Registry name.
Description. Description of the registry.
Position. Location in the general list of registers.
Database view. The name “SQL View” in the database.
Users. Users to whom this register is available.
Columns by default. When you open the registry, the configuration fields will be displayed [by default]. More details [Admin page] - [Data] - [Fields]
Table columns. Allows the user to customize the display of fields in registers.
For setting, you need:
Click on

Select the fields you want to display
Accounts. Accounts in which this registry will be available.
To create a new registry, you need:
Click on
Fill in all the data in the fields, set all the necessary settings, add users and choose an account.
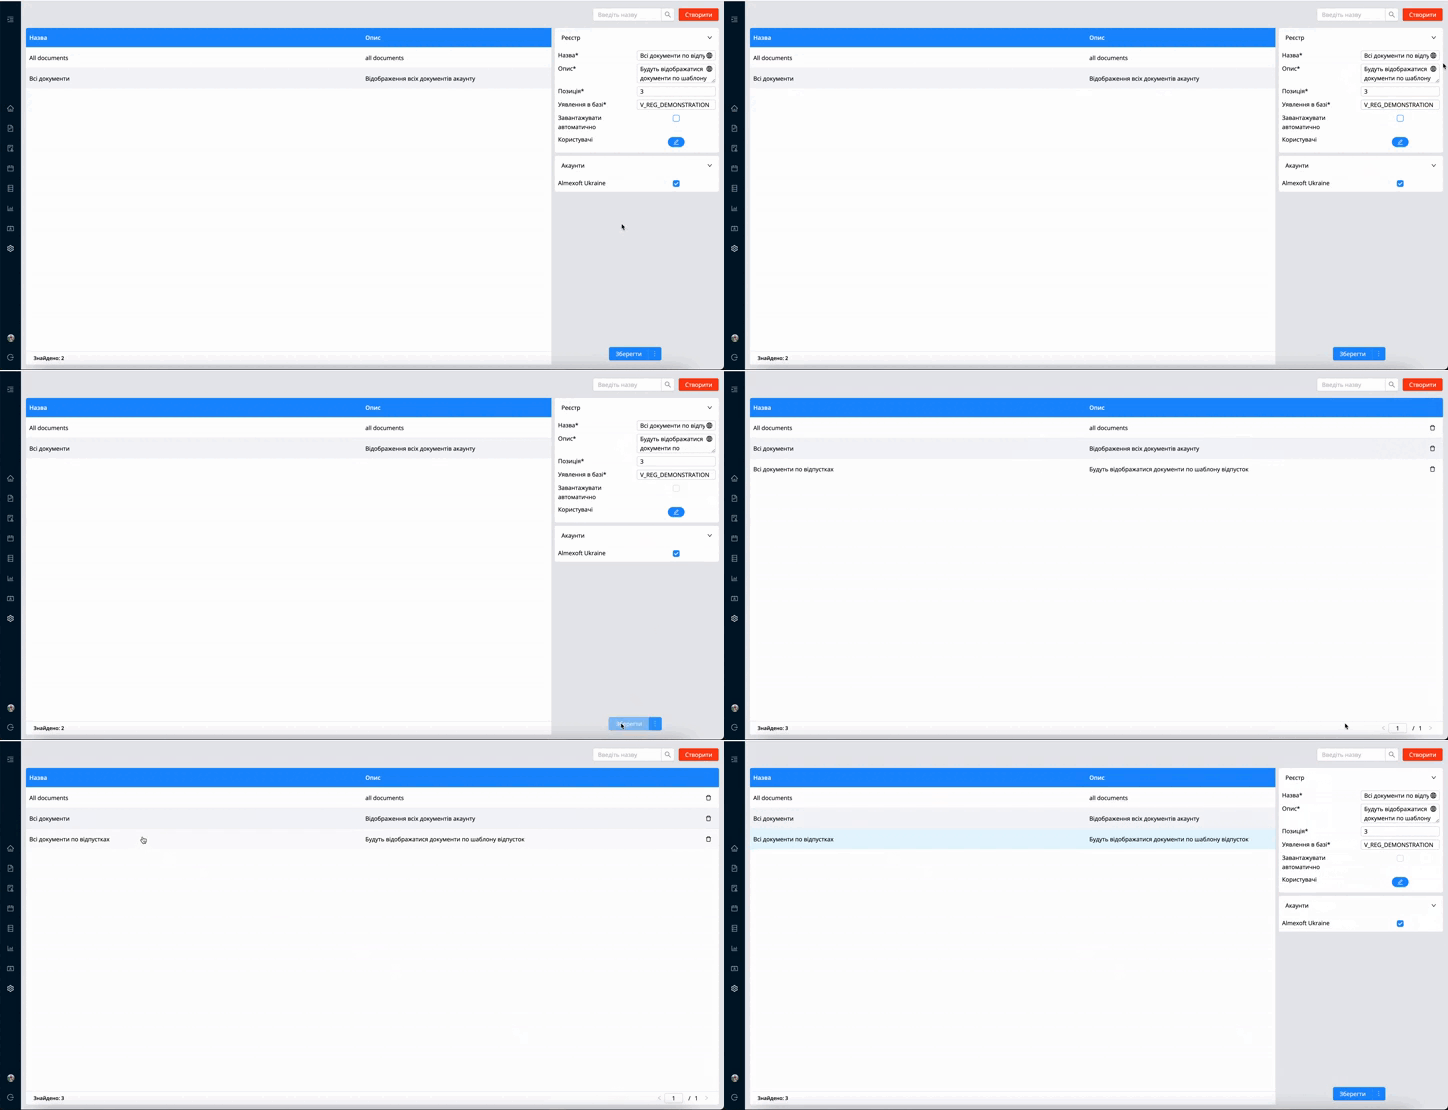
In creating window, the following fields are available:
Registry name.
Description of the registry.
Position (registers in the list are sorted by this field).
Database view (created by the database administrator in advance).
Download automatically.
If this setting is enabled, when this registry is opened, the list of documents will be loaded automatically.
If the setting is disabled, the user needs to make a search request to display the documents.
Users (to whom this registry will be available in the user section).
Accounts (in which accounts this registry will be available).
To edit an already created registry, you need:
Select the desired register.
Update desired information.
| Note! [ADMIN_REGISTRY_UPDATE] role is required to display this section |
|---|
Also in this section, the user can find the register by name. The search field is displayed in the upper right corner.
[Admin page] - [Data] - [Widgets]
Starting with version 3.31.1, the platform has the ability to customize which widgets are displayed on the home page.
This section displays standard or custom widgets.
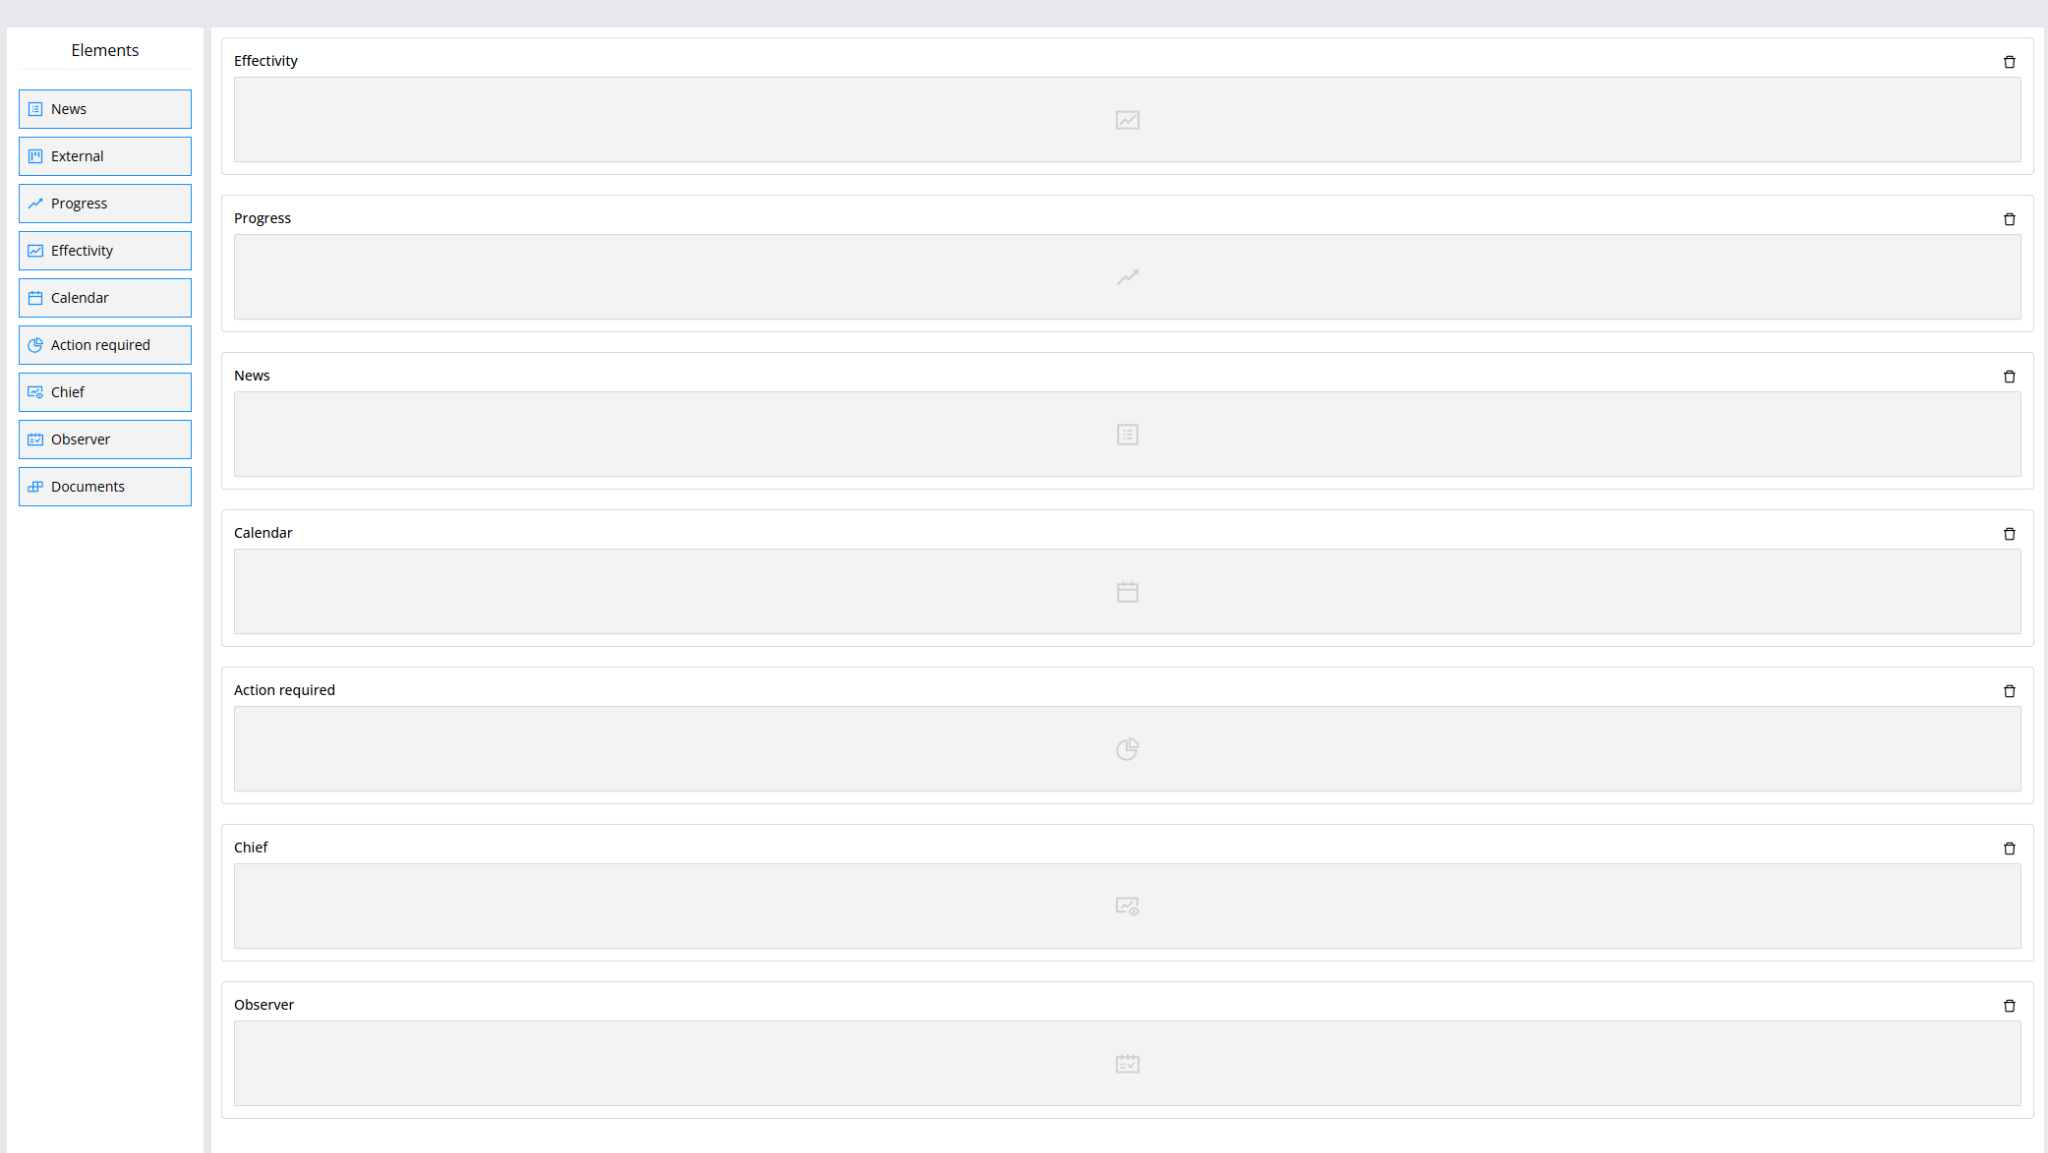
The same widget can be added multiple times, changing its name and settings.
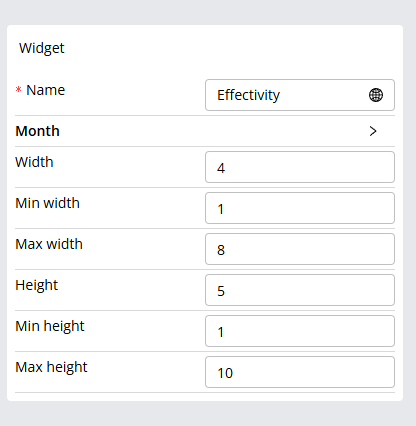
Each widget has its own settings:
Height
Width
Month. How many months to display documents or document cards.
New widgets types:
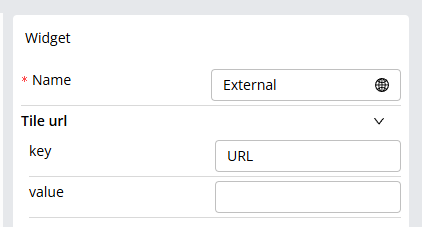
External. This widget has a URL setting, by specifying an iframe link in the field, and the ability to display information from an external resource.
Documents. This widget displays a list of documents configured by the following parameters.
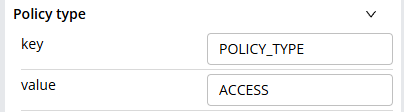
Policy type. Direct or indirect access to the document. It can take the following values → ACCESS, REGISTRY.
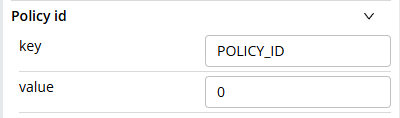
Policy ID. If the previous parameter is ACCESS, then you need to set it to 0. If REGISTRY, then in this parameter you need to set the registry ID through which access to documents will be provided.
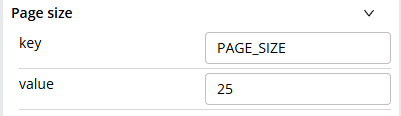
Page size. How many documents will be displayed in the widget list.
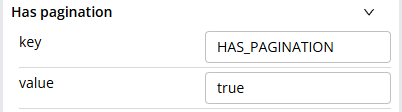
Has pagination. Responsible for the presence of page switching. Takes the value true/false.
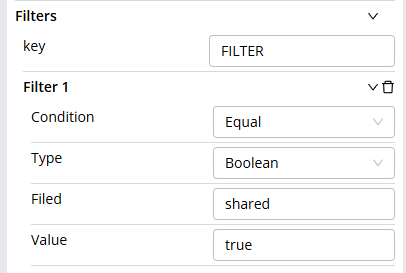
Filters. This parameter adds filters according to which documents will be displayed. You can add the same filters here that are used in the system filters in the Documents/Registers section. Link.
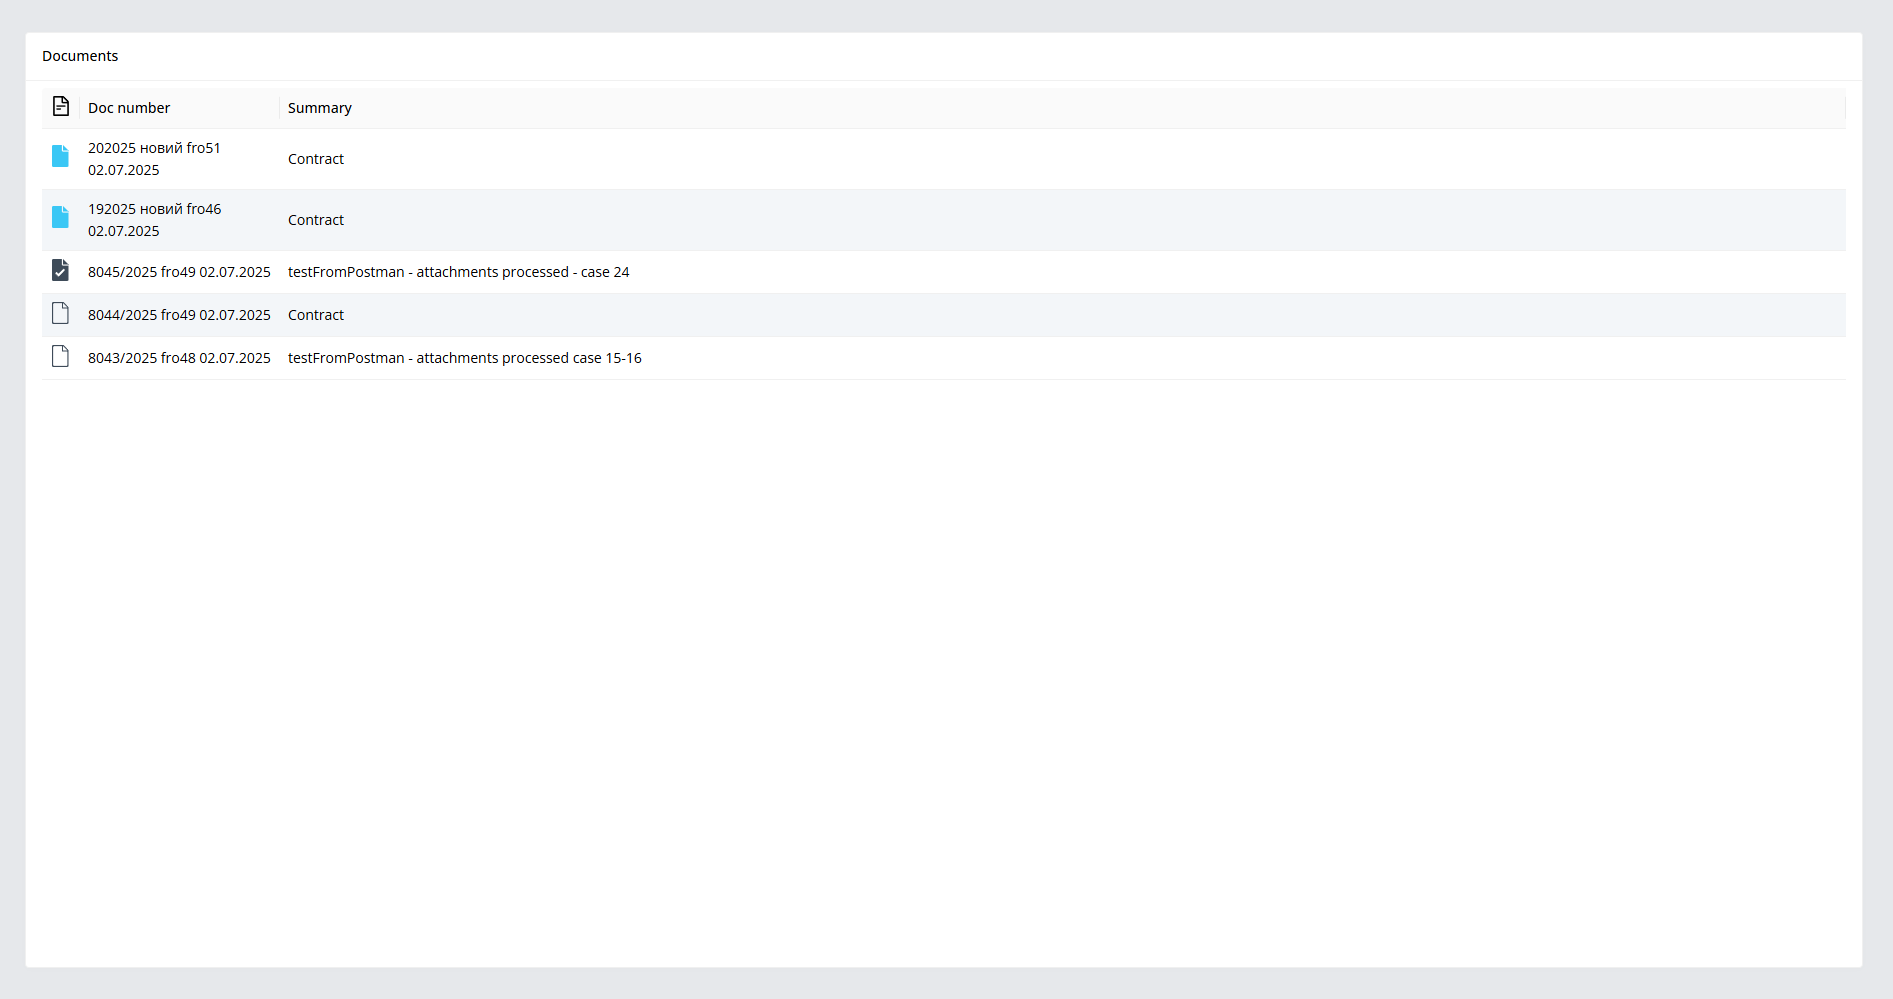
Displaying the widget on the home page.
[Admin page] - [Data] - [Desktop]
In version 3.31.1, the desktops section appeared, where you can configure widget tabs on the home page.
Each desktop is a tab with a specific set of widgets at home page.
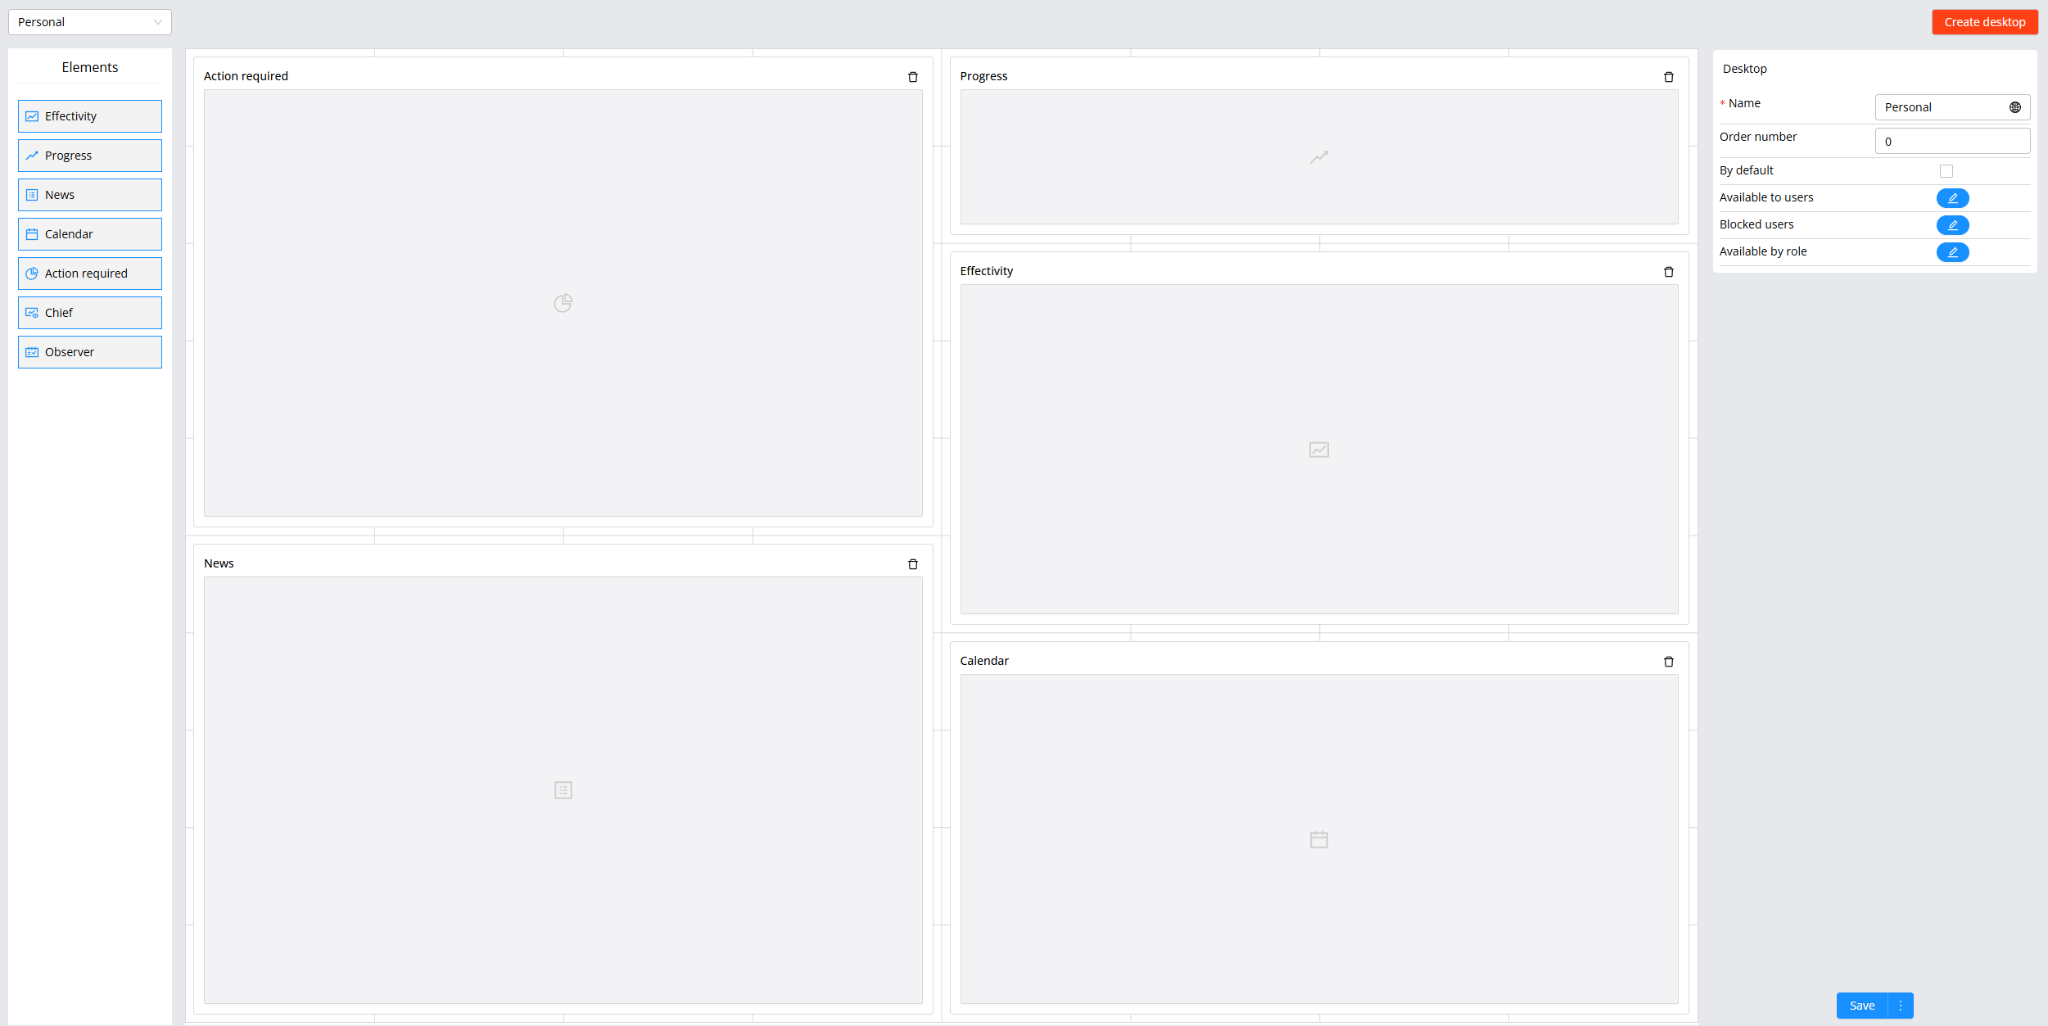
The following settings are available for the desktop:
Desktop name.
Sequence number.
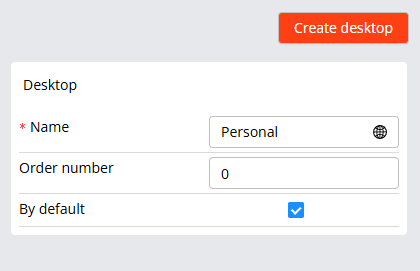
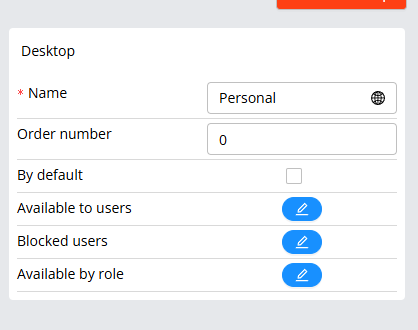
Default. If this setting is enabled, the dashboard will be available to all users of the system.
If the setting is disabled, 3 additional options appear:
Available to users.
Blocked users.
Available by role.
By default - on
By default - off
When customizing desktops, you can change the size of widgets.
[Admin page] - [Data] - [Handbook]
The handbooks contain metadata so that users can fill the necessary information faster when creating or editing documents.
Handbooks in the system are divided into three categories:
System. Adding and deleting values is allowed, but changing the structure and other parameters of the handbook is prohibited.
User. Created by system administrators or user with the appropriate roles.
External. Handbook data copied on a schedule or online from a third-party system.
The section serves to create and edit handbooks in the system. The handbook can also be used in the document (there is a corresponding field for this).
Handbook column types:
Text. This column is filled in all languages that are enabled on the server.
User. List of users created in your account.
Global text. The text column, but, is filled in one language.
Number.
Date.
Handbook. You can refer to a column from other handbook. Used to filter handbooks. More information.
To create a handbook, you need:
Go to section [Admin page] - [Data] - [Handbooks]
Click on

Fill in the name of the handbook (in all languages enabled on the server).
Go to the [Columns] tab.
Add the required columns.
Go to the [Accounts] tab and enable the required accounts (the main account of the user is already selected there by default).
Go to the [Access] tab and set the users who will be able to edit and add values to this handbook. When creating, the user who creates the handbook is automatically set there.
Click on in the lower right corner.
When creating a handbook, a block with other settings is available in the [Common] tab.
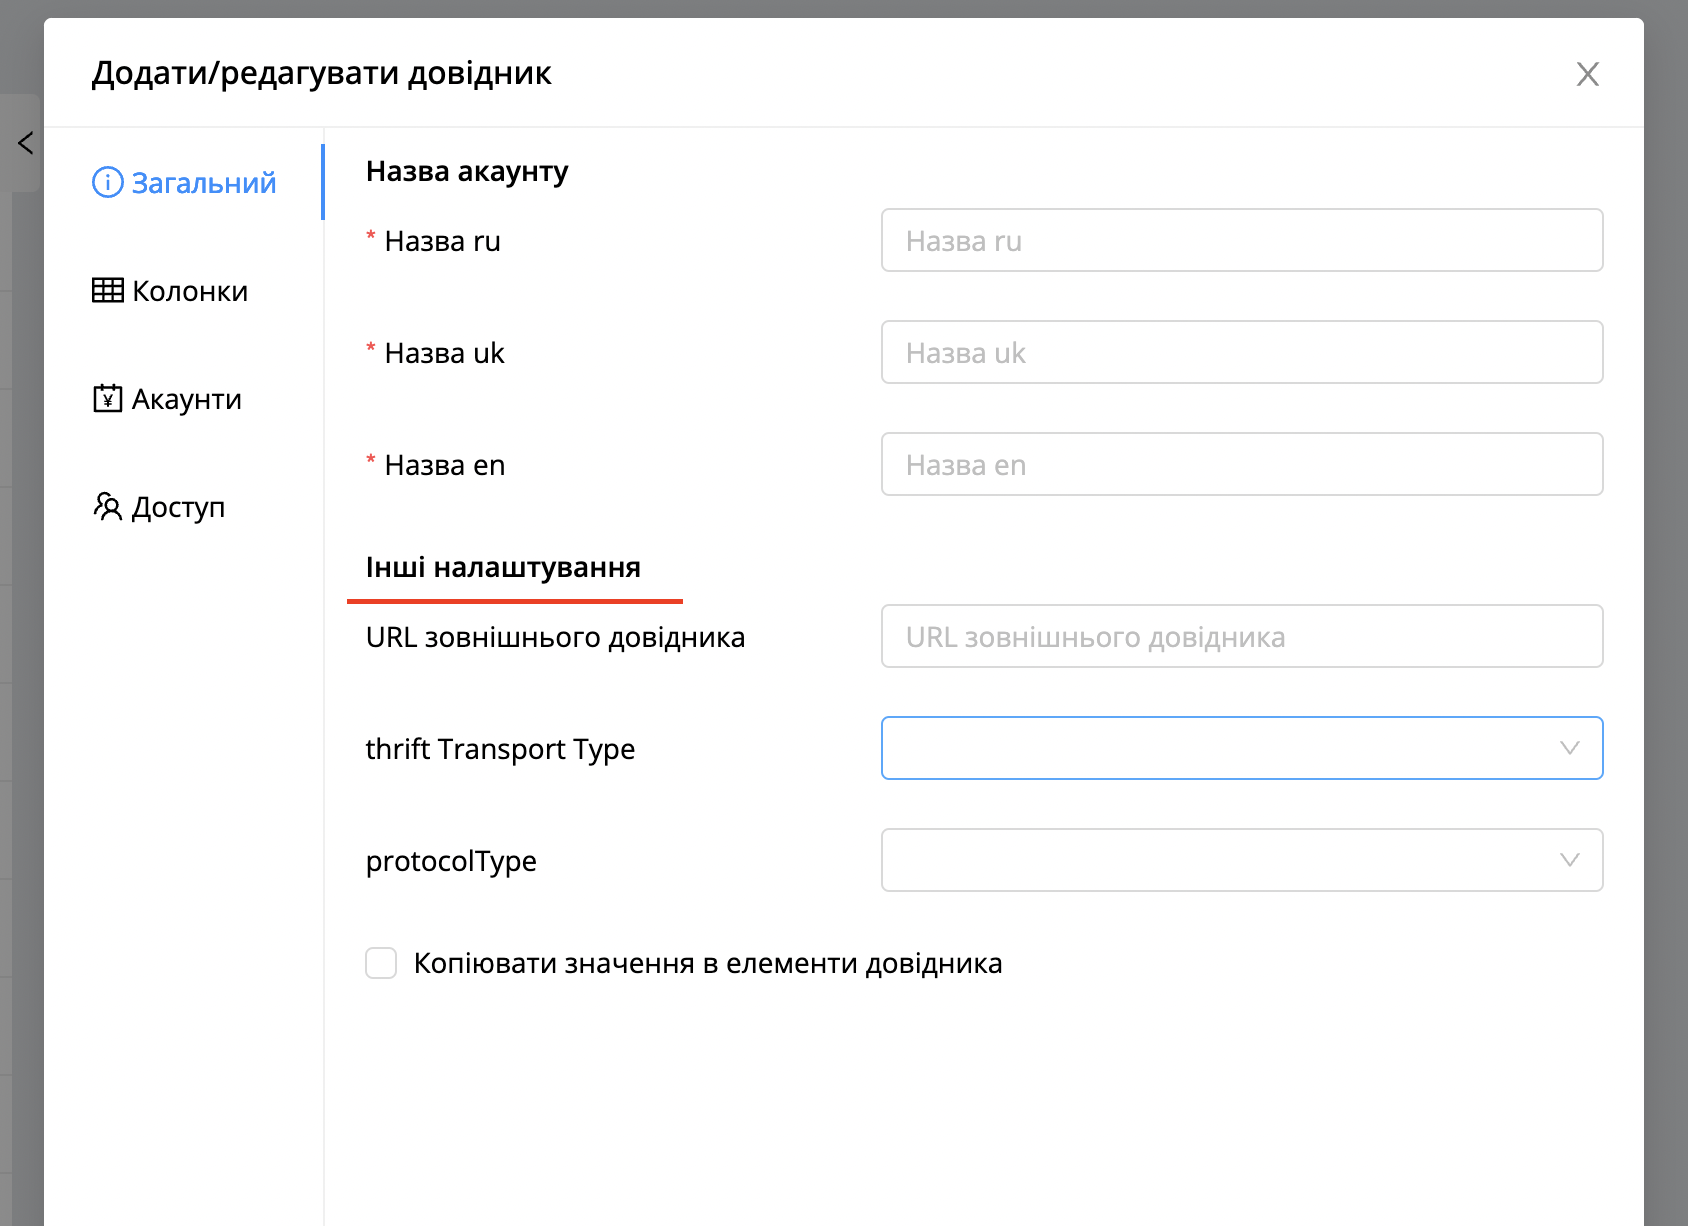
These settings are required to create an external handbook that will not be stored in the system database.
When creating an external handbook, you do not need to create columns. They will be created automatically (the ones created in your external service).
The [Copy values to handbook elements] setting works as follows:
If it is enabled, after editing a value in the handbook, it will not change in already created documents where this value was used in the handbook field.
If it is disabled, after editing the value in the handbook, it will also change in the created documents that used this value.
The following parameters are available when creating a hand column:
Name.
Required. It will be required to fill in.
Display for search. The user will be able to find documents by this filed in the documents/registers section. More information.
Type.
Sorting. Sorting types for text columns and user:
By creation date.
Alphabetically.
For a column with type number:
By creation date.
By order.
.
Sorting is responsible for the order of values in the handbooks section, as well as when creating or editing a document at the time of filling in the handbook field.
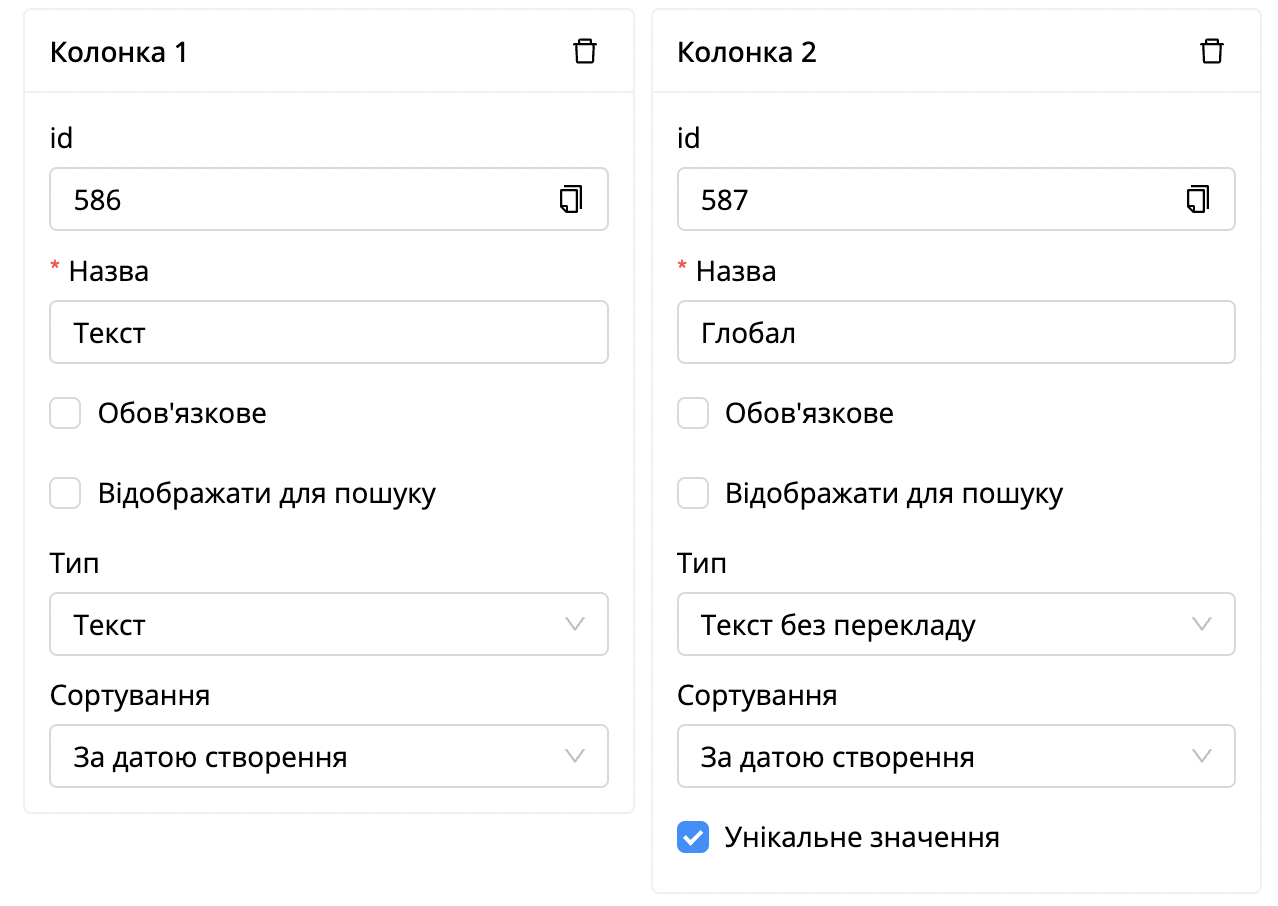
Also, [Number], [Global text] setting is available - [Unique value], if it is enabled, these columns should only have unique values. The system will not allow you to add a value that is already in the column.
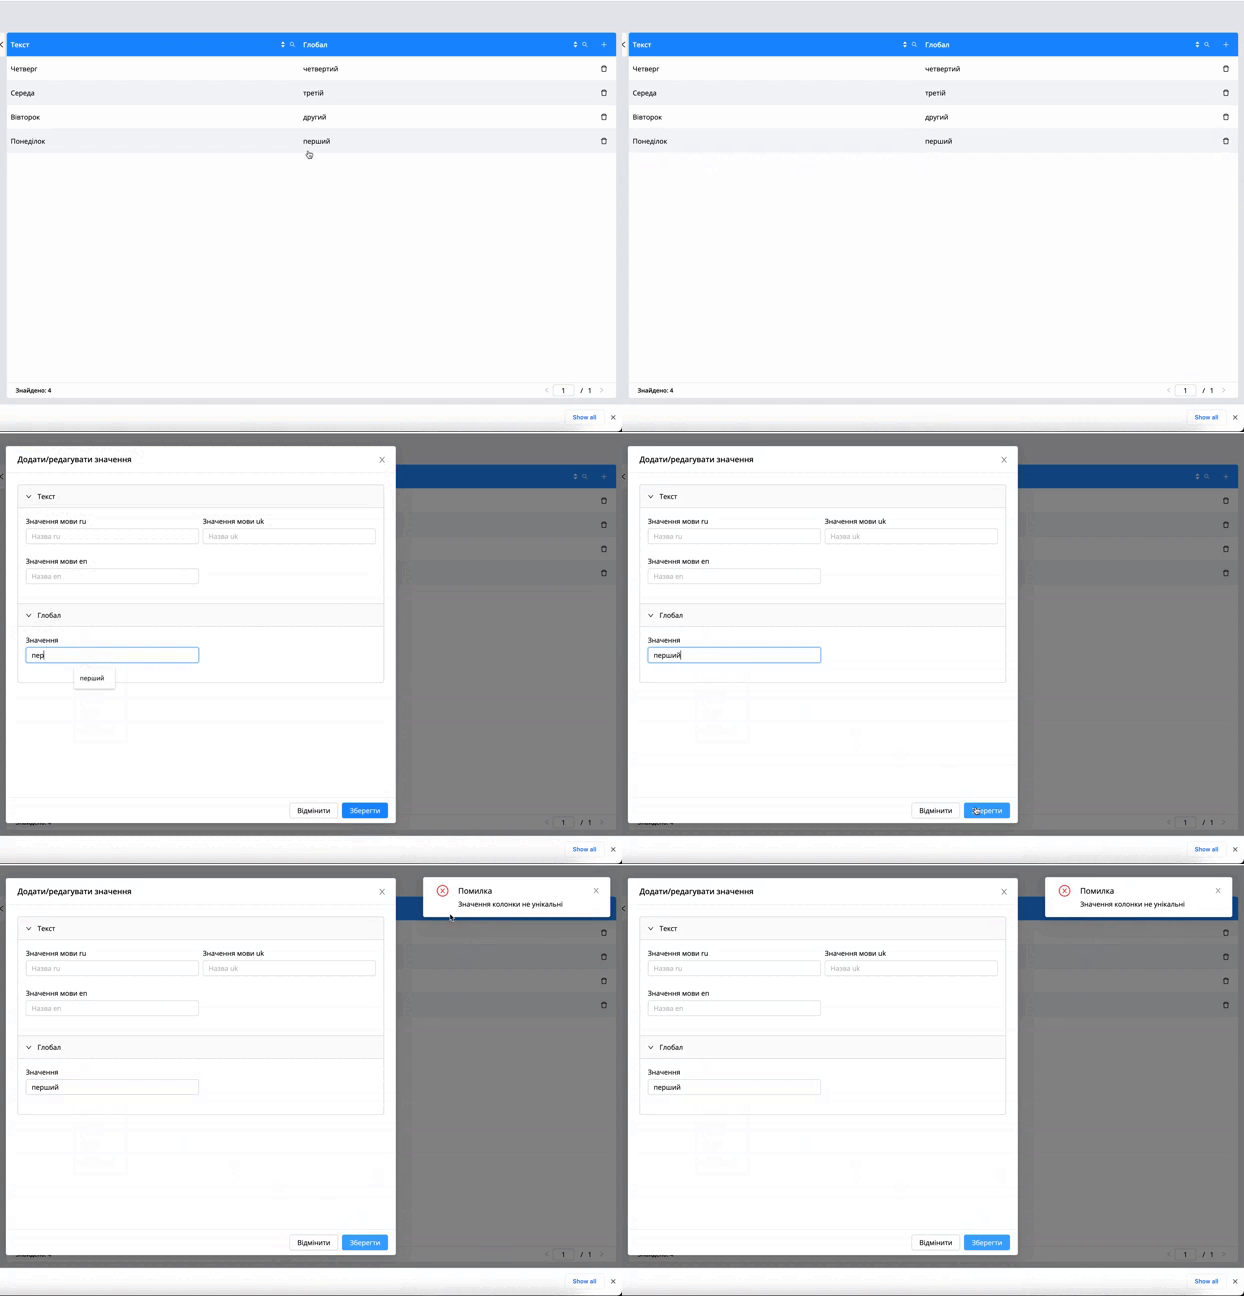
| Importantly! You cannot change the column type in an already created handbook. An error will occur. This is a system limitation. |
|---|
To edit a handbook, you need:
Go to admin section [handbook]
Click on the desired handbook in the list
Click on

Click on option [Edit handbook]
Change the required parameters
Click on
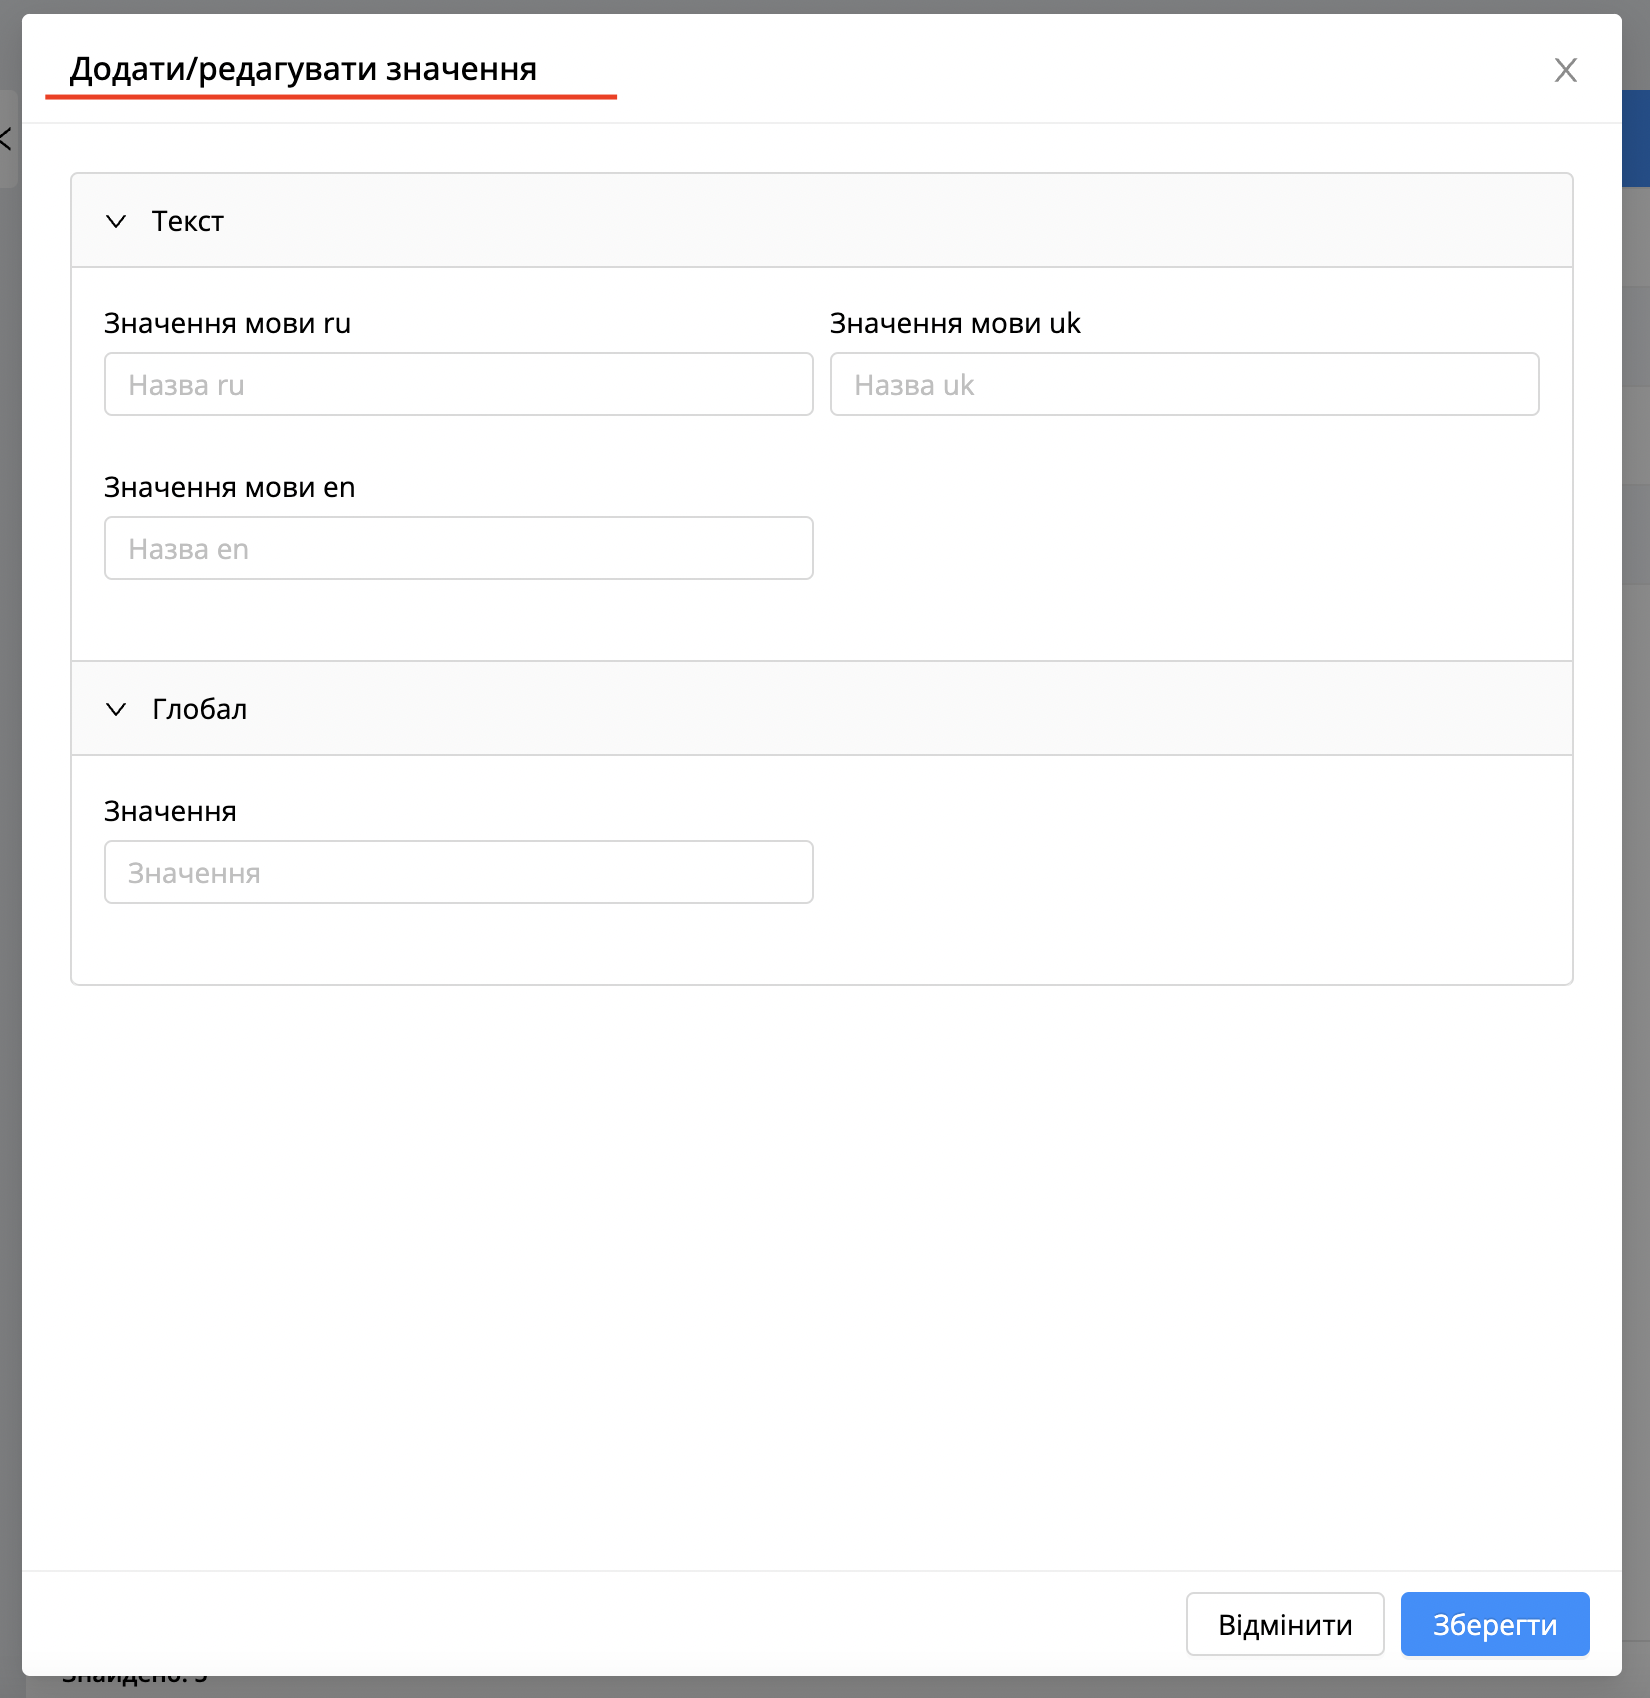
To add a value to the handbook, you need:
Go to admin section [handbook]
Click on the desired handbook in the list.
Click on
Click on option [Create handbook value]
Fill the fields with values.
Click on
Filtering is available for handbooks:
By accounts.
One system handbook [Standard resolutions] is automatically created in the system, which is used when assigning tasks in document. More information about document actions.
Note! The user needs to have [ADMIN_HANDBOOK_UPDATE] role to see the [Admin page] - [Data] - [Handbooks] section. If the user is added to some handbook in the [Access] tab, then this section will be available to the user even without a role, but the user will be able to add and delete values in the handbook, but the user will not be able to edit the parameters of the handbook. |
|---|
In 3.31.1 version
Importing handbooks from an excel file.
The system allows importing data from an xlsx file into a handbook. User can import all types of columns, including nested columns. The import itself consists of 3 steps.
Important! The column in the xlsx file must be filled with the user id or the nested row id in the system when importing data into columns with the type [user] or [handbook]. |
|---|
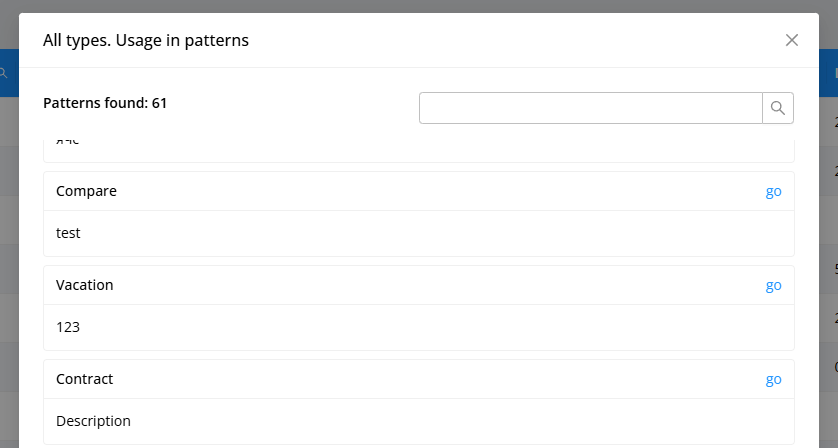
New option [Use in patterns]. Thanks to this functionality, user can see in which patterns this handbook is used.
There is also a search for patterns by name and by clicking on [ Go ] the pattern will open for editing.
[Admin page] - [System] - [Accounts]
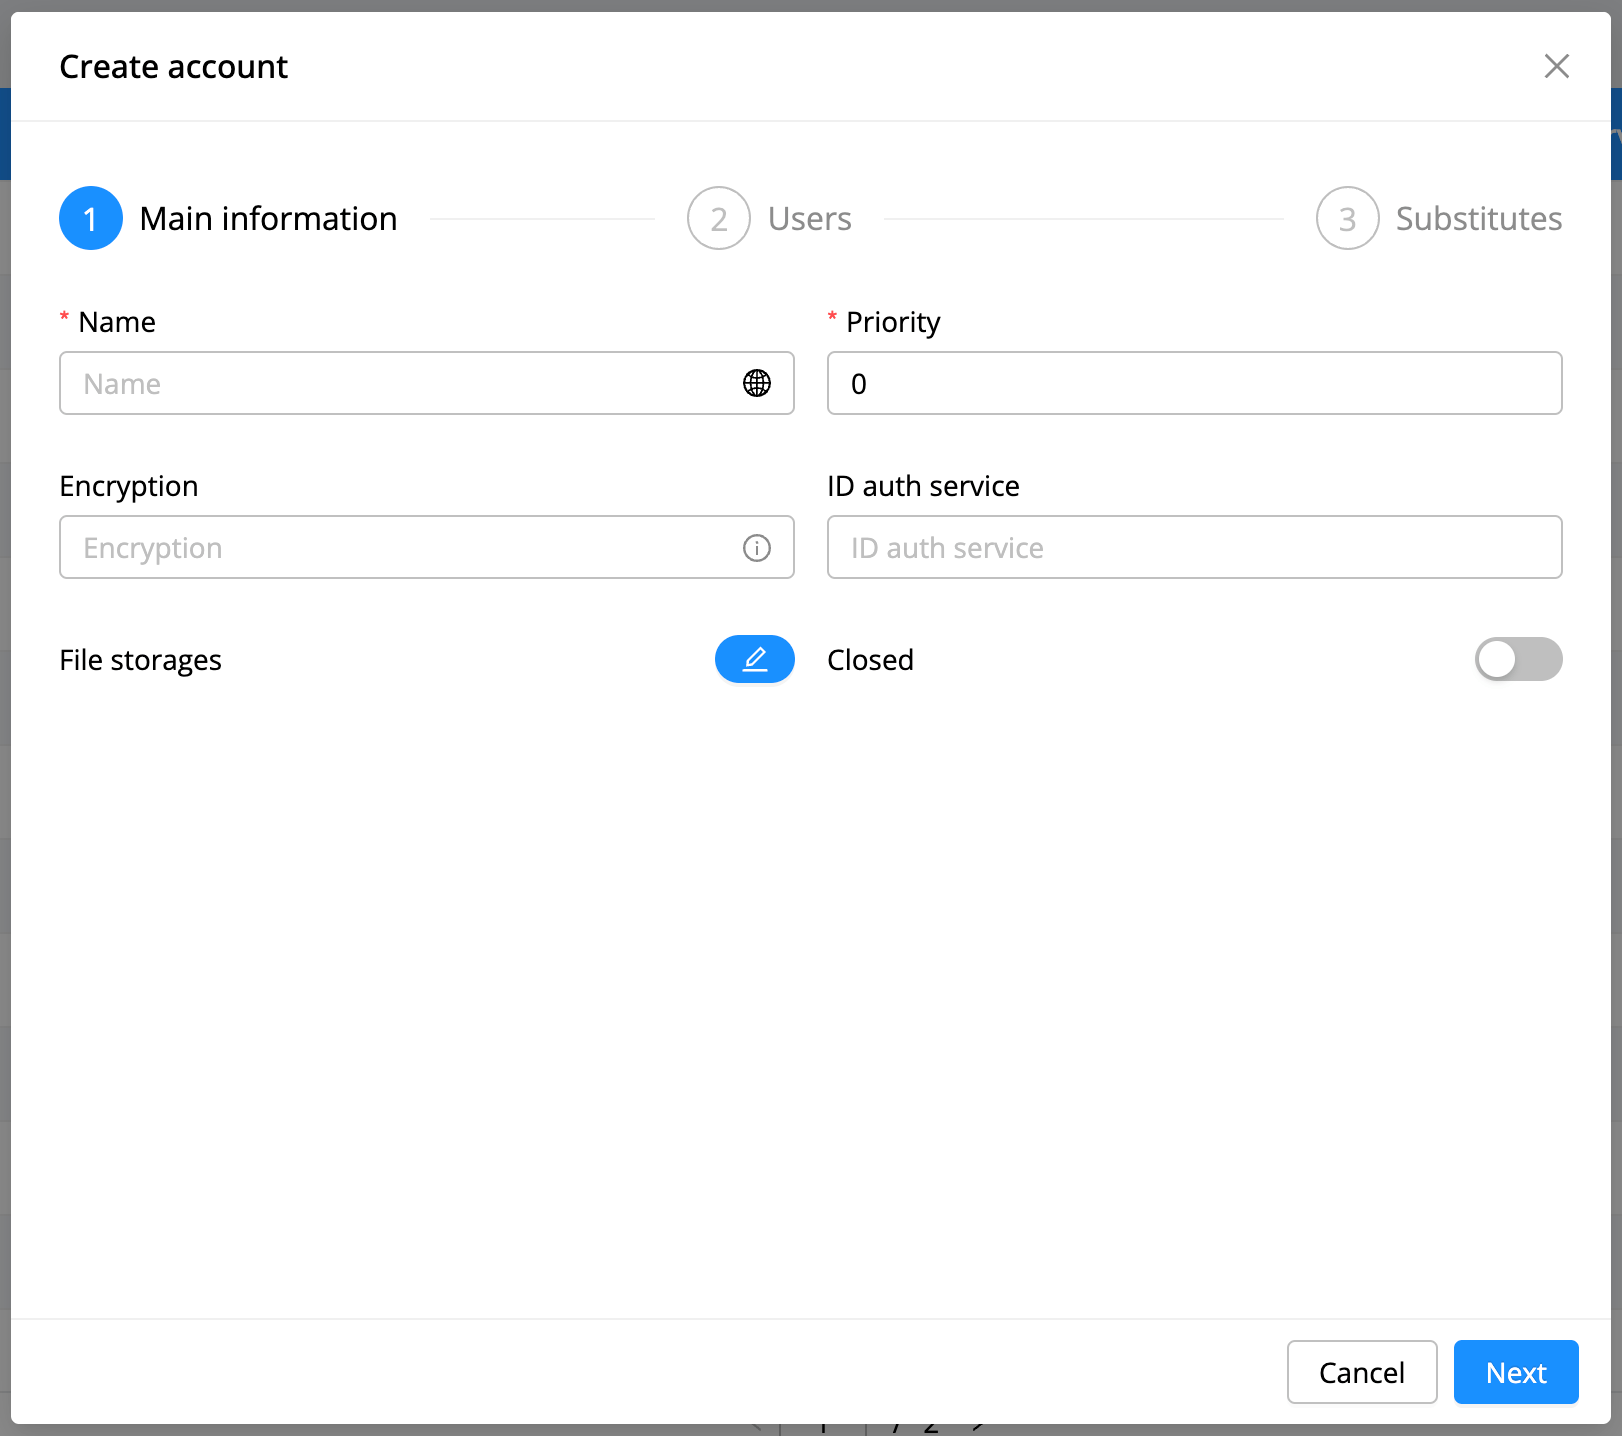
This section is used to create and edit system accounts. To create a new account, you need:
Click on
Fill in all fields:
Name. Specify the name of the account.
Priority. Is responsible for displaying accounts in the general list, the lower the number, the higher the account is displayed.
Encryption. Specify an encryption key if attachments in this account should be encrypted.
Closed. An account will not be displayed in the general account list if the [Show all accounts] setting is enabled for the account group.
ID auth service. The field is not mandatory. Filled in by the system administrator. The LDAP authorization.
File storage. Select the required file storage.
Step 1 - Main information
Click on the [Next] button.
In step 2, there is an opportunity to add users to the account.
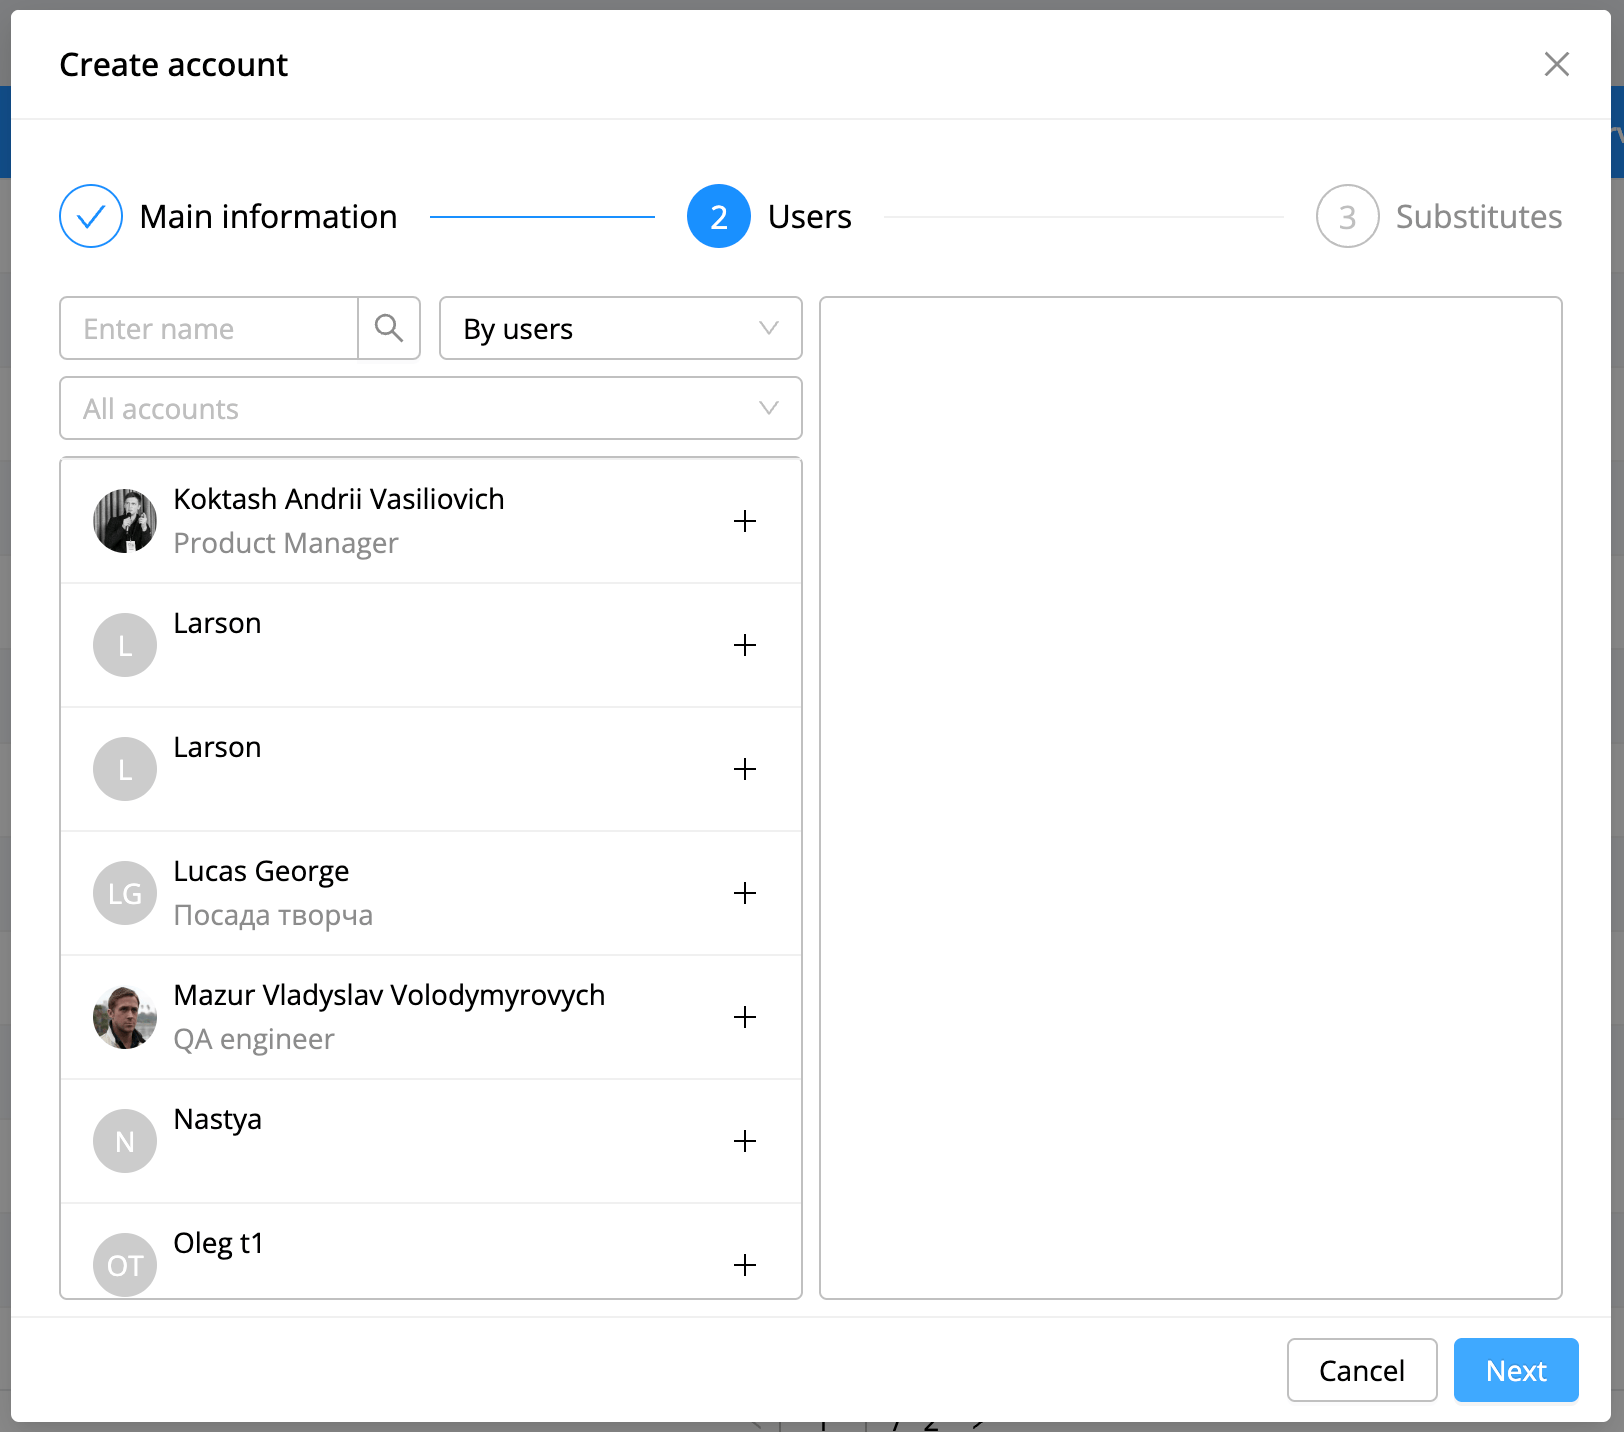
Click on the [Next] button.
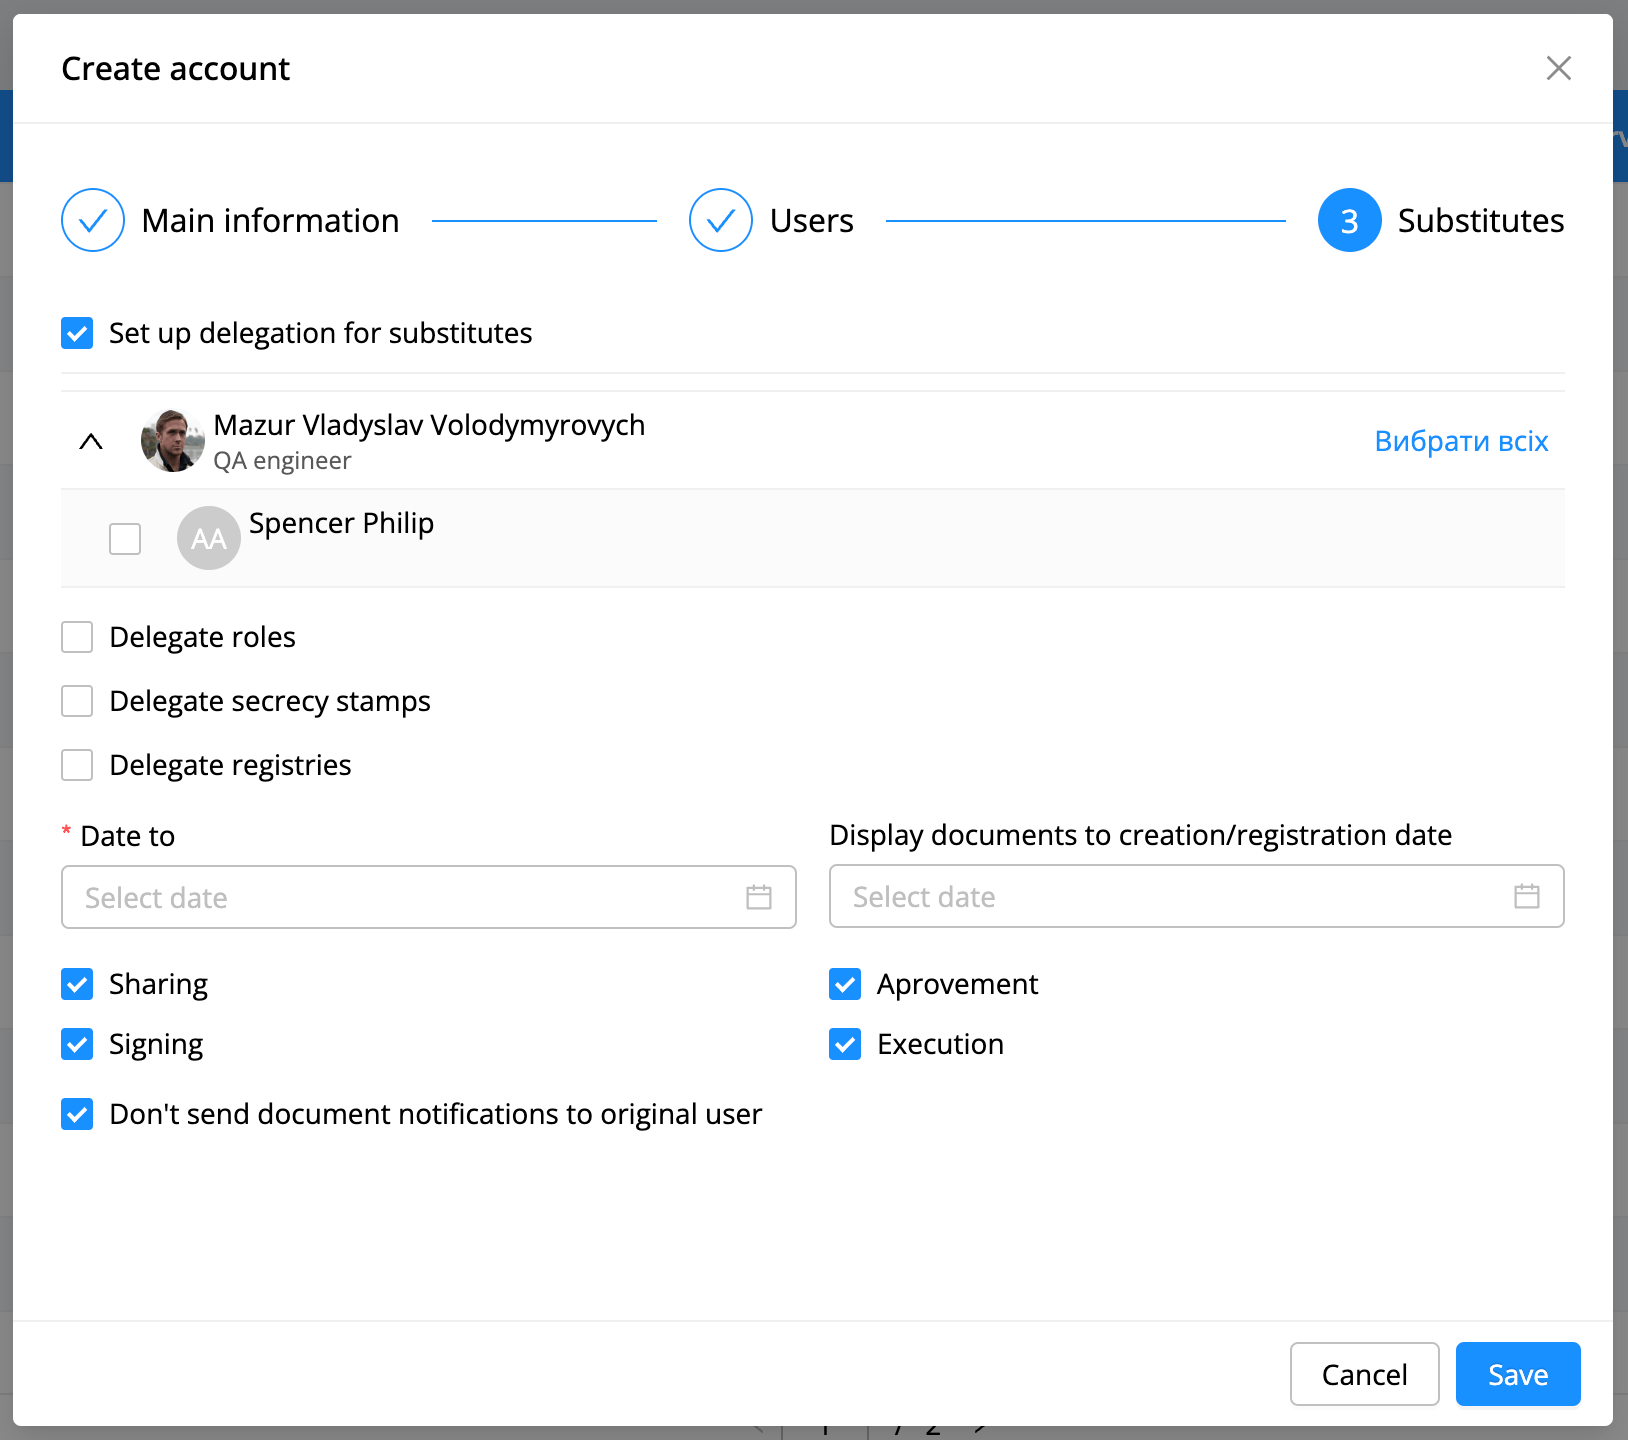
In the third step, you can expand the existing delegation to a new account immediately upon its creation.
For delegation, all standard settings are available, as in the section.
[Admin page] - [System] - [File Storage]
The system allows you to manage file storage. To add new storage, you need:
Click on
Fill in all fields:
Name. File storage name.
URL. Network location of the server.
Type. Can be Primary or Archive.
Priority. Integer value.
Accounts. Choose a storage account.
File storage URL depends on operating system of your server.
Note! They are usually as follows: linux server - [file:///opt/filestorage/primary] & [file:///opt/filestorage/archive] Windows server - [file:///C:\data\primary] & [file:///C:\data\archive] |
|---|
[Admin page] - [System] - [Translations]
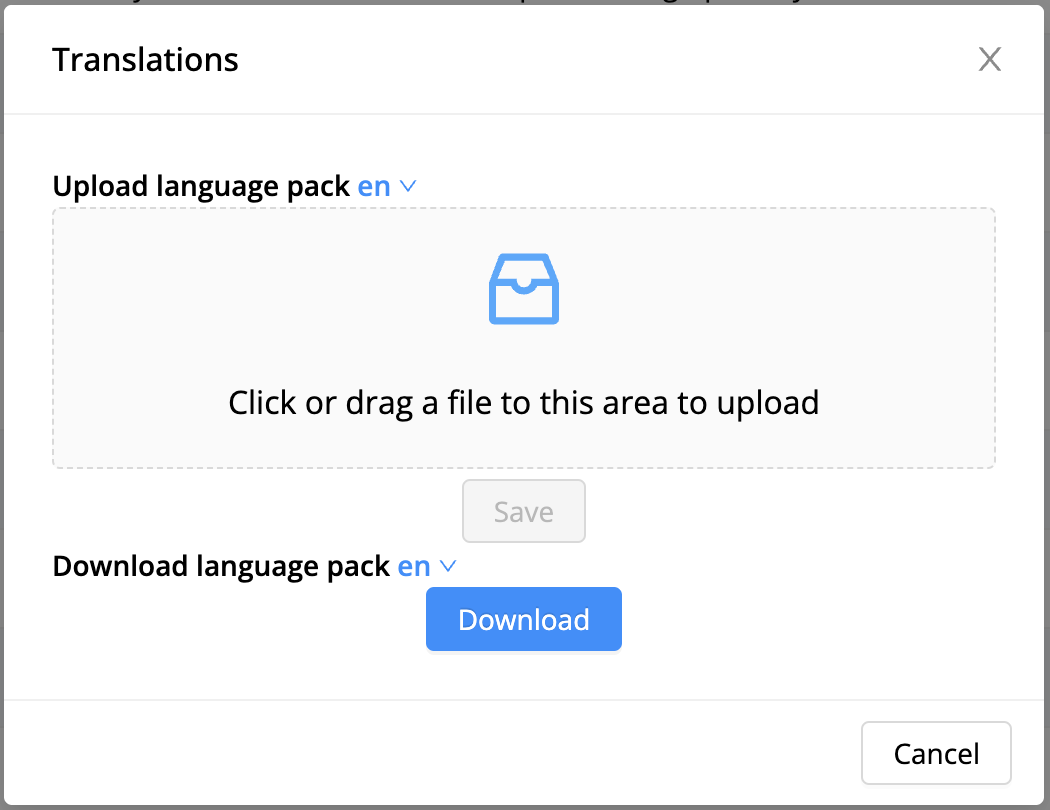
The section is used for downloading and unloading system translations. This section loads the translations used by the system backend when displaying errors and system messages.
To download the translation, you need:

Move the cursor on
Go to section [Admin page] - [System] - [Translations]
Download the required language pack
[Admin page] - [System] - [Nomenclature numbers]
The Nomenclature Numbers section is used to create and edit the Document Number Template. Used to create a registration mask. When creating or editing a template in the business process design section.
To create a nomenclature number, you need:
Move the cursor on
Go to the section [Admin page] - [System] - [Nomenclature numbers]
Click on
Fill in all the fields and choose the appropriate account:
Name. Give a name to the nomenclature number.
Document number template. Fill in the mask for the registration number.

This box contains a hint. Click on the icon and a list of all possible combinations for the registration number mask will appear.
Importantly! The nomenclature number mask must contain the parameters $num and $yy or $yyyy |
|---|
Note!
In the number, you can substitute the value from the document field, you need to add |
|---|
Current document number. Specify the number from which to start the numbering.
Account. Specify the account in which this number will be available.
[Admin page] - [System] - [Decorators]
The Decorators section is used to view a list of available decorators and watermarks.
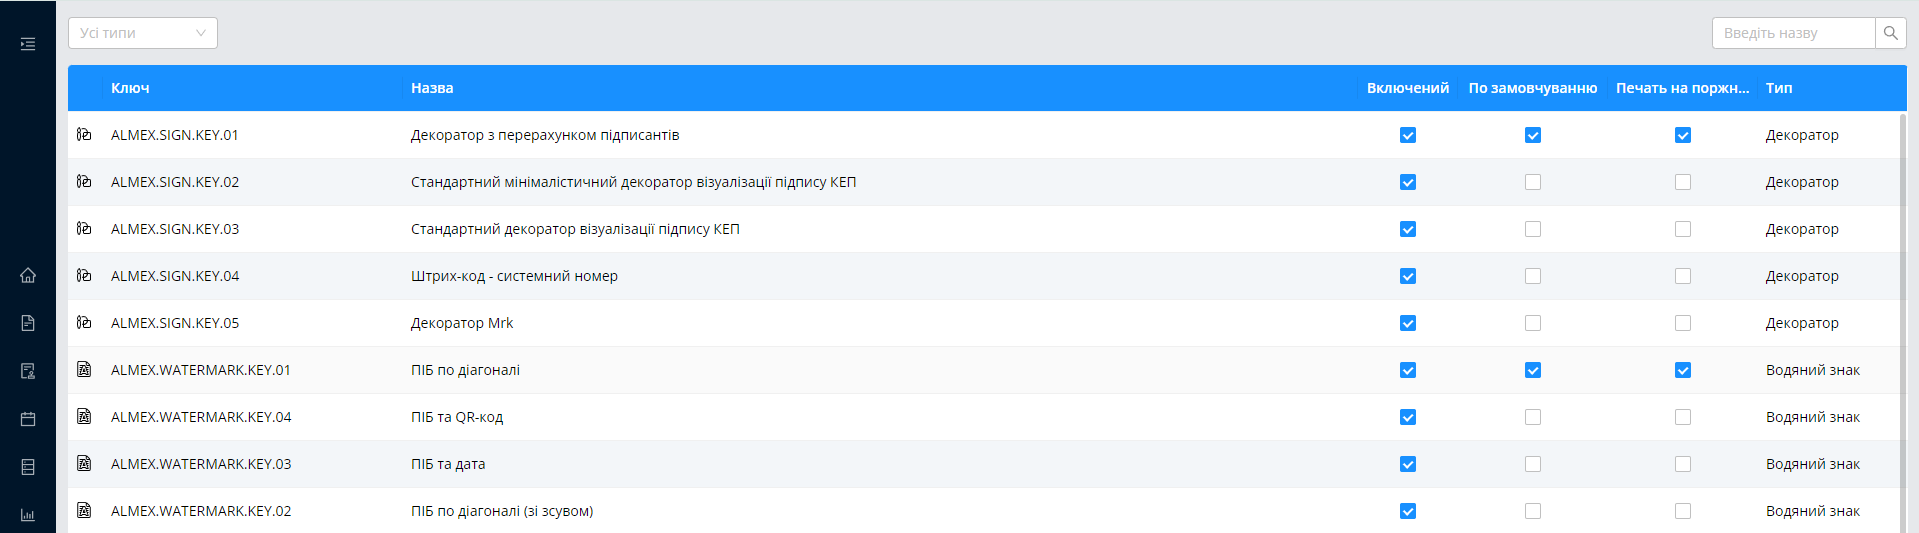
The system administrator can enable the setting [by default] decorator, watermark, enable use to print barcode on blank attachment and choose which types of attachments it applies to.
The attachment types setting applies to all templates where a decorator/watermark will be selected.
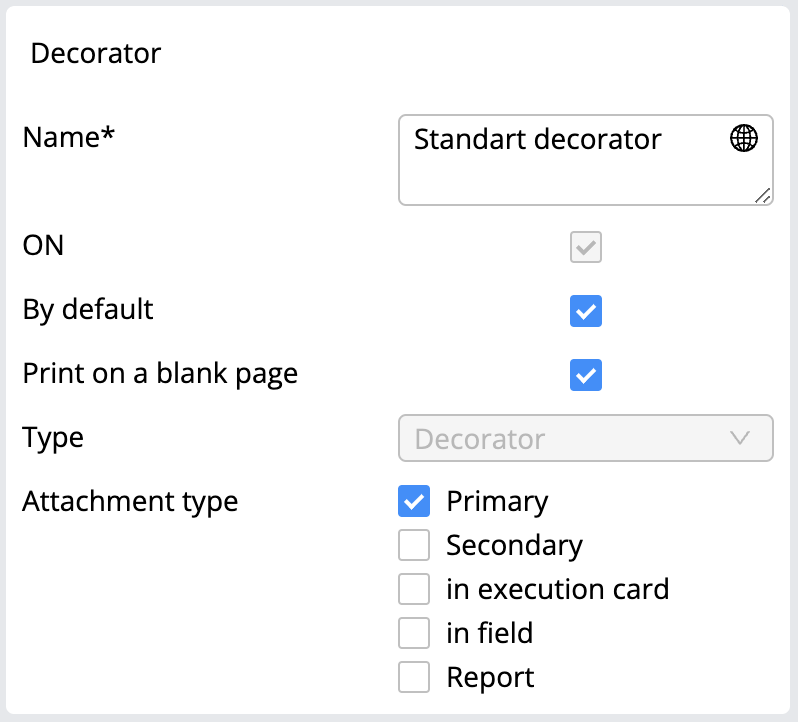
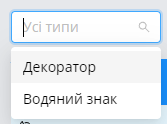
It is possible to change the name of the decorator in the list. Also search by name and filtering by type are available on the page.
[Admin page] - [System] - [Scheduled Tasks]
This section of the platform serves to control system tasks. Here, the user can manually launch a night task. For example, to transfer cases - jobTask or convertAttachments converting attachments.
To create a scheduled task, you need:
Move the cursor on
Go to [Admin page] - [System] - [Scheduled Tasks]
Click on
Select the required task
If the user has the ADMIN_SCHEDULER_EXECUTE role then it is possible to delete a scheduled task that has not yet occurred.
Filtering by the following parameters is also available in this section:
By period
The status of the scheduled task
Type of scheduled task
[Admin page] - [Calendar]
The calendar section is designed to work with such system functionality as:
Resources
Rooms
Weekends and holidays
Resources.
The section serves to manage resources for creating events in the calendar.
To create a resource, you need:

Move the cursor on
Go to [Admin page] - [Calendar] - [Resources]
Click on
Fill in all fields
Rooms.
This section has the following functionality:
Creation of premises
Work with resources
Used to inform participants of an event that can be created in the calendar.
Weekend and holidays. The section serves to work with the calendar, namely: with weekends and holidays.
There are several types of creation of weekends and holidays.
To create weekends or holidays, you need:
The first way
Move the cursor on
Go to [Admin page] - [Calendar] - [Weekends/Holidays].
Click on

Select the required option to create weekends or holidays
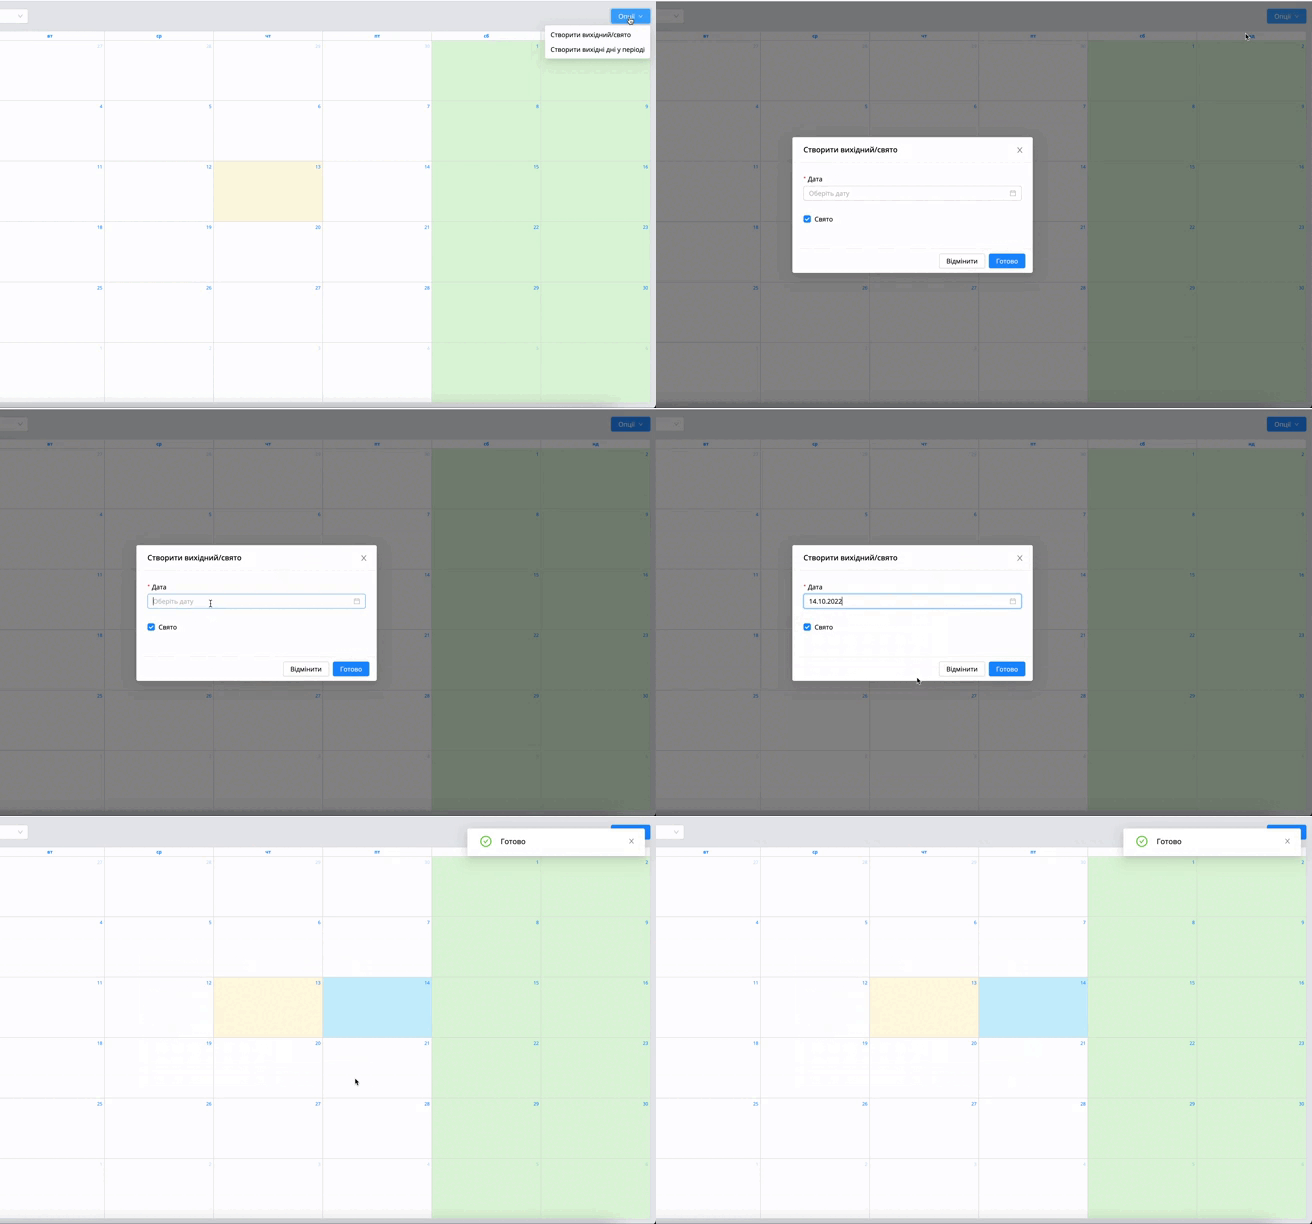
| Note! [ADMIN_WEEKEND_UPDATE] role is required to display this section |
|---|
The second way:
In the open section of the calendar, choose a date that is needed.
Click on
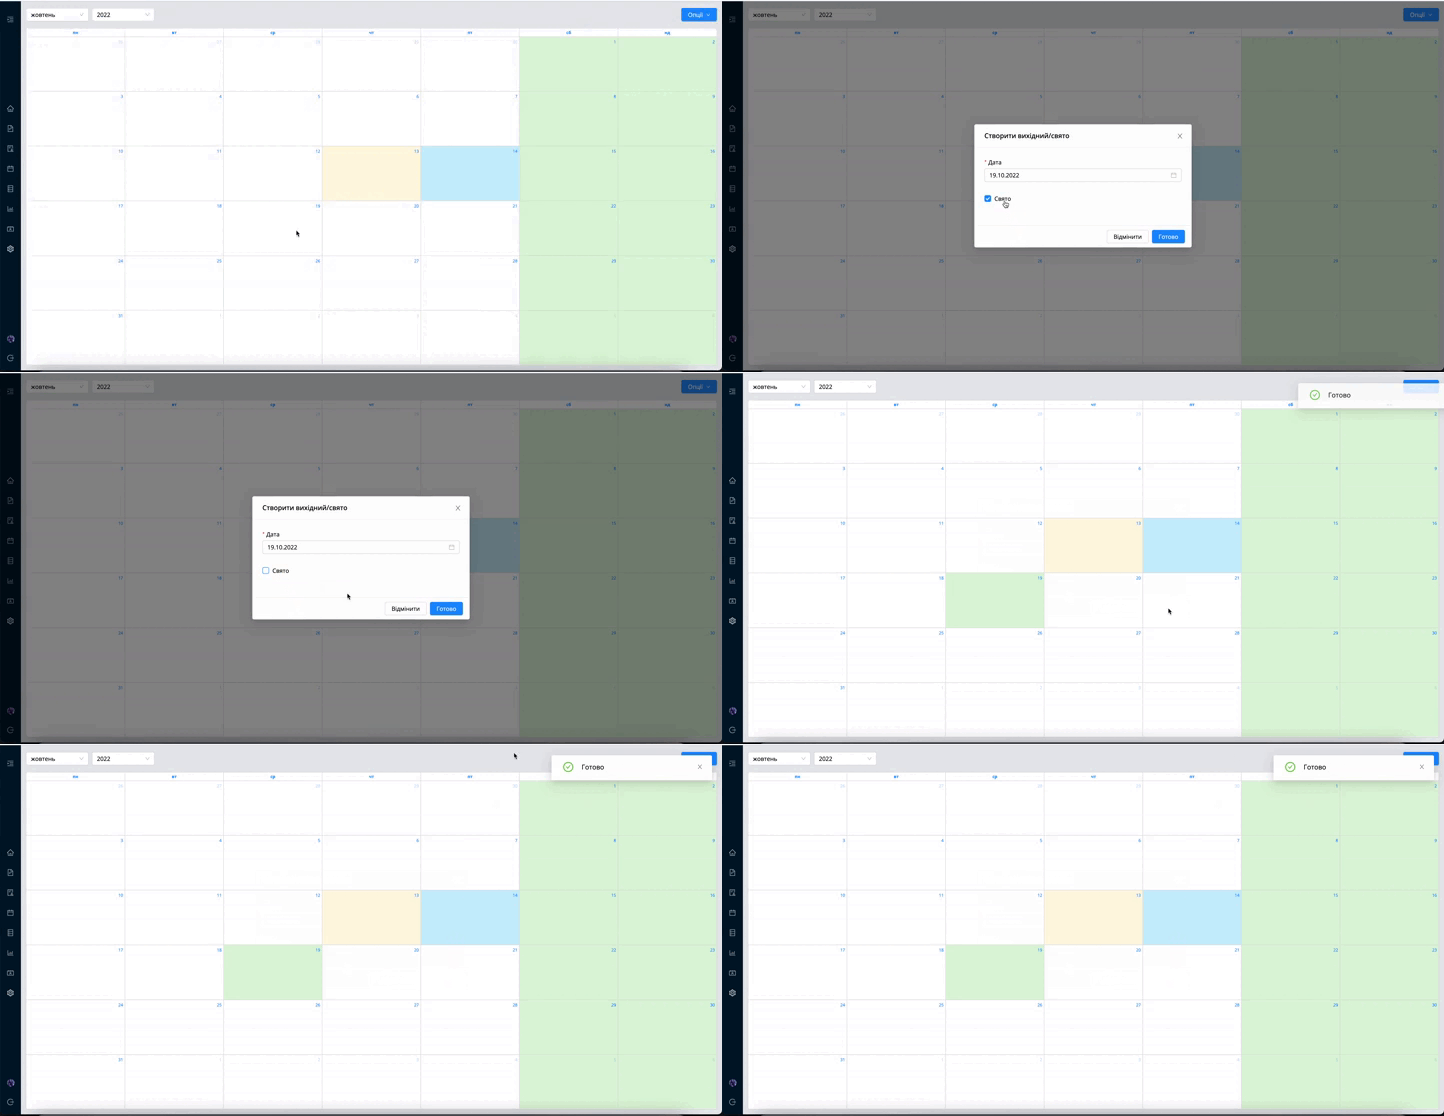
The user can create a holiday in the calendar.
Business process design
The BPM section allows you to manage:
Document groups and templates.
Create necessary business processes, add additional fields.
Manage reports for each document template.
Configure access to templates.
Importantly! By default, the system has a limit on the number of simultaneous use of stages and transitions in one business process template. Limit - 50 objects. This limit can be increased in system settings. |
|---|
[Designing a business process] - [Creating a group of templates]
A group of templates helps to combine documents according to the characteristics of a certain group of documents. For example, a group of organizational and administrative documents (Contracts) can include such templates as contracts, Application for leave, Orders, and others.
To create a group of templates, you need:

Move the cursor on
Go to section [BPM] - [BPM - process]
Click in the open section
Select "Group" from the drop-down list
Click on
Fill in all fields
Name of the group. The name will be displayed in the navigation menu for users and when creating a new document.
Description. Displayed when filtering and creating a new document.
Category. The field is informative.
Order Number. Determines the location of this group in all drop-down menus and lists of the system. For example, an Order of “0” indicates that the group will always be first in all lists. If order “0” is specified for multiple groups or templates, sorting is alphabetical.
Don't show in filter. The setting allows the to hide the template when filtering by templates.
[Designing a business process] - [Creating a template]
A template is an example of a document type that users will use to create documents. The template defines the business process followed by the document, a set of conditions and parameters for transitions between stages.
There are several ways to create a business process template in the system:
Creating a business process template

Move the cursor on
Go to section [BPM] - [BPM - process]
Click on in the open section
Select "Template" from the drop-down list
Click on
Fill in all the fields and set the necessary settings:
Template type. There are several types of template:
Document. This is the main type by which documents are created in the system.
Discussion. This type is used exclusively for planning meetings.
Discussion question. Used to create a meeting question via a document.
Discussion protocol. It is used to design a protocol that will be automatically created after the meeting.
Name. The name will be displayed in the navigation menu for users and when creating a new document.
Description. Displayed when filtering and creating a new document.
Group. The template group to which the new template will belong in the system.
| Note! If you don't specify a group, the template will automatically go into the [Without Group] group. This group will be displayed in the document creation window. |
|---|
Form summary. Has two functions:
If enabled - allows you to pre-create a summary of the document. The user won’t need to fill in it during document creation.
If disabled - when creating a document, the "Summary" field will be displayed and the user will need to enter it manually.
See more in detail in the document section.
Order number in the list of templates. Allows the user to choose the sequence of process display in the document selection list in the modal creation window.
Set the document number manually. Allows the user to assign a document registration number when creating it, instead of automatically assigning a number according to the nomenclature number.
Nomenclature numbers. Includes the following settings options:
Without number. It is used by default. The document will be without a registration number with this setting.
Existing number. If the document needs to have a registration number previously created in the administrative section [Nomenclature numbers].
New number. Used when standard number masks are not suitable. Allows the user to create a new nomenclature number.
Mask. For the document template, according to which the registration number will be generated. The mask must be unique for each document type within the same account.
Generate PDF attachment. All attachments in the document will be generated in PDF after passing the document through a Link with the “Draft Attachments” and “Publish” settings.
More details in section.
File extension for conversion. The file extension for which the document conversion will work is recorded in this setting
Add secrecy stamp. The user will be able to add secrecy stamps to this template(document).
If the setting is enabled, an additional field will appear where you can add an available secrecy stamp. A secrecy stamp added in a template cannot be deleted when creating a document.
More information in section.
Hide automatic stages in the execution tree . Allows the user to hide automatic stages during execution (E-MAIL, MUX, Report, Compare and so on). Learn more about automatic stages further in section.
Hide the steps of external modules in the execution tree. Allows you to hide the steps of external modules in the execution tree.
Such as:
Auto delegation
Module for working with counterparties
Don't show in filter. The setting allows the to hide the template when filtering by templates.
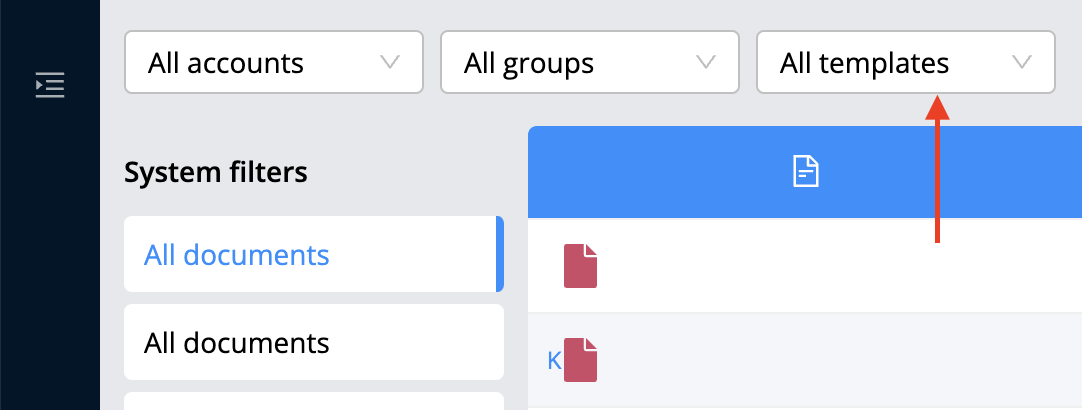
Document status. Provides access to the [Document Status] option The document must be registered. The setting also gives access to editing a status comment, as well as deleting a status comment.
Importing an already created business process template:

Move the cursor on
Go to the section [ВРМ] - [ВРМ- process].
Click on in the open section
Select [Template] from the drop-down list.
Press
Fill in the fields and upload the JSON file.
Importantly! If this is not done, an error will appear that the nomenclature number belongs to another group of accounts. When importing, users who have been configured in stages, handbooks in fields, users in process roles, users who have been added to the [User choice] field settings will not be transferred. |
|---|
Additional actions of an already created business process template.
The already created business process template has the following options:
Edit. Provides an opportunity to edit an already created business process template.
Delete. Allows the user to delete a business process template.
Export. Allows the user to download the created business process template in JSON format for further use during import.
[Business process design] - [Steps]
The Almexoft platform is built according to the low-code principle, which makes it possible to configure various business processes without programming.
To implement the selected work paradigm, a visual editor of business processes and data forms is implemented in the system, where business processes are presented in the form of processing stages of a process instance and connections between them.
The notation of the designer is close to the generally accepted BPMN 2.0, but for the convenience of construction, some attributes of the business process have been enlarged and moved to properties. A convenient process properties editor allows you to quickly customize the selected object (stage, transition).
Importantly! Each business process must have such stages as:
There can be more than 1 End stage in the template. |
|---|
| Note! All blocks must be connected in such a way that each of them has the opportunity to get to the End stage. Any other sequence of blocks will violate the logic of document processing and will not allow creating a correct template. To check the correctness of the created scheme, the administrator can execute the Verify method. |
|---|
The following access options are available in the parameters for all stages:
| Parameter name | Action |
|---|---|
| Author | The author of the document |
| Responsible | Responsible for the document |
| Participants | Participant of the current stage |
| User or group | Individual user or group of users |
| System role | Access with a system role |
| To everyone who sees the document | Anyone who has any access to the document |
For each stage there is a setting, there is a setting that sends the request to an external server.
pre rest call-back. Sends a request before moving to a stage.
post rest call-back. Sends a request after transitioning to a stage.
In the field, you simply need to enter the URL of the external service that will receive the request. Additional parameters are not allowed. The request body is generated at the core of the system and does not change.
The request is sent by the post method and has the following body:
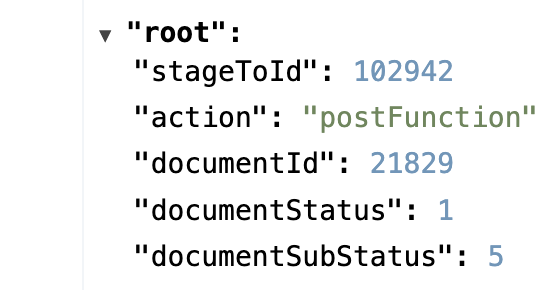
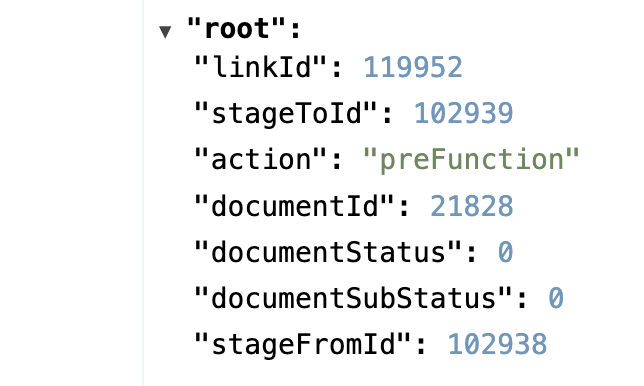
| Note! After the user makes a decision, the drools (pre-function) script is executed first, and then the pre request is sent. The post script and call-back work the same way. |
|---|
Standard steps for business process design
Bloc Start
This block is used to create a draft or project in the system. It is mandatory for any business process.
It has the following parameters:
Name. This name will be displayed in the execution tree of the document.
ID. Used to work with Drool - scripts
Description. Will only be displayed inside the template. It is only informative.
Display order. The order of displaying the stage in the course of execution during the creation and editing of a document.
Sub status. Only one status "Draft" is available for the Start step. Regulated by the functionality of the platform.
Additional statuses. You can set an additional status in the template, which is assigned when moving to a stage. A detailed description is provided in the section.
View form. Responsible for the form of short and full content when opening a document. Always has the [use default] option.
Editing form. Responsible for displaying additional fields on the document creation or editing form at this stage.
There are two types of forms:
inbox
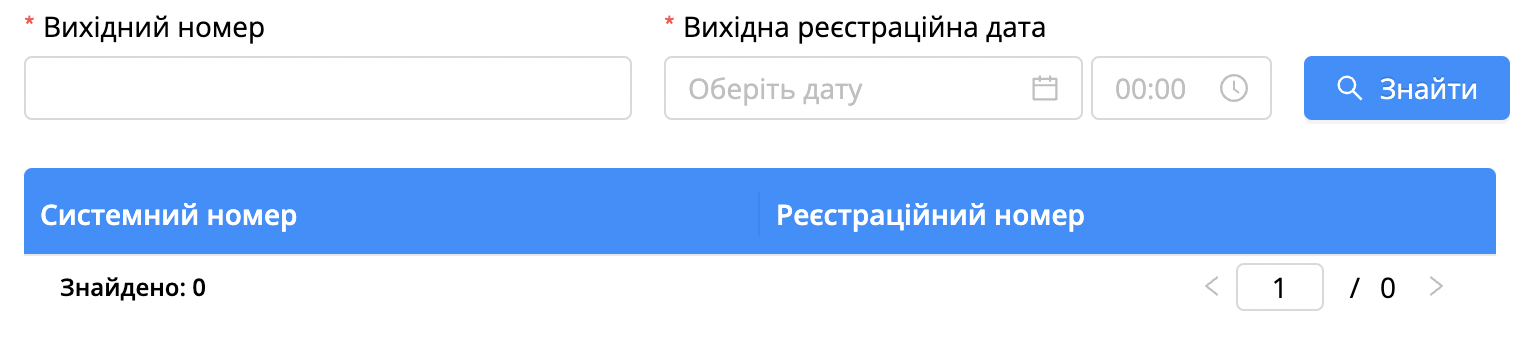
inbox_simple

Tabs visibility Allows the user to hide standard tabs (chat, history, attachments) at certain stages.
| Note! At the start stage, the [chat] and [history] tabs are unavailable. |
|---|
Changes in stage parameters when creating document. When creating a document, allows the author to add a participant to this stage in the [Execution tree] tab. This setting has no effect on the start stage.
| Note! The start stage is not displayed during execution when creating and editing a document. |
|---|
Changes in stage parameters when editing document. Allows the user to change the participants of the step while editing the document and change the deadline of the stage, affecting the display of the additional action "Add participants".
| Importantly! This setting works in connection with the [Edit Card (Summary)] setting. If these two settings are enabled, the [Execution tree] tab will be displayed when editing a document |
|---|
Changes in stage parameters when making a decision. Allows the user to change the participants of the stage and the deadline of the next step when making a decision.
Online editing. Allows the user to edit attachments in the current stage.
Online review. Allows the user to edit attachments with the ability to track changes. If this setting is enabled, all changes in the attachment are highlighted in color and you can see who exactly made these changes. The full name will be displayed next to the text.
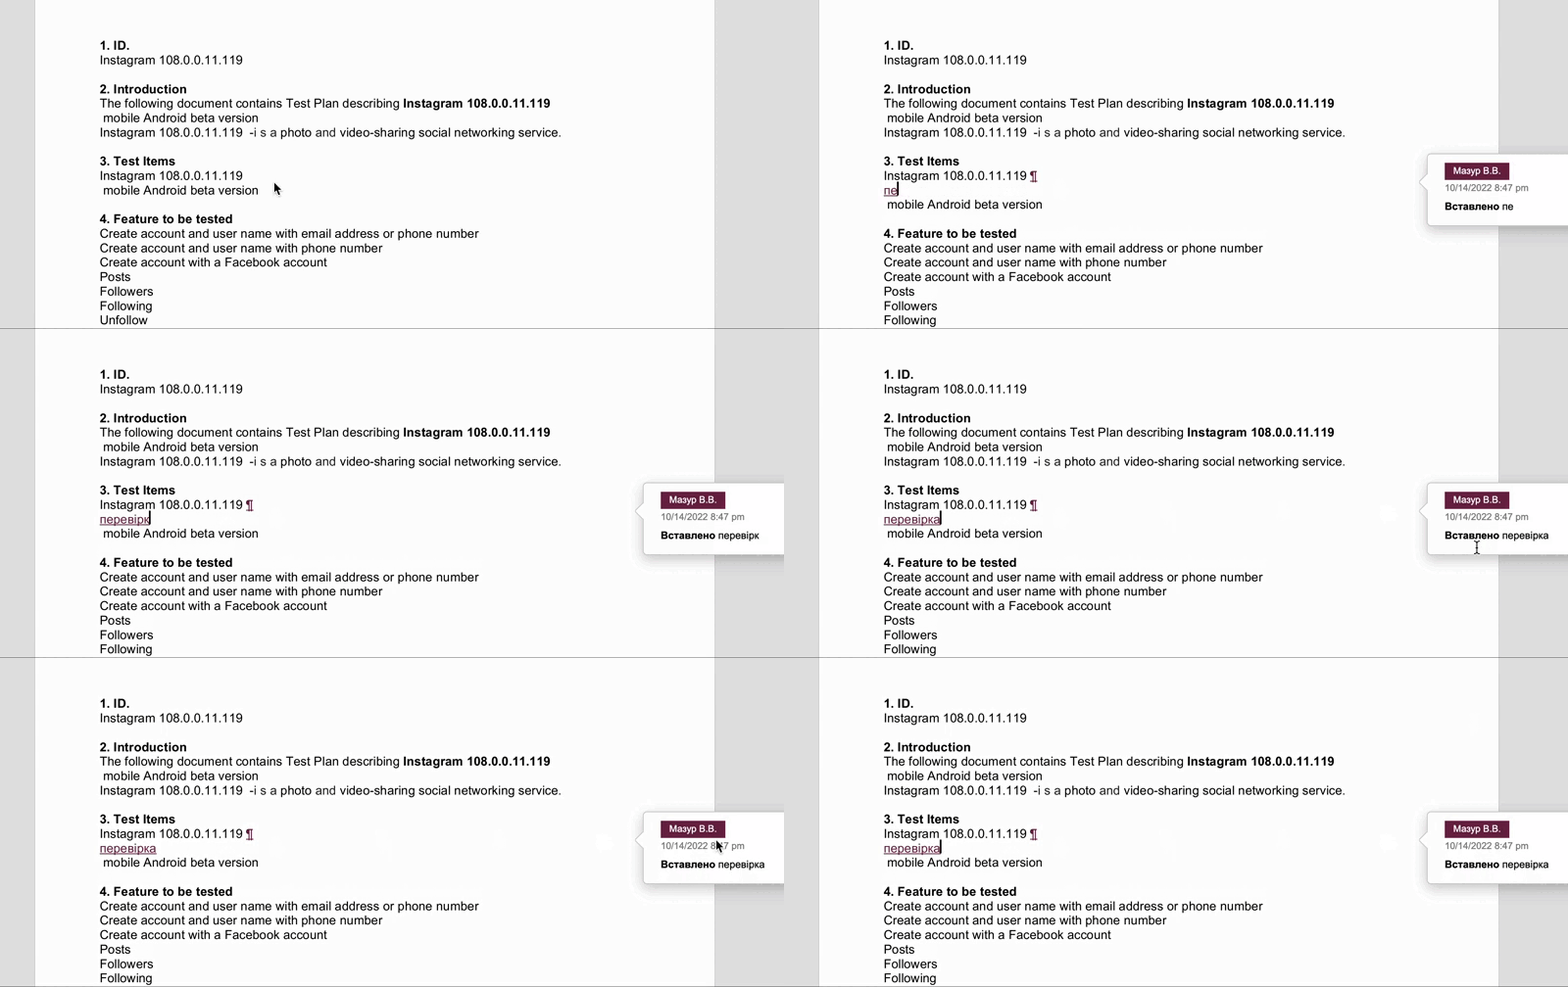
Card editing (summary). Allows the user to edit the summary tab of the document. Also, this setting is required for editing the execution tree (settings - Changes in stage parameters when editing document), to edit the fields(settings - Change content)
Add attachments. Allows the user to add attachments through the document options at the current document stage. Works in connection with the role [USER_ATTACHMENT_UPDATE].
Deleting attachments. Allows the user to delete attachments at the current stage of the document. Works in connection with the role [USER_ATTACHMENT_DELETE].
Download original attachment. Allows you to download the original attachment. Works in connection with the [USER_ATTACHMENT_ORIGINAL] role. Also, inside this setting there is a field [File extensions], in which you need to write the extensions of the files that can be downloaded. More information about downloading original.
Familiarize with document. Allows users to familiarize with the document at the current step.
Ability to sign attachments. Allows you to sign attachments using EDS.
Change content. Allows the user to edit fields in the document, if the fields are displayed [as a tab], this setting will allow the user to edit them, if the fields are in the [information] tab under the summary, then another setting is required [Card editing (summary)]
Display stage after closing. If this setting is enabled, the following setting will be displayed [Display stage after closing for], in which the user can configure the users who will see the step after it closes.
If this setting is disabled, the step will be displayed to all users.
| Note! This setting is enabled by default and is available for display - [To anyone who can see the document (in documents and registries)] |
|---|
Notification sending mode. The following message types are available for this setting:
When moving to stage
When deadline approaches
When is deadline
These types of messages can be turned off and will not send at this stage.
The following sending channels are available for notifications:
Use by default
EMAIL
PUSH
| Note 1 By default, the system will use the server settings for sending notifications (email & push), and the user can also configure sending notifications via one channel within one stage. |
|---|
Drools (Pre-function). Used to use drools scripts in the JAVA dialect.
Drools (Post function). Used to use drools scripts in the JAVA dialect.
Bloc Step
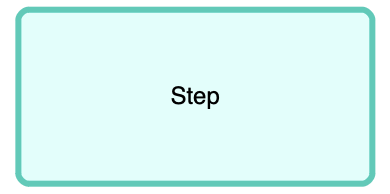
This block allows the user to add a new stage to the business process, to which the document will go through transitions (links).
It has the following parameters:
Name. This name will be displayed in the execution tree of the document.
ID. Used to work with Drool - scripts
Description. Will only be displayed inside the template. It is only informative.
Display order. The order of displaying the stage in the course of execution during the creation and editing of a document.
Action type. It serves for the correct operation of the system logic. The following types are available:
Execution
Signing
Approvement
Sharing
| Note 1 When switching the action type, the users on the stage are cleared, if they were there. |
|---|
Note 2 If the action type is [Signing], then an additional setting [Number of signatories] will appear in the stage parameters. By default, there is 1 user. |
|---|
Sub status. Responsible for document filtering in the system filters in the documents/registries section.
The following statuses are available:
On approval
On signature
In work
In execution
On registration
On correction
More information about system filters.
Additional statuses. You can set an additional status in the template, which is assigned when moving to a stage. A detailed description is provided in the section.
Approval type. Responsible for the order of execution of the step in the document.
The following types are available:
Parallel
Consistently
If the type is [Consistently], then users will make decisions in the order in which they were presented in the business process template.
If in parallel, then everyone can make a decision at the same time, without waiting for each other.
Sending/receiving. Allows the user to specify whether the participant of the current stage is the recipient or the sender of the document, or neither of the two options. Serves to generate $numksp if this is a stage with action type "Signing" and the participant is the recipient.
Available options are:
No
Receiving
Sending
Required stage. Responsible for mandatory completion of the [participants] field at the stage. If you enable the setting [Change stage parameters during document creation], then the user can not select participants in the stage. Completing this stage will be mandatory when creating a document in the [Execution tree] tab.
Register document. This setting is responsible for automatically assigning a registration number when entering a stage. The nomenclature number must be selected in the template.
Hide when creating document. The setting is responsible for displaying the stage during execution in the document creation window.
Allow additional approval. Responsible for the possibility of sending the document for additional approval. With this setting, the document action [Additional approval] is displayed.
Periodical execution. Allows the user to configure the periodic opening of execution cards. It has the following settings (Period - after what time to open cards, End of cycle - when to end the cycle, Execution time - decision time for an open execution card).
View form. Responsible for the document creation form. Always has the [use default] option.
Edit form. Responsible for displaying additional fields on the document creation or editing form at this stage.
There are two types of forms:
inbox
inbox_simple
Tab visibility. Allows the user to hide standard tabs (chat, history, attachments) at certain stages.
Note! The [history] tab is displayed in the full document details. |
|---|
Changes in stage parameters when creating document. When creating a document, allows the author to add a participant to this stage in the [Execution tree] tab.
Changes in stage parameters when editing document. Allows the user to change the participants of the stage while editing the document and change the deadline of the stage, affects the display of the additional action "Add participants".
Importantly! This setting works in connection with the [Card editing (Summary)] setting. If these two settings are enabled, the [execution tree] tab will be displayed when editing a document |
|---|
Changes in stage parameters when making a decision. Allows you to change the participants of the stage and the deadline when making a decision.
Online editing. Allows you to edit attachments in the current stage.
Online review. Allows you to edit attachments with the ability to track changes. If this setting is enabled, all changes in the attachment are highlighted in color and you can see who exactly made these changes. The full name will be displayed next to the text.
Card editing (summary). Allows the user to edit the summary tab of the document. Also, this setting is required for editing the execution progress (settings - Changes in stage parameters when editing document), for editing fields (settings - Change content)
Adding attachments. Allows the user to add attachments through the document options at the current document stage. Works in connection with the role [USER_ATTACHMENT_UPDATE].
Deleting attachments. Allows the user to delete attachments at the current stage of the document. Works in connection with the role [USER_ATTACHMENT_DELETE].
Download original attachment. Allows the user to download the original attachment. Works together with the role [USER_ATTACHMENT_ORIGINAL]. Also inside this setting there is a field [File extensions], in which you need to write the extensions of the files that can be downloaded. More about downloading the original.
Ability to sign attachments. Allows the user to sign attachments using EDS.
Change content. Allows the user to edit the fields in the document, if the fields are displayed [as a tab], then this setting will allow you to edit them, if the fields are in the [information] tab under the summary, then you need another setting [Edit Card (Summary)]
Execution term. Responsible for the completion date of the stage.
Participants. Stage participants are added to this setting, which will then be displayed in the document information tab.
Display stage after closing. If this setting is enabled, the following setting [Display stage after closing for] will be displayed, in which you can configure the users who will see the stage after it closes.
If this setting is disabled, the stage will be displayed to all users.
Note! This setting is enabled by default and is available for display - [To anyone who can see the document (in documents and registries)] |
|---|
Notification sending mode. The following message types are available for this setting:
When moving to a stage
When deadline approaches
When is deadline
These types of messages can be turned off and will not be sent at this stage.
The following sending channels are available for messages:
Use by default
EMAIL
PUSH
Note 1 By default, the system will use the server settings for sending messages (email & push), and you can also configure sending messages via one channel within one stage. |
|---|
Drools (pre-function). Used to use drools scripts in the JAVA dialect.
Drools (post-function). Used to use drools scripts in the JAVA dialect.
End (stage)
This stage serves as the closing of work on the document. This stage is mandatory for any business process.
Name. Will be displayed in the document execution tree and in the document template.
ID. Used to work with Drool - scripts
Description. Will only be displayed inside the template. It is only informative.
Display order. The order of displaying the stage in the execution tree tab during the creation and editing of a document.
Archive period. Responsible for the term after which the document will change its status to [Archived] and will be displayed in the corresponding system filter.
Sub status. It serves to generate reports, as well as to configure system filters.
There are the following parameters:
Closed. The document has been completed and closed with positive progress.
Learn more about document statuses Glossary.
Additional statuses. You can set an additional status in the template, which is assigned when moving to a stage. A detailed description is provided in the section.
Register document. This setting is responsible for automatically assigning a registration number when entering a stage. The nomenclature number must be set in the template.
View form. Responsible for the document creation form. Always has the [use default] option.
Edit form. Responsible for displaying additional fields on the document creation or editing form at this stage.
There are two types:
inbox
inbox_simple
Tabs visibility. Allows the user to hide standard tabs (chat, history, attachments) at certain stages.
Note! The [history] tab is displayed in the full document details. |
|---|
Download original attachment. Allows the user to download the original attachment. Works in conjunction with the [USER_ATTACHMENT_ORIGINAL] role. Also inside this setting there is a field [File extensions], in which you need to write the extensions of the files that can be downloaded. More about download attachment.
Familiarize with document. Allows users to familiarize with the document at the current step.
Display stage after closing. If this setting is enabled, the following setting [Display stage after closing for] will be displayed, in which you can configure the users who will see the stage after it closes.
If this setting is disabled, the stage will be displayed to all users.
Note! This setting is enabled by default and is available for display - [To anyone who can see the document (in documents and registries)] |
|---|
Notification sending mode. The following message types are available for this setting:
When moving to a stage
When deadline approaches
When is deadline
These types of messages can be turned off and will not be send at this stage.
The following sending channels are available for messages:
Use by default
EMAIL
PUSH
Note 1 By default, the system will use the server settings for sending messages (email & push), and you can also configure sending messages via one channel within one stage. |
|---|
Drools (pre-function). Used to use drools scripts in the JAVA dialect.
Drools (post-function). Used to use drools scripts in the JAVA dialect.
Automatic and extended steps for business process design
In the Almexoft platform, it is possible to work with additional stages such as:
Automatic.
Extended steps that extend the current business process template.
Automatic steps include:
Compare. Allows the user to adjust the logic of the transition between stages by analyzing pre-filled information in the document. The Compare stage has all the same standard settings as the step. At this step, it is necessary to use a script that will execute the written logic in the script and then make a decision on the desired transition.
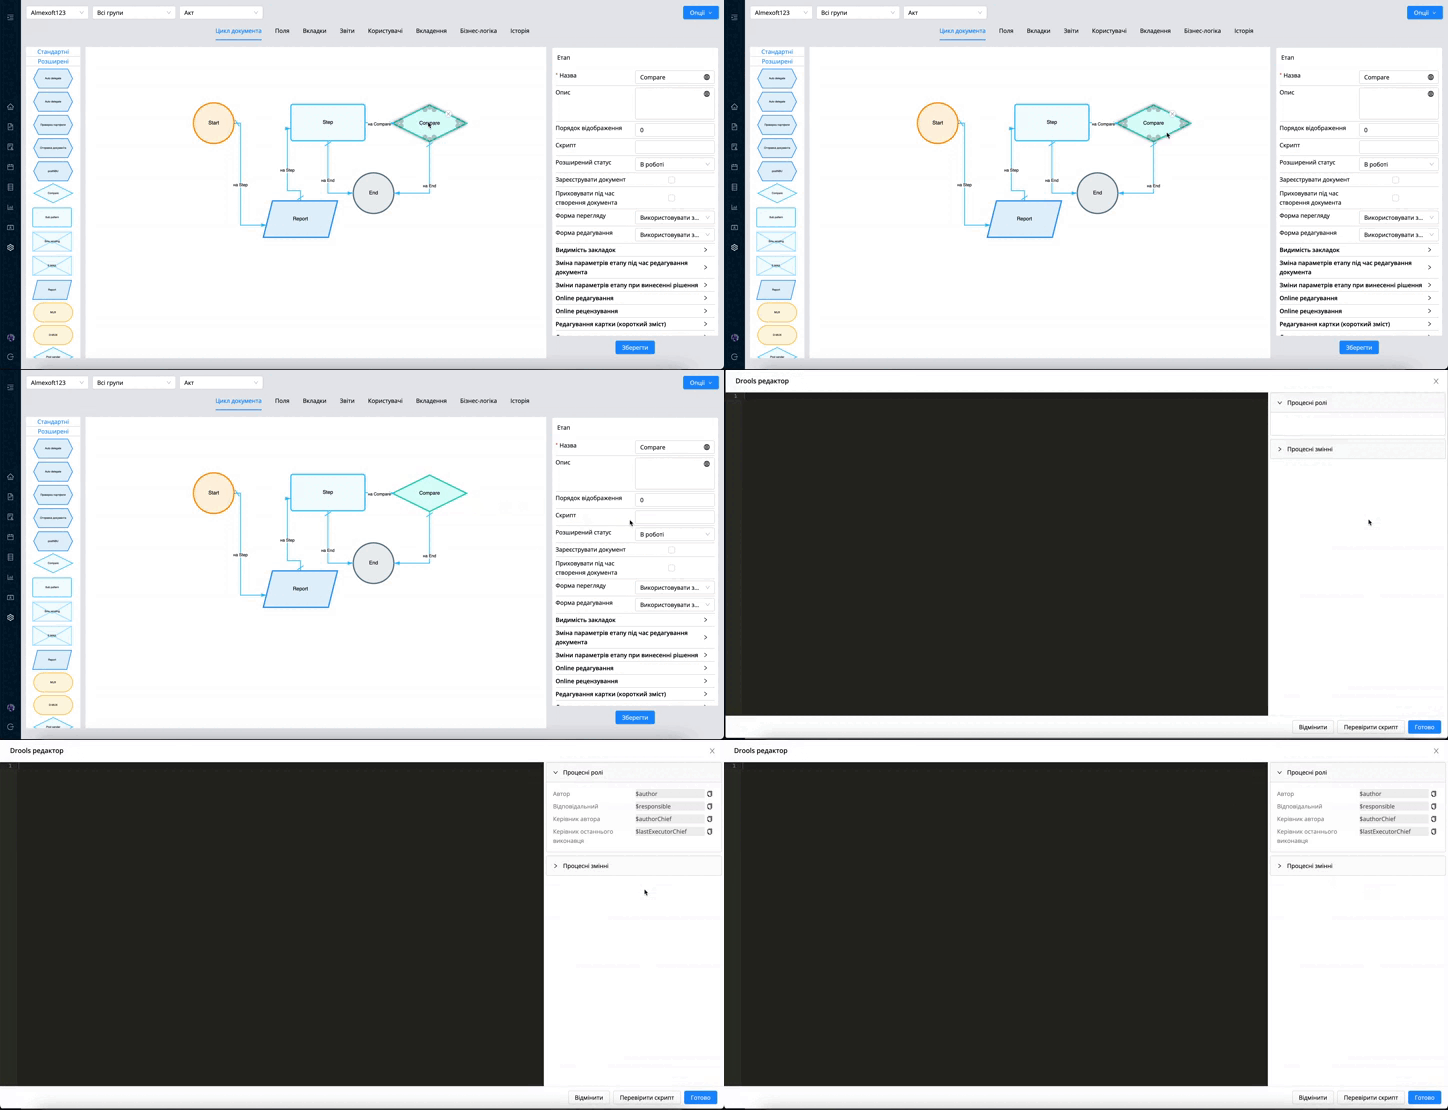
SMS Sending. The automatic sms sending step is responsible for sending sms messages when the document moves to this step. The sms sending step has all the settings that are in the Step, except for some specific settings for the business process template.
The step has the following additional settings:
Message text. The text of the notification to be sent.
Phone number. The number to which the notification will be sent.
For this step to work, the user needs to pre-adjust the sms configuration parameters from your SMS server in the system settings file (name_of_your_company.properties).
List of parameters:
sms.channel.host:
sms.channel.port:
sms.channel.login:
sms.channel.password:
sms•channei. sendex.alias:
sms.channel.translite:false
sms.channel.reconnect.interval:1000
sms.channel.enguire.link.interval:1000

Note! In fields of automatic step settings, you can use keys from document fields or system keys. More details in the glossary. |
|---|
Email. Responsible for sending e-mail through the system. When moving to the E-MAIL step, a letter with a pre-filled subject, content of the letter and an attachment will be sent to the specified mail address. The Email step has all the settings that are in the Step, except for some specific settings for the business process template:
Attachment type. There are 3 types of attachments the system can send:
ORIGINAL - the original file that was uploaded to the document will be sent (if the attachment is converted by the system, the system will still send the original of this attachment).
PDF_UNSECURED - it will send the converted file in the system without a watermark. That is, a file that has been published and converted to PDF in the system.
P7S - if there are signed attachments in the document, then the Email stage will send their envelopes (which the user downloads through the attachment options “upload p7s”).
Attachment types. A parameter that can be used to specify more than one attachment type. This parameter has a hint with the types that can be specified.
Note! If the [Attachments Type] setting is empty, the attachment type is taken from the previous parameter. |
|---|
Attachment mask. It is necessary to specify the format of the attachment that will be sent by email. An example of a mask: (.*)\.pdf , (.*)\.docx , (.*)\.xlsx. This parameter can be filled in through the document field by key.
Example: If the document has 3 attachments (pdf, docx, xlsx) and the [attachment mask] field says - (.*)\.pdf, then the system will send only the file with the pdf extension.
Subject. The text that will appear in the subject line of the outgoing email. The user can substitute values from fields by $keys.
Content of the letter. Text for the main content of the letter. The user can substitute values from fields by $keys.

Examples of keys in Glossary.
Report. Responsible for working with reports. When moving to the Report step, a report is generated and added as an attachment to the document. The Report step has all the same settings as the Step. In addition to some specific settings for the business process template:
Send document to a stop - list.
There are two ways this setting works:
If the setting is enabled, the document will go to the stop list in case of any error with the report added at this stage.
If this setting is disabled, then in the event of an error when creating a report, the document will go through the Report stage and will not create anything.
Attachment format.
The format in which the report file will be created:
PDF
XLSX
DOCX
The appropriate format should also be enabled in the settings of the report itself. More information.
Report template. It is necessary to specify the report template, according to which the attachment is formed. Report creation.
MUX. Serves to extend the parent process to other, separately created children processes, by creating a separate related document. The MUX step has all the same settings as the Ste, except for some specific settings for the business process template:
Copy process roles/variables. Responsible for copying the values of process roles, variables from the parent process to the child process. If this setting is enabled, when the document moves to this step, the values of process roles and variables will be transferred to the created child document (the one that will be created by the mux step), provided that the parent and child (created by the mux step) document have process roles and variables with the same key. More about process roles and variables later in the instructions.
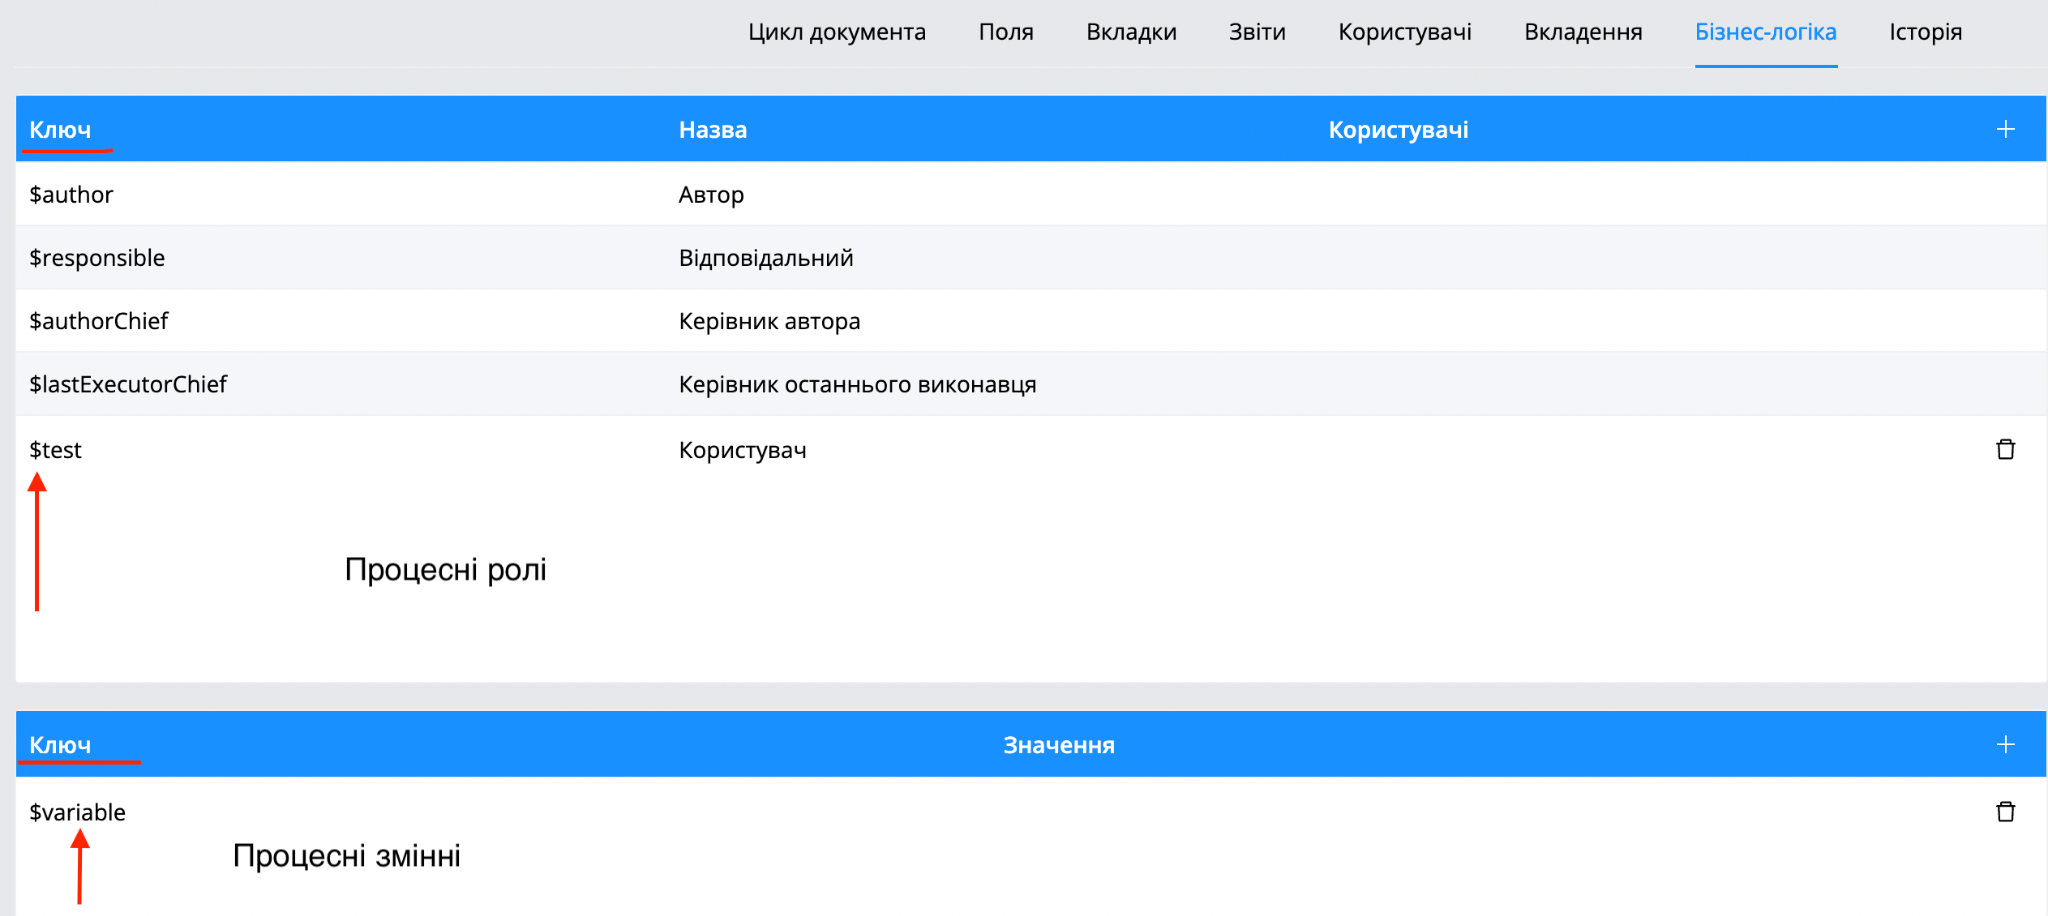
Send document to a stop - list.
There are two ways this setting works:
If the setting is enabled, the document will go to the stop list in case of any error when creating the document according to the template (which is added to the mux step).
If this setting is disabled, in the event of an error creating a child document, the mux step will simply move on to the next stage and the child document will not be created.
Wait for child documents.
The following options are available for selection:
NONE - The document will immediately go to the next step after creating a child document.
CREATED – The document will go to the next step after the child document (created by the mux step) closes (it will go to one of the end steps)
ALL – The document will move to the next step after all child documents generated by previous [mux] steps in the business process template have moved to the end steps.
Copy attachments. The setting type [check box] is responsible for copying attachments from the parent document to the child document.
Attachments type to copy
The following options are available for selection:
Primary. The main attachments of the document.
Secondary. Attachments that are attached as an attachment.
ALL. All types of attachments described above.
Pattern of copied file extensions. (.*)\.docx - used to filter attachments by extension.
Post sender. Allows the user to send post requests to another server - system. The post sender step has all the settings that are in the Step, except for some specific settings for the business process template.
Also has additional settings for sending a request:
Login. This is the user login under which the system will authorize when sending a post request.
Password. User password(external service).
URL. The address to which the post request will be sent.
Role Variable key for request. The key of the process variable, in which the JSON body of the request that will be sent to the external server should be written.
Role Variable key for response. The key of the process variable in which the response coming from the external server will be written.
The URL & Role Variable key for request fields are mandatory. All other fields can be left blank.
Note 1 Standard settings such as: [Online editing], [Online review], [Card editing (summary)] do not affect the operation of automatic stages in any way. |
|---|
Pause. Pause stage, at this stage the document will wait to move to another stage according to its settings.
Additional stage settings:
How long to wait. A field with a jiratime range, in which you can select: minutes/hours/days.
Wait for conversion. The stage will wait until all attachments are converted, after which it will make a decision further.
Until what date. The stage will wait for a specific date to make a decision.
Drools executor. A stage for executing drools scripts that will be executed outside the main thread and will not delay the queue for automatic execution of other stages.
Installed as an additional BPM module.
Extended steps include:
Sub pattern. Allows the user to extend the parent process to other, separately created children, without creating related documents. The Sub pattern step has all the settings that are in the Step, except for some specific settings for the business process pattern:
Document template. The user must specify a child template that will extend the parent process.
Note! Values from the fields of the main template cannot be used in the template that is added to the sub pattern, and users cannot be used in the steps from the main template without adding them to the template (which is added to the sub pattern). |
|---|
[Business process design] - [Transitions]
Transitions are used to link stages together. More than one transition can transfer from one step. The list of settings for the transition may differ, depending on which step the transition transfer from. For example: if it transfers from the step, then the transition will have more settings than the transition that transfers from the step [End].
A list of settings for a transition that transfer from the Step:
Name. It is used to display the name inside the business process template, as well as in the document in the execution tree. More information about actions on documents.
ID. Used in drools scripts. This option is displayed after saving the template, if you only create a transition, then this option will not be displayed until you verify a template.
Description. It is only informative. Only displayed inside the business process template.
Decision display order. Responsible for the order of displaying transitions in the list of document actions. The transition with the number 0 will be at the very top of the main actions of the document.
Attachment drafts. This setting affects attachments that are in the document when a document move to the next step.
There are the following settings options:
Ignore. When a decision is made with this setting, nothing will happen to the attachment.
Publish. While making a decision with this setting, the attachment will be published (if there are keys from the document or system fields inside, then a 2nd version of the attachment will be created and values will be substituted for the keys). If the [Generate PDF attachment] setting is additionally enabled in the template, the attachment is converted to pdf format.
Delete. If the attachment was uploaded and not previously converted, it will be removed from the document when the decision is made with this setting.
Fix version. The version is fixed in the attachment and its editing will be prohibited.
Importantly! In order to convert attachments with a fixed version, the user needs to enable [Forced launch of attachment conversion] on the setting transition. |
|---|
Forced launch of attachment conversion. With this setting, all attachments, previously converted attachments, and attachments with a fixed version will be converted. If the value of the $keys has already been substituted into the attachment, then the 2nd version of the attachment (created by the system) will be deleted from the document and a new version will be created with substituted values.
Requires comment. Responsible for mandatory filing in of the comment field when making a decision.
There are the following settings options:
Optional. The user can fill in or leave out the comment field.
Required. The user must fill in the comment field.
Forbidden. The comment field will not be displayed at all when making a decision.
Requires EDS. Responsible for mandatory signing of the decision.
There are the following settings options:
Optional. The user can sign or not sign the decision.
Required. The user have to sign the decision.
Forbidden. The [Sign EDS] field will not be displayed at all when making a decision.
Requires attachment. Responsible for mandatory adding an attachment when making a decision.
There are the following settings options:
Optional. The user can add or not add attachments.
Required. The user must add an attachment.
Forbidden. The [attachment] field will not be displayed at all when making a decision.
Share document with. In this setting, users are added who will be automatically familiarized with the document when going through this transition.
Author availability. The decision on this transition will be available to the author of the document.
Responsible availability. The person responsible for the document will be able to make a decision on this transition. The person responsible for the document is assigned while creating/editing of the document. More information.
Participants availability. The participants of the step will be able to make a decision on this transition.
User or group availability. The user can set users\groups who will be able to make decisions on this transition.
System role availability. Grant access to decision-making via a system role that is added to a user's profile.
Availability to everyone who sees document. Decisions can be made by all users who have direct or indirect (via the registry) access to the document.
Use by default. A system setting that is set automatically when creating the first transition that transfers from a step.
Importantly! There can be only one transition from each stage by default. |
|---|
Note! If there are 2 transitions from the stage, and there are no participants on the stage, then the document will follow the transition on which the default setting is enabled. |
|---|
Fast decision. Responsible for displaying the decision in the document details instead of the name [Main Actions], the name of the transition will be displayed immediately, and it will be possible to make a decision without clicking on the drop-down list of actions on the document.
Without fast decision:
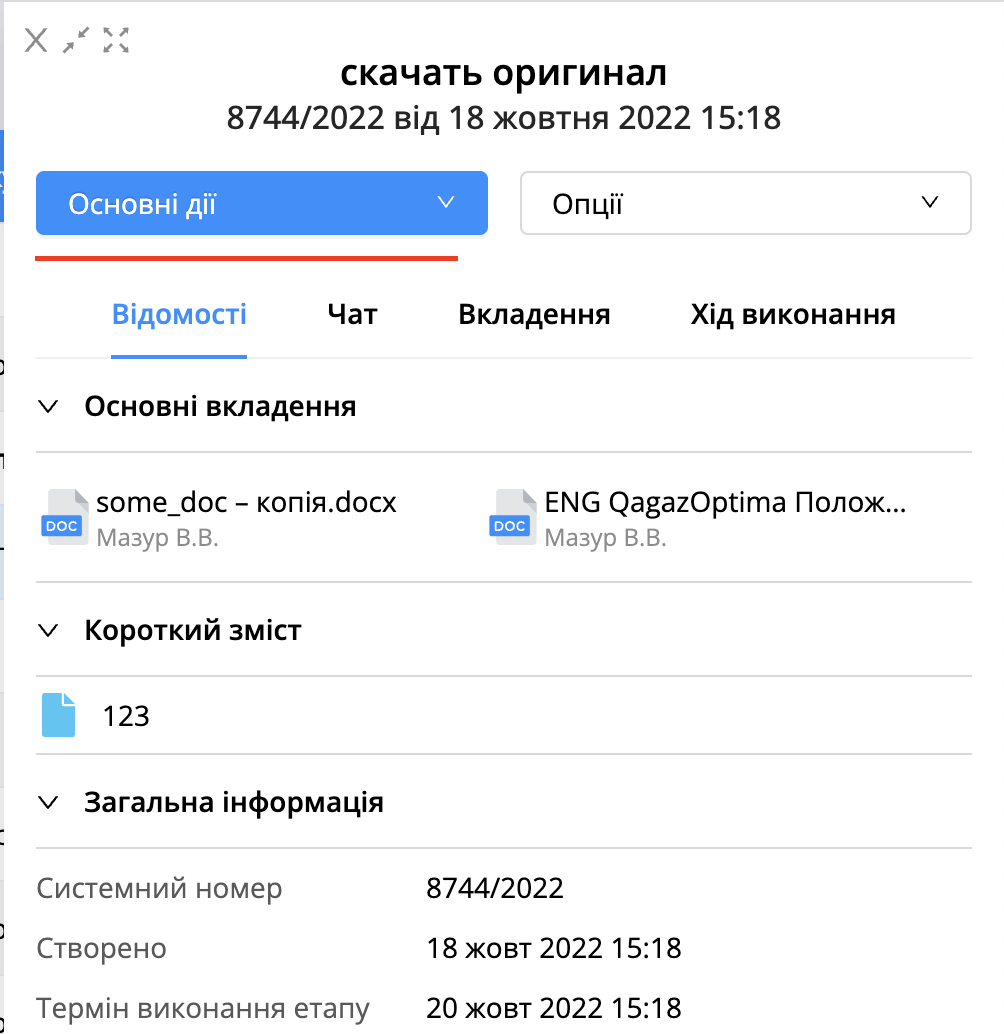
With fast decision:
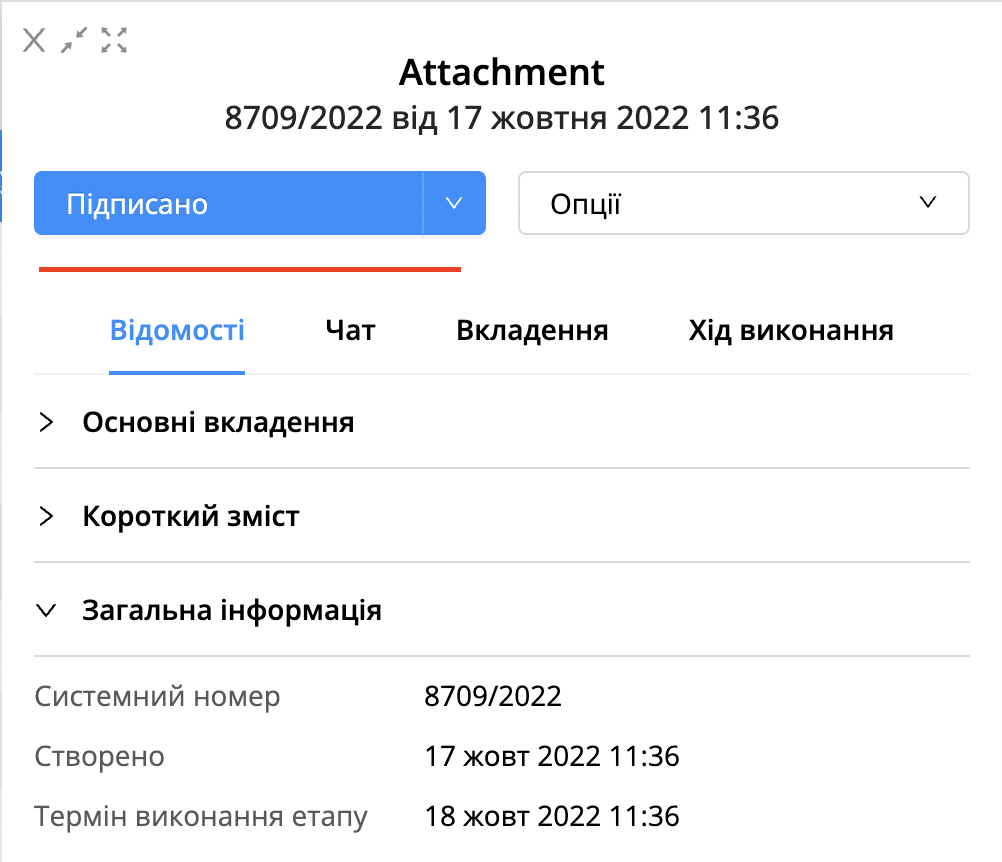
Note! If the settings [Requires comment], [Requires EDS], [Requires attachment] are prohibited at the transition, then when the user clicks on this decision, the document will immediately go to the next step without opening the decision window. |
|---|
Example:
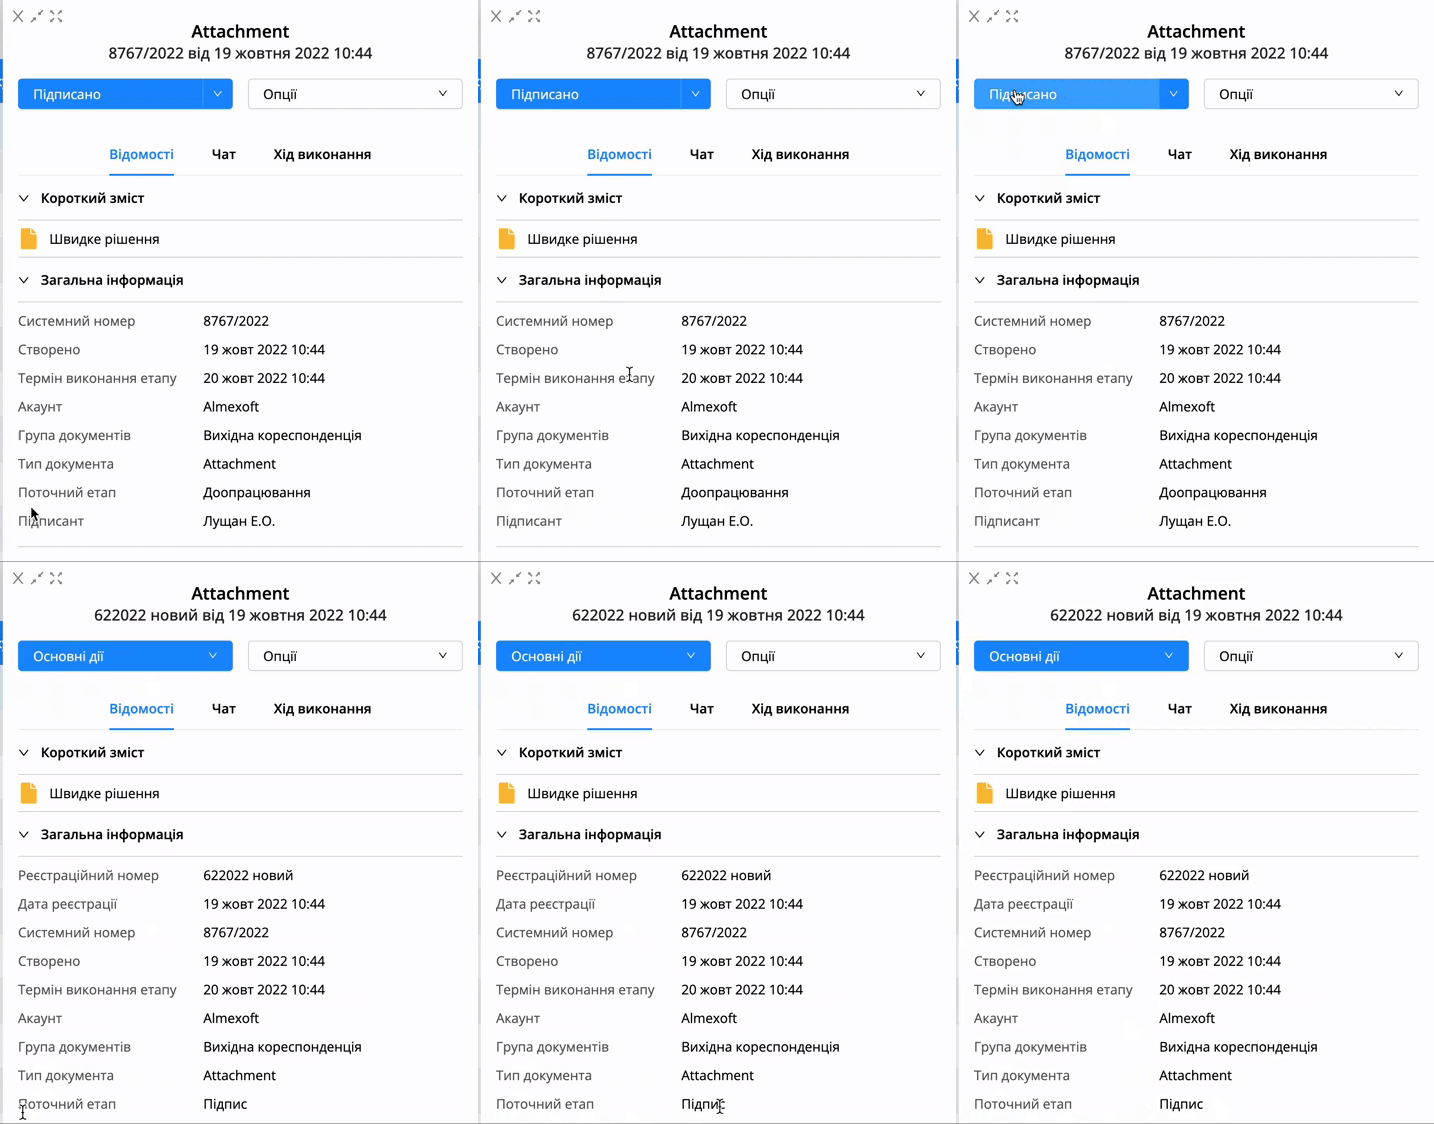
Required primary attachment in document. The document will not move to the next step until the user adds the main attachment If this setting is enabled. About the types of attachments further in the instructions.
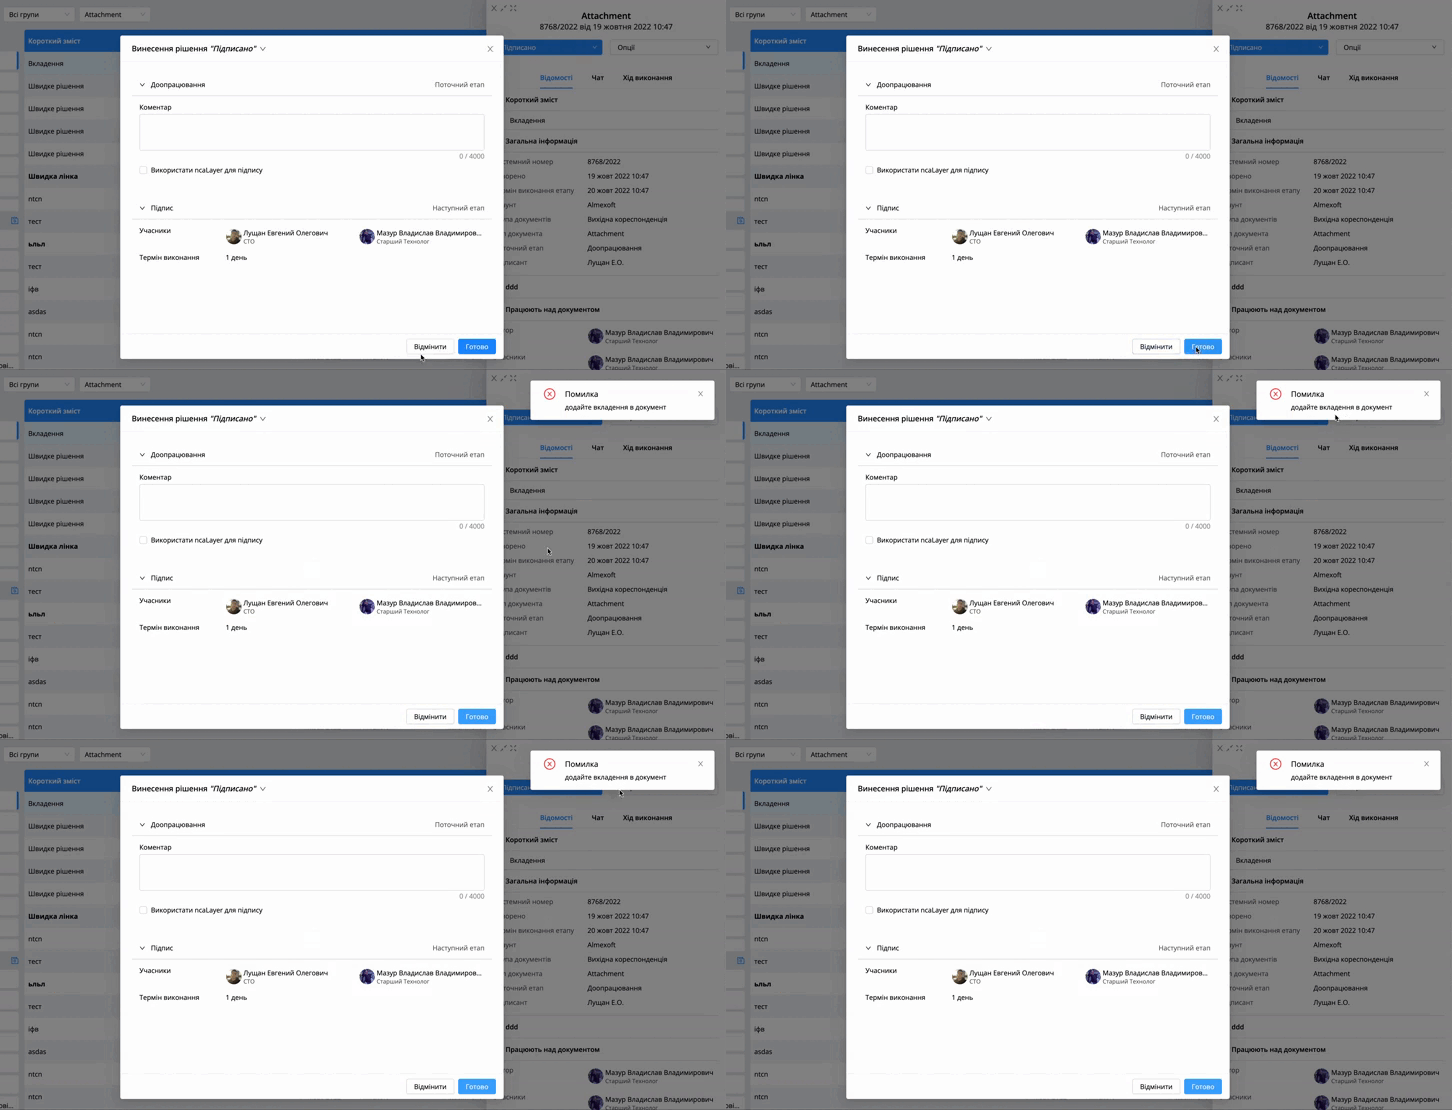
Attachment signature requirements setting. This setting is responsible for mandatory signing of all attachments (primary and secondary).
There is also a setting on the server that enables signing of only primary attachments.
Transition type. Responsible for the transition condition on this transition.
There are the following types:
Immediately. After making a decision with this setting, the document will immediately move to the next step without waiting for a decision from other stage participants.
All users. The document will move to the next step after all users of the step have made a decision.
Most participants. The document will move to the next step after the decision is made by the majority of users.
One of, wait for everyone. After making a decision with this setting, the system will wait for all other participants to make a decision, and only then the document will move to the next step with this setting. If this setting is selected on the transition, an additional setting will be displayed
[Transition priority]. If 2 or more transitions with this setting leave the step (this is possible), then the document will move to the transition with the highest priority (on which a decision will be made).
Important 1 This setting works when at least 2 transitions transfer from the step: one transition with the setting [One of, wait for everyone], and the second with the setting [All users]. Example of work: There are 2 transitions from the [agreement] step - one [need a revision] with the setting [one of, wait for everyone], the second [agreed] with the setting [all users]. One of the participants made a decision [need a revision], and the other 2 participants made a decision [agreed]. In this case, the document will go through the [need a revision] transition. |
|---|
Important 2 The setting [one of, wait for everyone] will not work with the setting [most participants]. The business process template will not be validated. |
|---|
Execute automatically. Responsible for automatically making a decision after the due date of the stage has expired.
It has the following settings:
Time interval. Responsible for the amount of time that must pass after the step deadline for the system to automatically make a decision. Example: The deadline for the stage is 1 day, the time interval for automatic decision-making is 1 day. In this case, the system will make a decision 2 days after the transition to the step.
Comment. The user can add a comment that will be displayed in the execution tree tab.
Drools (pre-function). Used to use drools scripts in dialect JAVA.
Close window on transition. A system setting that does not affect system operation when moving to the next step.
From. Displays the name of the step from which the transition transfers.
To. Displays the name of the step in which the transition enters.
Resolution handbook. The user can display any handbook with pre-created resolutions that can be selected when making a decision. The following settings are also available: column (the column from which values will be displayed is selected), edit resolution (if it is disabled, the resolution selected from the list cannot be edited.)
A drop-down list icon will be displayed in the decision window.
 For a transition that
transfers from the [End] step, all the same settings are available,
except:
For a transition that
transfers from the [End] step, all the same settings are available,
except:
Use by default
Fast decision.
Transition type.
Note! A transition that transfers from the [End] step is prohibited from using the [participants availability] setting because there can be no participants on the [End] stage. |
|---|
Importantly! A transition that transfers from an automatic step has all the same settings as a step, but the user does not need to configure the availability and type of the transition, because at this step the participant is always the system user. |
|---|
[Business process design] - [Fields]
This section of the system is responsible for working with additional fields when creating and editing a document.
All fields store information according to the business process template.
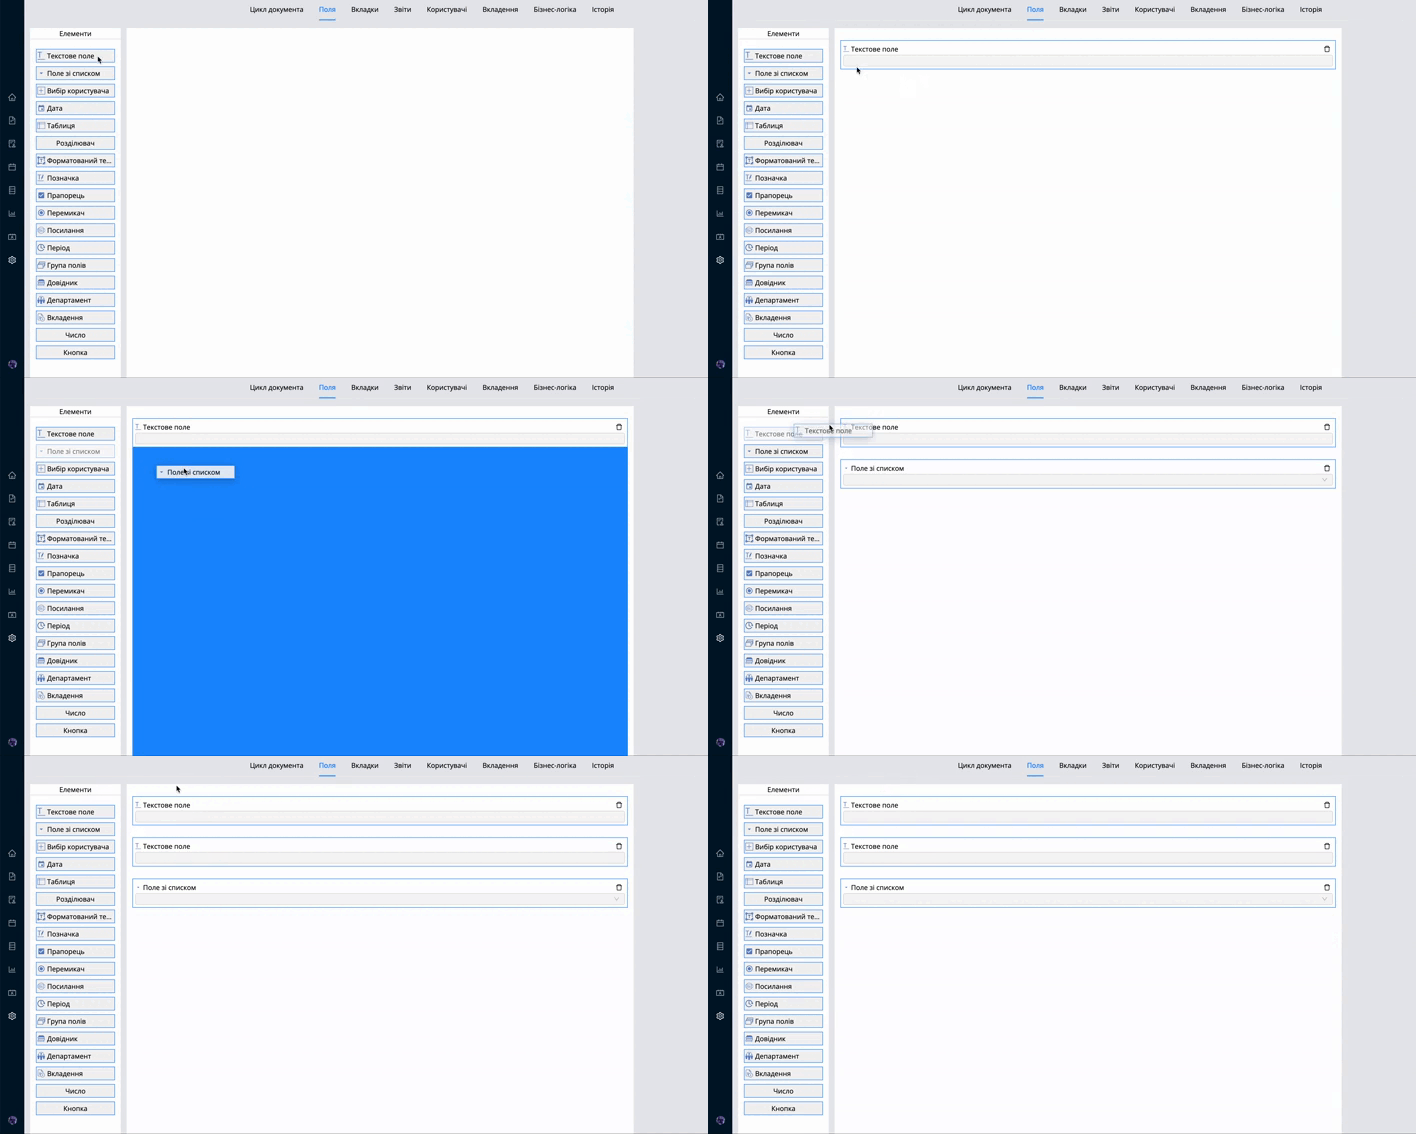
There is an option to copy fields by clicking on the three dots and copy fields.
After copying fields, the option [paste fields] will be displayed in another template.

All fields have a set of standard settings, and each field has its own additional settings.
List of standard settings:
Key. The key is used in scripts, reports, filters and for substitution in attachments. The field key can consist of any characters (except special characters - ! #”%^*()#&) and does not necessarily have to start with the $ character. If the user needs to perform autosubstitution by key in the attachment, then the key must start with $.
Name. The field name is displayed during document creation and in the document information tab.
Description. An additional icon
 will be displayed next to the
field name with the entered description when creating/editing a
document, as well as when making a decision.
will be displayed next to the
field name with the entered description when creating/editing a
document, as well as when making a decision.Value. The user can pre-fill this field with the desired value so that it does not need to be filled in when creating the document.
Autosubstitution. If the attribute is false, then when publishing an attachment, the summary field is not taken into account during auto-substitution by keys, which significantly reduces the load on the system.
Content search. The user can search for a document by the value of this field if this option is enabled. More about search.
Column number. Allows to display field information data in such sections as:
Registries
Documents
More about the work in the section [Admin page] - [Data] - [Fields]
Note! The [button] field only has [Key] and [Name] settings. |
|---|
The following fields are available in this section:
Text field. Consecutive character set.
The following additional settings are available for this field:
Mask. In this field, the user can write a regular expression (RegExp), the rules of which will be compared with the text entered in the field. That is, this setting checks whether the field is filled in according to the rules. An example of a regular expression is [0-9]{6,11}. A field with such a mask accepts only numeric characters and the minimum must be 6 values, and the maximum 11. Otherwise, the field will be highlighted in red and an error will be displayed.
Mask description. During the creation of the document will be displayed as a hint
. It is used as a
recommendation for the user.
For example, it answers the question of which characters to enter in the field.
Select list. When working with this field, it is possible to select the required value when creating a document.
The following additional settings are available for this field:
Value options. Value options are created in this setting, which will then be displayed when creating\editing a document or inside a template in the [Fields] tab.
To create variants of values, you need:
Click on

Add the number of necessary values t.
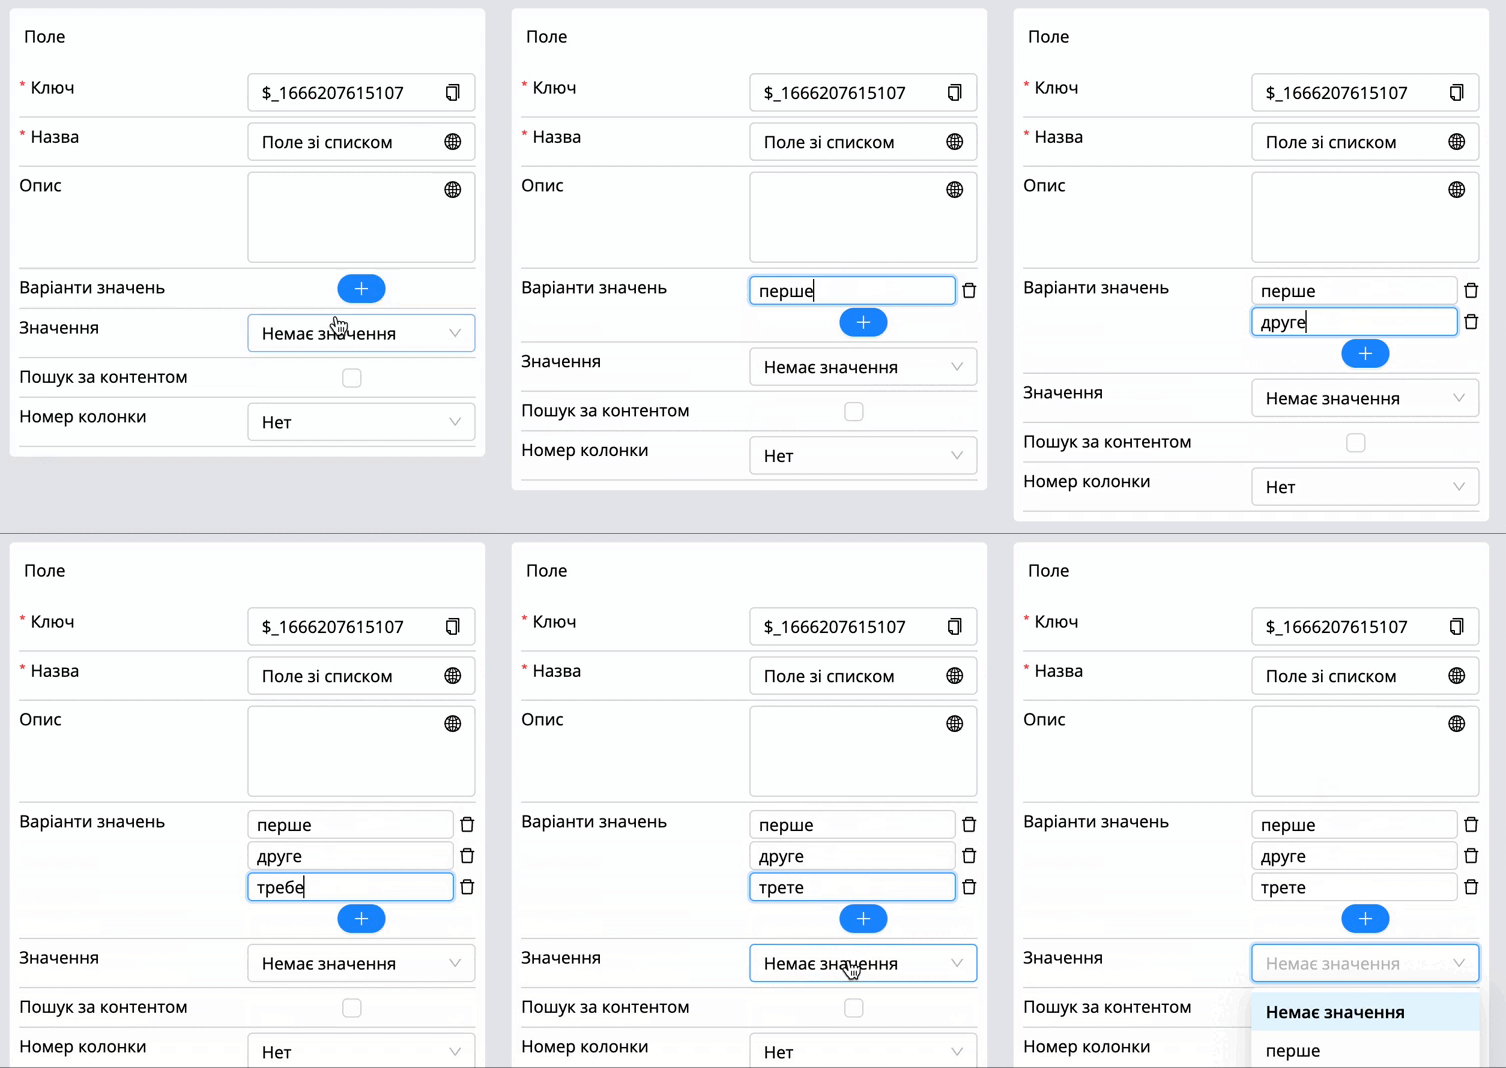
Note! The user can create an unlimited number of values, both textual and numerical. |
|---|
Value. In this field, the user can select the value that we created earlier, and when creating the document, this field will already be filled.
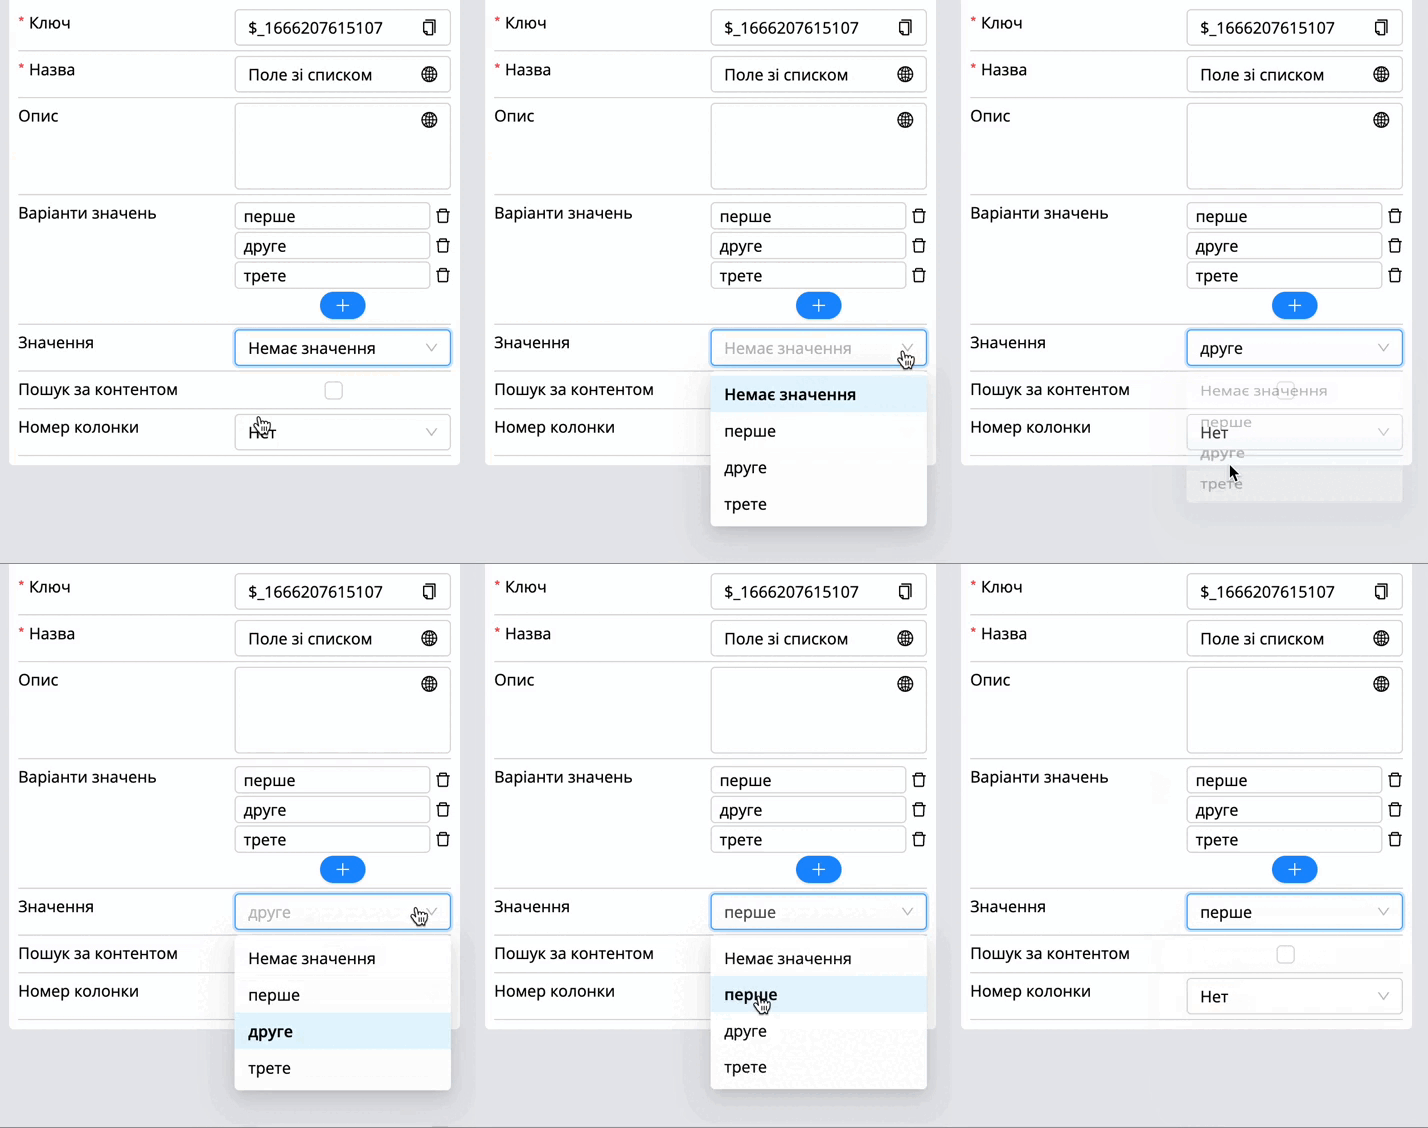
User choice. Allows the user to select users while creating a document.
The following additional settings are available for this field:
Only active users. Allows the user to select only active users. The setting [Allow access to the system] is disabled in the user profile. Learn more about profile settings.
Maximum number of users. The maximum number of users that can be selected in the field.
Users. Allows the user to select users that will be selected by default when creating a document.
Allowed users. Allows the user to limit users for selection. If the field is empty, all users are available for selection.
Note! If there are already users added in the [users] setting and then add users to the [allowed users] setting, the [users] setting will be cleared. |
|---|
Calendar. Allows the user to set a date in the field (choose from the calendar).
The following additional settings are available for this field:
Value. Allows the user to insert a default date so that the user does not need to fill in when creating a document.
Table. Allows the user to group fields in a tabular form.
The following additional settings are available for this field:
viewMode. It has two settings:
Table – displays the fields in tabular form.
Card – displays fields as a separate block of information as a list.
selectMode. System setting. Field functionality is not affected.
The table can be opened to the full screen by clicking
 next to the name of the
field when creating or viewing the document.
next to the name of the
field when creating or viewing the document.
Note! The order of the fields inside this field is configured in the [Fields] tab. |
|---|
Multiplied text. A text field with the ability to use line spacing. It has only standard settings.
Note. This field is informative. Can be used as the name of a group (block) of fields.
Checkbox. An interface element that allows the user to control an option with two modes: on, off.(true, false).
Radio button. It is an element of the graphical interface that allows the user to make a single choice from several options.
The following additional settings are available for this field:
Value options. Value options are created in this setting, which will then be displayed when creating\editing a document or inside a template in the [Fields] tab.
To create variants of values, you need:
Click on

Add the required number of values.
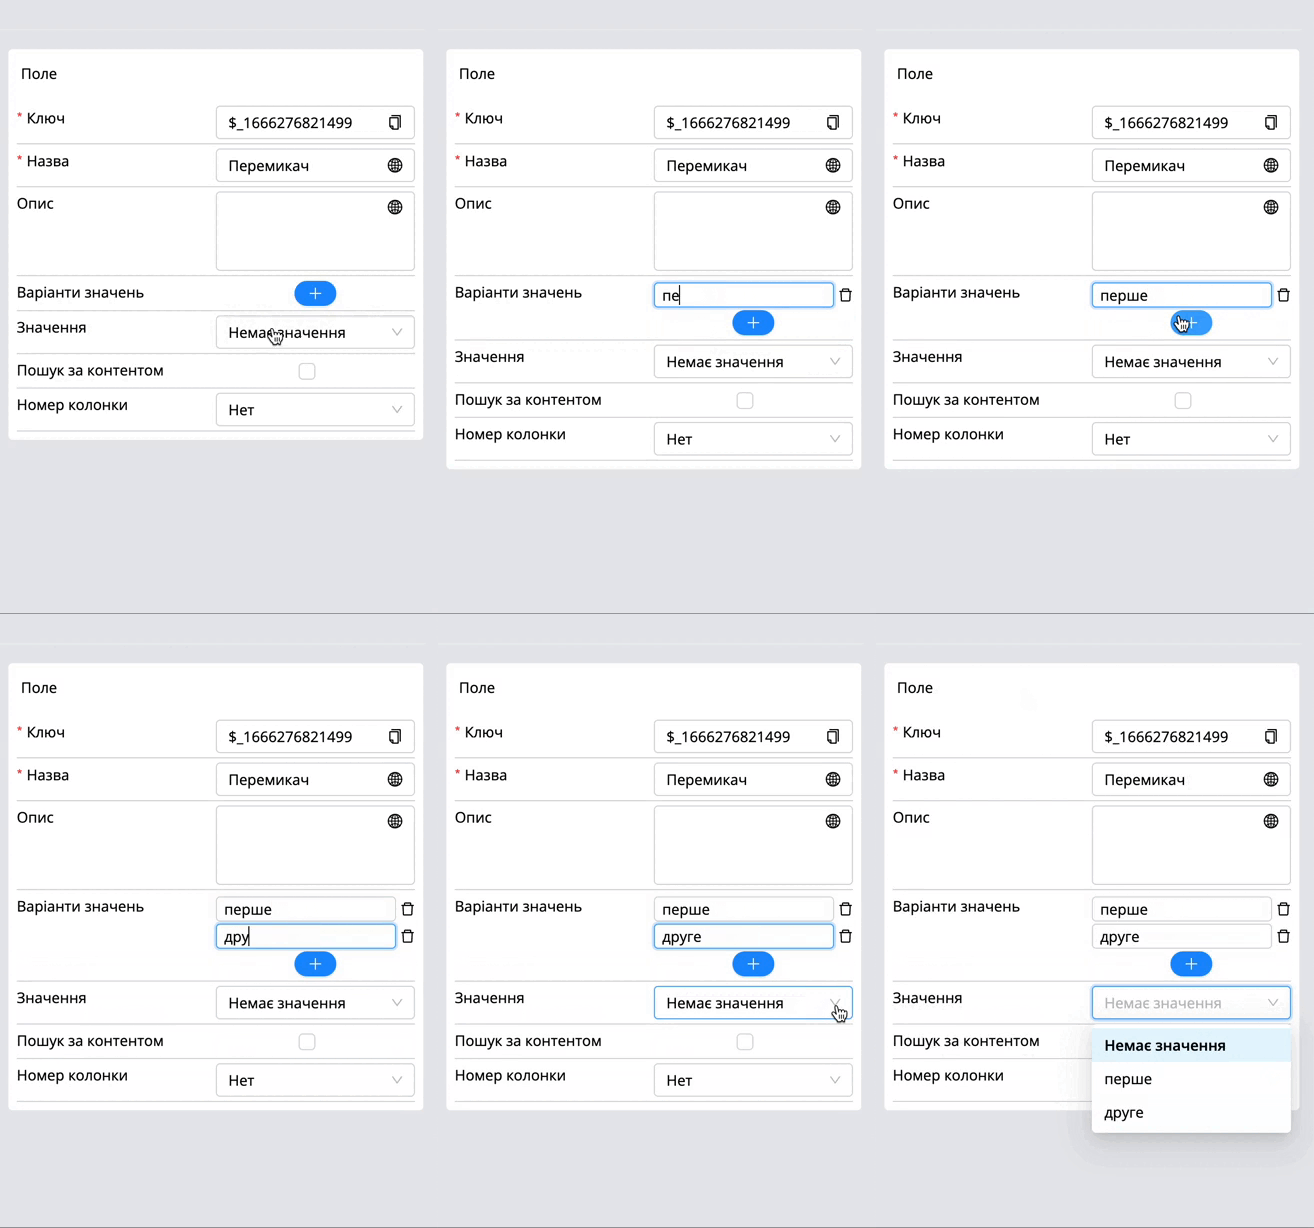
Value. In this field, the user can choose the value that was created earlier, and when creating the document, this field will already be filled.
Link. A new tab in the browser will open after clicking on the link inside the field.
Importantly! In this field, the user needs to write the full url along with the protocol (http, https). Example: https://www.google.com.ua/?hl=uk |
|---|
Period. Allows the user to select a date within a period. It is informative and does not affect the due date of the document.
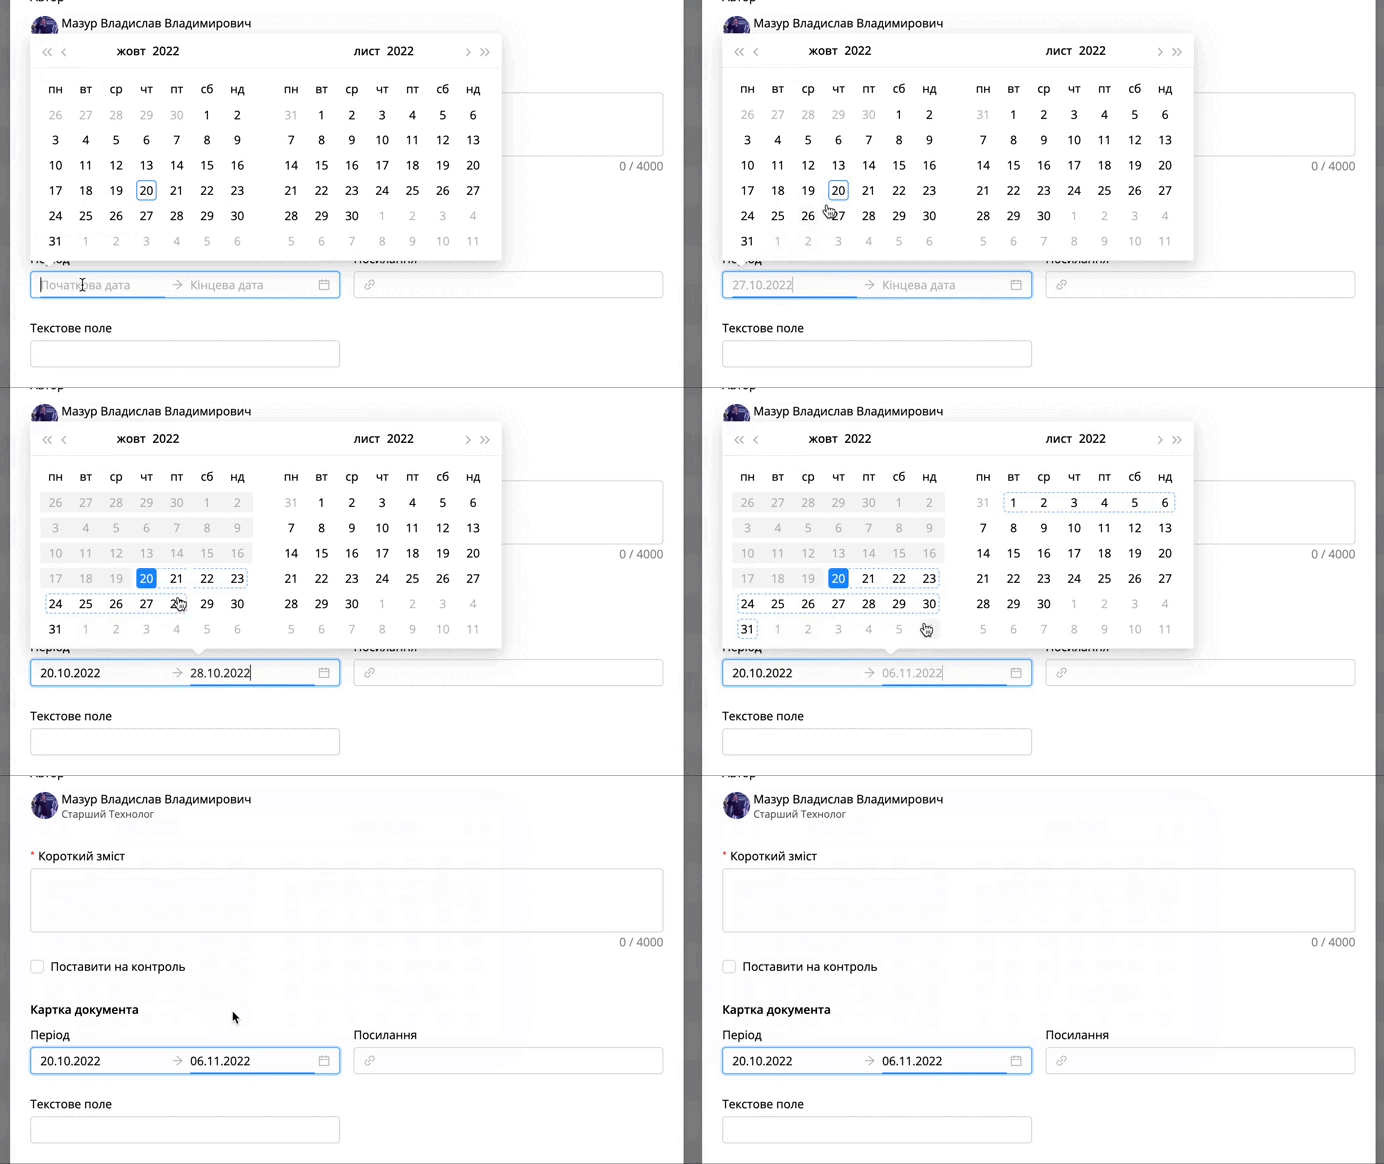
The following additional settings are available for this field:
Value. A choice of two dates will be available to indicate a specific time period.
Field group. Allows the user to combine fields into a separate block.
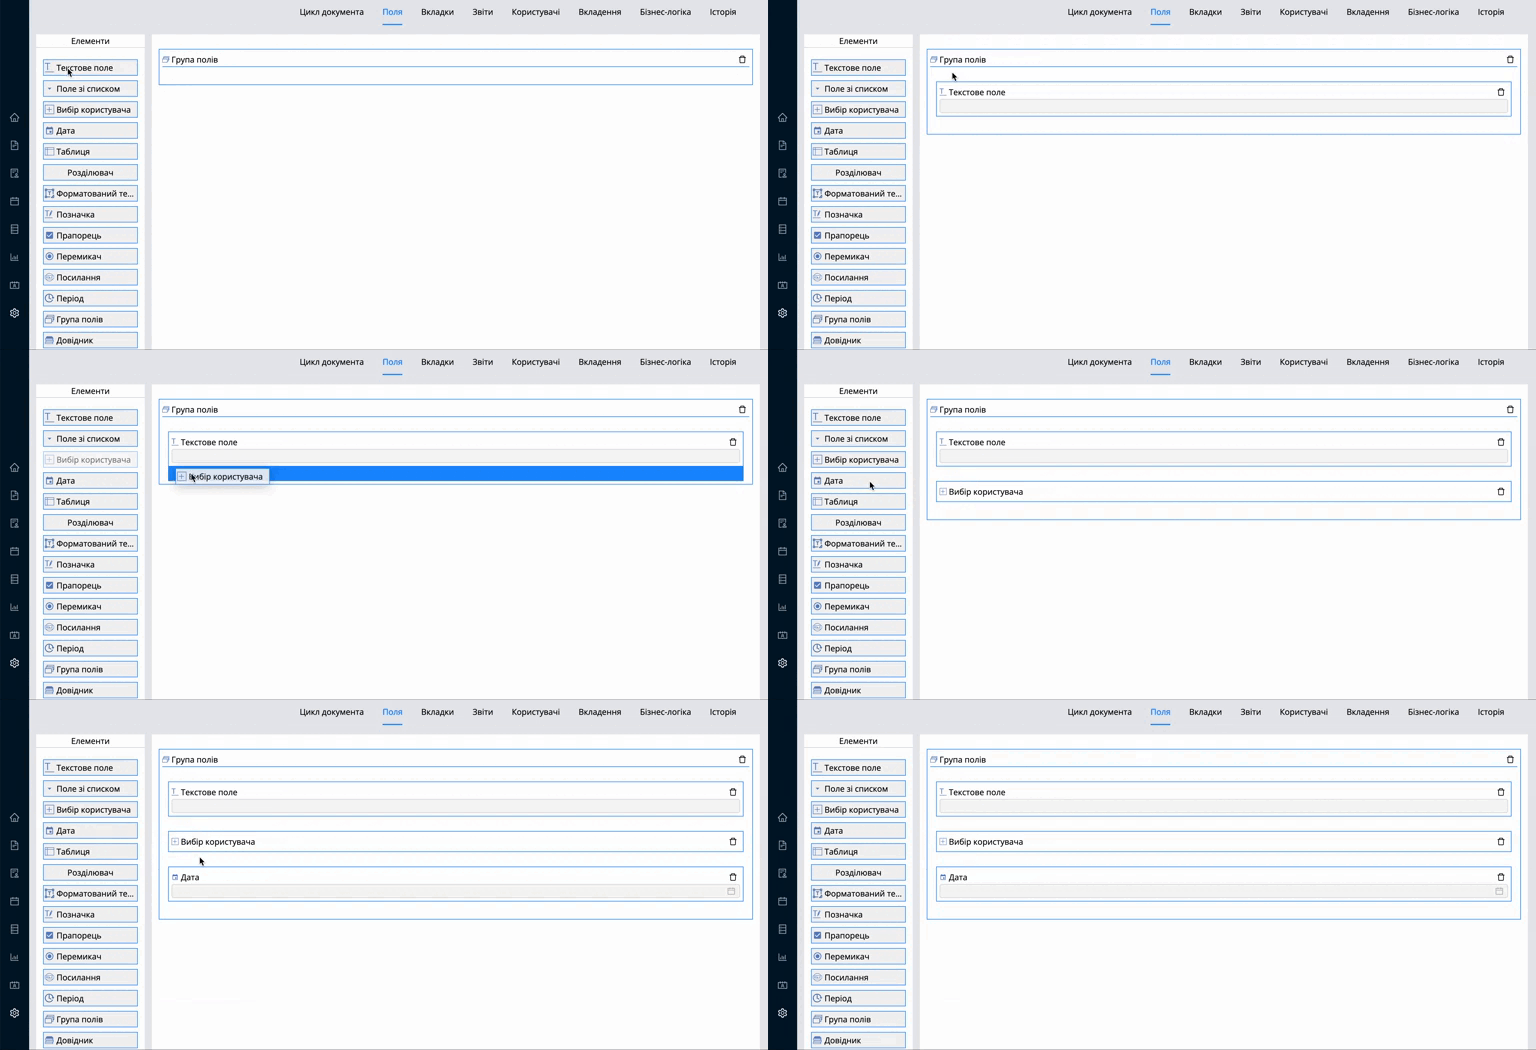
Note! The order of the fields inside this field is configured in the [Fields] tab. |
|---|
Handbook. The field makes it possible to work with pre-formed information when creating a document. More information about document creating.
The following additional settings are available for this field:
View list. Displays data as a list. If filtering is enabled for the handbook, this setting will be inactive.
Quick fill. Allows the user to add new handbook values while creating a document.
The setting [view list] is enabled:
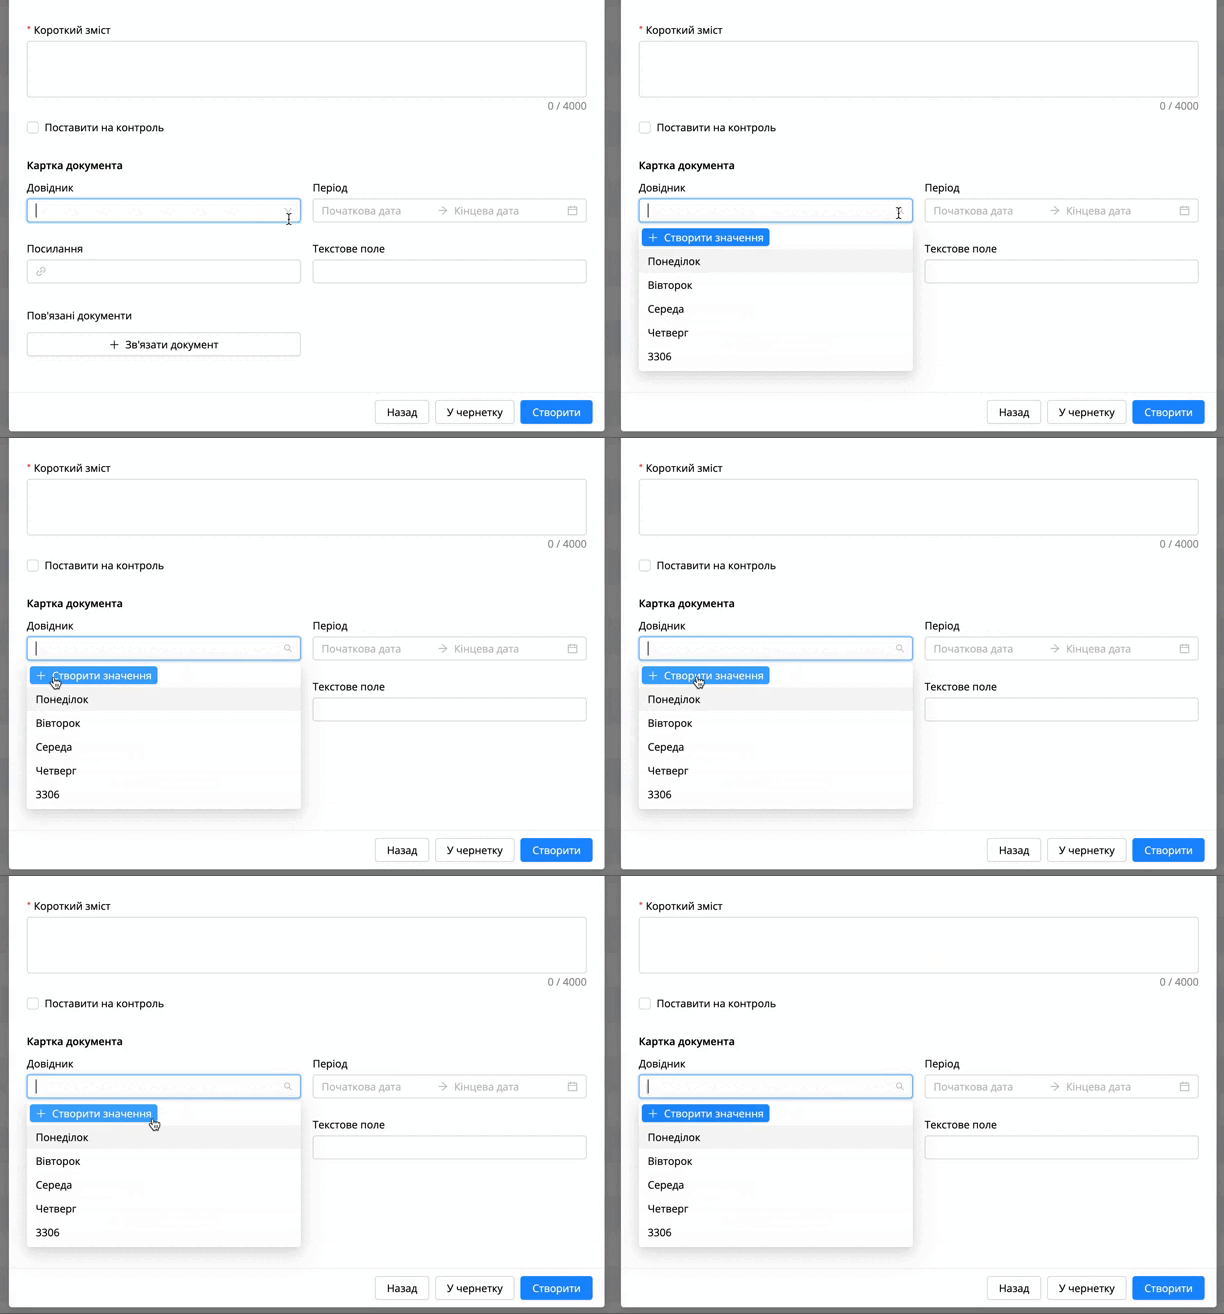
The setting [view list] is disabled:
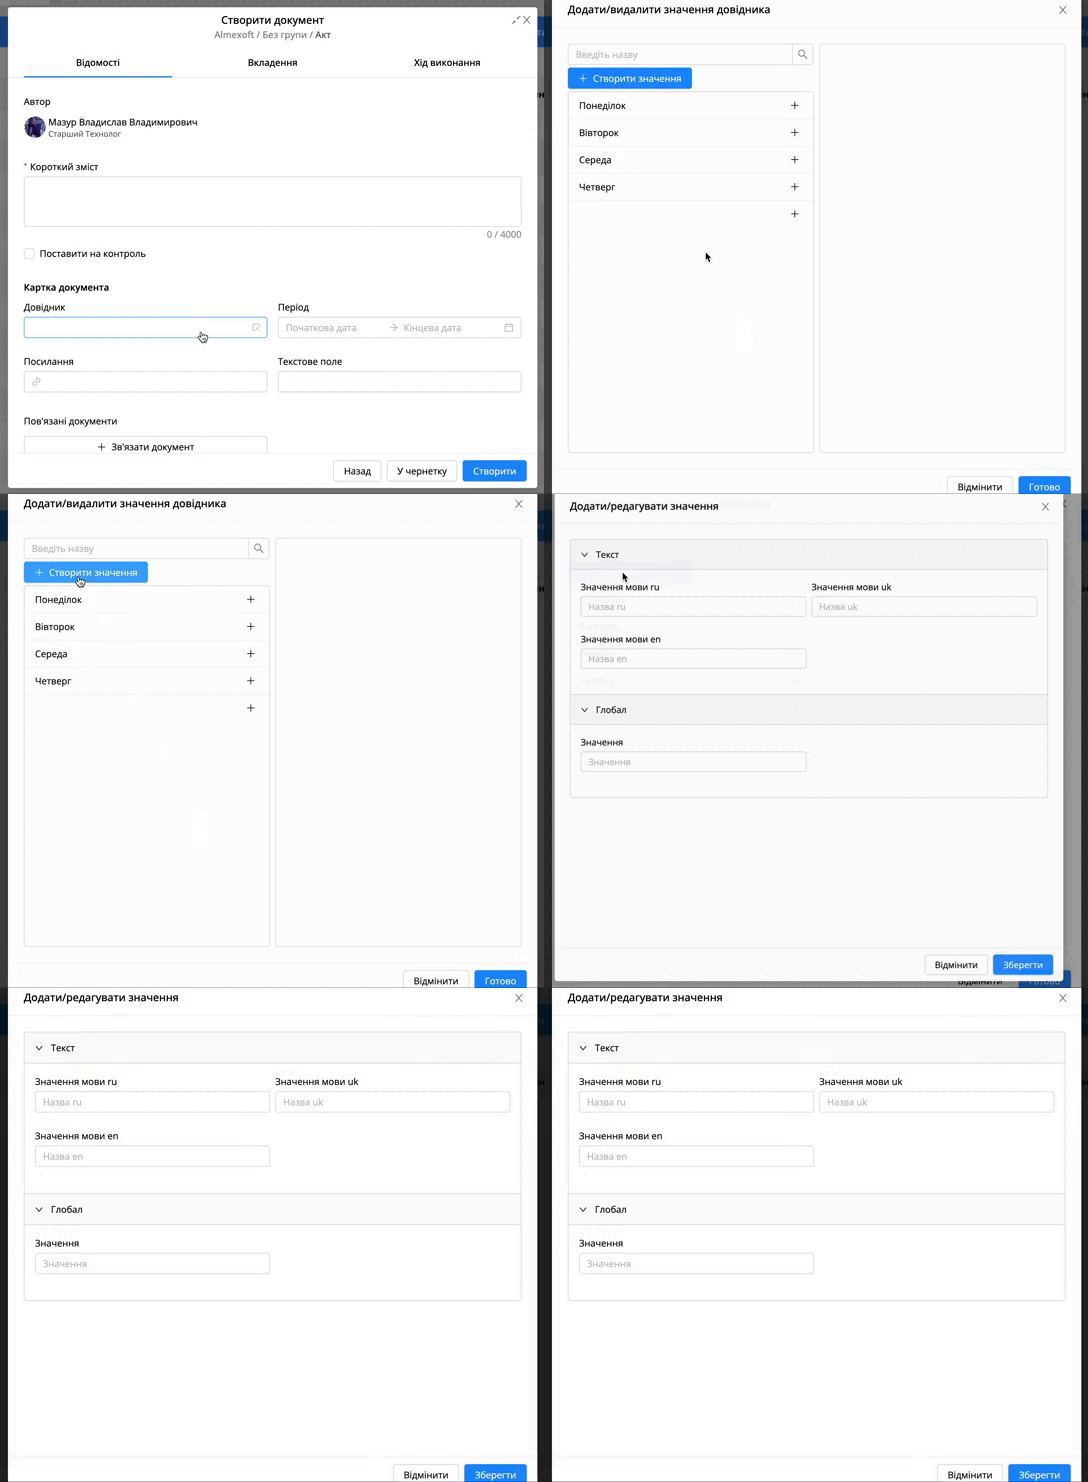
Handbook. Selection of the handbook from which the data will be displayed.
Handbook field. Selection of the column from which to take the value. It is the values from this column that will be displayed when creating the document, when filling in the handbook field.
Column key. Used to filter the handbook and also by the system when sending the document to the AlmexSign module. More details in the instructions for the AlmexSign module.
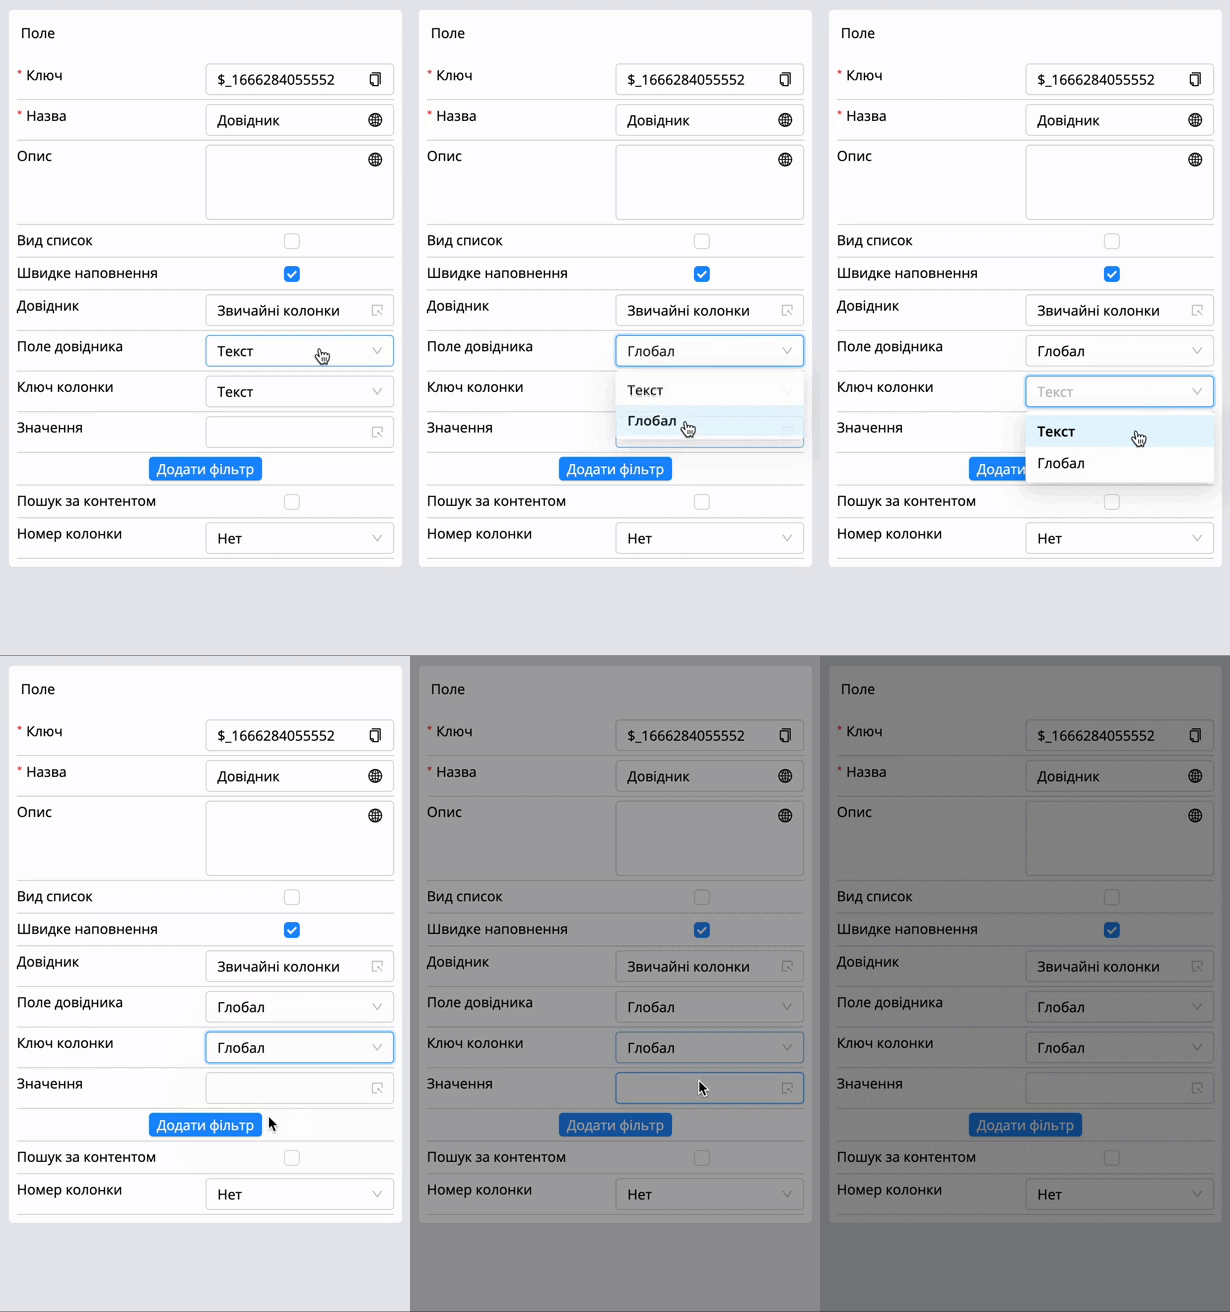
Note! The handbook field and column key are filled automatically with the first handbook column when the user adds a handbook to the field. |
|---|
Value. In this field, the user can choose the value that was created earlier, and when creating the document, this field will already be filled.
Add filter. Allows the user to add a filter when working with handbooks.
More details in the filtering of handbook section.
Department. Allows the user to select any department from previously created ones in the system.
The following additional settings are available for this field:
Filter: This setting allows filtering and displays child departments.
| Example: If the security department was selected in the first field, then all subsidiaries will be displayed in the second field, where the filter is configured. |
|---|
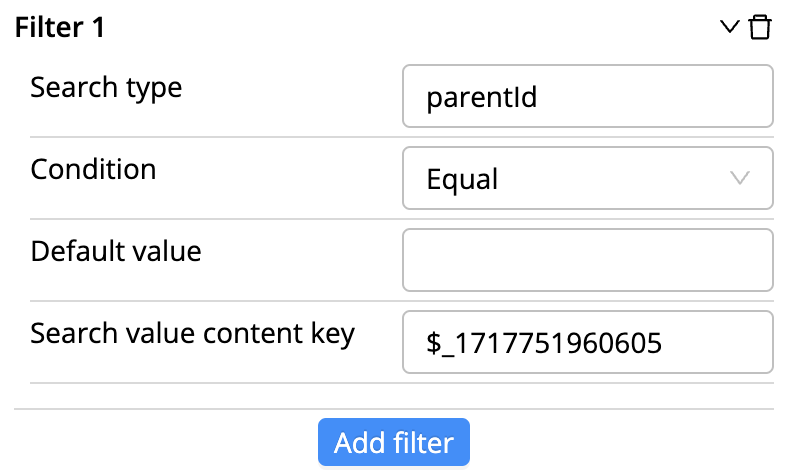
More details about the creation of the department in the section [Admin page] - [Users] - [Organizational structure].
Attachment. Allows the user to add attachments when creating and editing a document.
Note! Attachments added to this field will not be displayed in the main document tab [Attachments]. |
|---|
Number. The field accepts only numbers. Automatic formatting is available for the field, only 2 numbers can be written after dot.
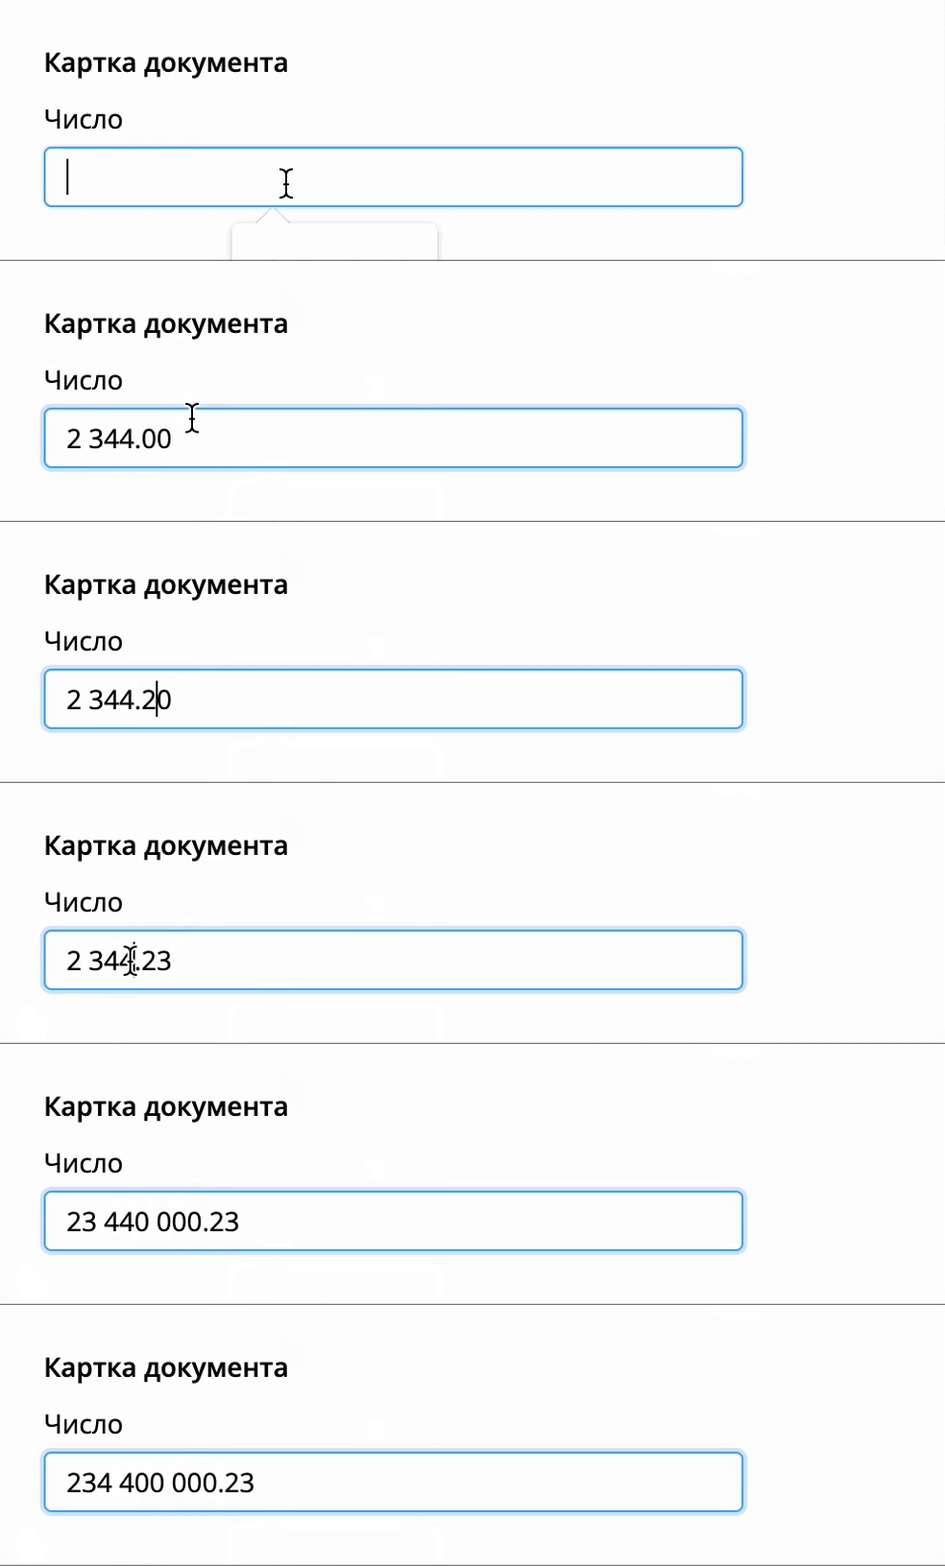
Note! In the attachment, the value of this field is substituted without spaces ($key) |
|---|
Button. The field was created to work with front-end scripts.
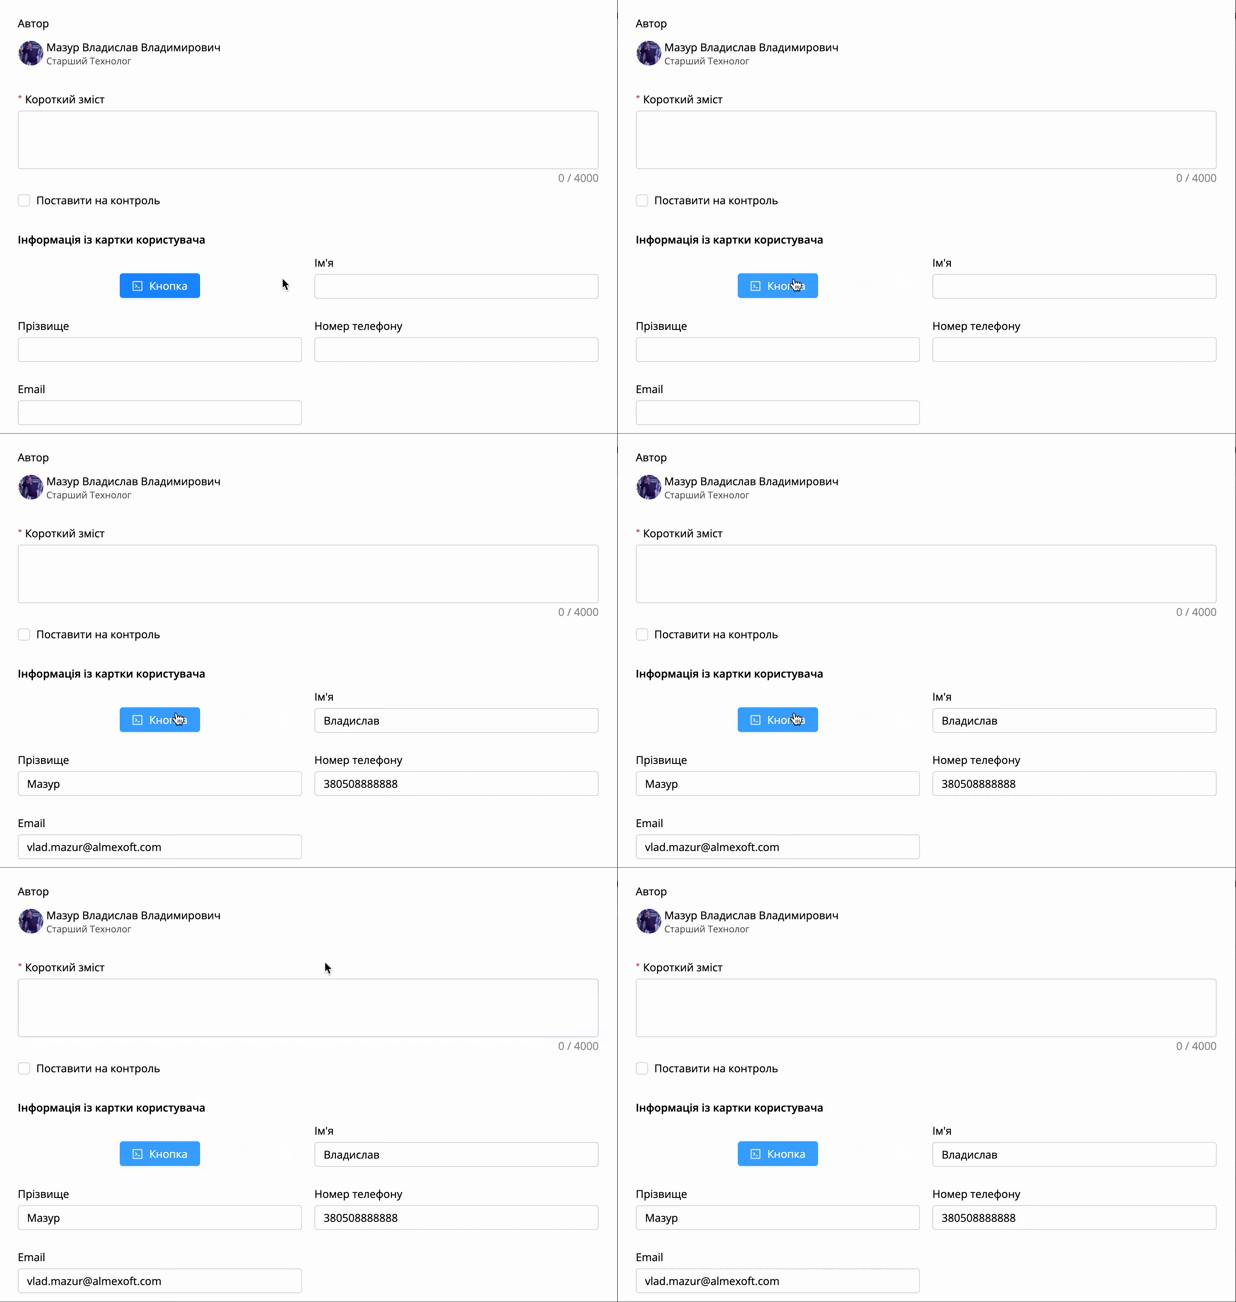
Separator. Visual separator for fields.
Date/time. Allows to add date and time.
[Business process design] - [Tabs]
The Tabs section exists for grouping fields, regulates access to them at the level of stages and transitions, controls the display of fields in full and short information.
There can be an unlimited number of tabs in one document. To create and fill tabs, firstly, the user needs to create fields in the "Fields" tab and make their initial settings, then create a tab and transfer fields from the "All fields" column on the left side of the screen.
The same field can be used in each tab - this allows the user to avoid duplicate fields if the user needs to configure different forms when choosing different decisions.
To create a tab, you need:
In the lower right corner, click on the three dots
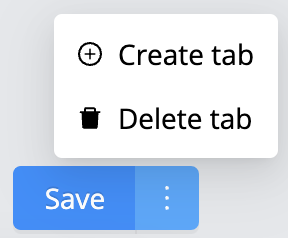
Select the option - create tab
Fill in all required fields:
Name. Name of the tab.
Order. Tab display position when creating a document.
Show in summary. Tab display option.
Show in detail view. Tab display option.
Display as info block. Allows displaying the tab not as a separate element, but under a summary.
Settings options [Tabs]:
The tab is displayed only in the short document information window and when creating the document under the summary field.
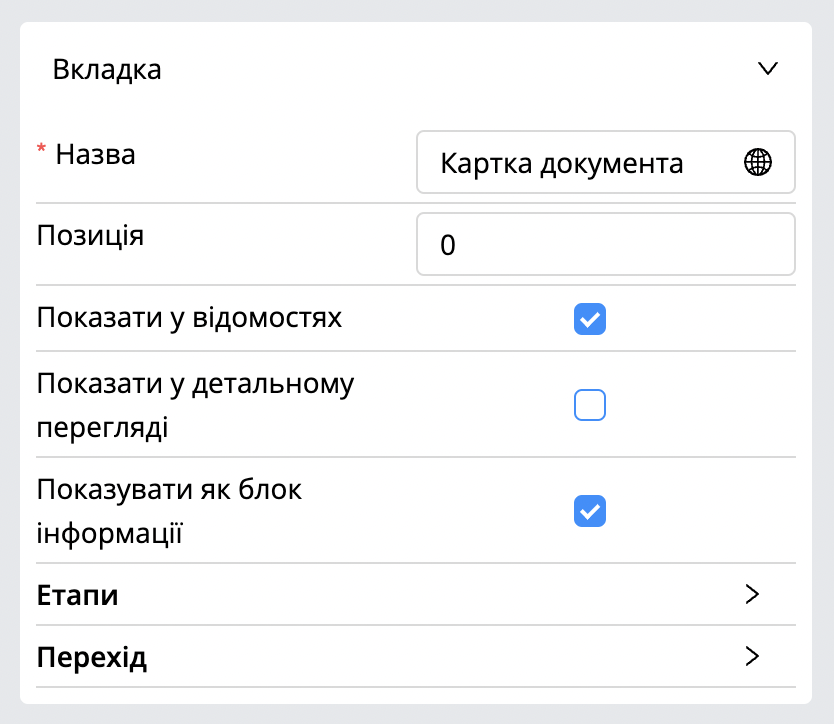
In the creation window.
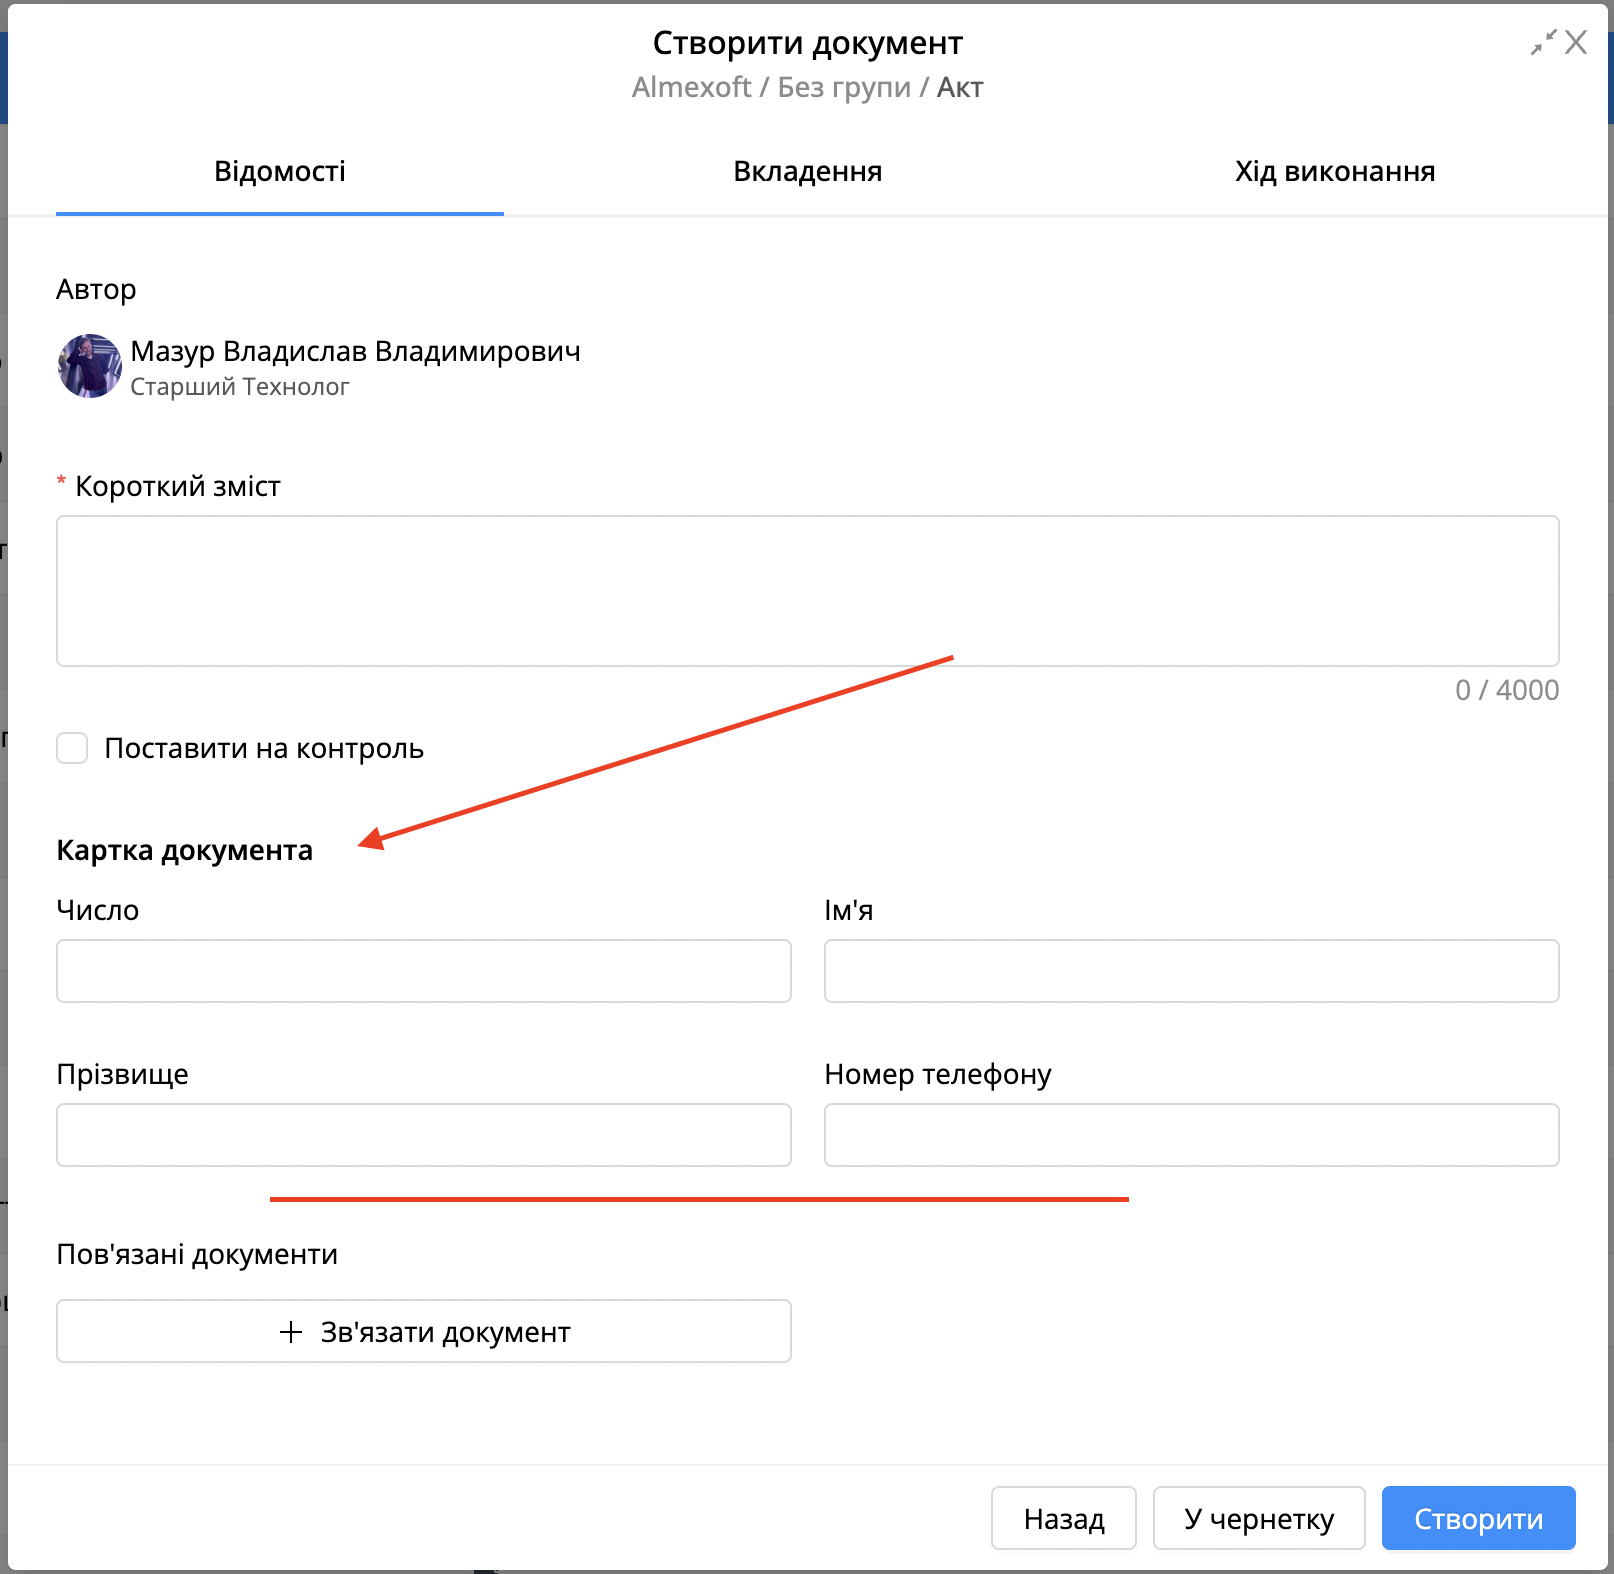
Display in the created document in short information.
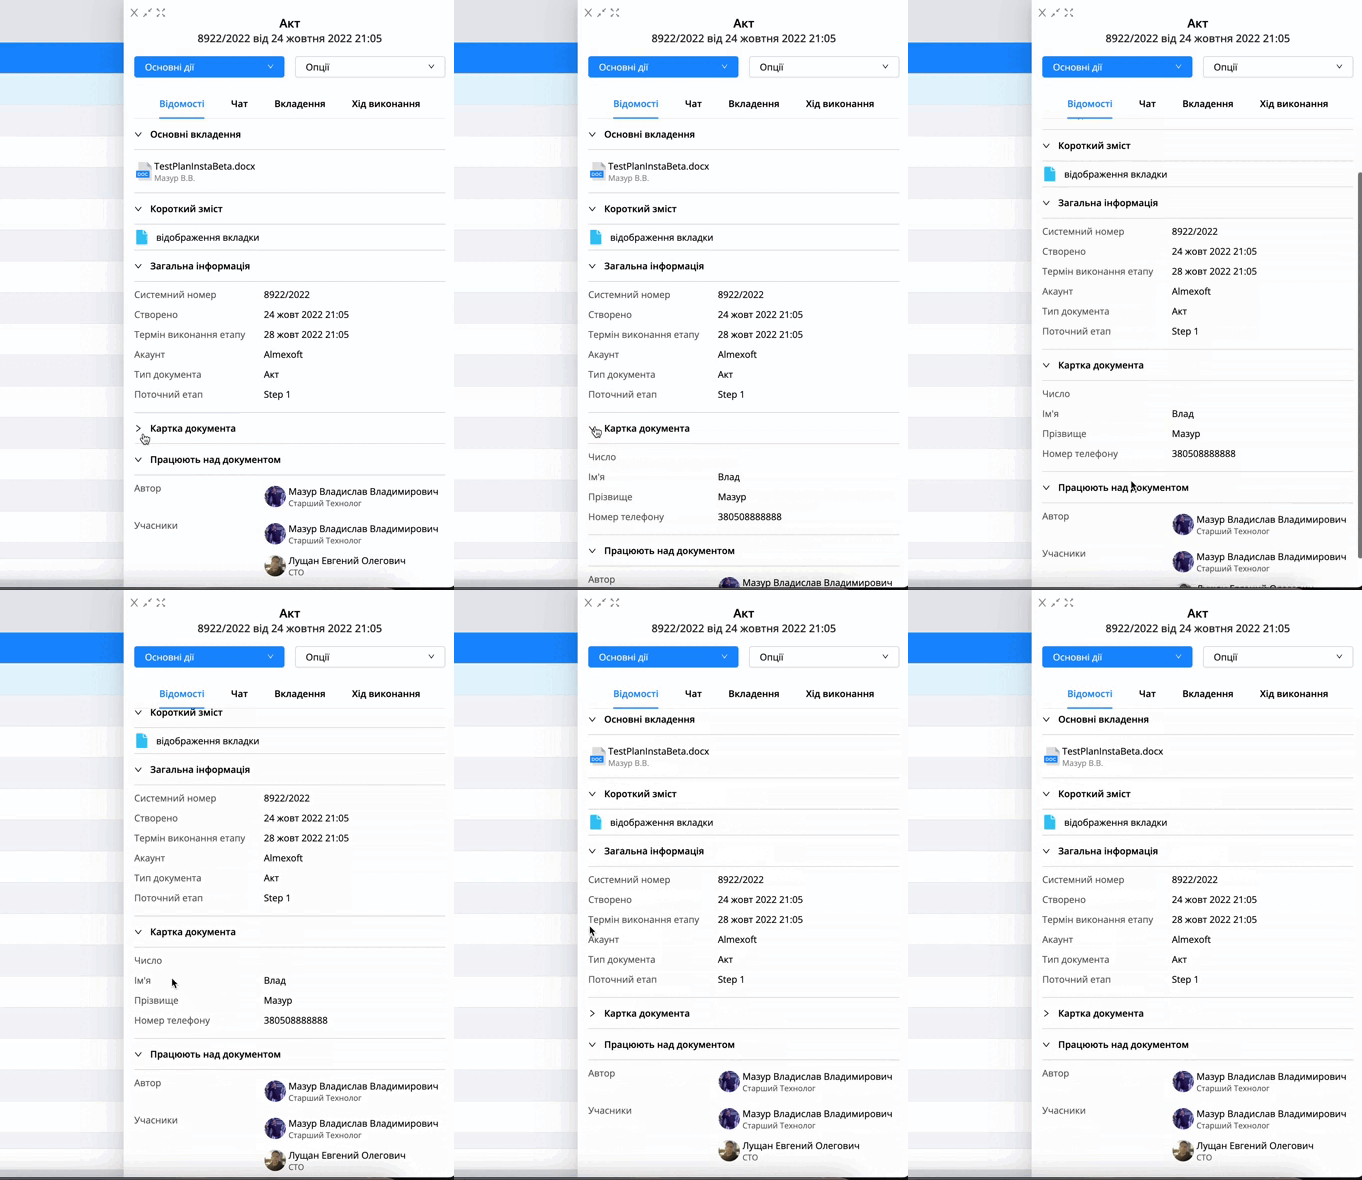
The tab is displayed only in the full details of the document (not as a separate tab) and when creating a document under the summary field.
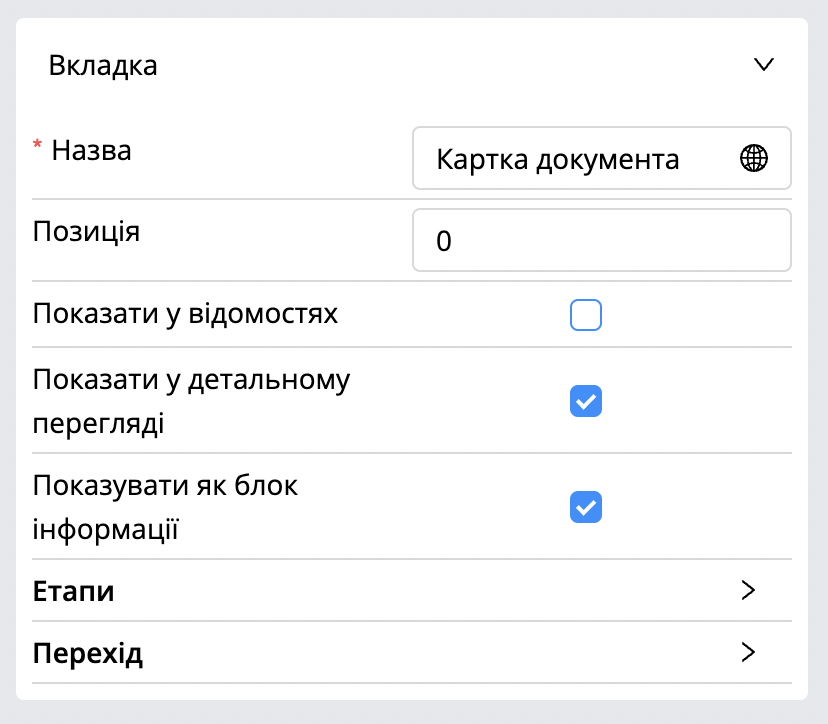
In the creation window.
Display in the created document in full information.
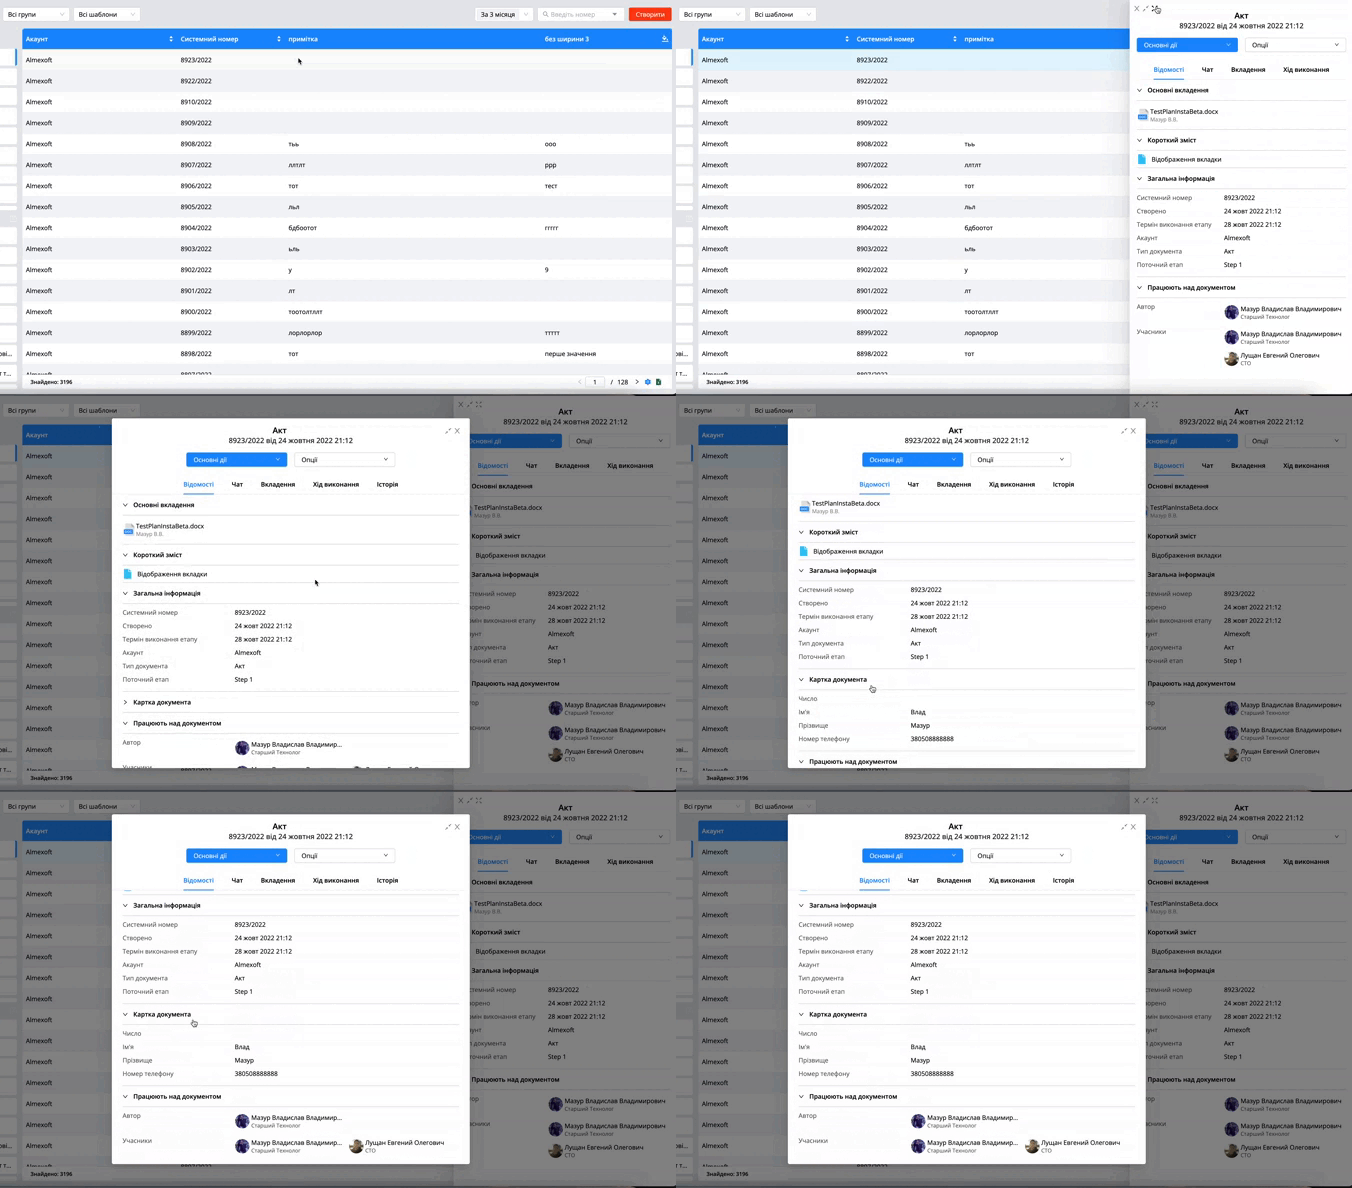
The tab is displayed in the full/short information of the document and when creating the document under the summary field.
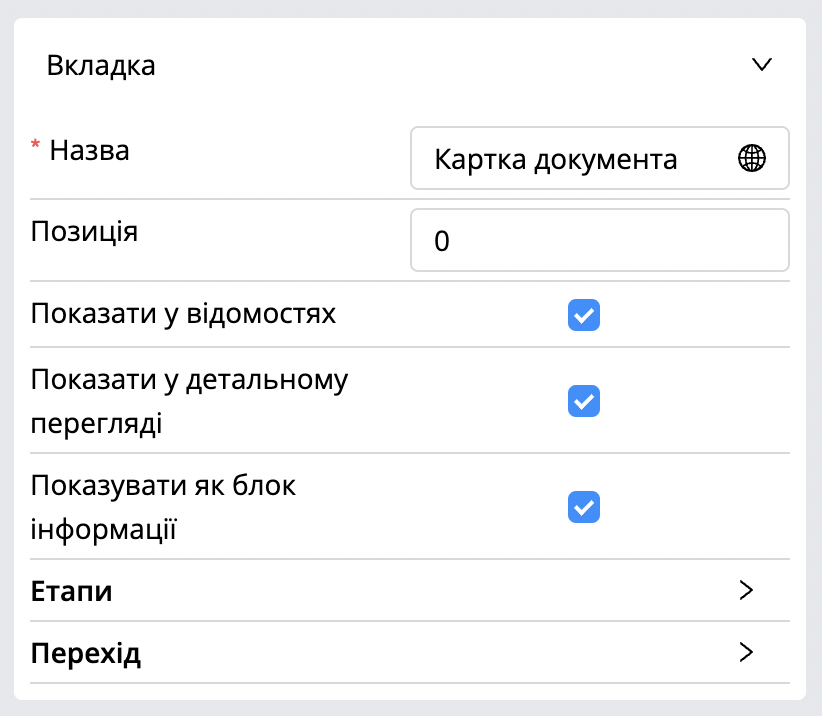
In the creation window.
Display in the created document in full details and short details.
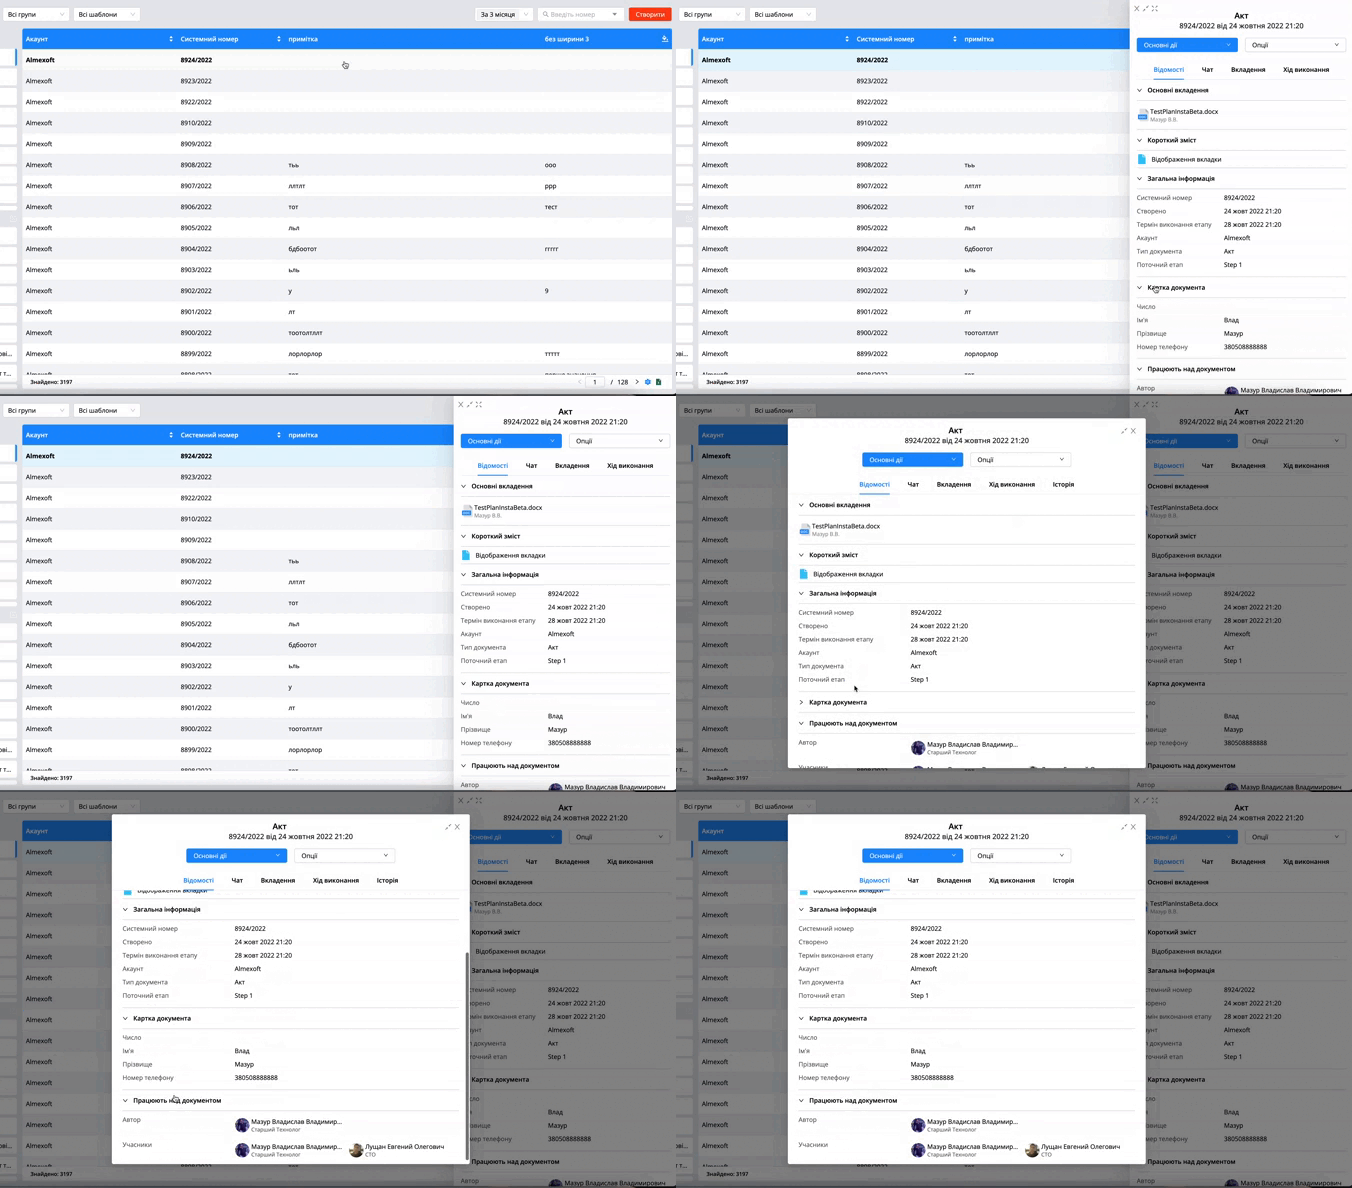
The tab is displayed as a separate element when creating a document and in the full details of the document.
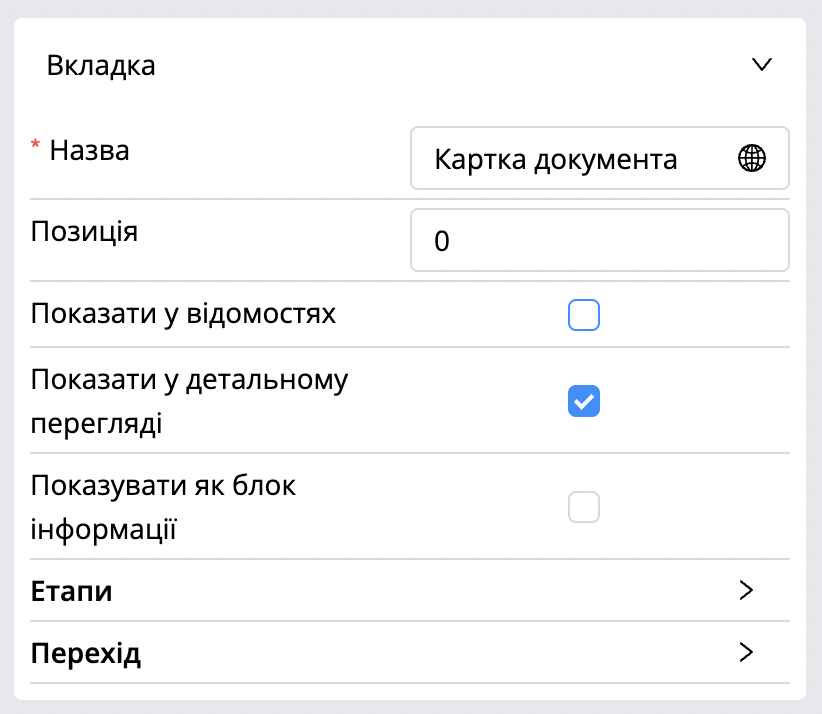
In the creation window.
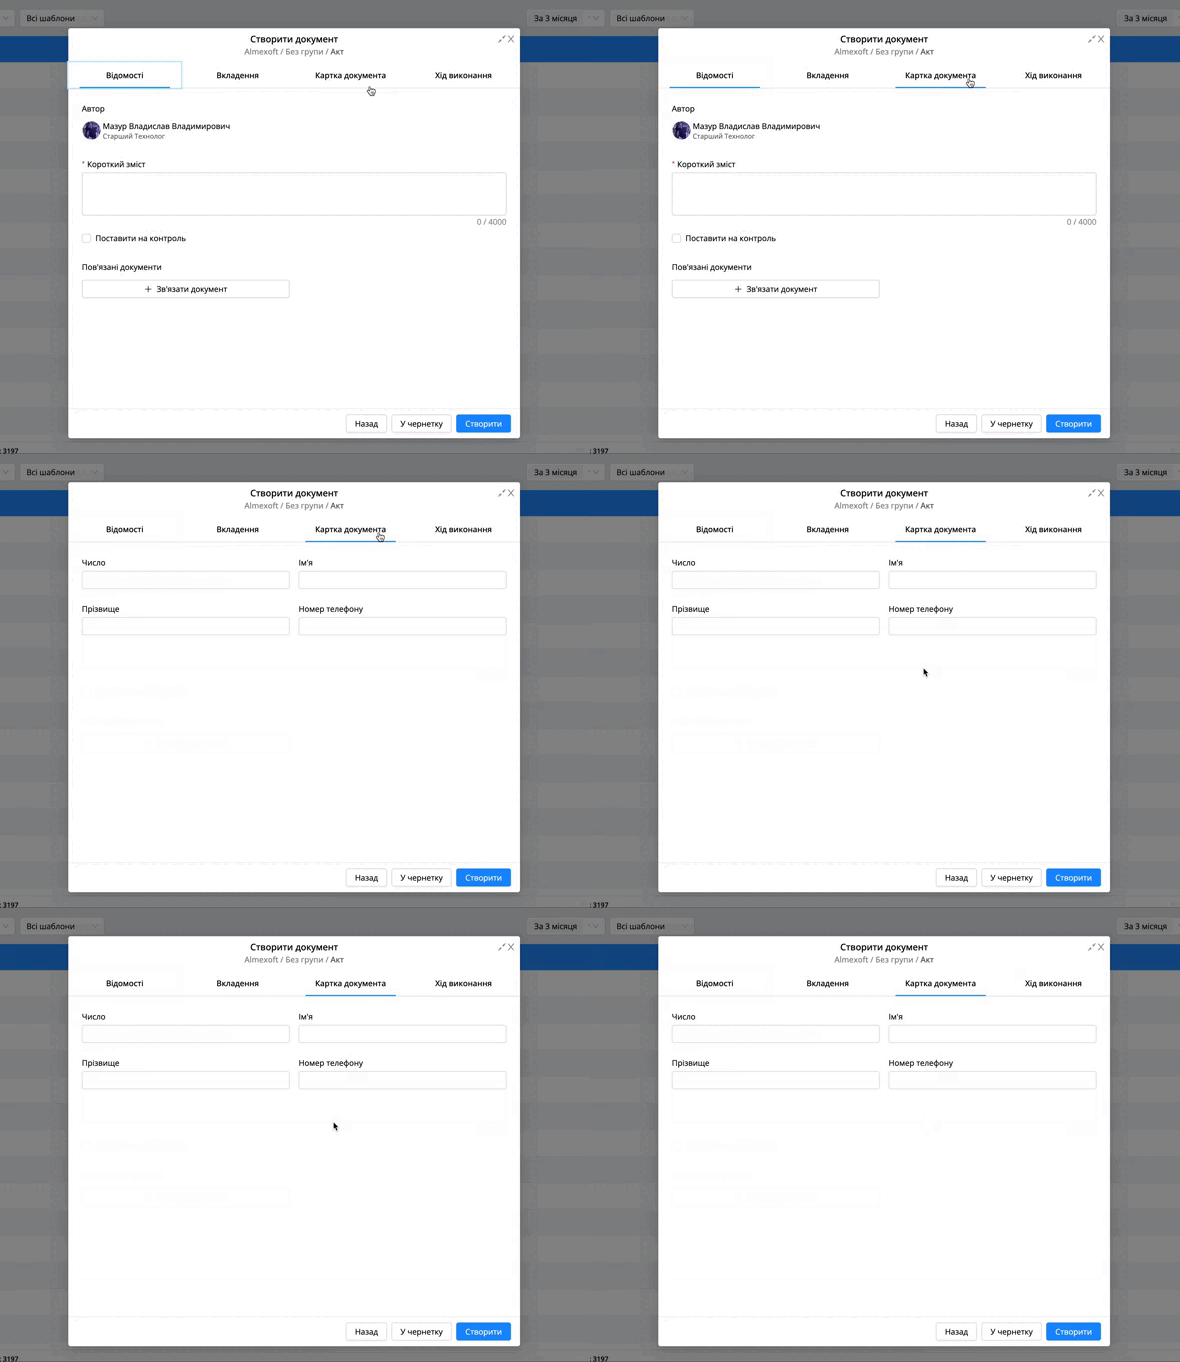
In the created document.
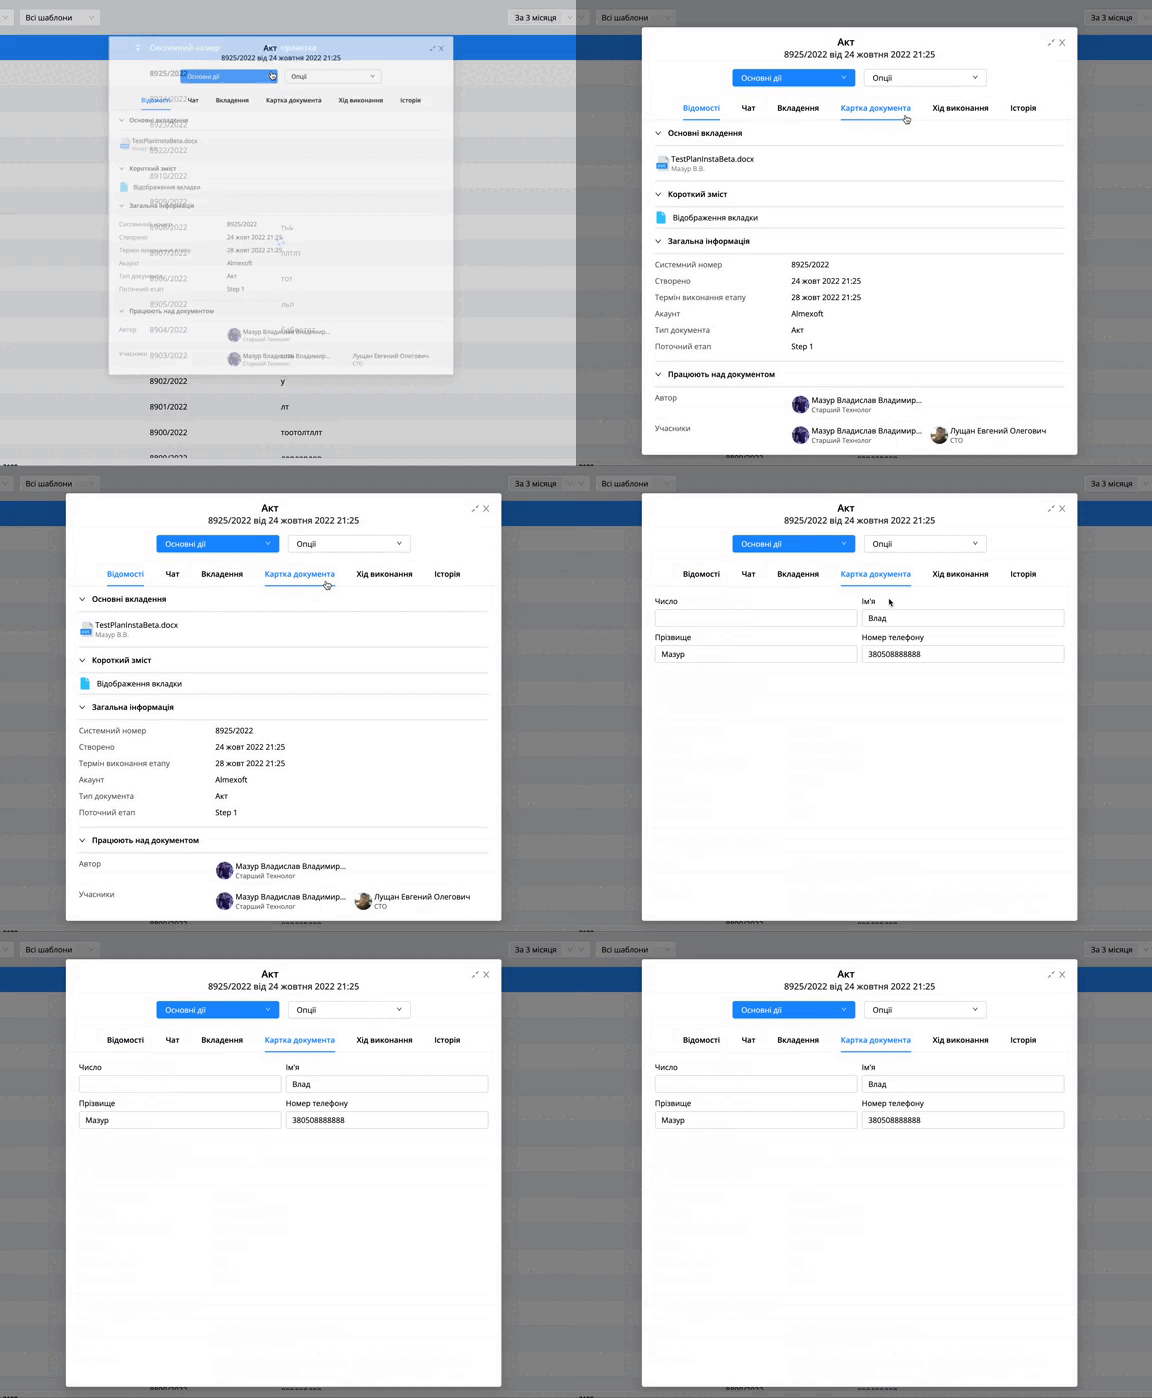
Tab access settings consist of a list of stages, transitions defined in the "Document Cycle".
For each step and transition, you can specify the following parameters that are responsible for displaying fields for a specific group of users:
Author availability
Responsible availability
Participants availability
User or group availability
System role availability
Availability to everyone who sees document
In order to display the fields in the document decision form, it is necessary to indicate at which transition the tab will be available.
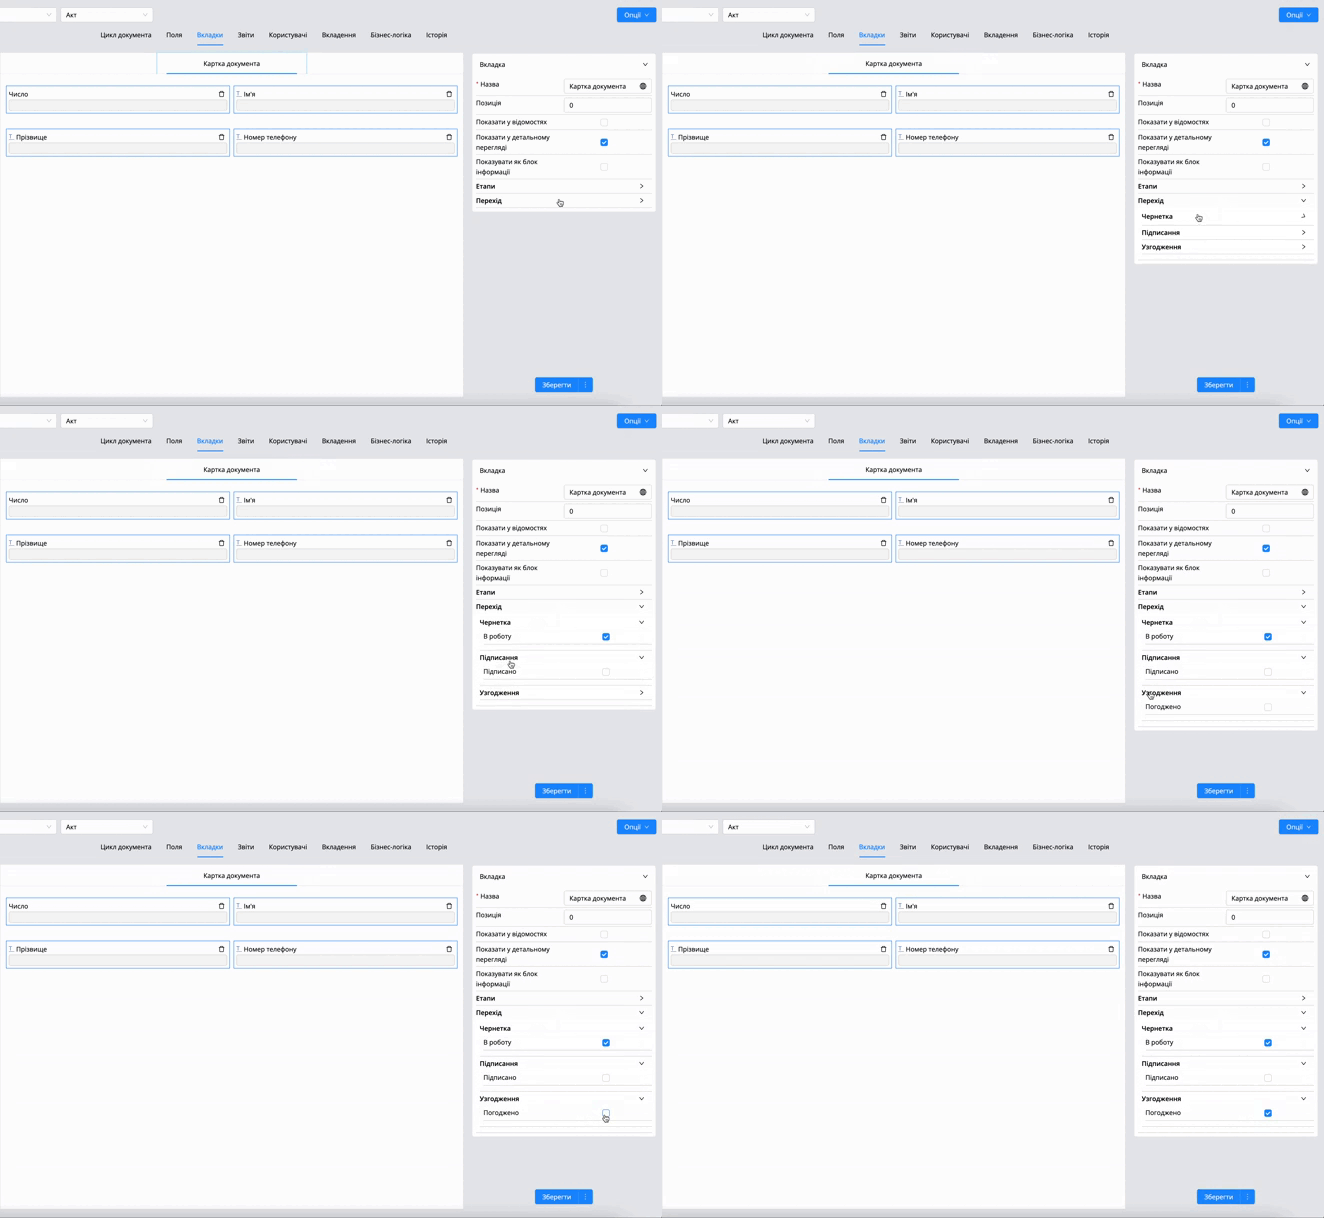
Importantly! Only one tab can be displayed in the document decision form. |
|---|
Setting the fields inside the tab
The system has the ability to individually configure each field inside the tab.
To configure fields, you need:
Click on the field
Make all the necessary settings:
Name. The name of the field.
Key. Used for scripts.
Visible. Setting the visibility of fields.
Required. If enabled, the user will have to fill in the field when creating the document.
Read only. The field will be read-only.
Field visibility condition. Used for scripts that will adjust the visibility of this field depending on the value of another field or fields.
Allowed. The setting is used to work with scripts.
Field value change condition. It is used for front-end scripts that will be executed when there is a change in the field to which the script is added.
| Importantly! If the field is hidden, the script will not work. |
|---|
Note 1 The user cannot change the field name and key in the [Tabs] tab. |
|---|
Note 2 If the user enters a long name in the [note] field, it may not be displayed in full in the [Fields] tab, but it will be displayed in full in the document. |
|---|
[Business process design] - [Reports]
In this tab, the user can upload reports that can then be generated via the document options. More information in document options. The creation of the report was described in the corresponding section.
Importantly! The report type must be [To document]. A report with a type of [common] will not appear in the list of reports when added. |
|---|
To add a report to a template, you need:
Open bpm template.
Go to the [Reports] tab.
Click on

Select the desired report from the list.
Click on
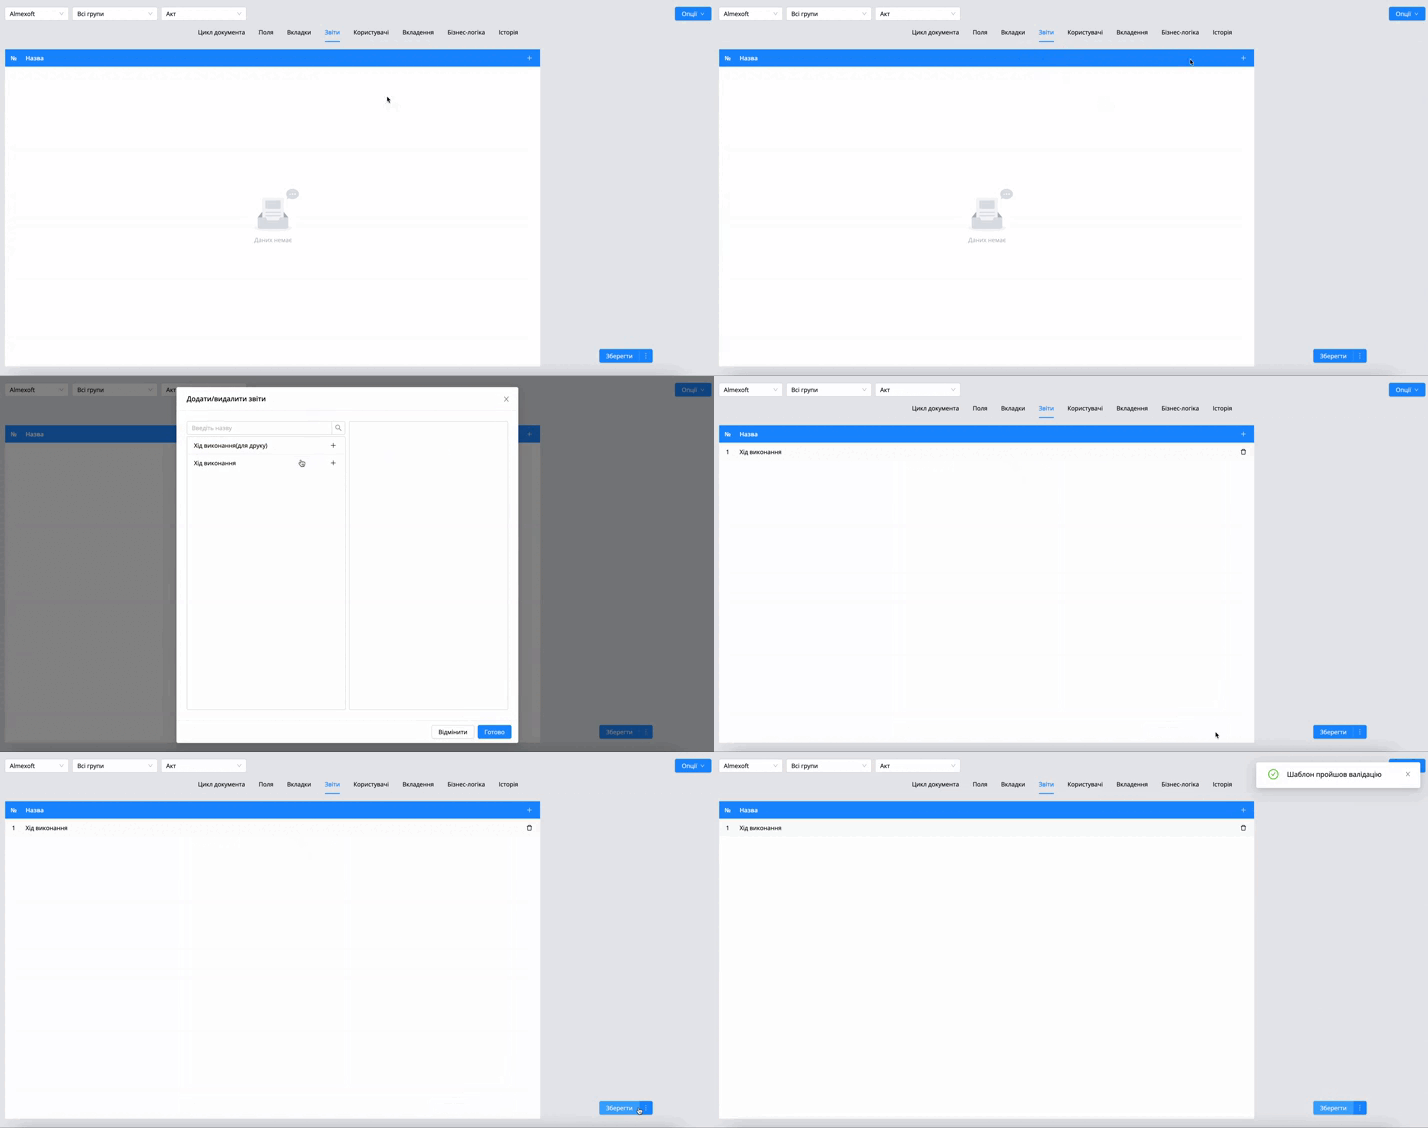
[Business process design] - [Users]
This section is used to give users access to create documents based on this template, as well as to access the steps.
The following columns are available:
Can receive. Users who are added to this column can be participants in steps with [type of action - Execution, Sharing].
Note 1 Users from this column are displayed in the list when performing an action on the document - [Share]. |
|---|
Can create. Users added to this column can create a document based on this template.
Can sign. Users who are added to this column can be a participant of the step with [type of action - Sign].
Can approve. Users added to this column can be part of a step with [type of action - Approval]
Administrator. A system column that does not affect the functionality of the document. The user can not add users to this column.
Note 2 The user can also add user groups to these access columns to provide immediate access to the right user groups. |
|---|
Importantly! If the user has already created a document, but forgot to add the necessary users, then the user can add them to the template and then add them to the necessary steps in the already created document during editing (if the process settings allow it) or via the document options (if there is a corresponding role. More information). |
|---|
[Business process design] - [Attachments]
This tab is used to add attachments, which will then be automatically added when creating a document, or to select the desired attachment from the attachment template. You can also edit attachments in this tab.
To upload an attachment, you need:
Open the desired template
Go to [Attachments] tab
Click on

Click or drag & drop the file into the add attachment window
Click on

The following settings are available for the uploaded attachment:
Auto-add attachment. While creating a document, an attachment will be added automatically.
Prevent automatic attachment editing when creating document. While creating a document, this attachment will be prohibited from editing, even if the template settings allow it.
Prevent automatic attachment removal when creating document. While creating a document, it will be forbidden to delete attachments.
[Business process design] - [Business Logic]
Process roles
Process roles are used to extend the capabilities of automatically assigning users to document steps. The user can add users to the process role immediately in the business process template or using a customized drools script.
For each template, 4 process roles are automatically created:
Author. The author of the document will be set in this process role.
Author Chief. The chief of the author of the document will be set in this process role.
Responsible. The responsible user for the document will be added to this process role. (When creating or editing, the user can set a responsible user). More information later in the instruction.
Last Executor Chief. This process role will add a user who is the manager of the last user who made a decision before the stage with this role.
The user can add users/groups that are added in the [Users] tab to the [Can receive] column in the business process template to the process role.
Process role parameters:
Key. Used in drools scripts.
Name. The name of the process role that will be displayed when it is added to a stage.
One value. The principle of operation of the setting:
If enabled, only one user can be added, groups cannot be added.
If disabled, users and groups can be added
Value. Users/groups are added in this field.
Note! To assign a process role to a step with the action type - [Sign] or perform the action [Assign], the user needs to enable the [One value] setting. |
|---|
Process variables.
Process variables are used only inside drools scripts to store information that will be used throughout the process. The user cannot work directly with the data of the process variables.
There is only [Key] setting for the process variable.
[Business process design] - [History]
This tab displays the history of changes to the business process template.
What the user can see:
Who changed
When changed
What changed
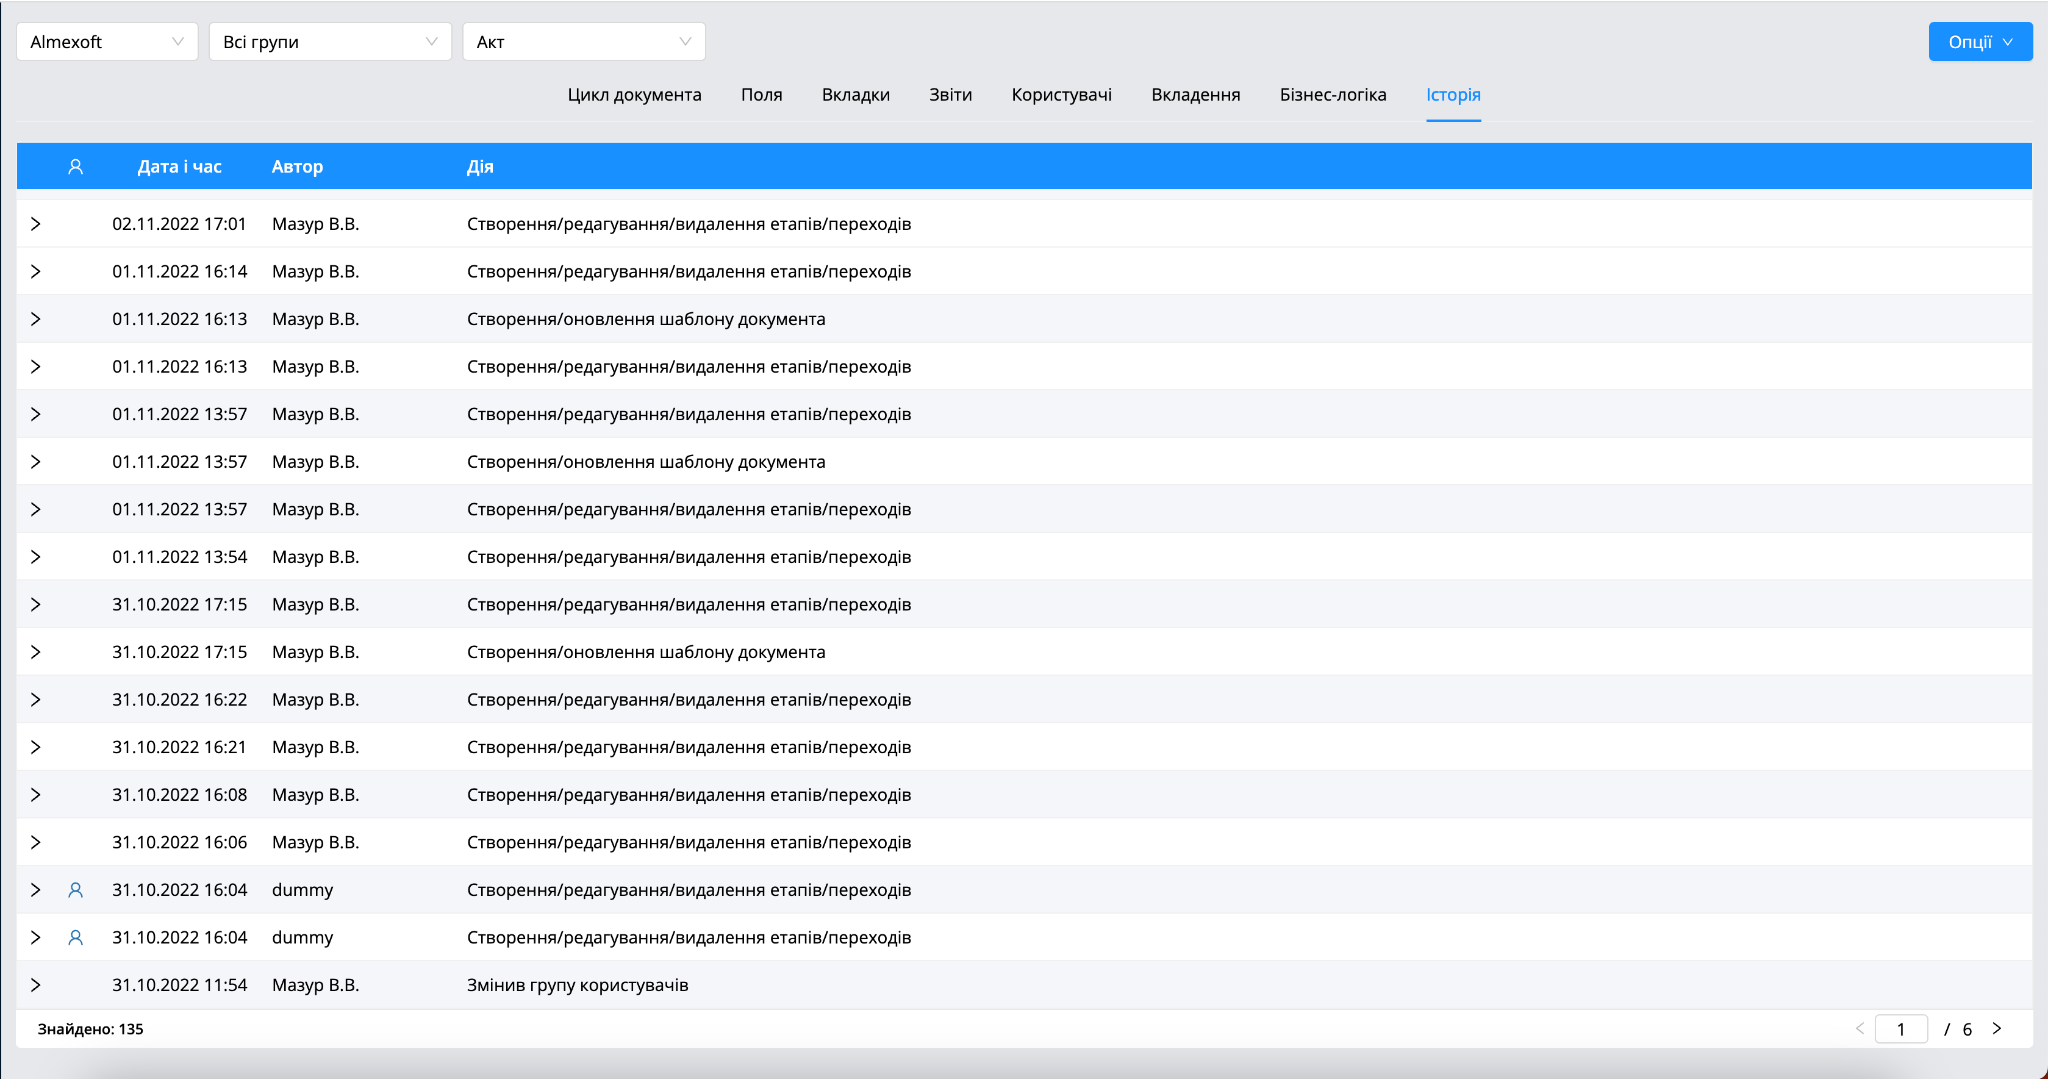
[Business process design] - [Columns]
This tab is used to configure the table fields in the documents section when filtering documents according to this template.
There are two types of column settings:
By default. When filtering documents by this pattern, fields with the setting [by default] will be displayed.
Setting fields manually.
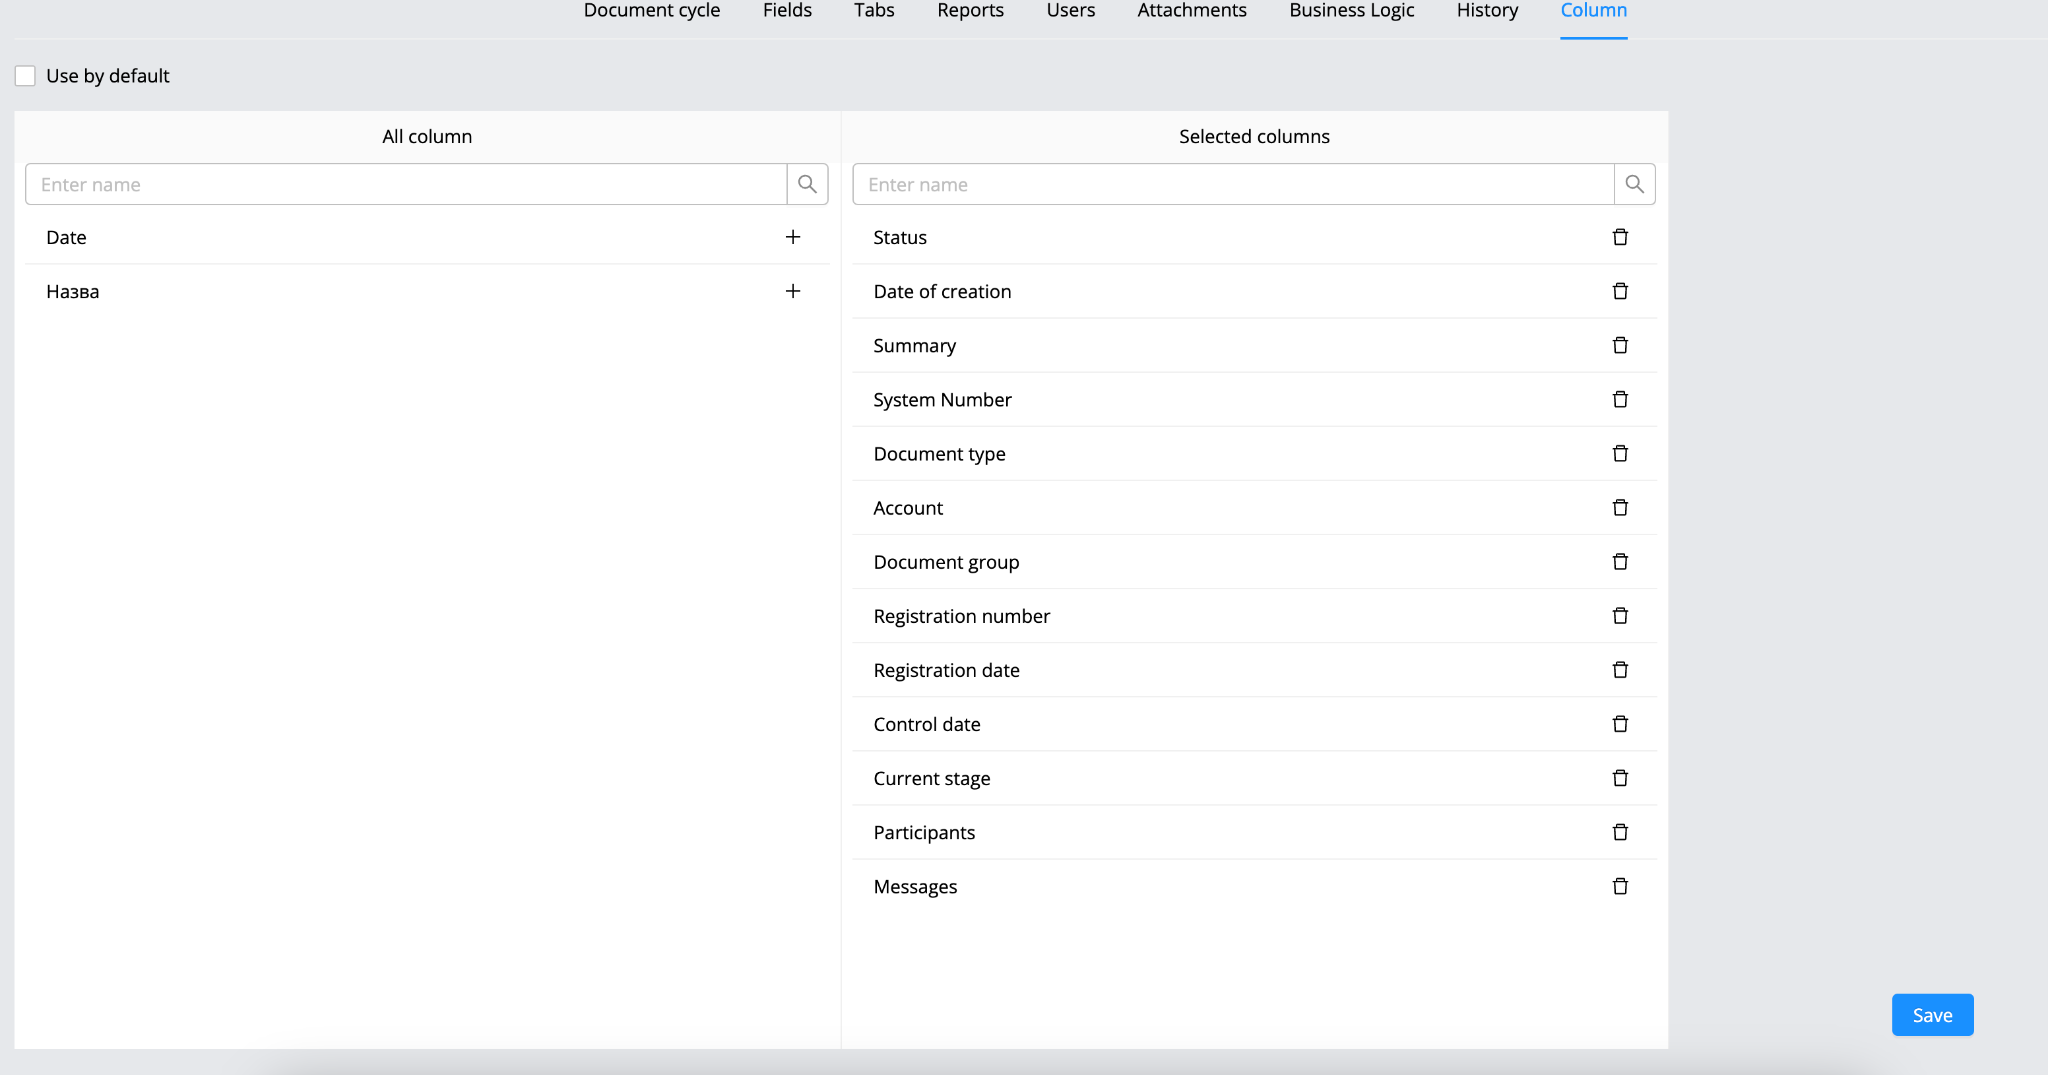
Importantly! When filtering by a group of templates, all fields selected in templates will be displayed without duplicates. |
|---|
[Business process design] - [Decorators]
This tab is used to configure decorators and watermarks that will be displayed when signing and converting attachments in documents created using this template.
There are two types of decorator settings:
By default. When signing attachments, the default decorator will be displayed. So is the watermark.
Manual settings.
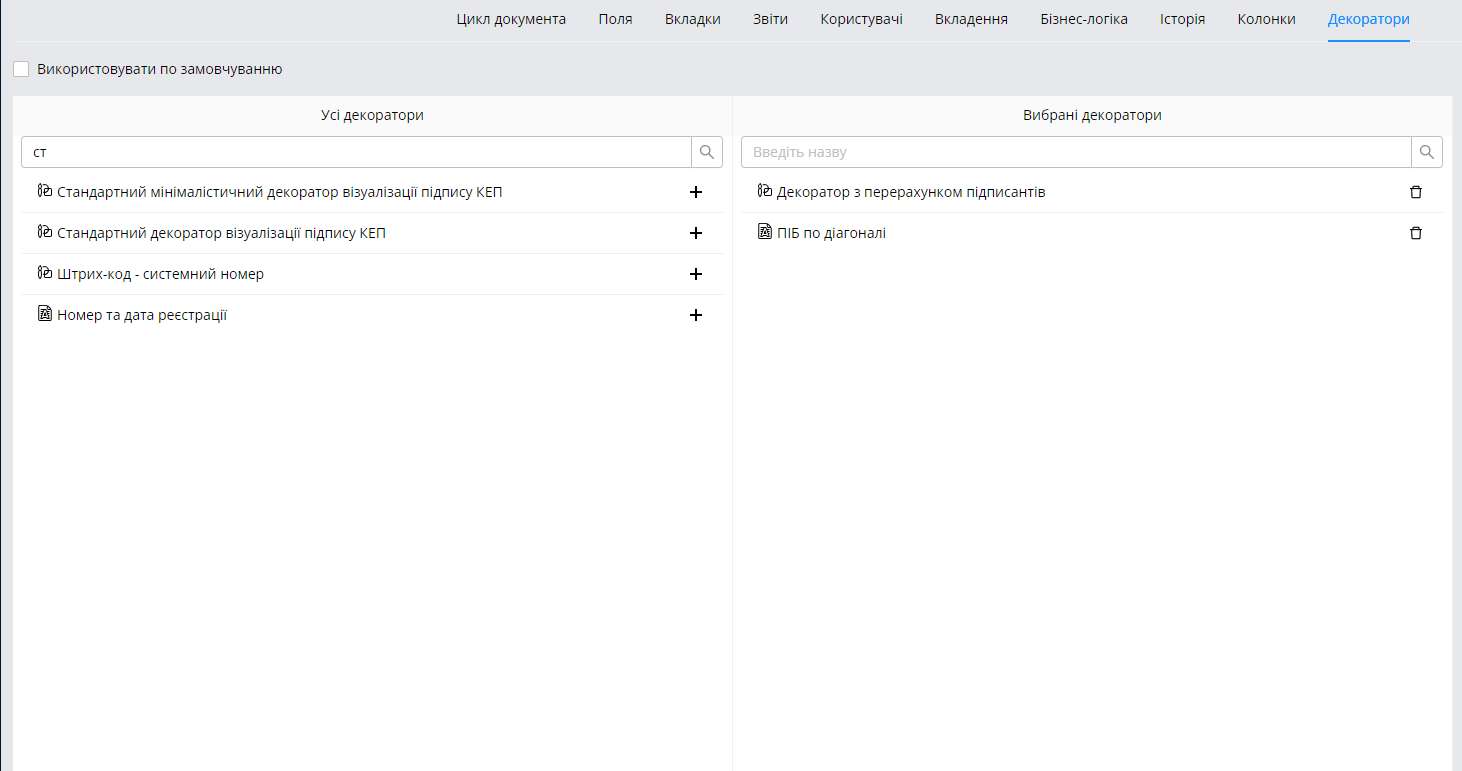
Document Actions
This section describes actions on documents:
Creating a document
Making a decision
Assign
Additional approval
Share
Add participant
More about the documents in the section documents.
[Document actions] - [Creating a document]
For creating a document, you need:
Log in to the system: enter your login and password
Go to the Documents section on the left side menu
Click on
In the template selection window, select:

Select an account
Template group
Template
Note! By default, the main account is always selected. |
|---|
Fill in all required fields with information. Those fields that are preconfigured in the template
Add an attachment if you need.
Click on

Note! When clicking on the button a document will go to the draft step. |
|---|
While creating a document, the following tabs are available:
Information. The main fields are displayed in the information tab.
When creating a document, the user can assign a responsible person and select a control date. The user need to click on the setting [Mark as control].
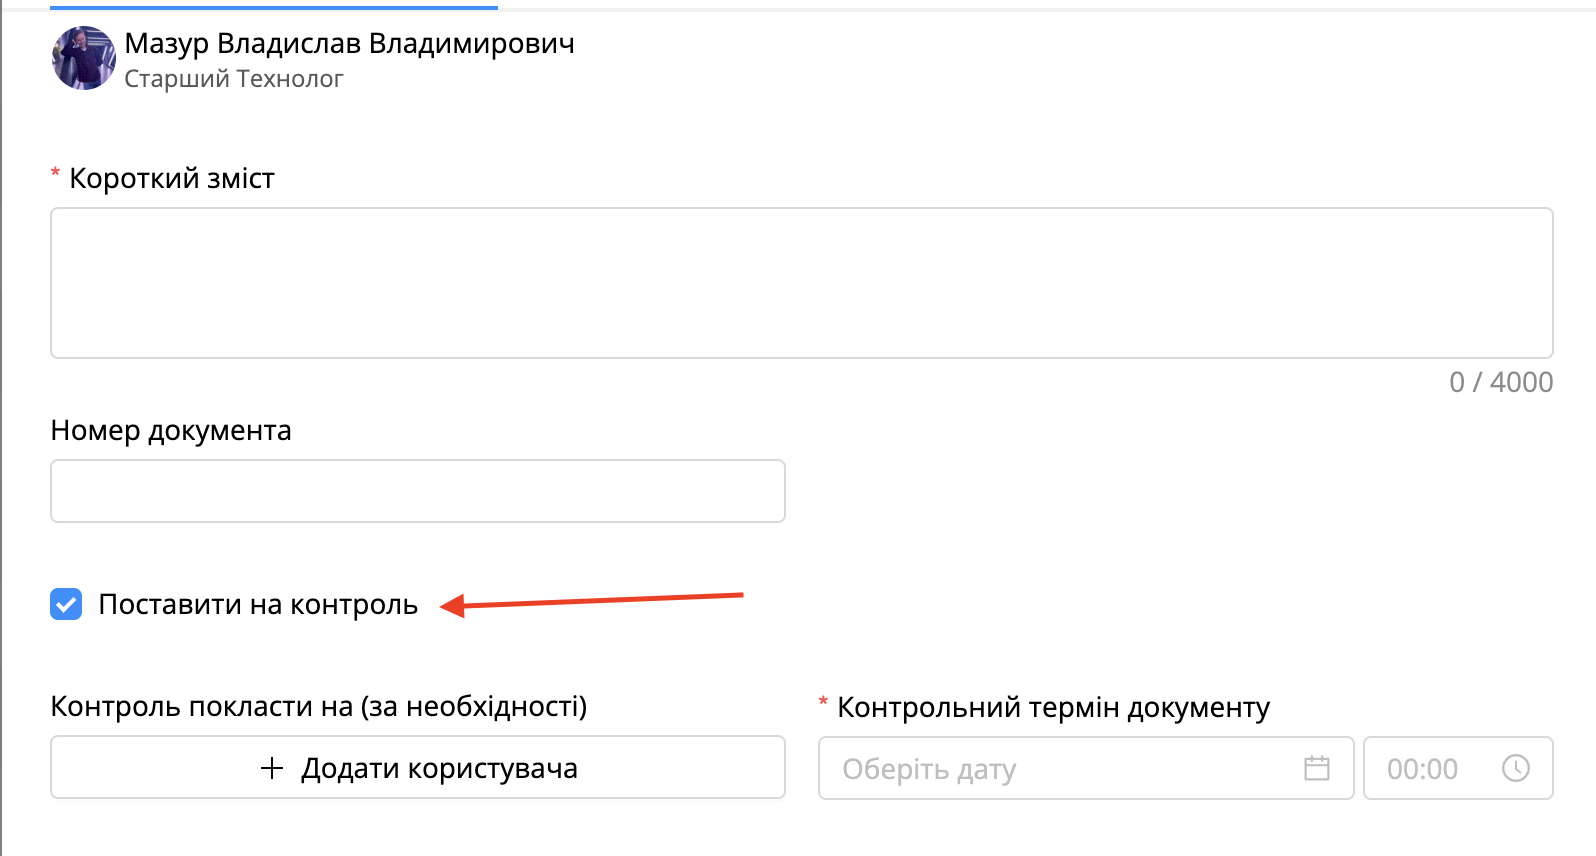
Also, while creating a document, the user can link documents to each other in the [Related documents] block.
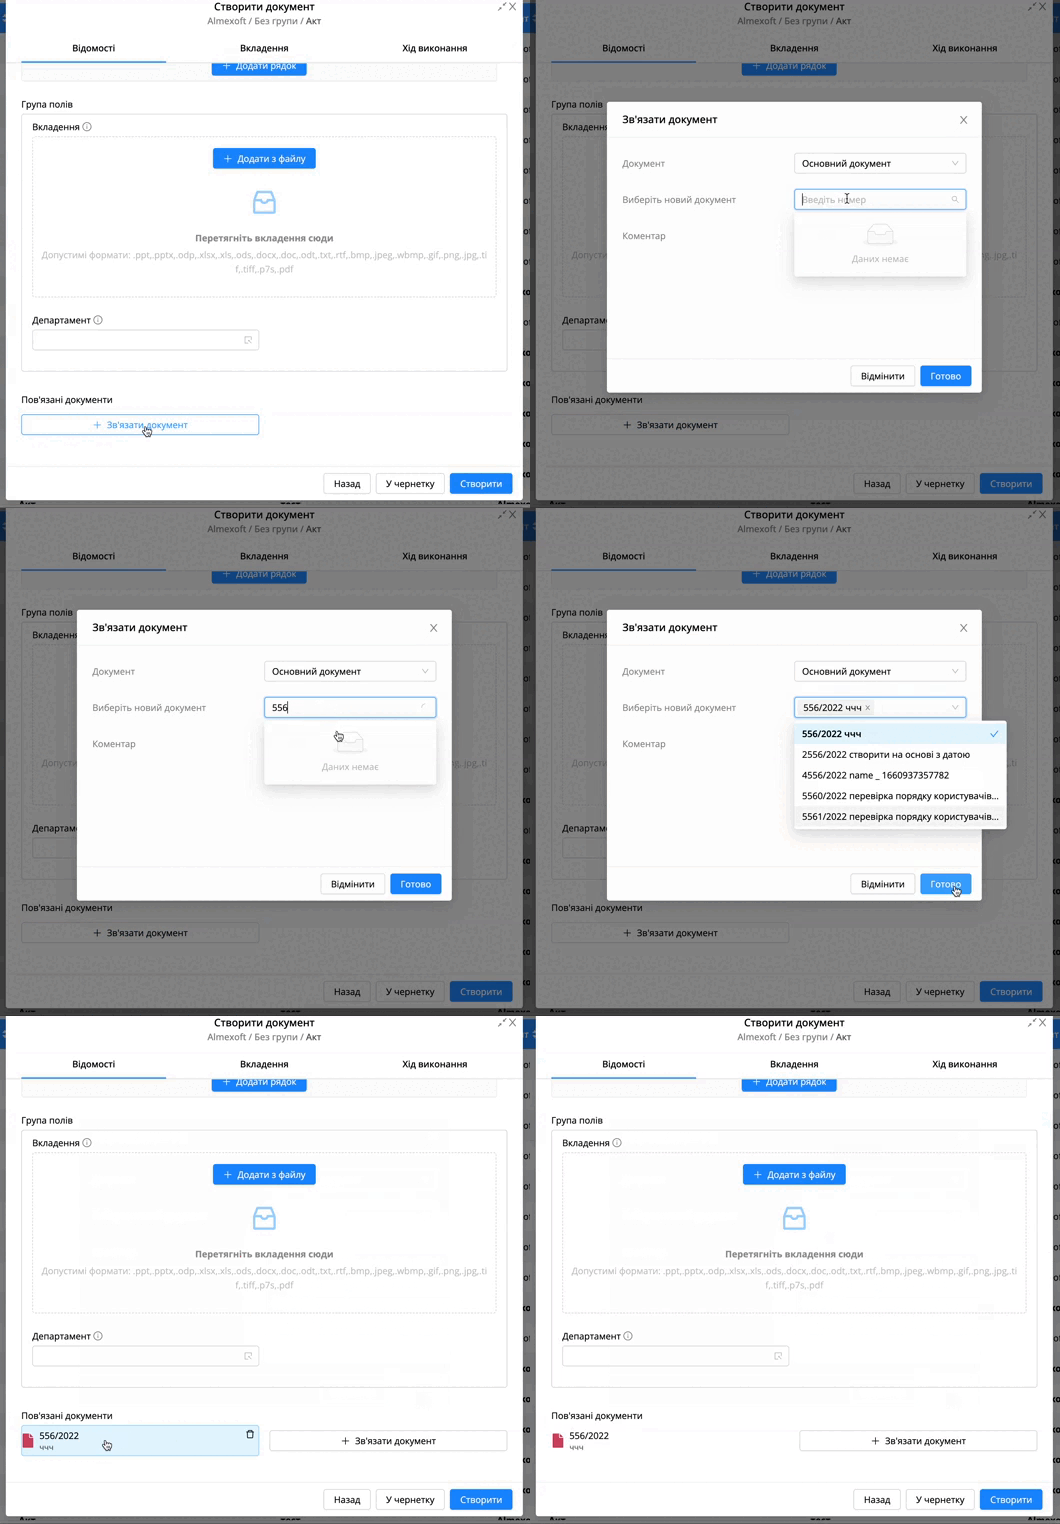
Note! The user can make a decision on the document inside the open attachment on the left side menu. The same list of actions is available there. |
|---|
When creating, the user can add a secrecy stamp if the user enables
the [Add secrecy stamp] setting in the template.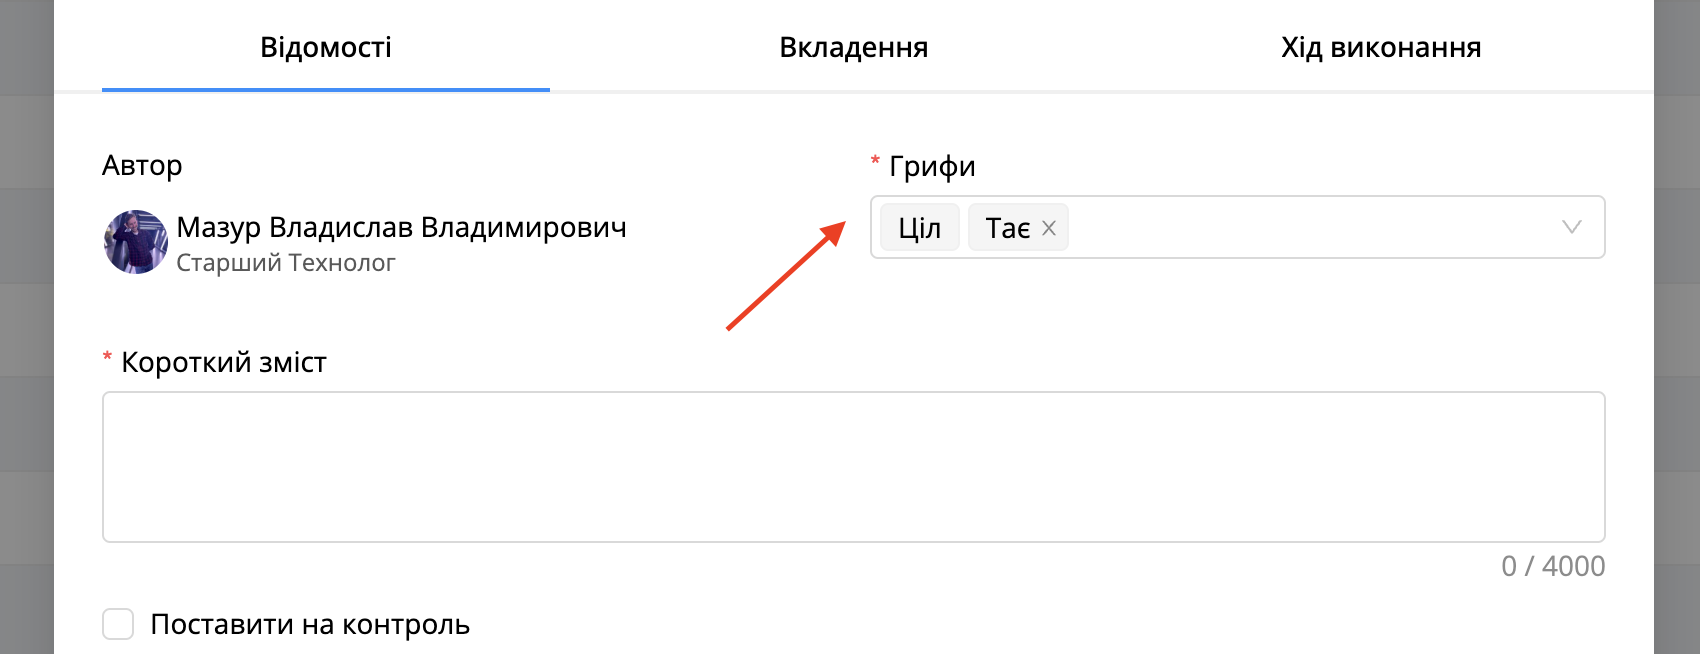
Attachment. This tab displays the attachments that will be in the document. The user can add and edit attachments.
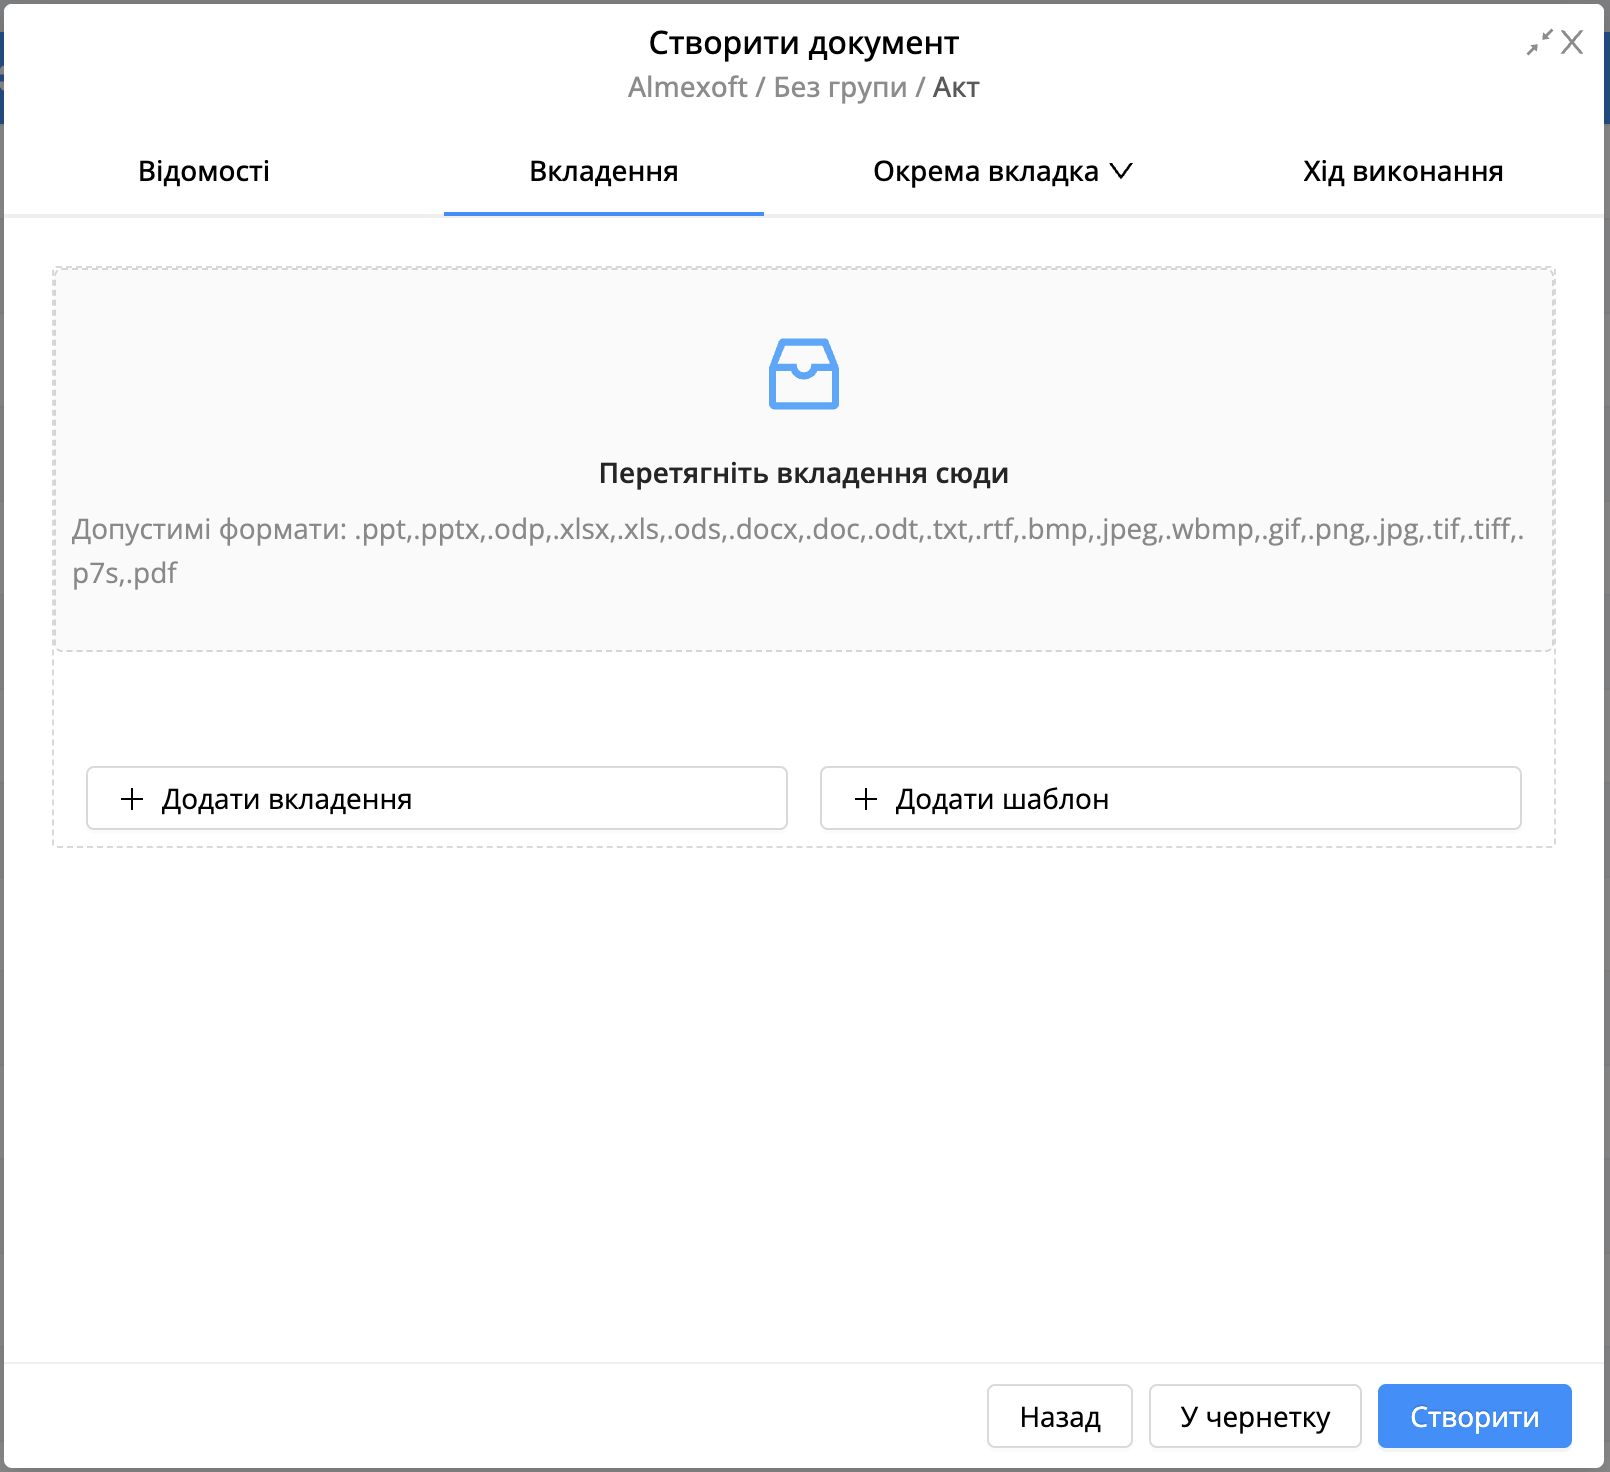
Also in this tab, the user can add attachments from the template that are configured in the business process template. More information.
Execution tree. This tab displays normal and automatic steps, except [Start] & [End] step.
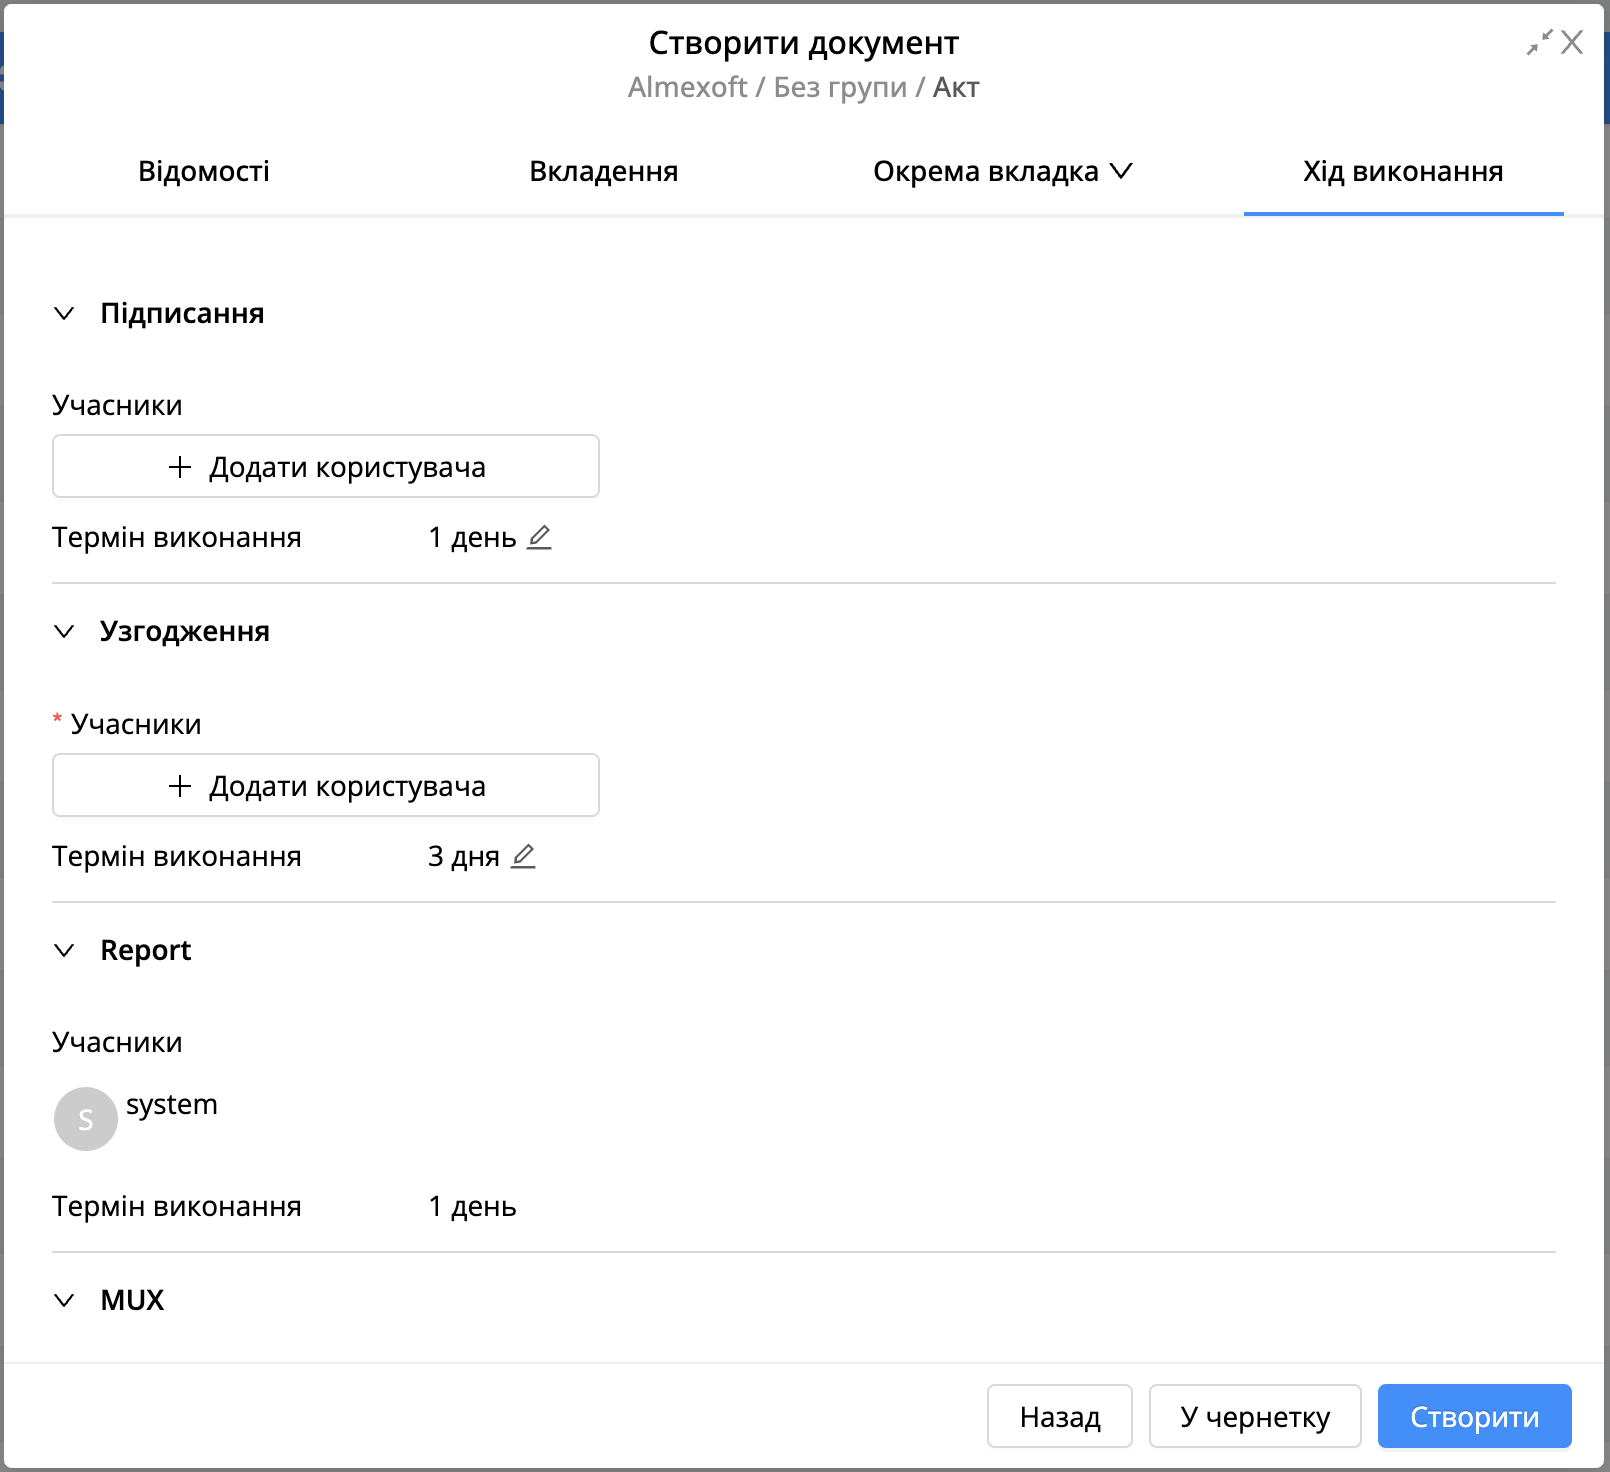
If the user enables the setting [Change of stage parameters when creating a document] at a normal step, then when creating a document in the [Execution tree] tab, it will be possible to edit the participants and the execution period. As shown in the screenshot above.
Tab with fields (If configured in a template. More information).
You can fill in the fields when creating a document.
The user has the opportunity to change the display order of attachments when creating and editing a document.
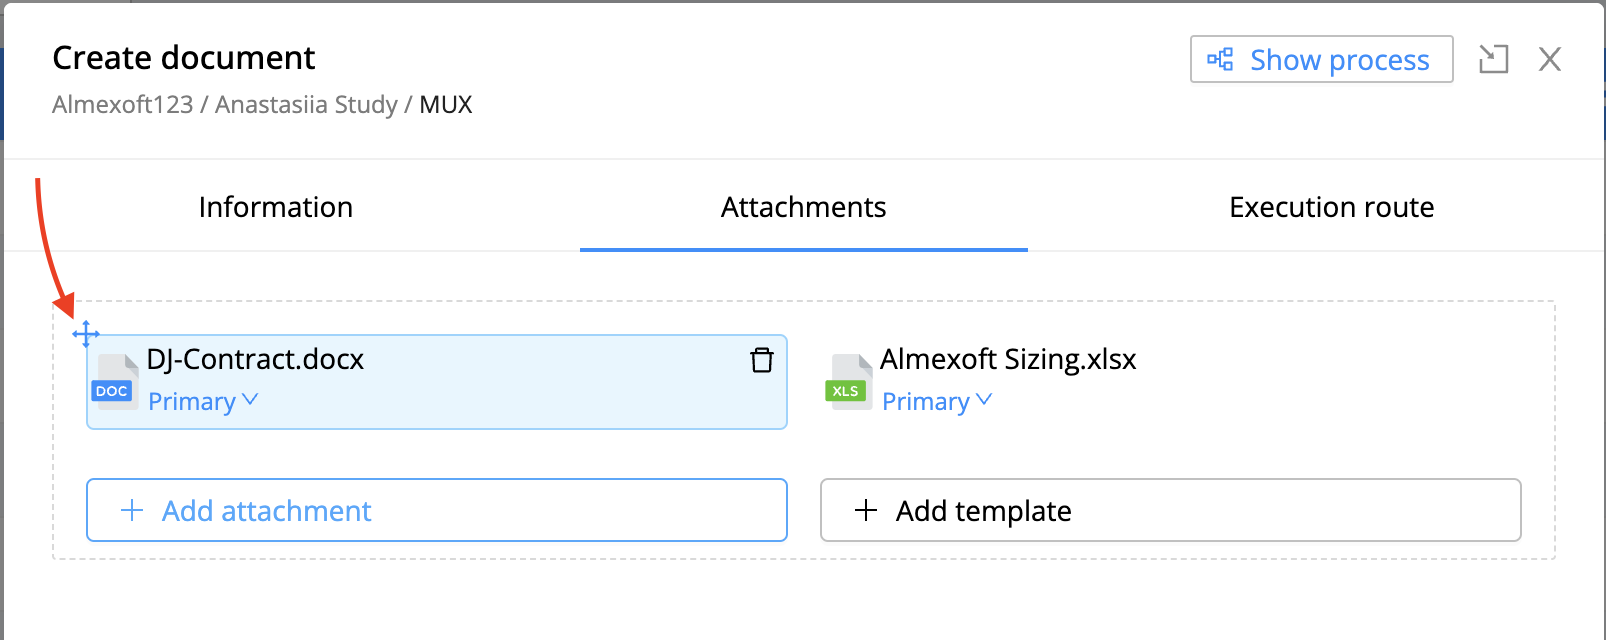
Note! On the document creation form, you can view the business template
process by clicking on |
|---|

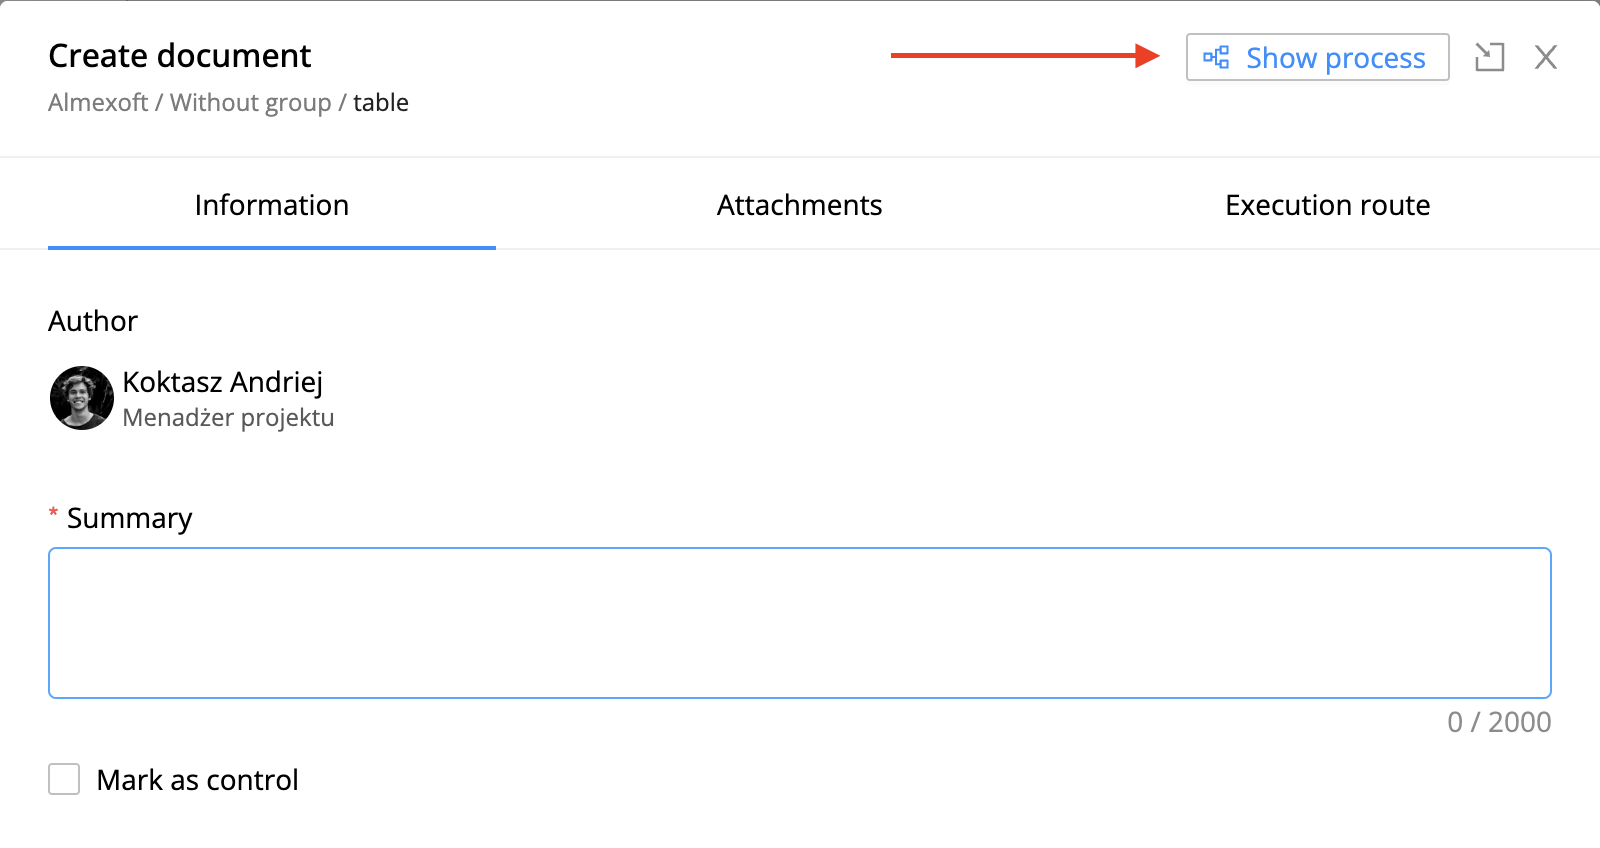
[Document actions] - [Making a decision]
For making a decision, you need:
Select a document from the list
Click on

Choose a decision
Fill in the fields, add attachments, if such conditions are configured in the document template.
Also, when making a decision, it is possible to sign attachments en masse.
For signing attachments, you need:
At the stage from which decisions are made, the user needs to enable the setting [Ability to sign attachments].
Place the cursor on

Select the required signature type - [Upload file] or [Choose from secure storage].
*** The secure storage option is paid and requires licensing
Upload a key file or choose from a repository
Enter the key password
Click on
After uploading the key, a list of attachments that have been published will be displayed (settings on transition)
Click on in the decision window
After the decision is made, a signature will be added to all attachments that were on the list.
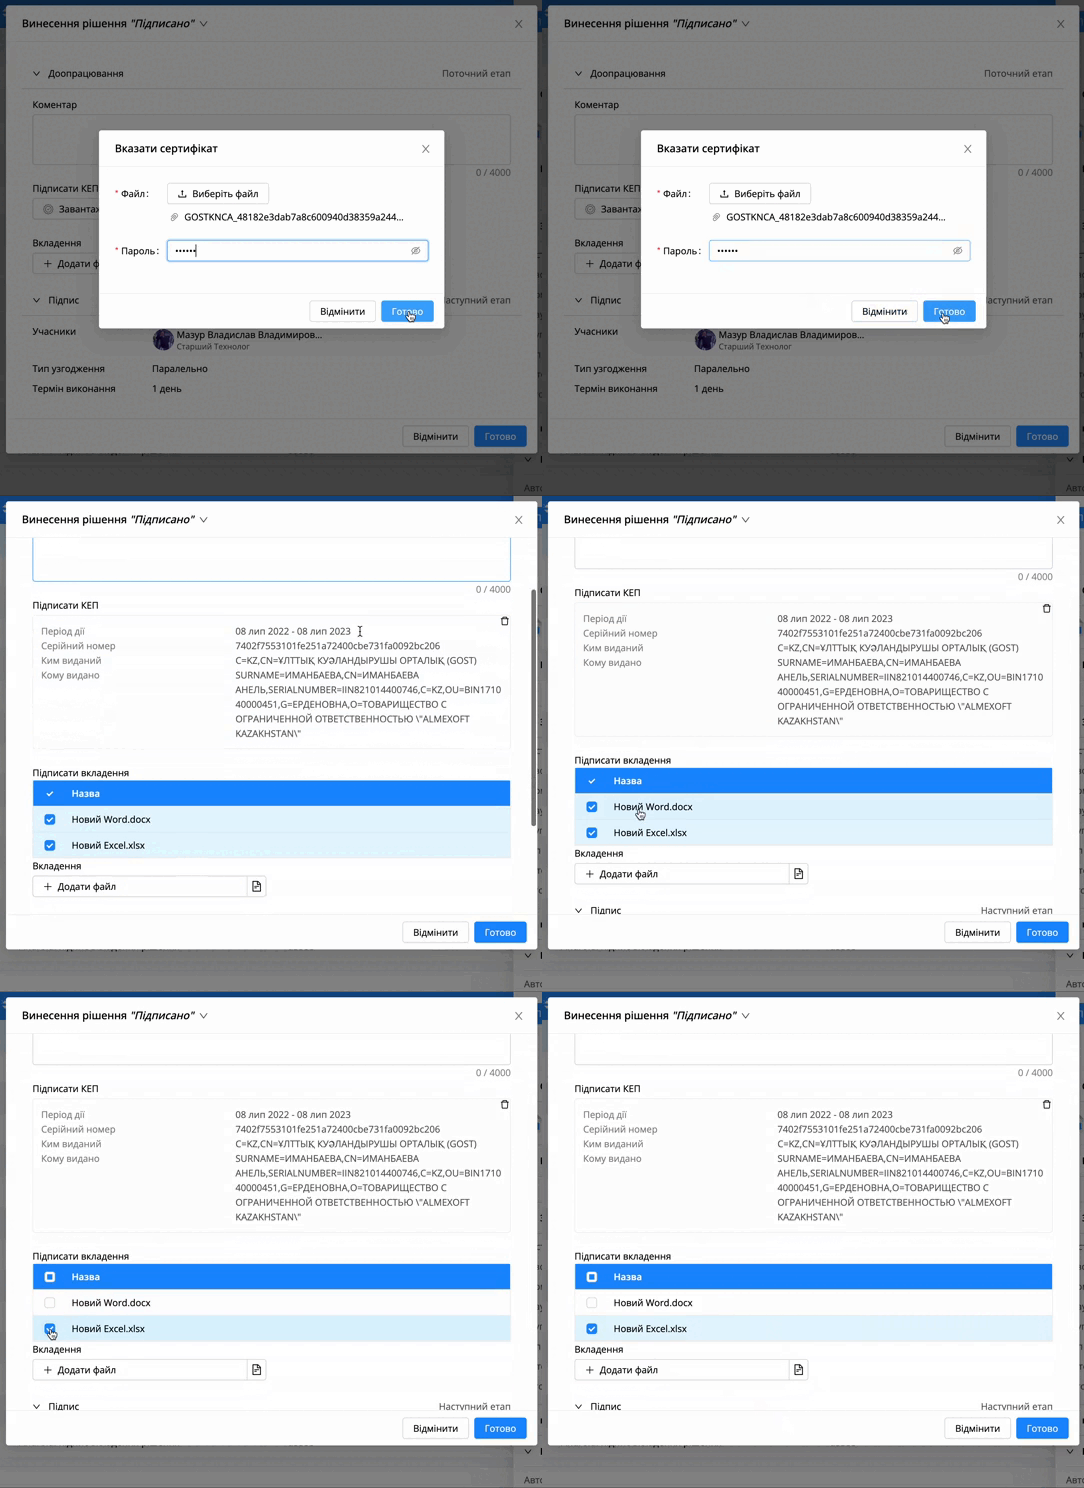
Note! An attachment will not be re-signed if it has already been signed. |
|---|
Importantly! In the system, the user can sign attachments that are added to the document as primary or secondary. When adding an attachment, there is a choice of the type of attachment. More about options. |
|---|
[Document actions] - [Assign]
The assign action enables the user to entrust the execution of actions on the document to other user. The action can be performed on a user or process role for which the setting [One value] is set.
Note! The assign requires the role USER_DOC_REASSIGN_UPDATE or ADMIN_DOC_REASSIGN_UPDATE, to be a step participant and the duration of the document step is more than 2 days. Setting - [One value] for the process role is required to prevent users from bypassing system rules and making assign to a group of users. |
|---|
There are two types of assignment:
Without control. Without control - the document will immediately go to the next stage, will not wait for the decision of the person who assigned and will change the status of the document to "In progress, does not require your participation" from the user who assigned. (if the transition is set to "Immediately").
With control. With control - the document will not go to the next step, after the decision is made, but will wait for the decision of the user who assigned.
For assign, you need:
Select a document from the list
Click on
Select action
Fill in all mandatory settings and required fields
Click on
[Document actions] - [Additional approval]
The function of additional approval in the system is necessary to obtain expertise from a specialized employee, in case of additional questions when working with the document.
For additional approval, you need:
Select a document from the list
Click on
Select action
Fill in all mandatory settings and required fields
Click on
Note! The additional approval action is available if the user has one of the USER_DOC_ADD_CONFIRMATION, ADMIN_DOC_ADD_CONFIRMATION roles and the “Allow additional approval”. |
|---|
Note! Setting [display in "Require action"] affects the display in the system filter for the document - Requires participation. |
|---|
[Document actions] - [Share]
The [share] action makes it possible to familiarize other users with a document.
For familiarization, you need:
Select a document from the list
Click on
Click on

Select the user or users for familiarization with the document
Note! To display this action, user must enable the settings at the required stage |
|---|
[Document actions] - [Add participant]
This function makes it possible to add any participant to the current step of the document, if this user is added to the template (according to which the document was created) in the [Can receive] column of the [Users] tab.
Note! This setting is displayed if the user has the ADMIN_DOC_ADD_EXECUTOR role and the step has the setting - [Changing stage settings while editing a document] |
|---|
To add a user, the user needs:
Select a document from the list
Click on
Click on
Click on

Select the user or users for adding
Click on
When adding a user, there are additional fields with settings:
Comment. Will be displayed next to the user card in [execution tree] in the document.
Execution date. Control date for this user in the document. By what date, the user needs to perform the action before the card expires.
Individually. After clicking on settings, the display of adding a user changes, and the user can add 2 or more users and individually set the control date and comment for each.
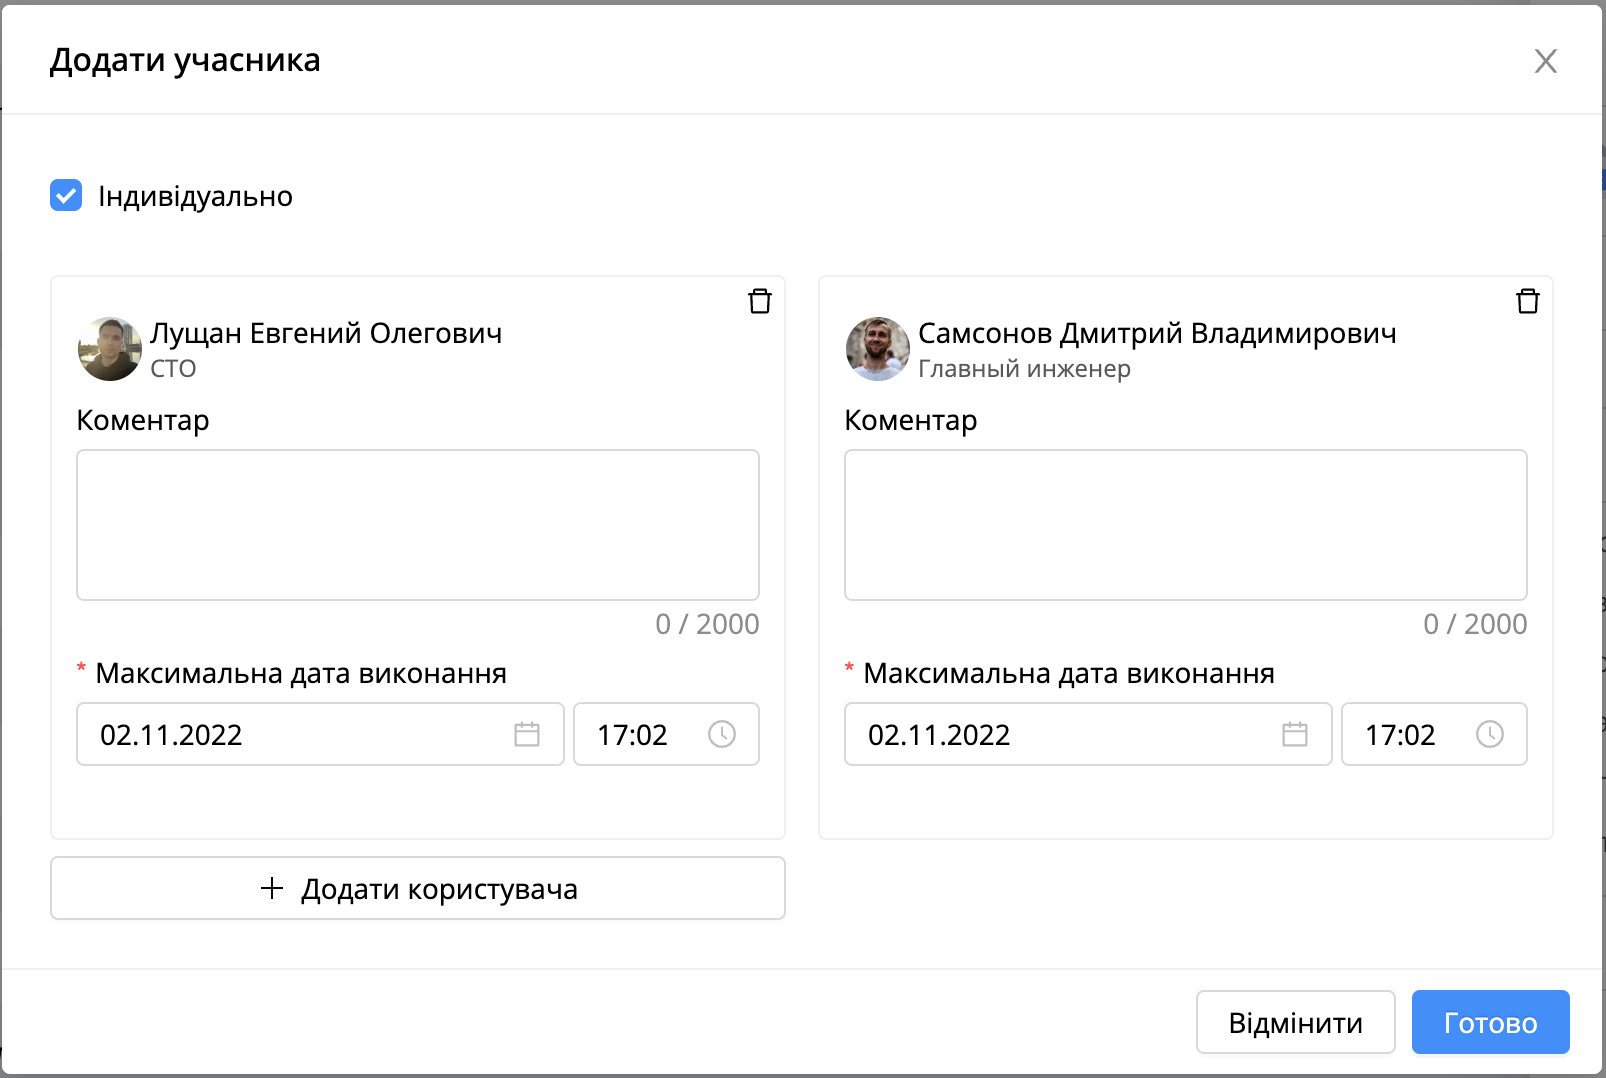
[Document actions] - [Ask question]
This function allows the user to ask question to the user at the stage. The user must be added to the [Can receive] column.
To ask a question, the user needs:
Open the document

Click on the button
Click

Fill in all mandatory settings and required fields
Press

Importantly! This action will be displayed if the step template has the “Ask question” setting enabled |
|---|
Note! Setting [display in "Require action"] affects the display in the system filter for the document - Requires participation. |
|---|
[Document Actions]-[Log work]
The system has an action on the document - taking cards into work. The creation function is to demonstrate the user's work on the document without making a decision and without closing the main card.
There are three decisions:
Start work.
Log work.
Stop work.
The last two decisions will be displayed after the start of work.
When making such decisions, a comment field is available.
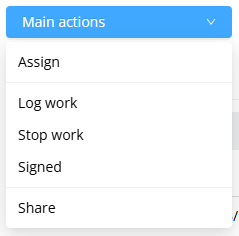
The card logging functionality can be disabled through the server settings (execution.card.work.logging).
There are three options in the setting:
REQUIRED. The user will be required to start work before making a decision;
OPTIONAL. The user can make a decision without starting work. This action is optional;
PROHIBITED. The start work action will not be displayed.
Options
Document options
Additional features of the platform when working with documents and attachments.
To work with document options, you need:
Select a document from the list
Click on

And choose the necessary option
The following options are available in the LOW - CODE platform Almexoft:
Add to favorite.
Adds the document to favorites, which will be displayed in the system filter. More details.
Add to knowledge base.
This option allows the user to add a document to a knowledge base folder if the user has the role [KNLG_DOCUMENT_BIND] and access to a folder configured in the section.
Note! If the user does not have access to any folder of the knowledge base, then when clicking on this option, there will be an empty list of folders in the add window. |
|---|
Label.
The label allows the user to mark the document with an available color, which will be displayed in the corresponding field [Color]. More information.
Mark as unread.
If the document has already been read, it is possible to make it unread.
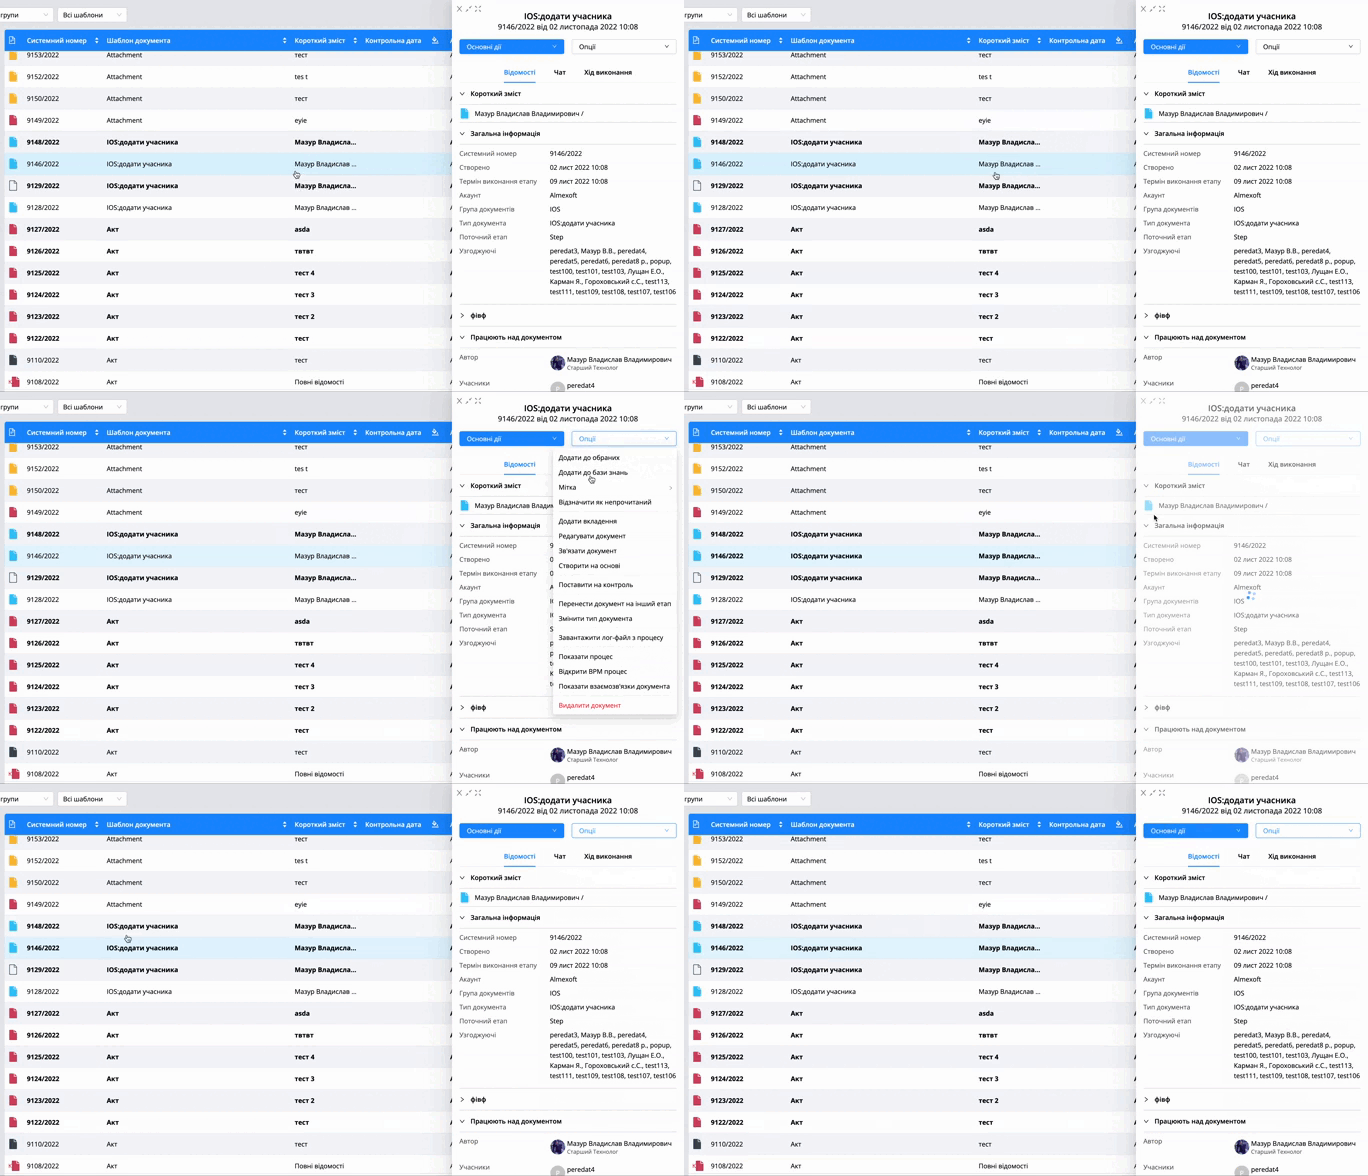
Add tag
It is possible to create tags for the document. There is also an option to create a new tag in the add tag window.
Add tag form.
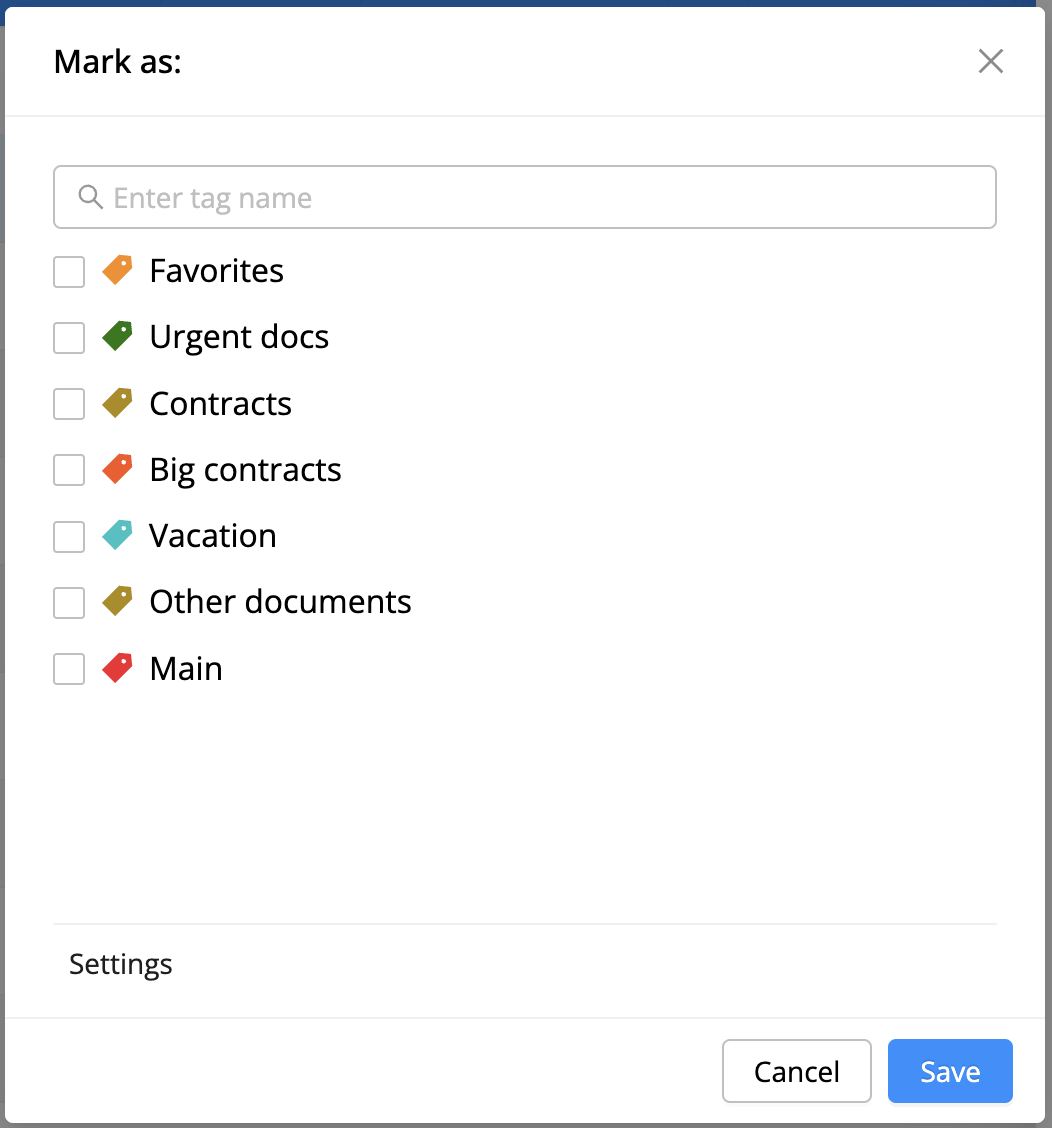
Clicking on the settings button opens a form for creating new tags and editing old ones.
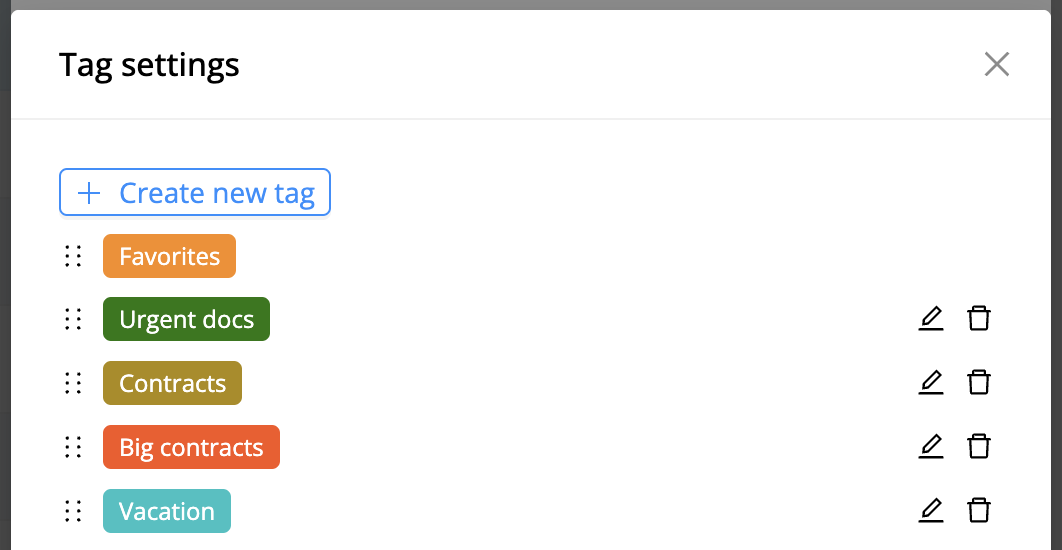
These are custom tags and are only available to your user, other users will not see them. The Favorites tag is available to all users and is created automatically.
| Note! Tags can also be added through the column in the documents section. This is a system column that is created automatically. |
|---|

In the document, the tag is displayed in the general information.
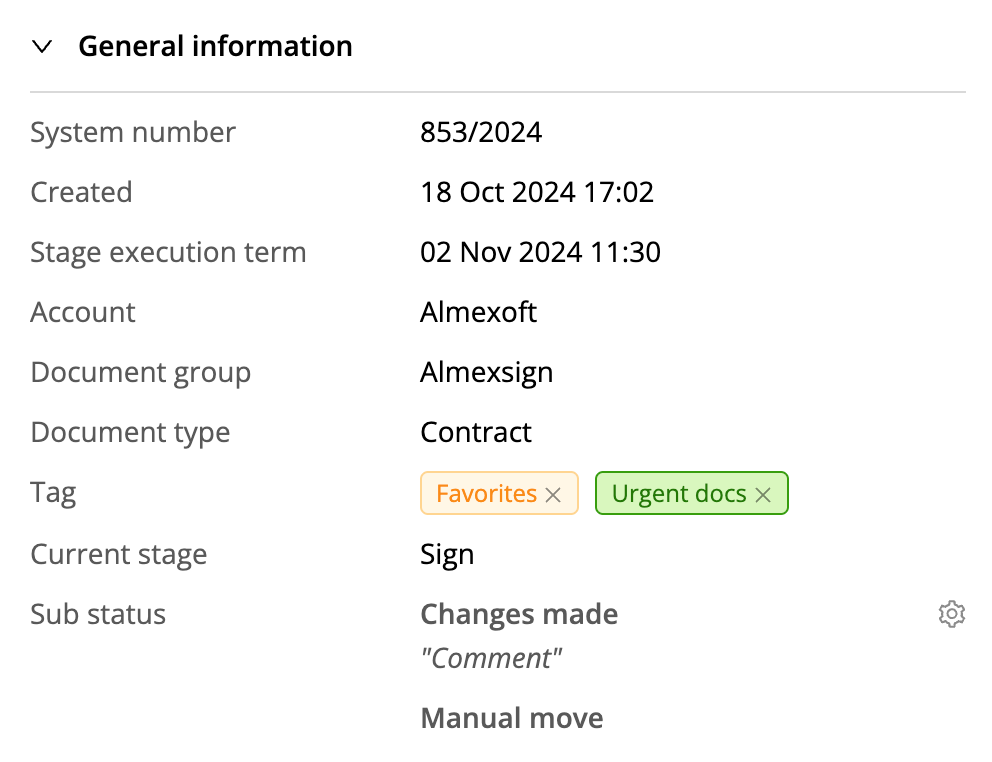
Add attachment
The option allows the user to add attachments to the document. This option is displayed if there is direct access to the document - there is a role USER_ATTACHMENT_UPDATE + settings [Add attachments] at the step. If access to the document is not direct, then only the role ADMIN_ATTACHMENT_UPDATE is required.
| Note! File size limit is 50mb. Administrator can increase this amount, setting file.content.max.size in property file. |
|---|
Edit document name.
The option allows you to edit the summary without binding to the setting in the [Edit Card (Summary)] stage. The ADMIN_DOC_NAME_EDIT role is required for the option to be displayed.
Note! Editing of the title will be prohibited if the summary is generated automatically and there are field keys. |
|---|

You can also edit the name of the document by clicking on the icon next to the summary.
Edit document.
The option allows the user to edit the current document. The following tabs are available during editing:
Information. Allows the user to edit the summary of the document responsible, fields in a tab (which is not configured as a separate tab), related documents, outgoing number and date.
Attachment. Allows the user to edit already uploaded attachments or add new ones.
Execution tree. Allows the user to change the parameters of the stages of the document, namely:
Due date.
Periodic performance.
Editing and adding participants.
Fields that are configured as a separate tab.
This tab allows the user to edit the field values.
Link document.
The option allows the user to link documents to each other. The option is displayed if there is direct access to the document, then the role[USER_DOC_RELATIONS_UPDATE] is required, if there is no direct access to the document, then the role [ADMIN_DOC_RELATIONS_UPDATE] is required.
Note! When searching for a document to be linked, the number and summary are displayed, if the document (which is being searched) is in the confidential document account, then instead of the summary there will be symbols ***** |
|---|
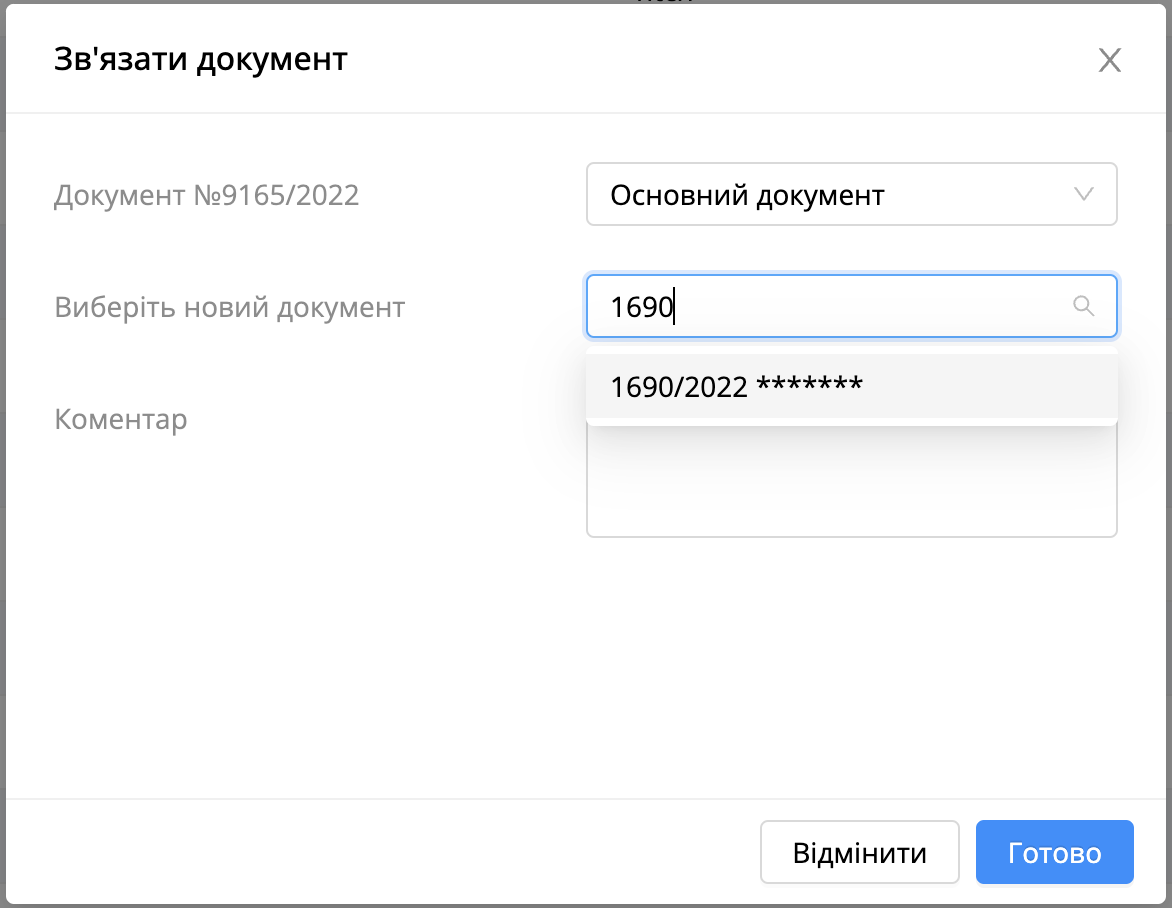
Create based on
The option allows the user to create a new document based on an already created document.
While creating based on, the user can transfer field values from the parent document to the child document. To transfer field values, you need:
Same field key and field type.
The setting [COPY_CONTENT_ITEMS_VALUE_TO_CHILD:true] needs to be enabled.(In the front-end parameter file)
The user can also transfer document attachments with or without a digital signature. To transfer attachments with digital signature, you need:
The setting [COPY_ATTACHMENT_TO_CHILD_DOC:true] needs to be enabled.
The server setting [copy.attachment.with.digital.signs] needs to be enabled.
Importantly! The fields that will be transferred must be displayed in the current step and must be displayed on creation of the document. Values from fields that do not display in the current step or in the child document at creation window, but the key and type match will not be transferred. |
|---|
To display the option [creation based on] the user needs to have roles:
If direct access to the document- USER_DOC_RELATIONS_UPDATE, USER_DOC_CREATE.
If no direct access to the document - ADMIN_DOC_RELATIONS_UPDATE, USER_DOC_CREATE.
Note! For transferring values from the select list field, the list values must be in the same order in the child template and in the parent template. |
|---|
Change registration number and date.
The option allows the user to change the registration number and date of the document in an already created document. For this option to be displayed, the document must be registered, and the user needs to have the role [ADMIN_DOC_REGISTRATE].
Note! In the number change window, there is an additional setting [Change initial document number]. The setting allows the user to change the next number of this registration number template used in the business process template. |
|---|
Change document participants.
The option allows the user to add or remove participants at the current step of the document.
Note! The role ADMIN_CHANGE_PARTICIPANTS is required to display this option. |
|---|
Change process roles.
The option allows the user to change the process roles created by the user in a document template.
Note! The role ADMIN_CHANGE_PARTICIPANTS is required to display this option. |
|---|
Assign registration number.
Allows the user to register a document at the current step if there is a nomenclature number in the business process template.
Note! To display this option, the user needs the role - USER_DOC_REGISTRATE or ADMIN_DOC_REGISTRATE, depending on the access to the document. |
|---|
Mark as control.
The option puts the document under control by adding a red letter "K" next to the document status.
Note! This option requires the roles USER_DOC_RESPONSIBLE_UPDATE or ADMIN_DOC_RESPONSIBLE_UPDATE depending on the access type of the document. |
|---|
Move document to other stage
The option allows the user to manually transfer the document to any available step in the document.
Note! The role ADMIN_MOVE_TO_STAGE is required to display this option. |
|---|
Change document type.
Allows the user to change the current document type to any business process template available for creation or to the same template. This option is needed if the documents have already been created according to the business process template (status in work) and the flow of the process in the business process template has changed, according to which the document must be agreed, and in order not to create new documents, the user can change their type. When changing the document type, the values of fields, process roles, and process variables are transferred, if their keys and type are the same (for process roles, variables, only keys).
Note! The role ADMIN_CHANGE_DOC_TYPE is required to display this option. |
|---|
Also, the user can change:
Choose the step to which the document will go.
Change Step Participant if setting [Edit Card (Summary)] is enabled.
Enter or change the registration number.
See which fields will transfer while changing the type of the document.
View process roles & variables.
Download process log.
The option allows the user to identify errors in the work of drools scripts that are added to the business process template. If an error occurred during the execution of the script, a stack trace will be written to this file.
Show process.
The option displays the flow of the business process, and also shows the user at which step the document is. No roles or settings are required to display this option.
Open BPM process.
The option opens the business process template in a new browser tab.
Note! The role ADMIN_PATTERN_UPDATE is required to display this option. |
|---|
Show linked documents.
The option shows which documents the current document is linked with.
Delete document.
Allows the user to delete a document from the system.
Note! The roles USER_DOC_DELETE or ADMIN_DOC_DELETE are required to display the option, depending on document access. |
|---|
Report.
This option is displayed if a report (with type [To document]) is added to the business process template. A report can be generated via this option.
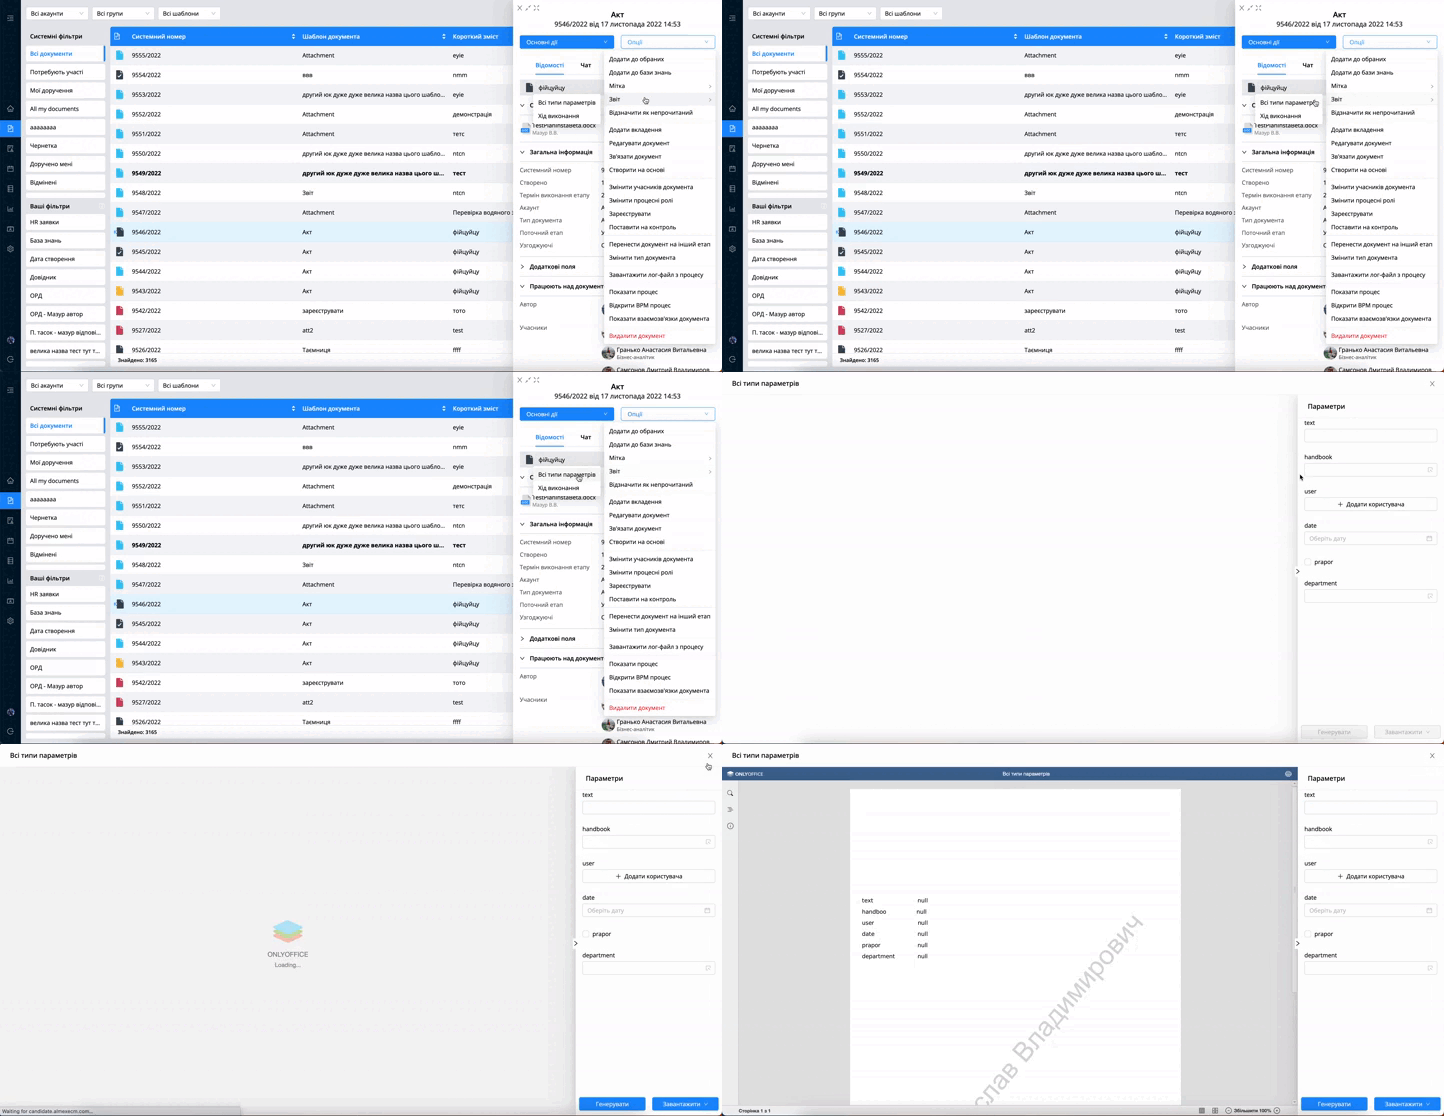
Extend the term of the document.
This option is displayed if a control date was added when creating or editing a document. If there is a control date in the document, and it is longer than the due date of the user's card, then when making an assignment or additional approval, the final date will be the control date.
Send document.
It is possible to resend a document to an external module if the document was not sent the first time. The ADMIN_DOC_UPDATE role is required to display this option.
Extended document status.
To display the option to change the extended status in the details, the user must have the ADMIN_DOC_SUBSTATUS_UPDATE role or the [Add Document Status] template setting.
These settings work independently of each other. You do not need to have both the role and the template setting.
The following parameters can.add.sub.status(1), can.remove.sub.status(2) are added to the server settings.
Functionality description:
The advanced status editing option allows you to add only statuses that are added in the settings (1).
Displaying status in details:
Form for adding an extended status (opens by clicking on the icon
 in the document
details).
in the document
details).
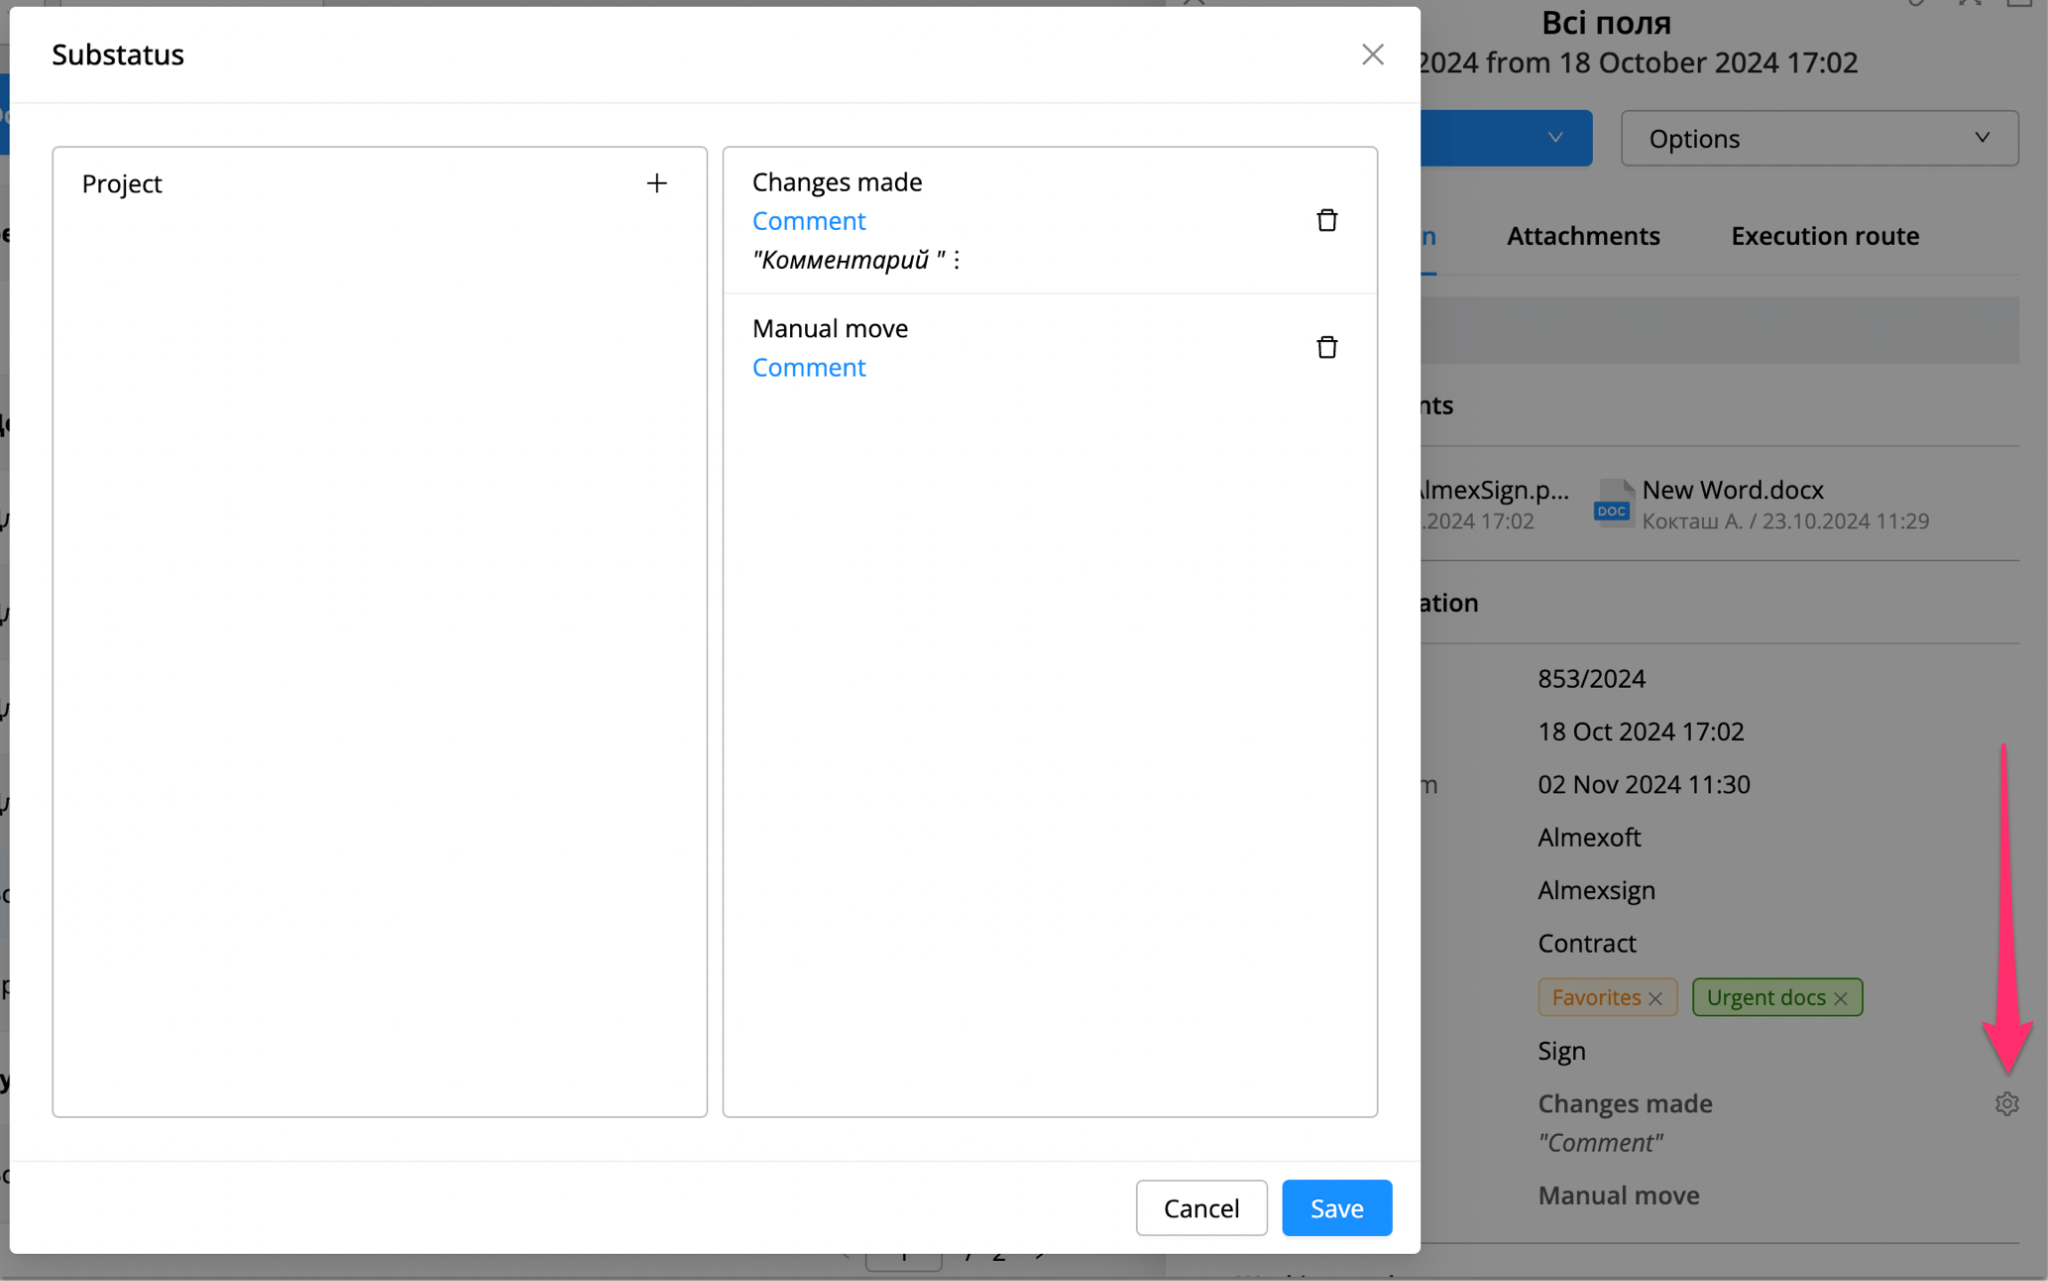
You can add a comment to the status by clicking the [Comment] button.
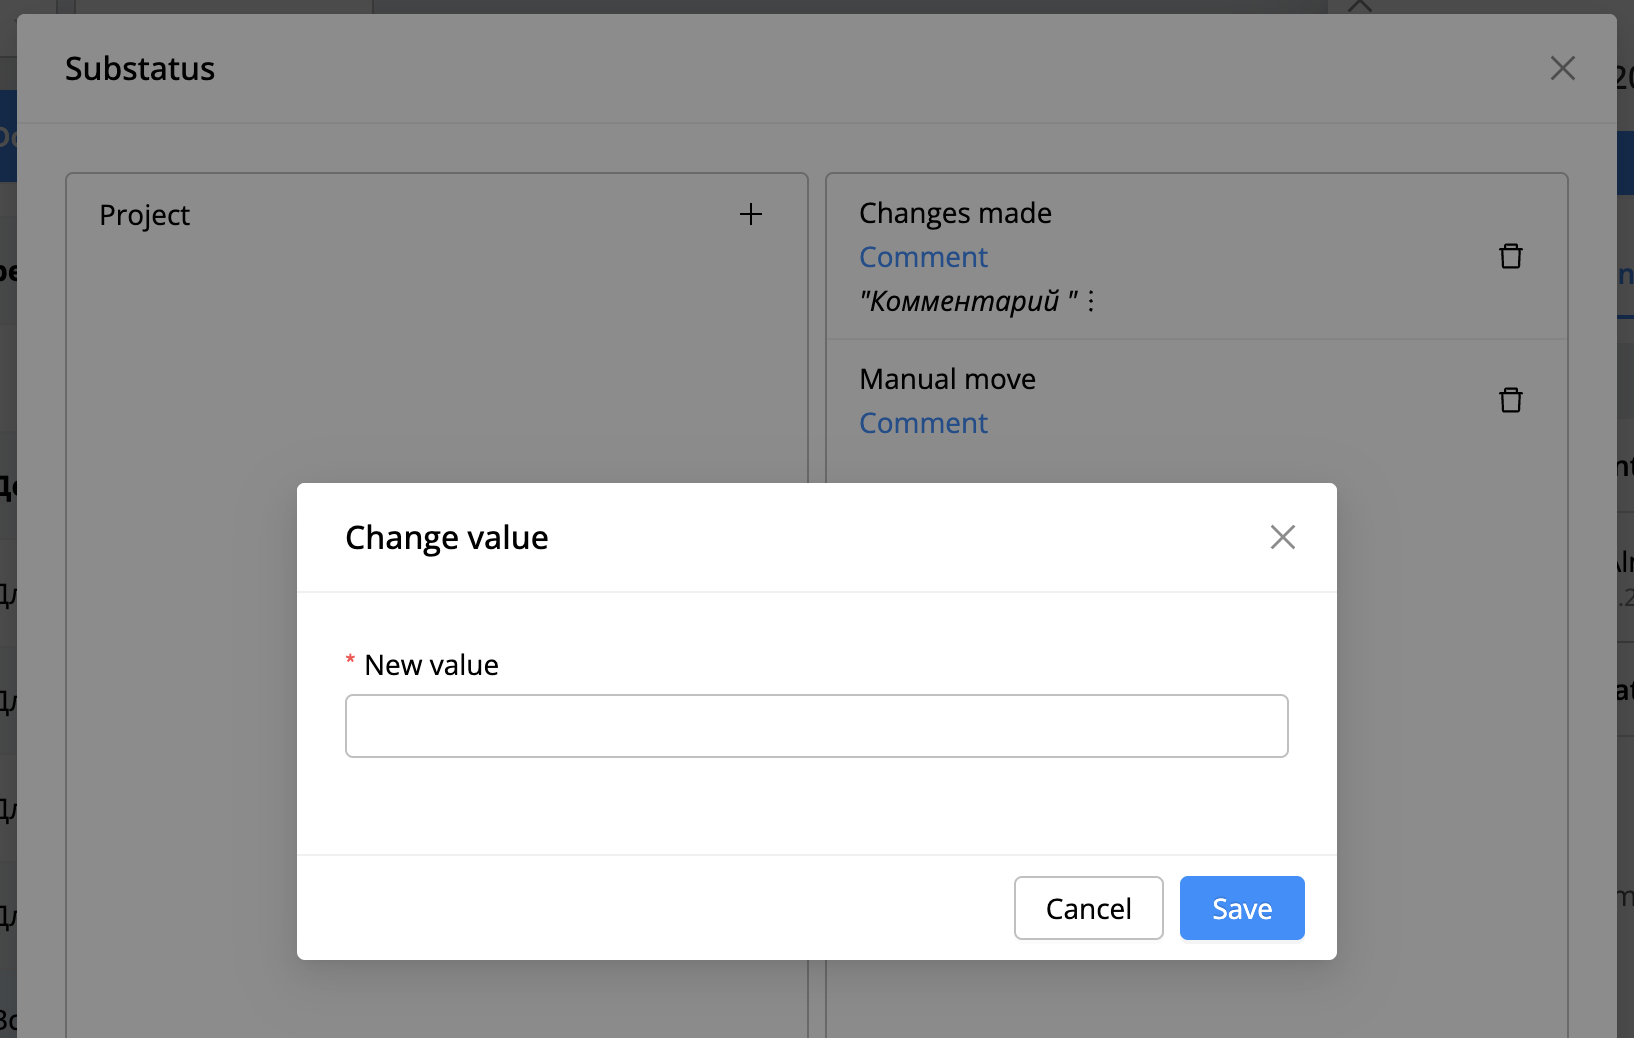
After creating a comment, options to edit or delete are available.
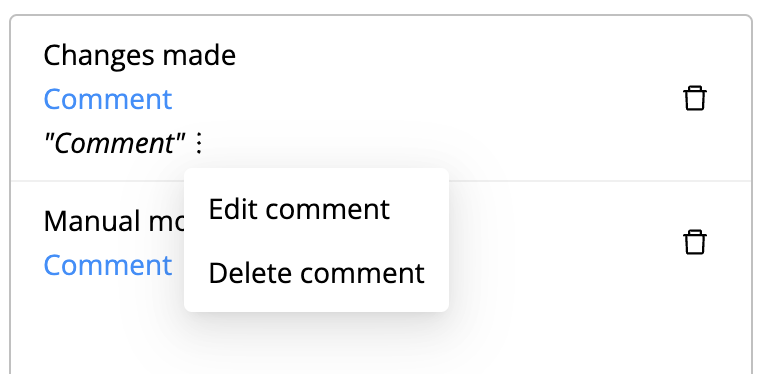
There are the following types of document statuses:
Canceled;
Changes made;
Active;
Draft;
Archive;
Manual move. Added automatically when moving a document to another stage through the document options - [Move document to another stage].
Status table:
| Expanded status | Start | Step | End | Addition | Removal |
|---|---|---|---|---|---|
| Group main | |||||
| Draft | + | ||||
| Under development | + | ||||
| Upon approval | + | ||||
| At the signing | + | ||||
| In progress | + | ||||
| At registration | + | ||||
| In work | + | ||||
| Closed | + | ||||
| Additional | |||||
| Acting | + | + | + | + | + |
| Canceled | + | + | + | + | + |
| Project | |||||
| Project | + | + | + | + | + |
| Manual movement | |||||
| Manual movement | + | + | + | + | |
| Archive | |||||
| Archive | + | + | + | ||
| Changes made | |||||
| Changes made | + | + | + | + | |
Attachment options
To work with an attachment, you need:
Open attachment
Click on

Select required option
Available attachment options:
Update attachment. The option allows the user to update attachments.
Hide attachment. Allows the user to hide attachments. Users without the role [admin_hide_attachment] will not be able to see hidden attachments.
Download original. Allows the user to download the original version of the attachment.
Download PDF version. Allows the user to download a PDF version of a converted attachment with a watermark.
Download without watermark. Allows the user to download a PDF version of a system-converted attachment without a watermark.
Create new version. Allows the user to create a new version of the attachment with the original extension of the attachment loaded into the system. This option will be displayed if the user has the USER_ATTACHMENT_UPDATE role and the [Add Attachments] setting is enabled in the stage, or just the ADMIN_ATTACHMNET_UPDATE role.
Delete. Allows the user to delete an attachment from the current document. If the attachment is signed, this option will not be available.
Note! The role [USER_ATTACHMENT_DELETE] + setting [Deletion attachments] at the step (if direct access to the document) are required to display the option. Role [ADMIN_ATTACHMENT_DELETE], if there is no direct access to the document) |
|---|
Turn page. Allows the user to turn pages clockwise.
Reconvert attachment. Allows the user to convert an attachment that has already been converted. For the attachment, the status in the database will be changed and the scheduler (which is responsible for the conversion) will take this attachment for reprocessing.
Add sign. Allows the user to add a p7s envelope with a signature to a converted attachment. After adding a signature, a printed form with information from the signature will be superimposed on the attachment. This option is designed to upload documents that were signed in other system and after signing, the user downloaded a zip file with signatures and the original attachment.
Importantly! If the user takes a zip file with signatures, uploads some attachment to the system and tries to add a signature (from the zip file), the system will give an error that the signature is incorrect. This is made for security measures so that no one can sign any other attachment. |
|---|
Download p7s. Allows the user to download an envelope with signatures for further verification of the legal validity of the document. This option is displayed if the attachment is signed by EDS and the user needs to have USER_ZIPCMS_DOWNLOAD role.
Download zip. Allows the user to download a zip archive with signatures (p7s file) and the original signed attachment. This option is displayed if the attachment is signed by EDS and the user needs to have USER_ZIPCMS_DOWNLOAD role.
Print barcode on paper original of document. Allows the user to download a PDF version of the attachment with a system-generated barcode.
The following actions are also available for attachment:
Show/Hide information.
Main actions. More information.
Sign attachment. Available signature types:
Select file. When signing, the user will need to upload the EDS key file and enter the password from it.
Choose from secure storage. When signing the attachment, a list of keys that have been uploaded to the user profile will be displayed, and the user will need to enter the password for the key.
*** The secure storage option is paid and requires licensing
Device. Signing using a flash drive.
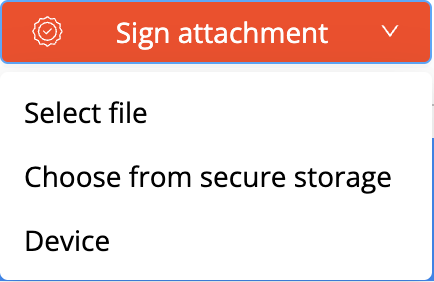
Important The system does not allow signing attachments that are not the latest version. |
|---|
User card options (Execution tree)
In the Almexoft platform, the user can review an execution tree of the document.
[User card options] - [Root card options]
The root card is the main element in the execution tree of the document, which is available for viewing and interaction if the user is a participant in the step.
Available options:
Comment. It is possible to leave a comment on your or any other open user card in the execution tree. The role USER_DOC_COMMENT_UPDATE or ADMIN_DOC_COMMENT_UPDATE is required if the user needs to add a comment to other user's card.
Extend due date. Allows the user to extend the due date of the user's card. The due date of the user card is equal to the term of the step. The role ADMIN_DOC_EXTEND_DEADLINE is required.
Note 1 If the user extends the due date of the card, the due date will be extended only for the user card that was extended, and the due date will remain the same for all other users. |
|---|
Add attachment. Allows the user to add an attachment to a user card. Attachments will be displayed in a separate block in the attachment tab. The Role USER_ATTACHMENT_UPDATE or ADMIN_ATTACHMENT_UPDATE is required if the user needs to add to other user's card.
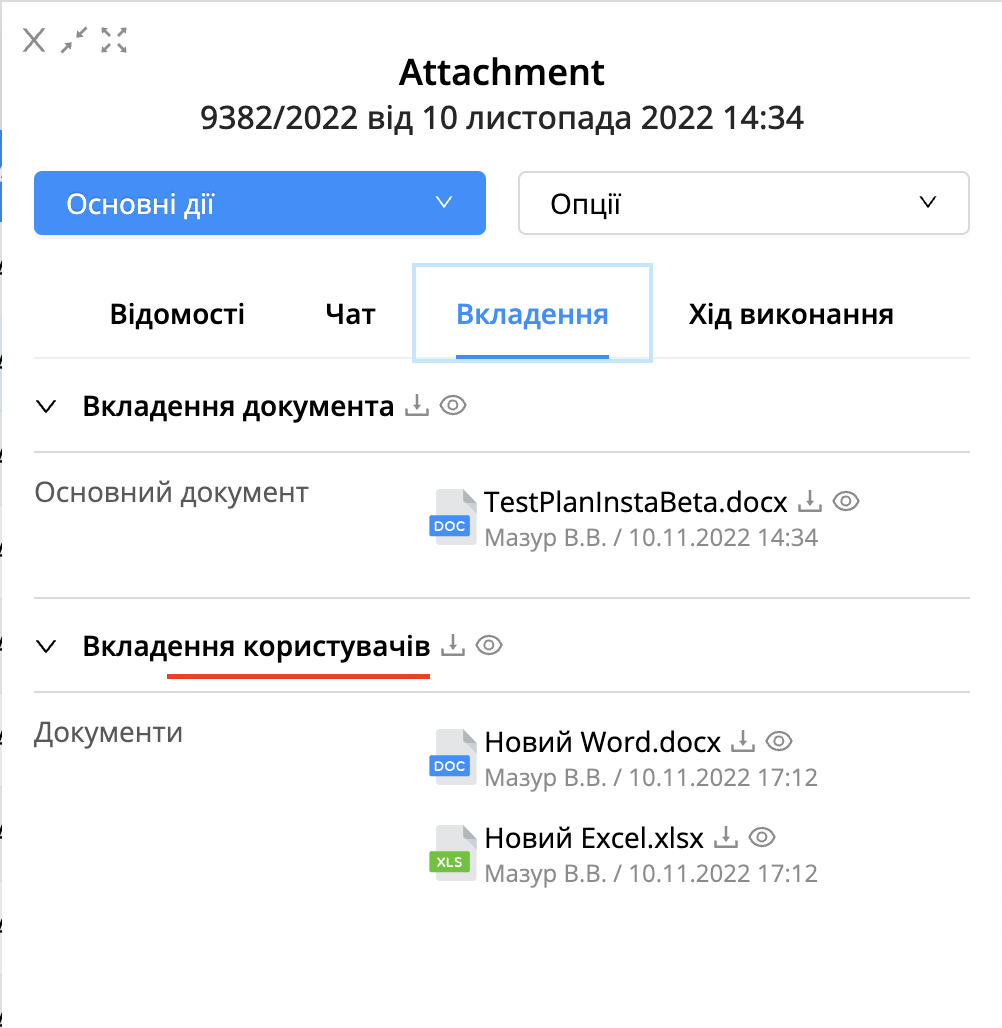
Note 2 Attachments can be added to a closed root card if the user has the roleADMIN_ATTACHMENT_UPDATE. |
|---|
Remind. Allows the user to send reminders. The user will receive an e-mail - a reminder that the user has an open document card. The role ADMIN_REMINDER is required.
Additional approval. Allows the user to make additional approval from any open user card. The role ADMIN_DOC_ADD_CONFIRMATION is required.
Delete decision. Allows the user to delete the wrong decision if the document did not go to the next step. If this is your user card, then the role USER_DOC_REVOKE_OWN_DECISION is required. If this is the other user's card, then the role ADMIN_RESOLUTION_DELETE is required.
[User card options] - [Assignment card options]
An assignment card has the same options as a root card, except for the following:
Revoke card. Allows the user to revoke the assignment card. A revoked card will show a cross-out in the execution tree and will have a [Canceled] status. The role USER_DOC_REASSIGN_DELETE or ADMIN_DOC_REASSIGN_UPDATE is required.(admin role needs for assignment cards that were made by other user)
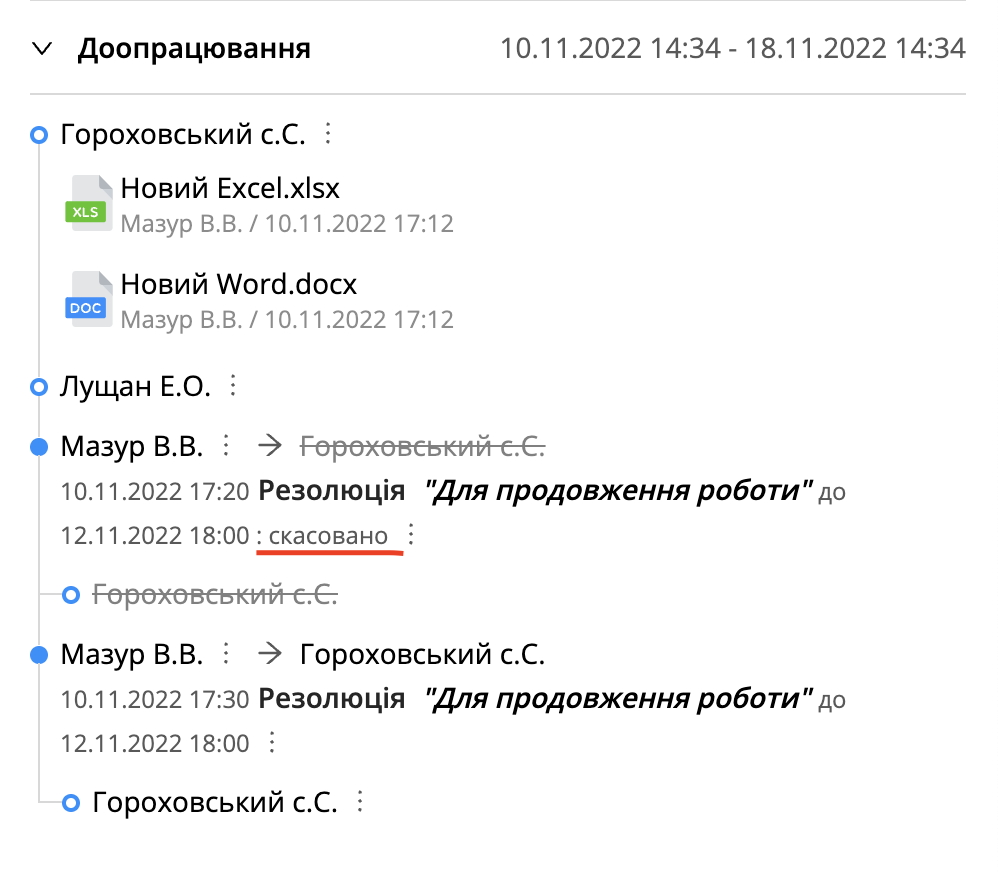
Delete card. Allows the user to delete an assignment card. Deleted cards will not be displayed at all in the execution tree. The role ADMIN_DOC_REASSIGN_UPDATE is required.
Importantly! If the user executes an assignment with control and the assigned user made a decision, then after deleting this decision, a re-assignment will be created to the user whose decision was deleted. |
|---|
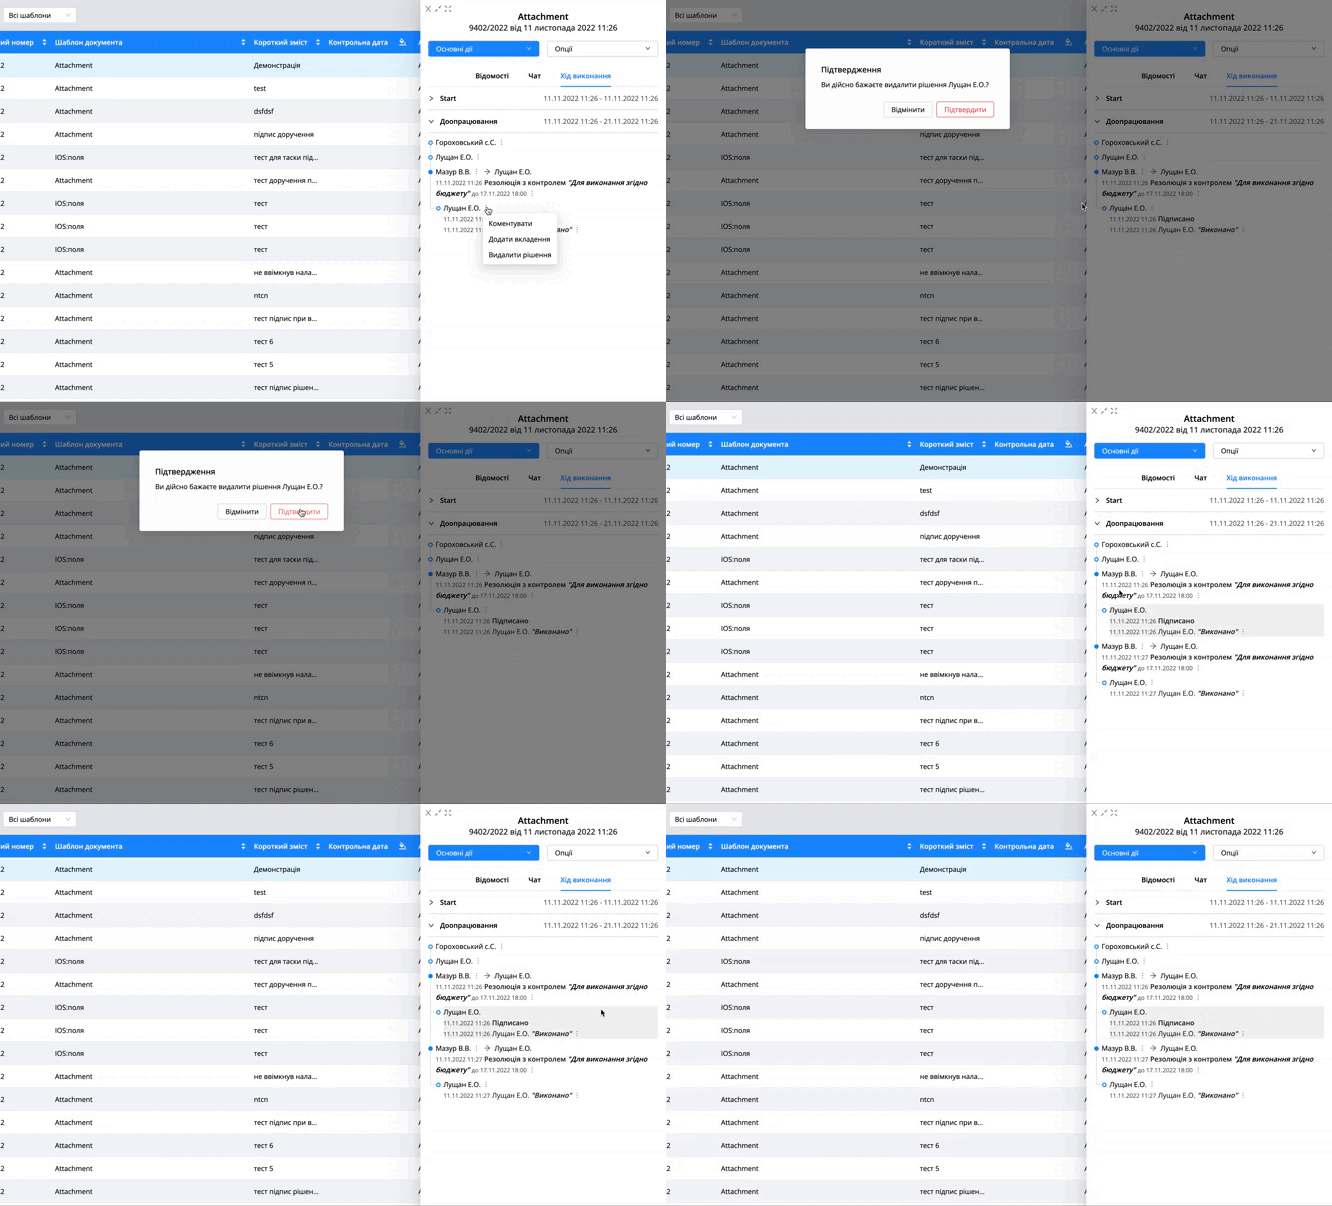
Deleted decisions will be displayed to the user (will be highlighted on a gray background) with the role ADMIN_RESOLUTION_DELETE.
Note 3 The assignment resolution can be edited via the options(three dots next to the resolution) |
|---|
[User card options] - [Additional approval options]
The additional approval card has the same options as the assignment card.
[User card options] - [Comment options]
Available options:
Editing. The role USER_DOC_COMMENT_UPDATE or ADMIN_DOC_COMMENT_UPDATE is required if the user needs to edit other user's card.
Reply to comment. If the user is the author of the document, it is possible to leave a response to any comment on the execution card during execution. As a result, the user who was answered will receive an email message.
Note 4 Without roles ADMIN_ATTACHMENT_UPDATE, ADMIN_DOC_REASSIGN_UPDATE the user will only see his own card. |
|---|
Description of the elements of the execution tree:
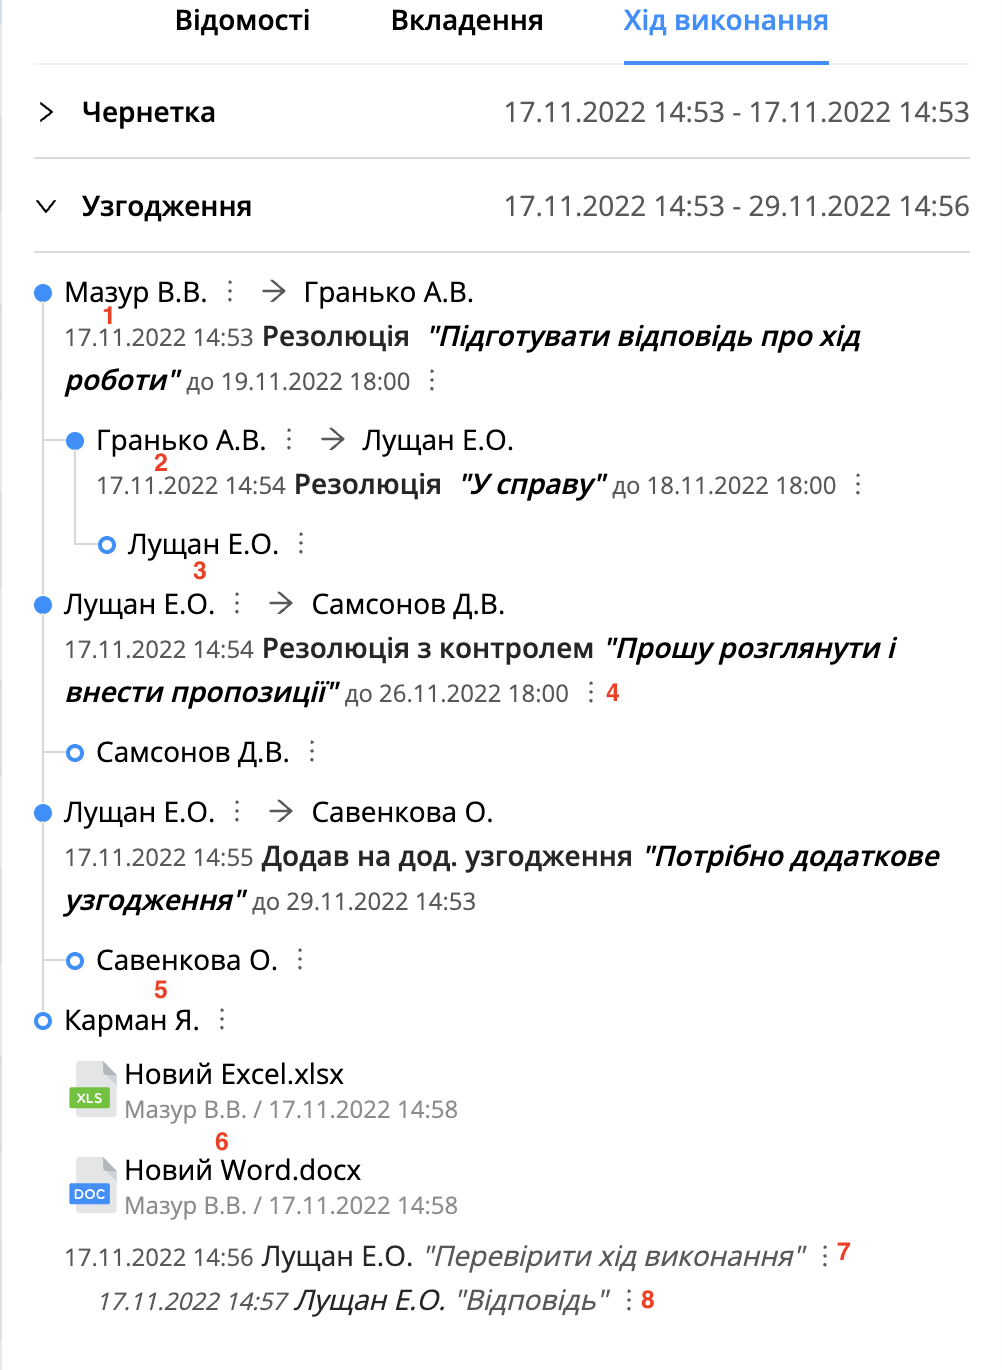
First level card (root execution card).
Second level card (after assignment).
Third level card (assignment card).
Resolution options button.
Second level card (after additional approval).
Attachments, which were added to the user execution card.
User card comment.
Reply to comment. Only the Author of the document can leave a comment.
Search in the system
Search is available in the following sections:
Documents
Users
Handbooks
[Search] - [Documents]
To perform a search to a document, you need:
In the upper right corner, click on the button from the drop-down list of document search types
Select the required type and set the required parameters
Click on

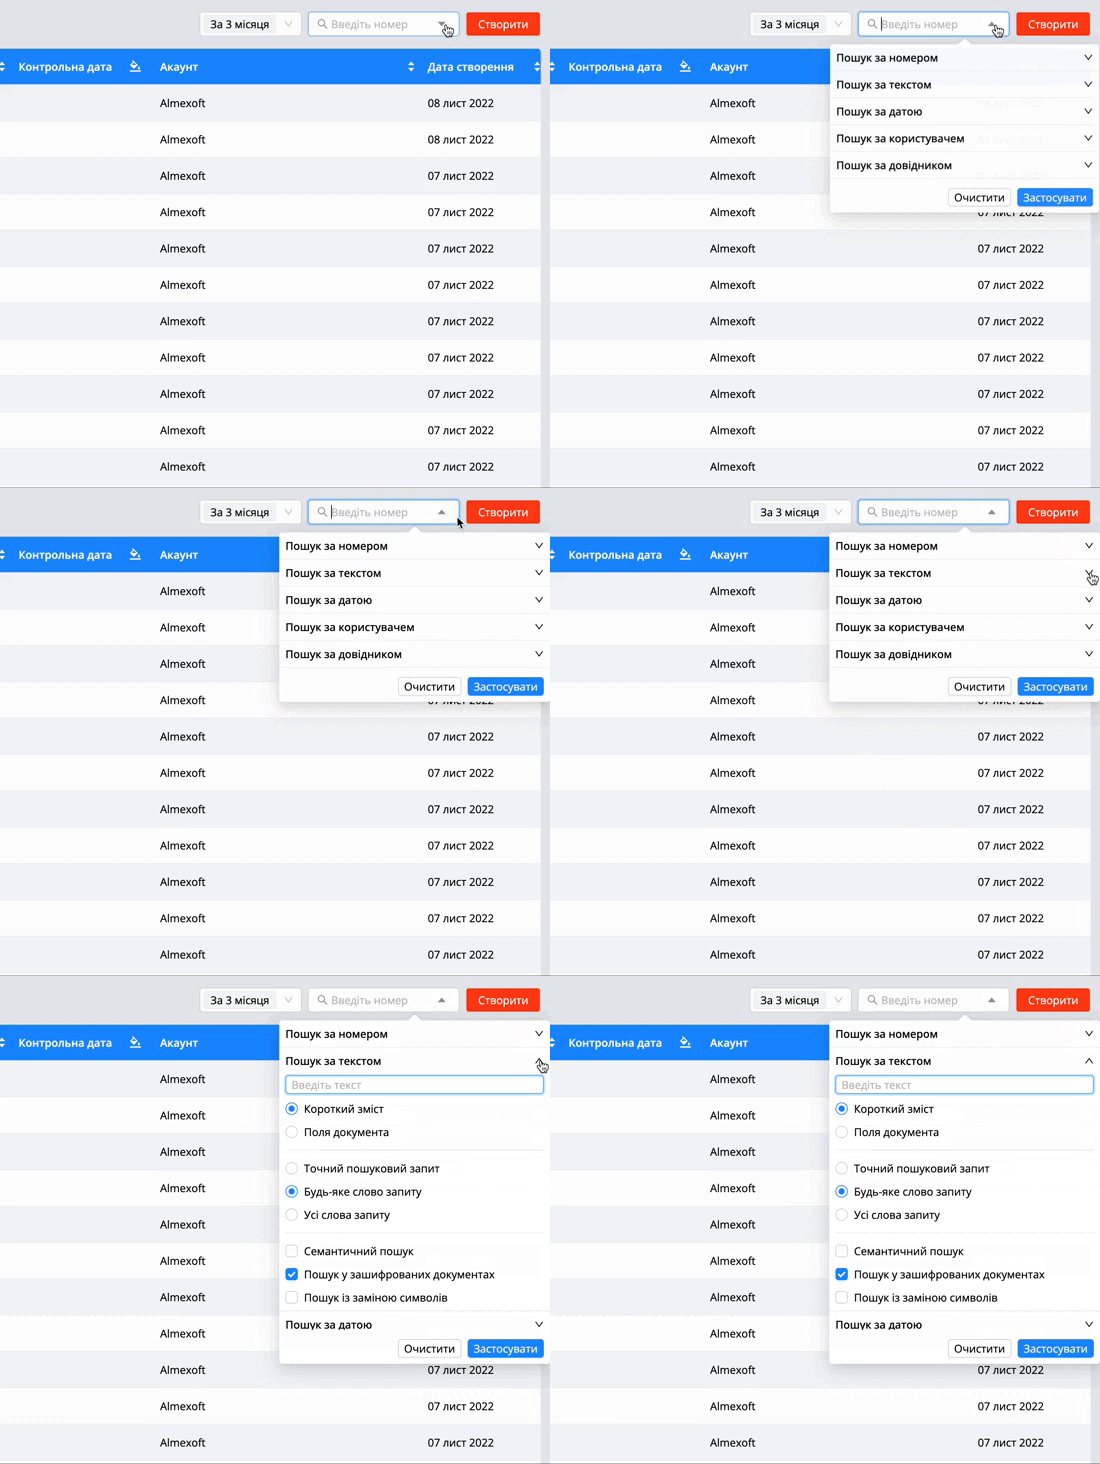
Note 1 If the user enters the document number in the [Enter number] field, the search will be performed simultaneously by the system and registration number of the document. |
|---|
Document search types:
By number. There are three options for searching by number:
System
Registration
Outgoing number
Note 2 The "Exact search" option will display documents that exactly match the search query. |
|---|
By text. There are two options for searching by text :
Summary.
Document fields. More information.
The following additional search parameters can be used with document summary and document fields search:
Exact search request. Documents with an exact match of the entered value will be included in the response (the word order must also match).
Any word request. Documents with any match of the words entered in the search field will be included in the response.
All words request. Documents that contain all the words entered in the search field will be included in the response, but the order of the words may differ.
Also, for the summary, there are additional parameters that can be used when searching, namely:
Semantic search. It is an intelligent search that helps to find documents if a mistake has been made in the query.
| Example: There are documents with a brief content - [Employment contract], and the words [Emplaument contract] were entered in the search field, if the semantic search was enabled, such documents will be found. |
|---|
Search in encrypted documents. Documents from an encrypted account (confidential document flow) will be included in the search.
Search with character replacement. When searching, letters in words will be replaced according to the settings from the system database table - [tbl_char_matching_dictionary]. The user can add there the value from which to which symbol to make a replacement during the search.
Note 3 The following additional options are not available for searching by document fields - Semantic search, search in encrypted documents, search with character replacement. Due to system limitations. |
|---|
By date. There are four types for search:
By create date
By registration date
By due date
By outgoing registration date
When working with this type of search, the user must specify a period for document search.
Note 4 The selected period in this type of search cannot be earlier than the month/year filter selected in the [Documents] section. |
|---|
By user. It is necessary to enter the user's name in the search filed.
In the search, the user can choose the type of user in the documents to be found, namely:
Author.
Responsible. Who was chosen to be responsible for the document (While creating of the document).
Signer. User is a step participant with an action type - signing.
Executor.
Recipient. The user is a participant in a step with the setting [Send/Receive] = Receive.
Agreement. User is a step participant with an action type - agreement
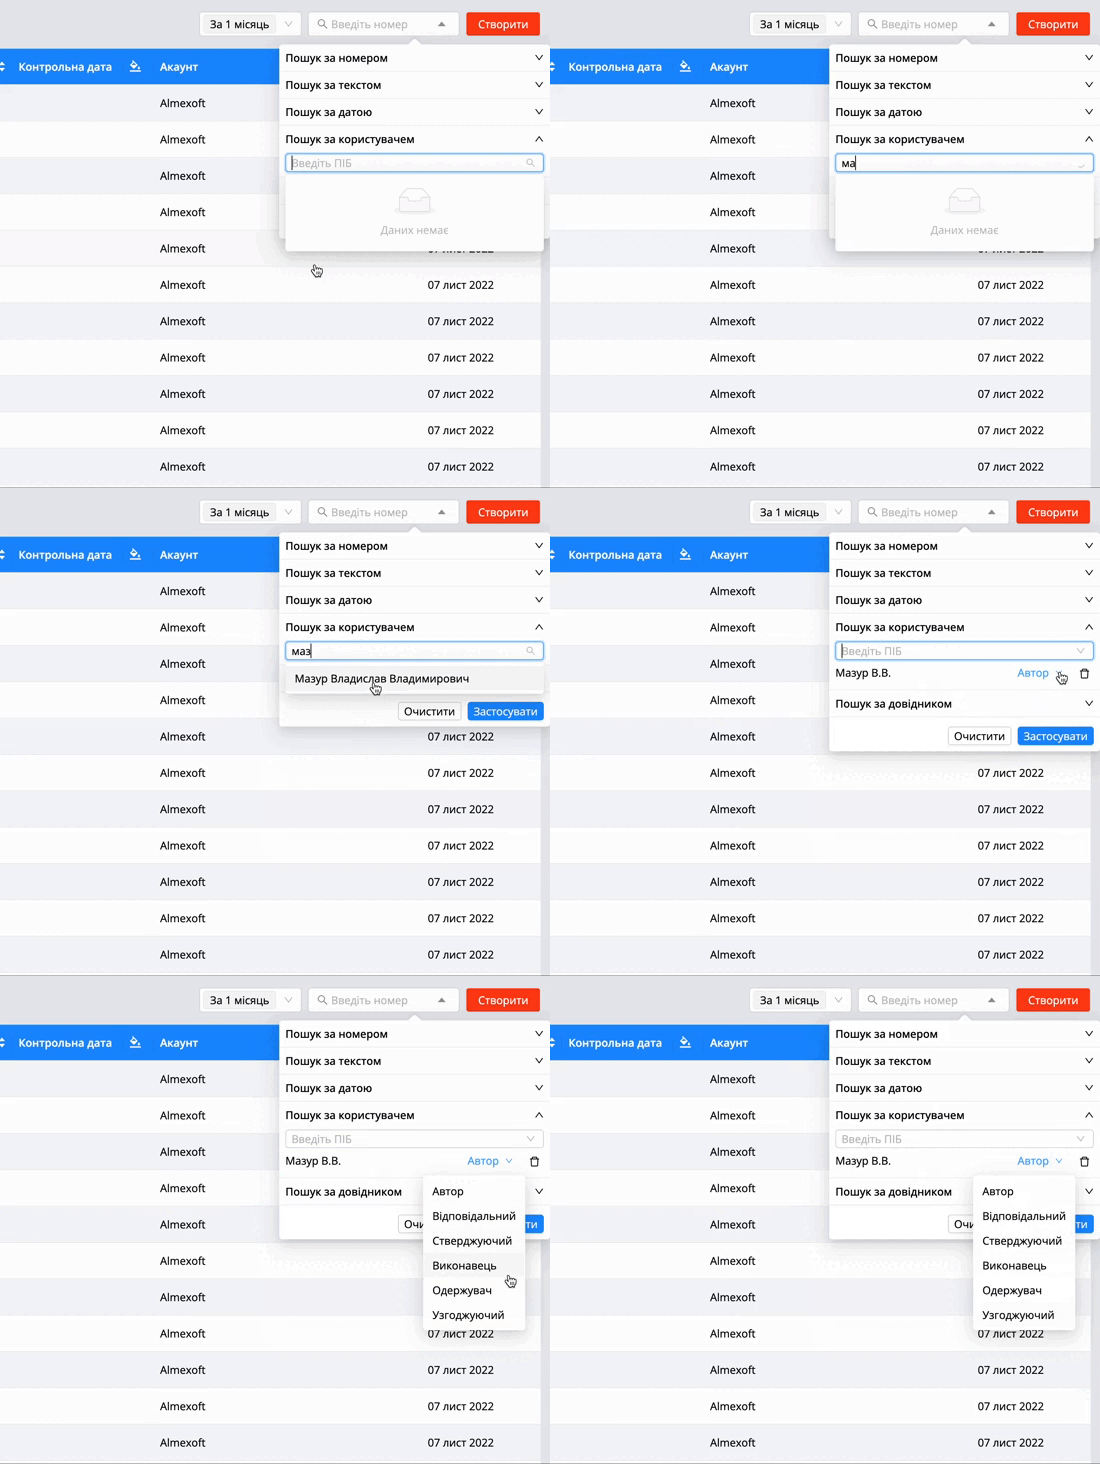
Note 5 When searching for a user, deleted and blocked users are displayed.
Icons will be displayed next to the name |
|---|


By handbook. There is a search by value from a handbook field. In order for the handbook to be displayed in the list and for the search to work, you need:
Enable [Display for search] for the desired column in the handbook.
In the template, in the [fields] tab, enable the setting - [Search by content] for the desired handbook field.
Actions for searching by handbook value:
Go to the documents section
Click on the search type drop-down list in the [enter number] field
Click on the type [By handbook]
Select handbook
Select a column
Select a value
Click on
Note 5 In the system, the search starts with 2 characters, and documents with a complete number match will be displayed at the very top of the list. |
|---|
[Search] - [Users]
User search is available in the Almexoft platform.
To search, you need to perform the following steps:
Go to the section [Users] or [Admin page] - [Users] - [Users].
Click on the full search icon in the upper right corner
Fill in the required parameters
Click on
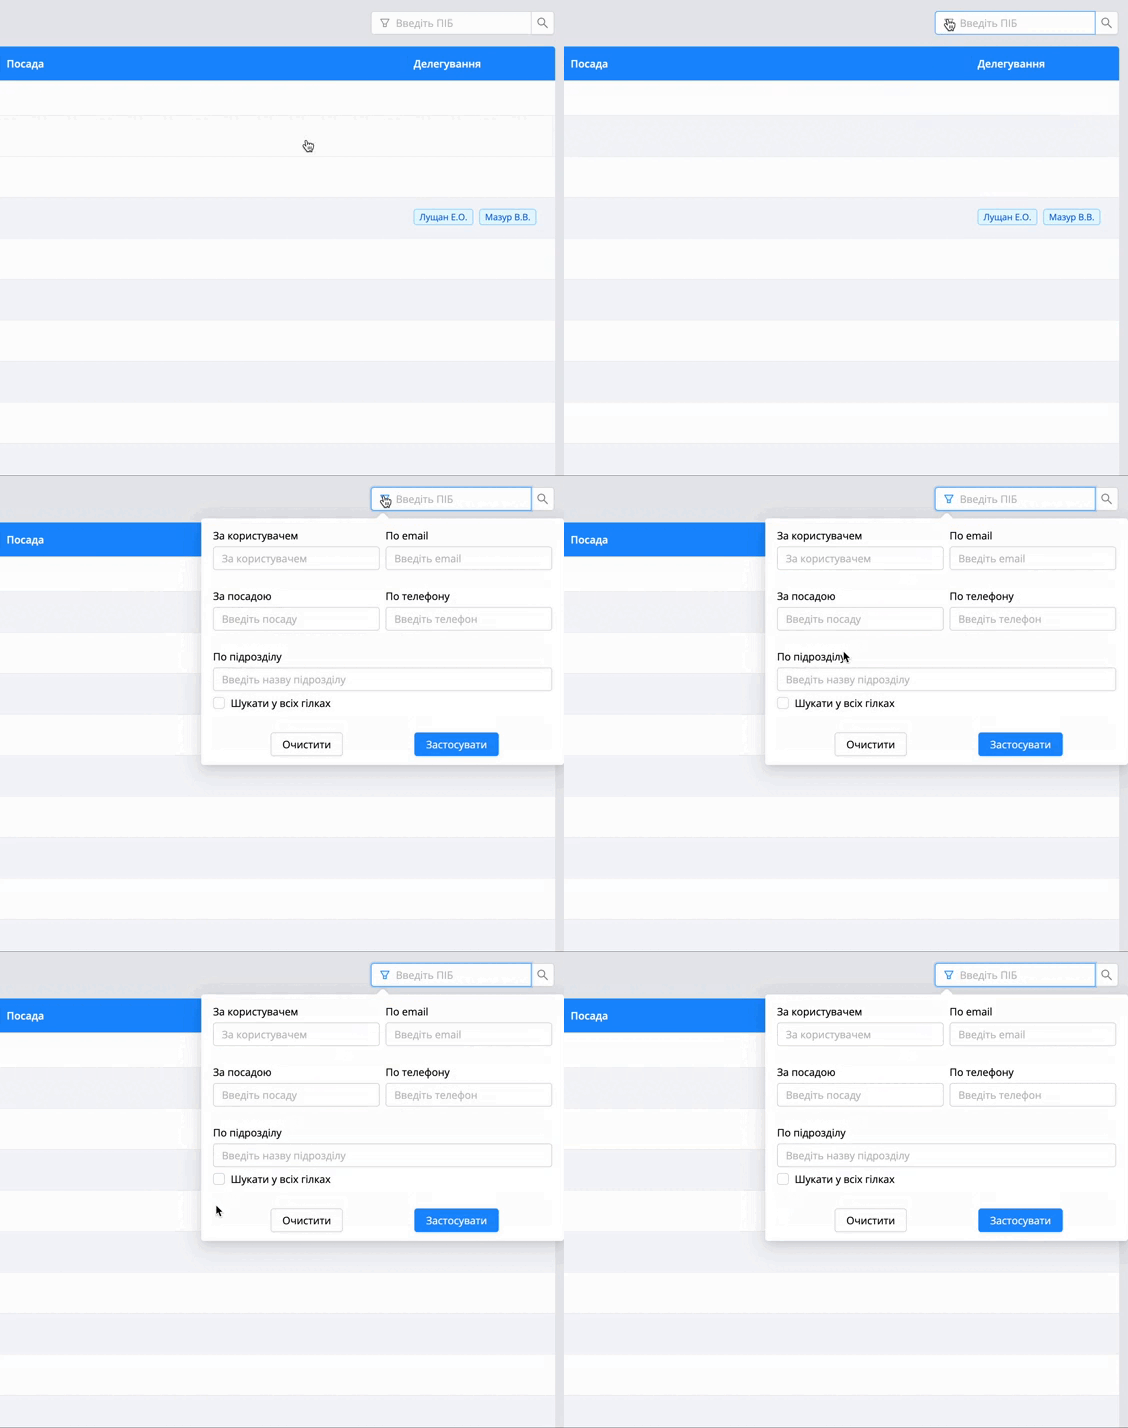
Search parameters:
By username
By phone number
By email.
By position.
By department. There is an additional option [Search in all branches] that allows the user to find users from the subsidiaries of the department that the user entered the search field. The department is searched by name and short name.
Free search. Searches simultaneously by the following fields: full name, department, position.
An additional option is available in the administrative page:
By login.
During the search in the administrative section by the full name, the user you are looking for will be found, as well as users who have this user as a delegate.
Note! The first and last name search type works as follows: Surname + First Name, Surname + First Name. |
|---|
[Search] - [Handbooks]
In the Almexoft platform, search by name and by value of the handbook is available.
Handbook search by name is available
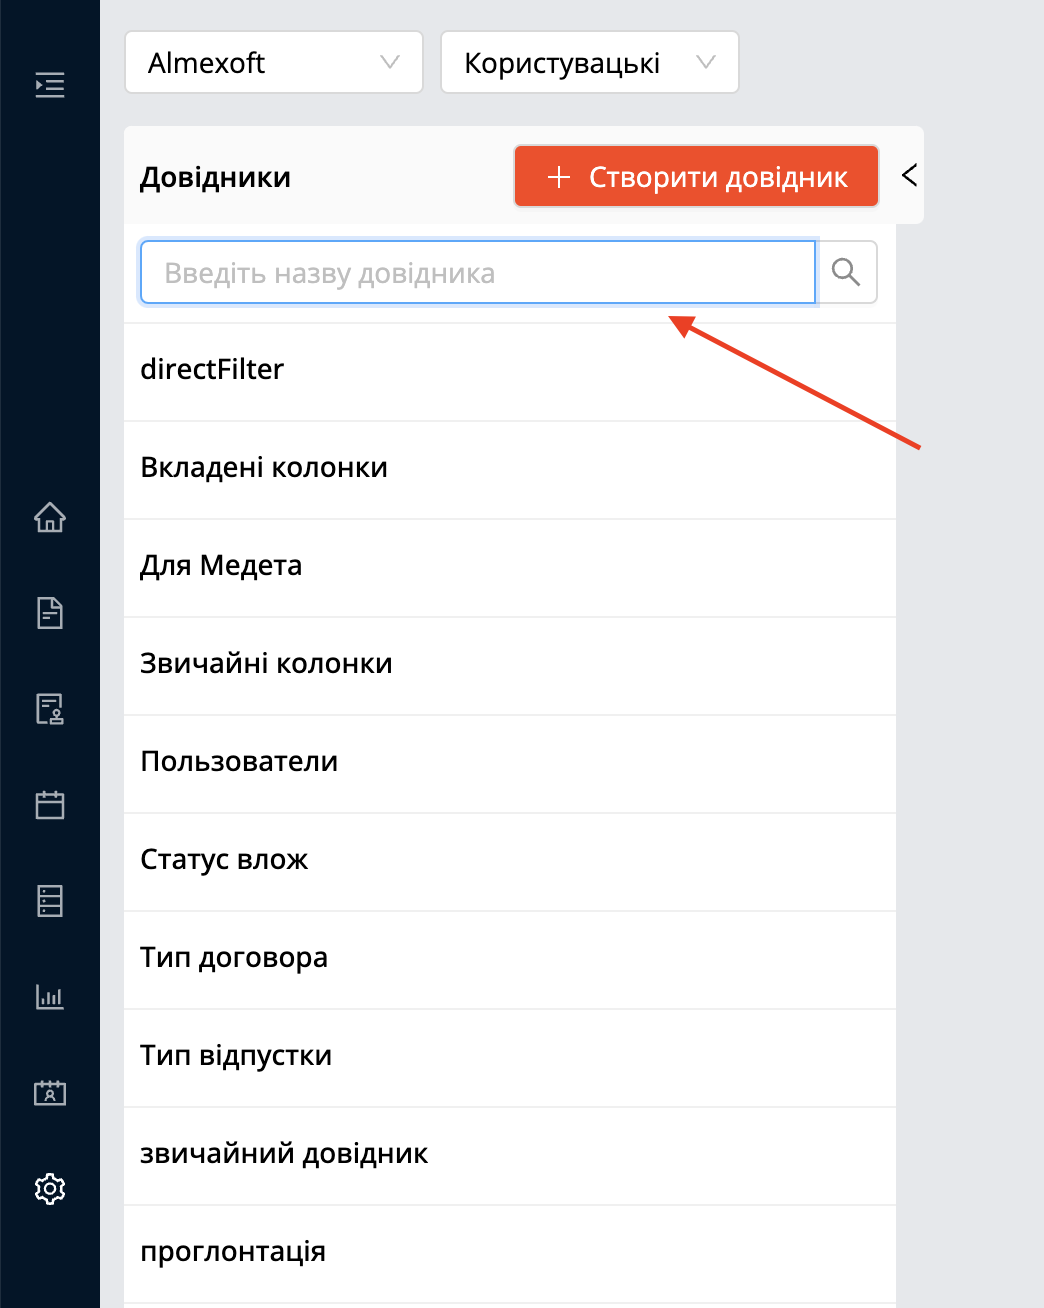
Search is available for columns.
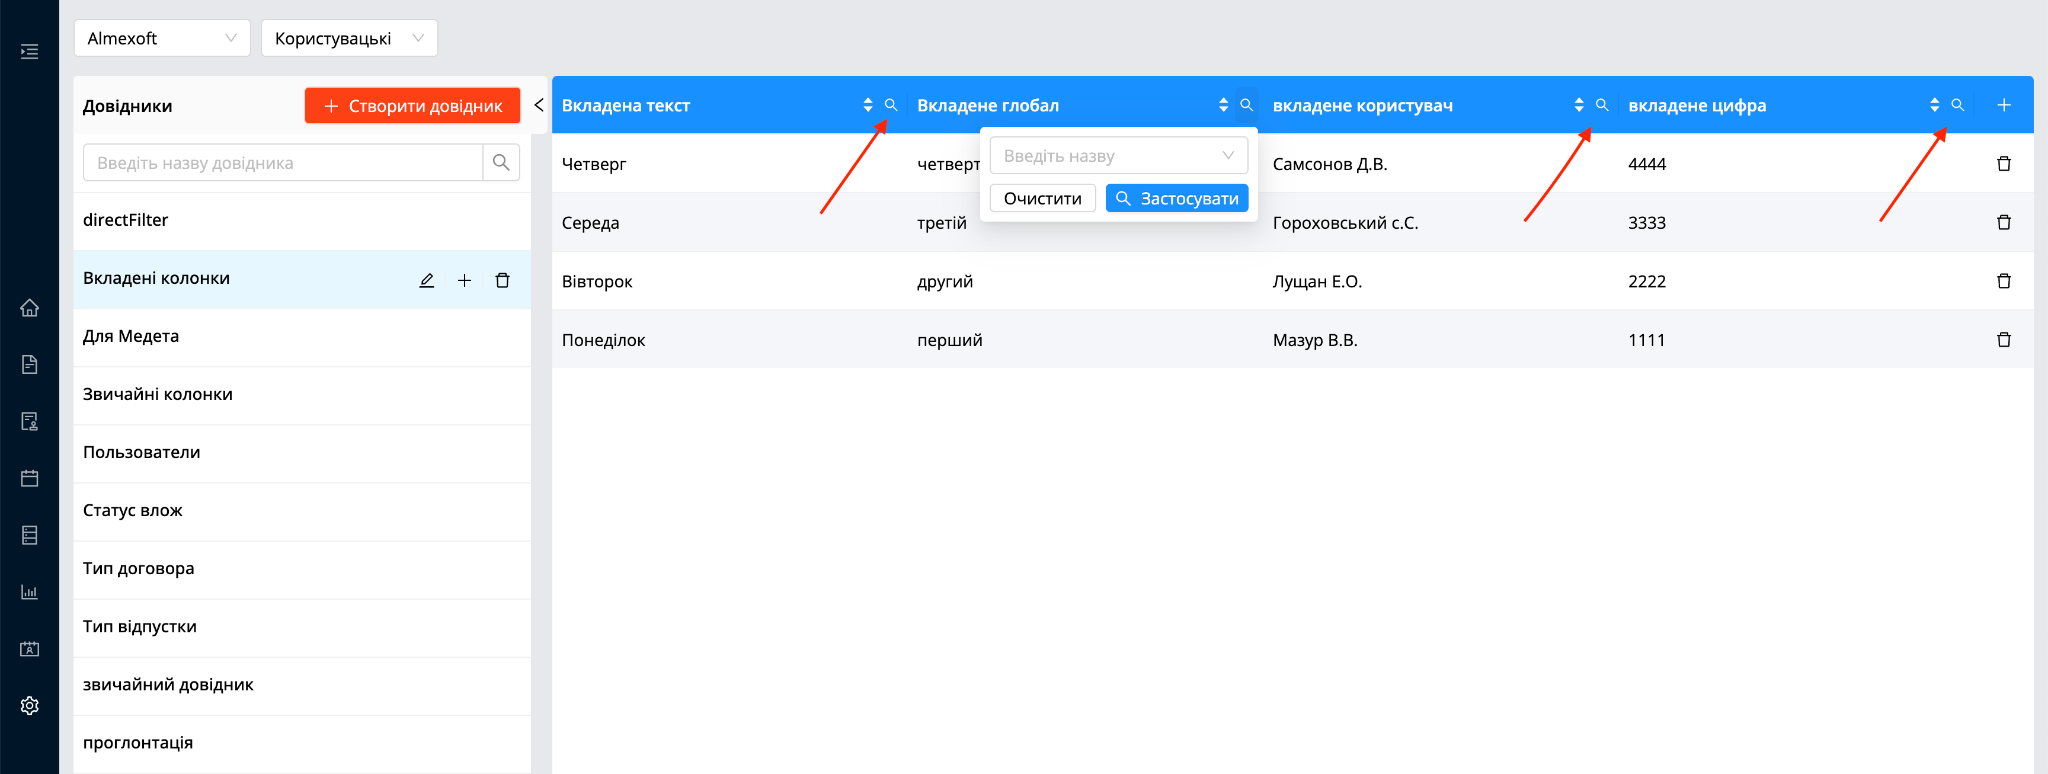
Filtering of handbook values in the document (when creating and editing)
The system has several types of filtering in the system. Which works according to many-to-one, many-to-many principles.
Many-to-one - there is an entity people, which is related to phone, that is, two tables: people and phones. One person can have several phones, but not vice versa. To do this, we create a many-to-one relationship, while a new field will appear in the phone table that refers to an element of the people table.
Many-to-many - occurs when multiple records in a table are related to multiple records in another table. For example, there is a many-to-many relationship between customers and products: a typical example of a many-to-many relationship is between students and classes. A student can register for many classes, and a class can include many students.
For Many-to-one conections, the system provides the following filters:
directValueOrId
directDepRowId
directUserId
directUserFullName
For many-to-many conections, the system provides the following filters:
reverseValue
reverseId
reverseUserId
Importantly! For filtering in the system, the user needs to use only directDepRowId, directUserId (for filtering by the current user session), reverseId, reverseUserId (for filtering by the current user session). All other filters in the user interface will not work. |
|---|
To configure filtering [directDepRowId] you need:
Create the first handbook with column type [user].
Create a second handbook with 2 columns (one with the column type [global text] and the other with the column type [handbook] and enter the handbook from the first point). More information.
In the second handbook, create a value (in this step, the user configure the relationships of one column with other).
Open the desired template
Go to tab [fields]
Add two fields [Handbook]
In the first field of the handbook, put the handbook from point 1.
In the second field, put the handbook from point 2 (choose the global text column).

Click on in the right side menu.
Select the type of filtering - directDepRowId.
Select the condition - Equals.
Set the key from the first field of the handbook in the settings - [Key content value for search].
Select the handbook field (in this setting, only nested columns are displayed)
Go to section [Documents]
Click on
Select the group of templates
Select the template (in which the handbooks were configured)
Click on
Fill in the field of the first handbook
Click on the field of the second handbook
First handbook.
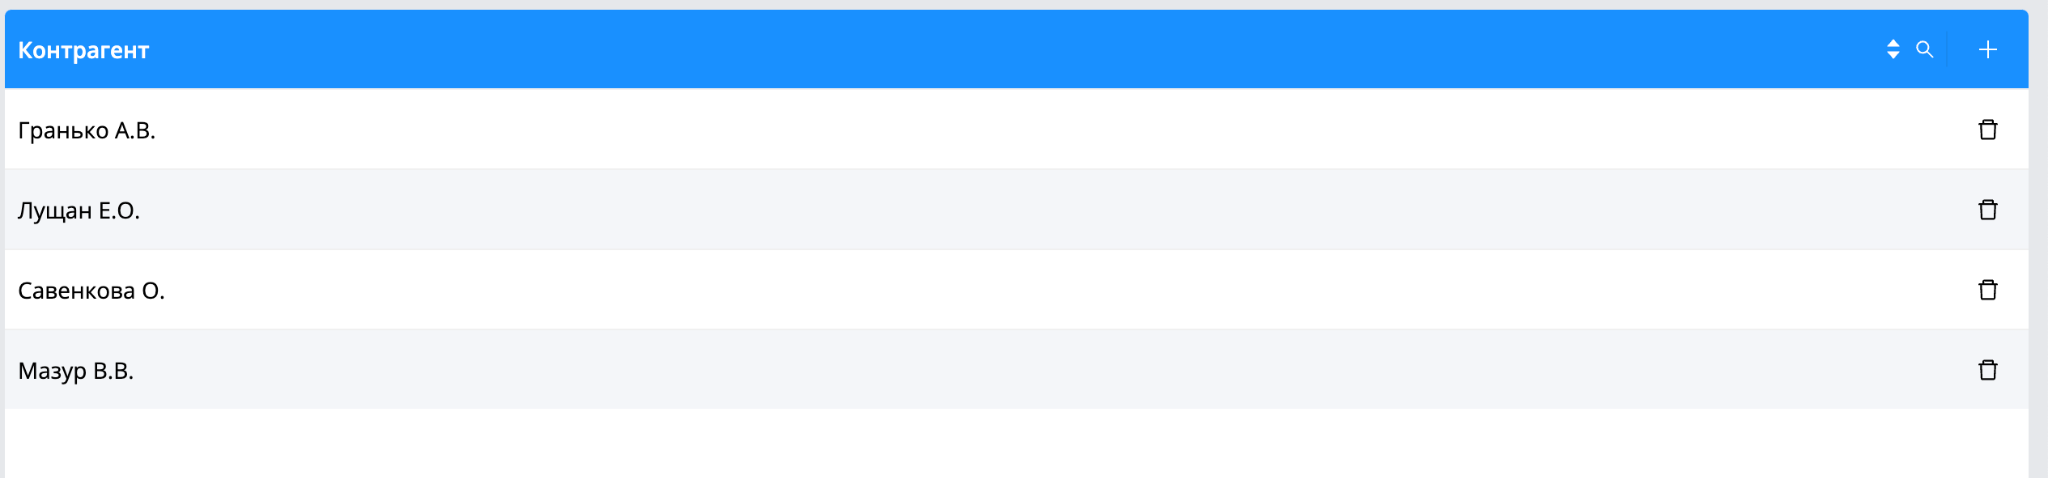
Second handbook.
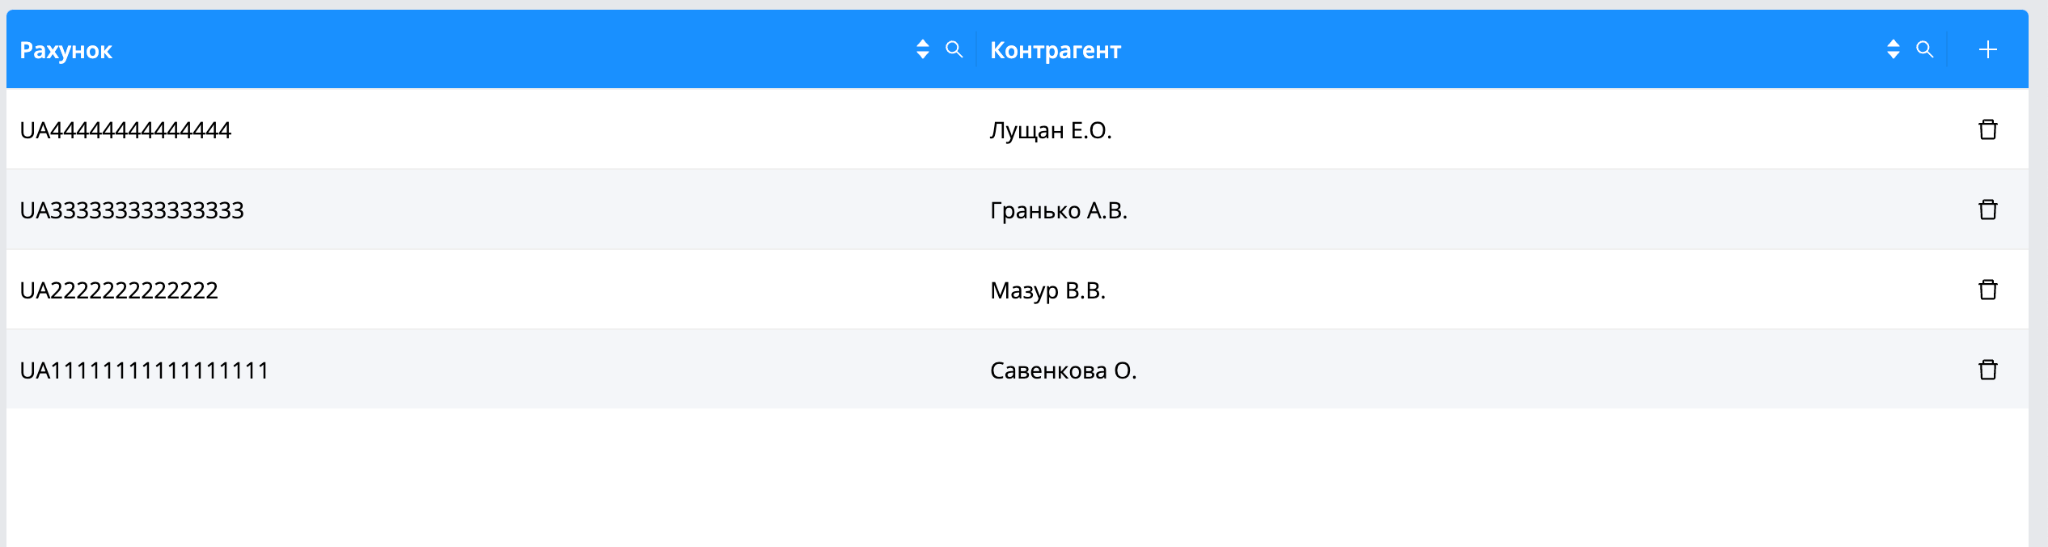
Filter settings in the second field of the handbook.
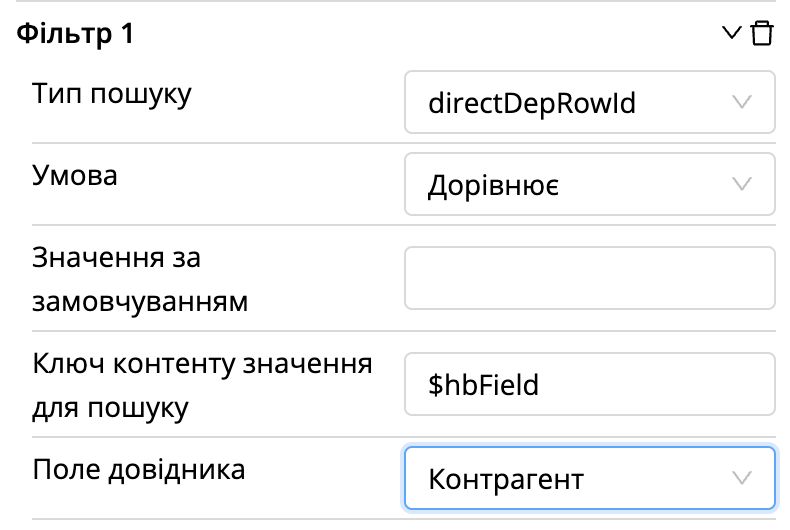
Filtration.
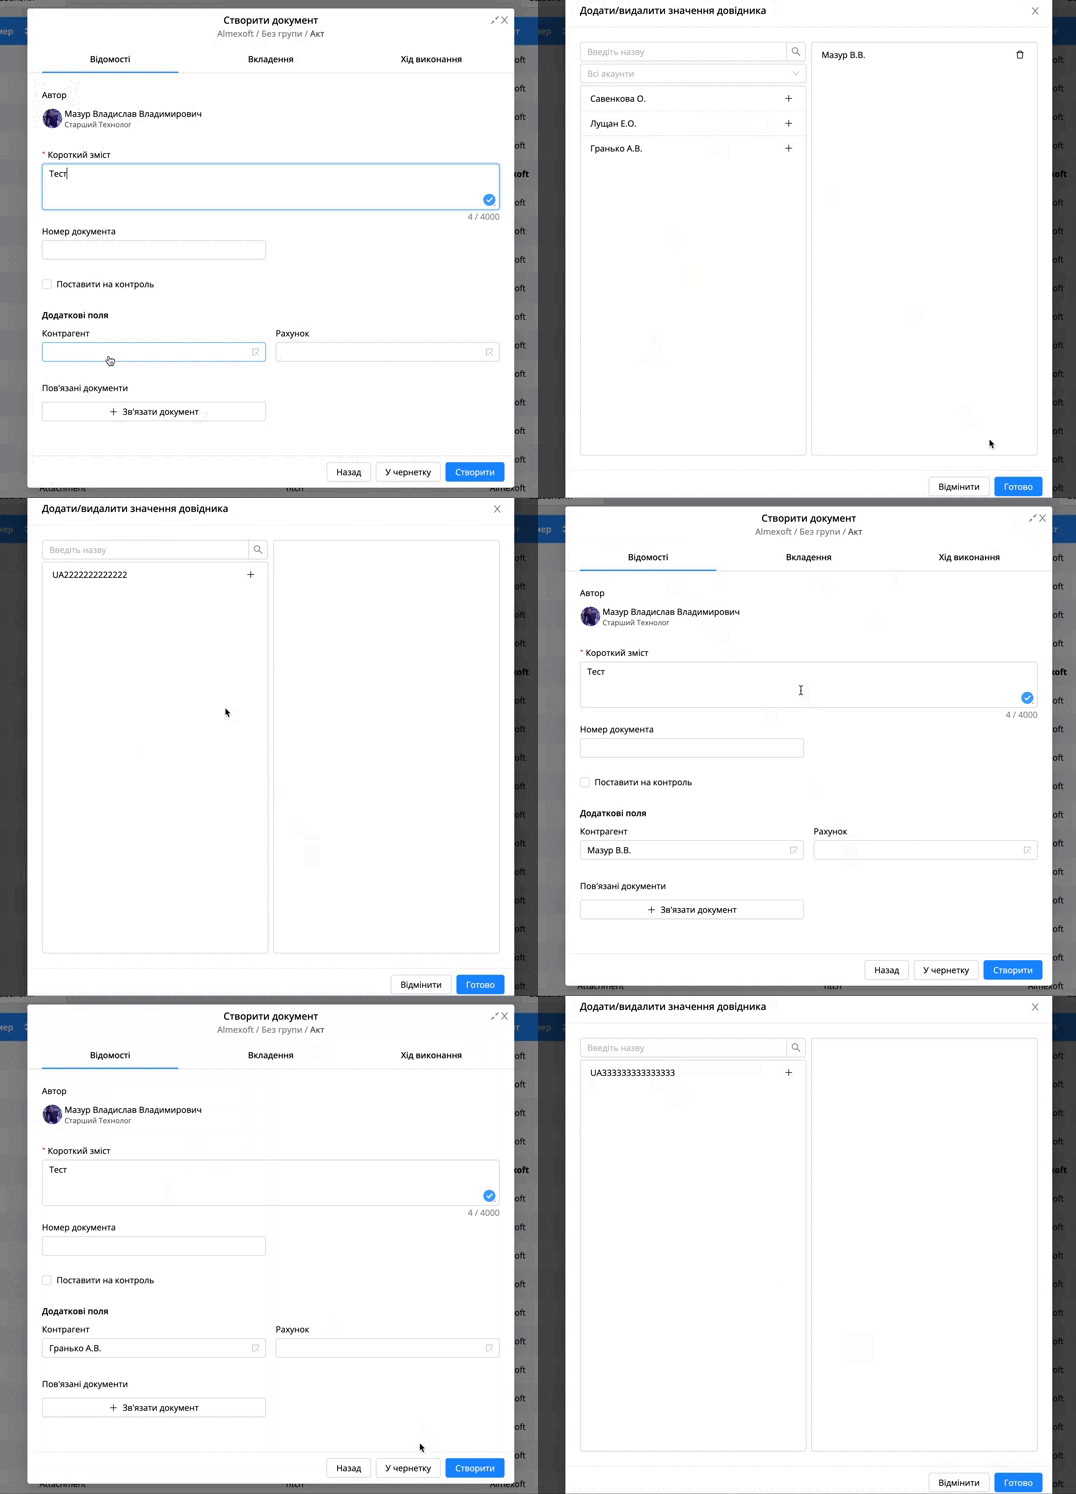
To configure filtering [reverseId] you need:
Create first handbook with column type [user].
Create a second handbook with 1 column - column type [global text]. More information.
Create 3 handbook with 2 columns with type - [Handbook]. These will be nested columns from the first two handbooks (this handbook will connect the previous 2 handbooks).
In the third handbook, create a value (in this step, the user configure the relationships of one column with other).
Open the template
Go to tab [fields]
Add two fields [Help]
In the first field of the handbook, put the handbook from point 1.
In the second field, put the handbook from point 2
Click on in the right side menu (for the second field).
Select the type of filtering - reverseId.
Select the condition - Equals.
Set the key from the first field of the handbook in the settings - [Key content value for search].
Set the third handbook in the settings - [Linking handbook].
Set the column from the second handbook to the [current column] setting.
In the [filtering column] setting, set the column from the first handbook.
Go to section [Documents]
Click on
Select the group of templates
Choose the template (in which handbooks were configured)
Click on
Fill in the field of the first handbook (where the handbook from the first item is selected)
Click on the field of the second handbook (the value of the correspondingly configured one in the second handbook will be displayed there)
First handbook.
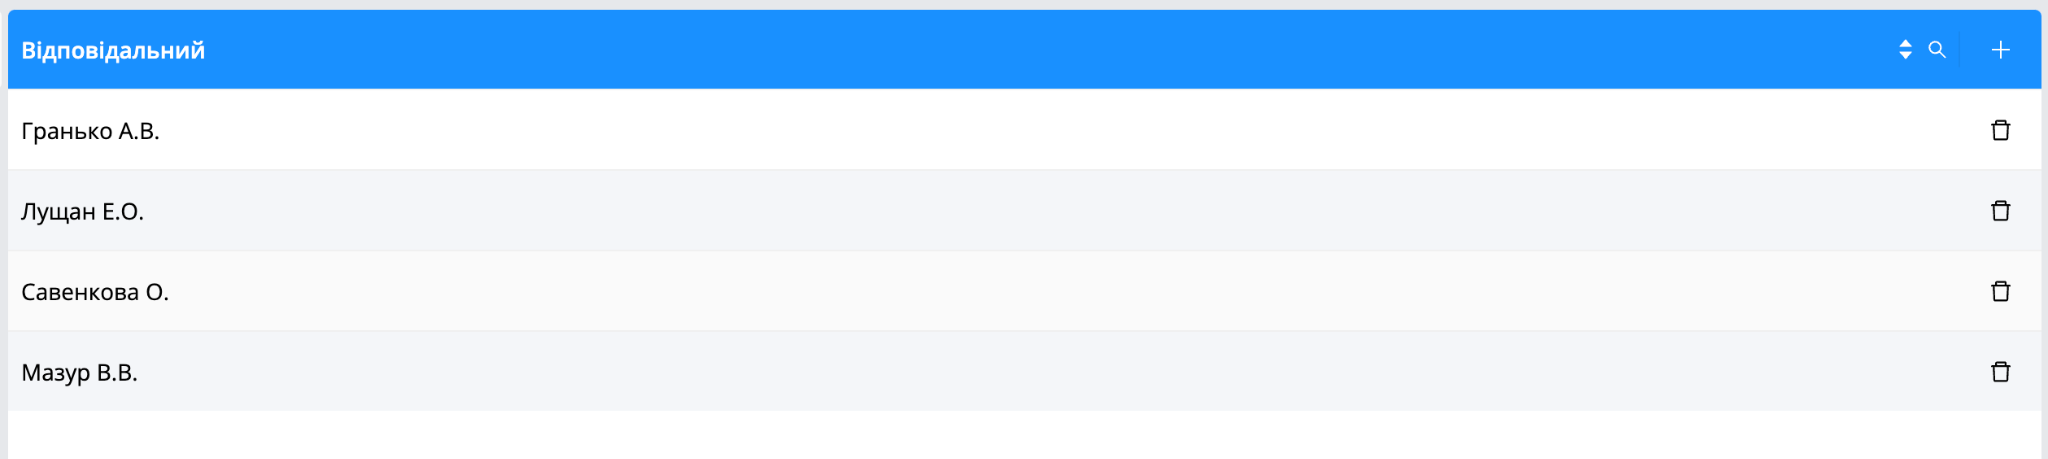
Second handbook.
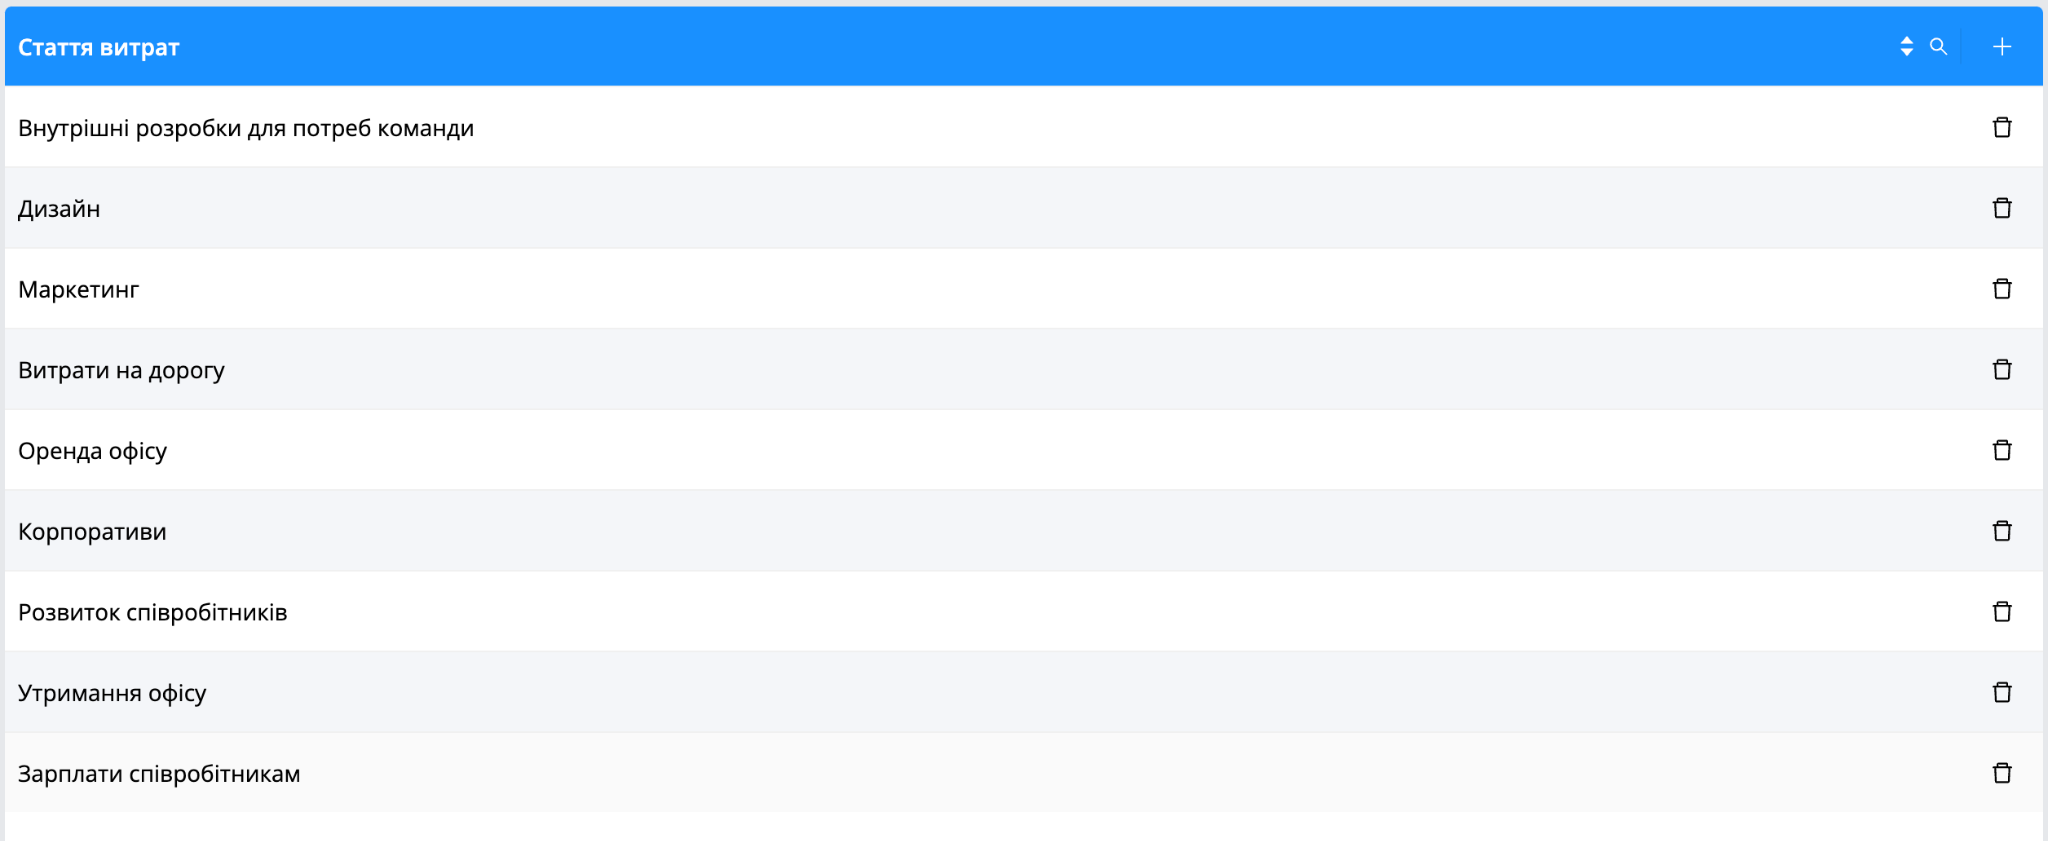
Third handbook.
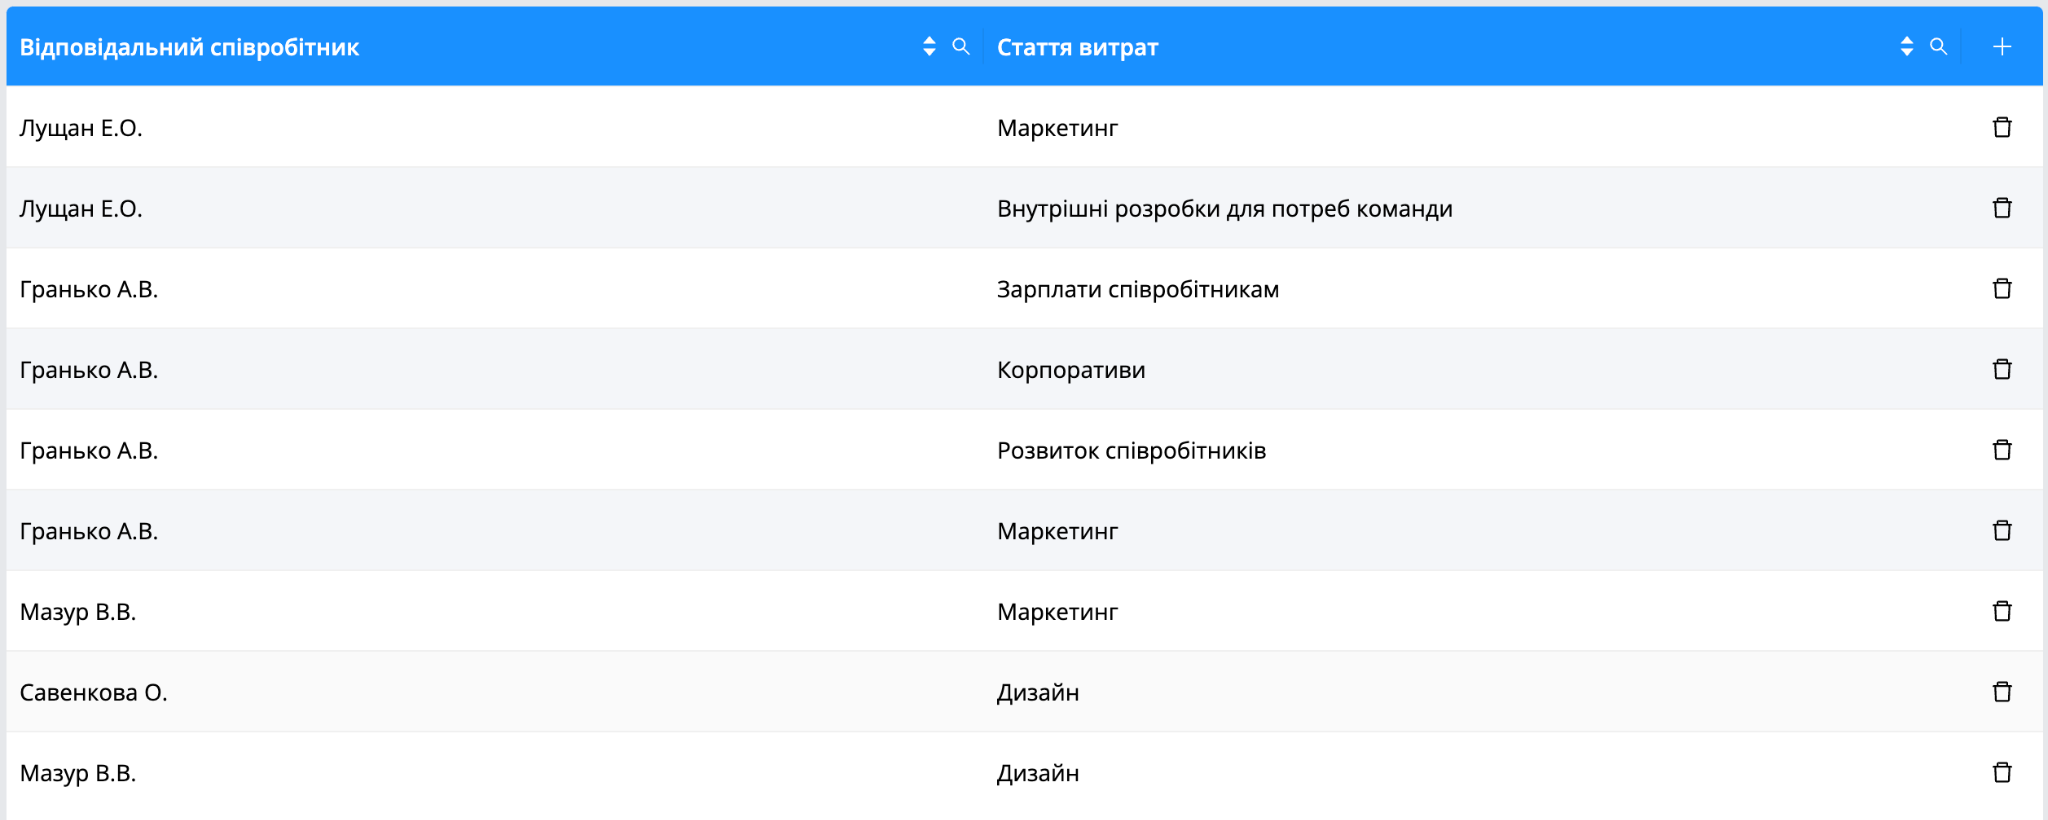
Filter settings in the second handbook.
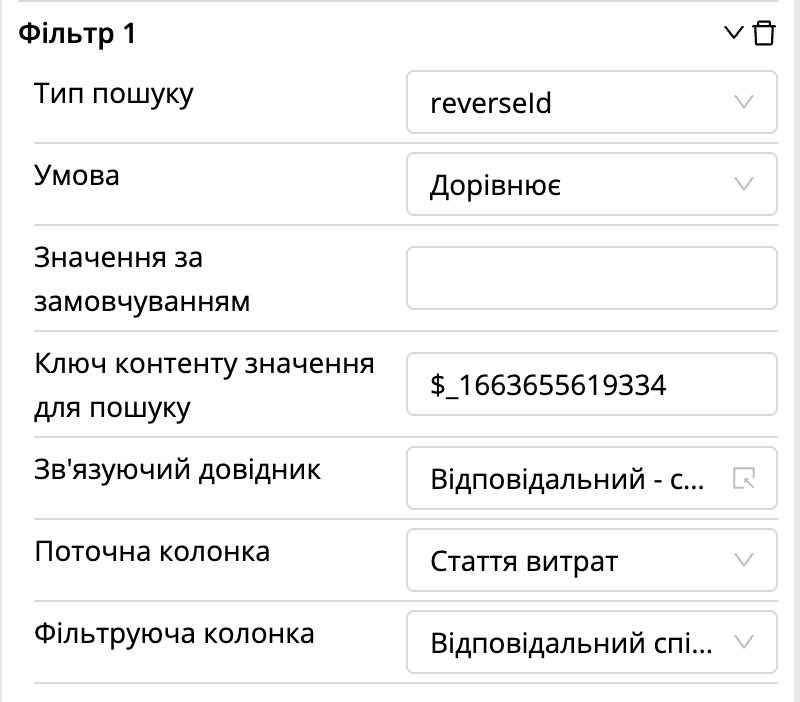
Filtration.
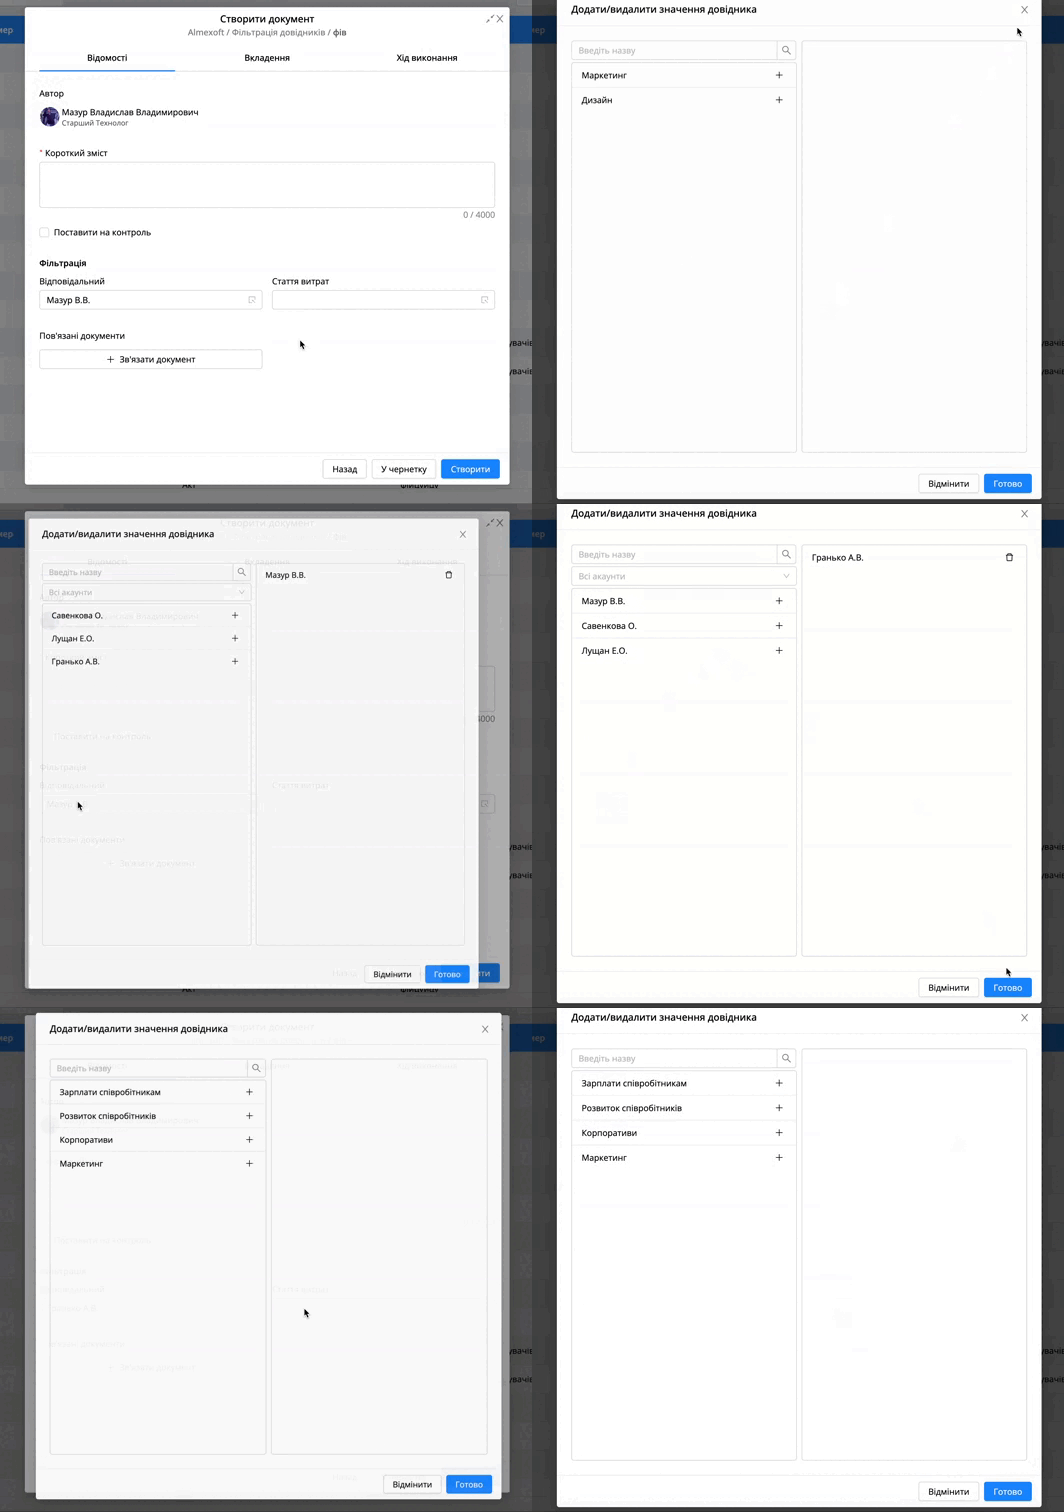
For filtering by current user session, you need:
Choose filtering type directUserId or reverceUserId.
In the handbook filter, remove the value from the setting [Content key of the value to search for].
In the [Default value] setting, set the value $currentSessionUserId, $currentSessionOriginalUserId(to get the original user session if logged in as a delegate).
The user can not use the first field in the filtering setting examples and just fill in the second field.
The user can use more than one filter for a handbook field, but using 3 or more filters may slow down the system's performance. We do not recommend using more than 2 filters for a one handbook field. The user can also filter by different types of columns.

Importantly! To fully understand the principles of filtering when creating a document, the user should configure and test each type of filtering separately. |
|---|
Delegation
There is a delegation module in the low - code platform - Almexoft.
There are two types of delegation:
Manual delegation.
To set manual delegation, you need:
Click on

Go to the administrative section [Users]
Choose the user from whom we want to make delegation

Click on
In the delegation creation window, click on

Make all the necessary settings and fill in the fields
Delegation settings:
Add a user to whom we will delegate.
Select the necessary delegation parameters.
Delegate roles.
Delegate secrecy stamps.
Delegate registers.
Note! If the user does not delegate roles and secrecy stamps, then when the user logs in under the delegate, the roles and secrecy stamps of the original user (under which you logged in the system) will be available. If registries were not delegated, no registries will be available under the delegate at all, not even the original user's registries. |
|---|
Grant access to all documents.
Grant access to individual documents. Accounts, template groups, templates can be delegated.
Start date - End date of the delegation.
Display documents from/before the date of creation/registration. If this is not filled in, the documents will be displayed for the entire time.
Sharing. If enabled, the user will be able to make decisions under the delegate at steps with the action type [Sharing].
Agreement. If enabled, the user will be able to make decisions under the delegate at steps with the action type [Agreement].
Signing. If enabled, the user will be able to make decisions under the delegate at steps with action type [Signing].
Execution. If enabled, the user will be able to make decisions under the delegate at steps with action type [Execution].
Do not send email messages for documents to the original user. That is, the notification of newly created documents to the user from whom the delegation was made.
The system will close the delegate session if the delegation has been removed from the user's profile and if the delegation has expired.
Automatic delegation (you need to use an additional module).
An additional paid auto-delegation module is available in the low-code platform - Almexoft.
This module is located in the [BPM - process] section.
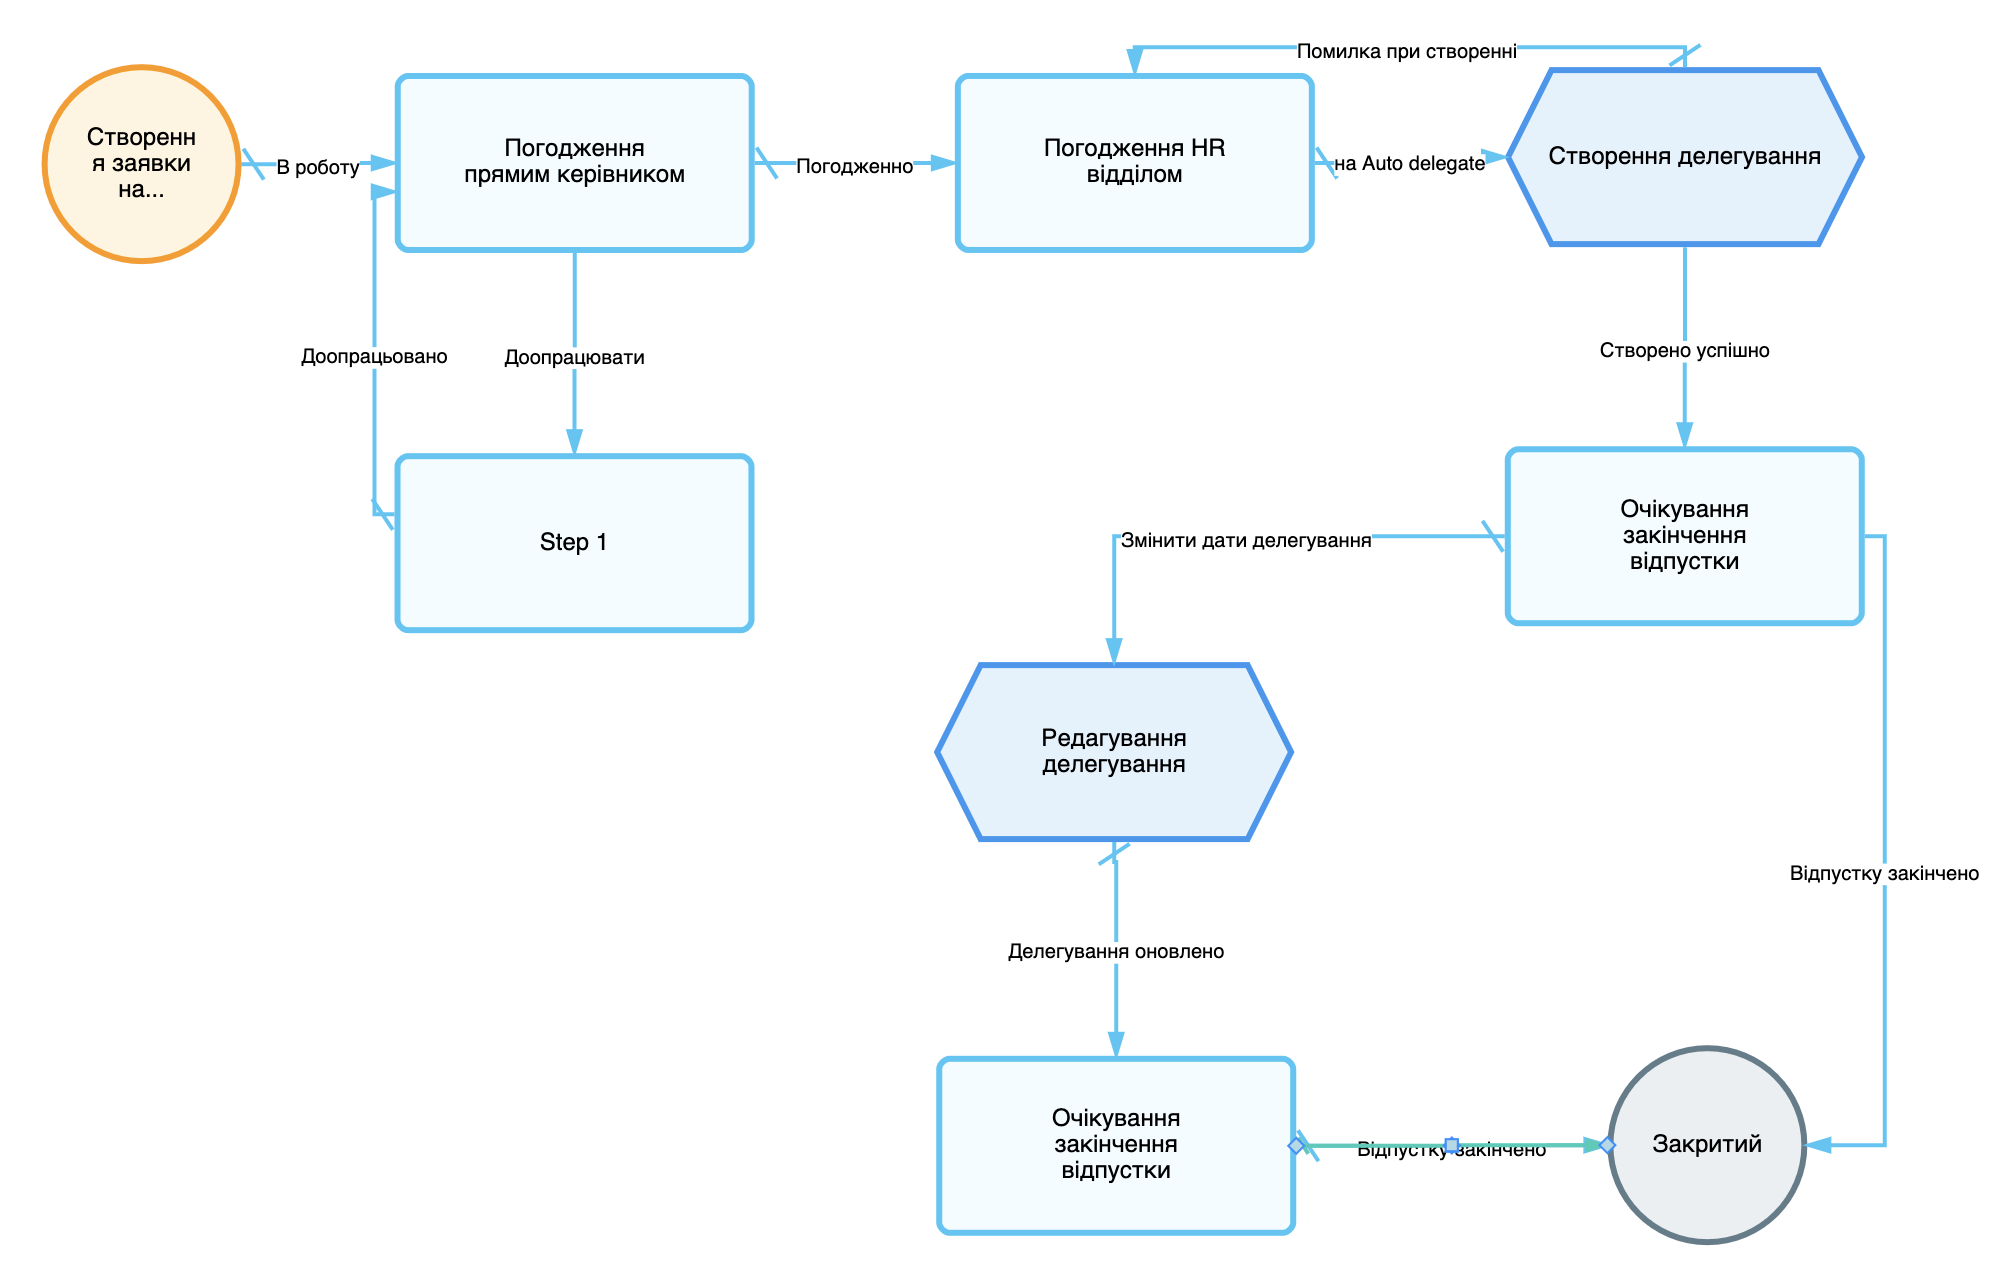
The automatic module has the same configuration steps as the manual delegation. Except to delegating individual template groups and templates. The user can delegate only documents from the entire account.
Note! The user can delegate to one user at a time. |
|---|
Transfer cases
Case transfer functionality is available in the low-code platform Almexoft. It is created to transfer access to documents, templates and other access rights.
To transfer cases, you need:
Click on
Go to the admin page section [Users]
Choose the user from whom we want to transfer cases

Click on
Click on and choose the work transmission function.
Make all the necessary settings and fill in the fields
Transfer cases settings:
Add a user to whom we will transfer cases.
Choose the necessary case transfer parameters.
Assign the roles of the current user to the new user.
Assign the groups of the current user to the new user.
Assign the secrecy stamps of the current user to the new user.
Provide access to all documents. For the entire time or for the selected period.
Grant access to individual documents. The user can choose accounts, groups or templates.
Provide BPM. The user to whom the case was transferred will replace the original user in the templates (in the settings, members, access to the template tab - [Users] in the document pattern).
Replace in the user choice field. After transferring cases, the user will be replaced in all fields, [user choice]. Settings - allowed users, users
Block access to the system.
Delete the user from the system. The user can also leave a comment when deleting.

To transfer cases, the history is available by clicking on
in the case transfer creation window.
Note! Transfer of cases will be performed automatically during non-business hours. The documents will be transferred on the next working day. Case transfers can be started manually via section. |
|---|
Decorators and watermarks.
The decorator is a visualization of your EDS signature, which is displayed after signing the document.
Five types of decorators are available in the system
Standard decorator.
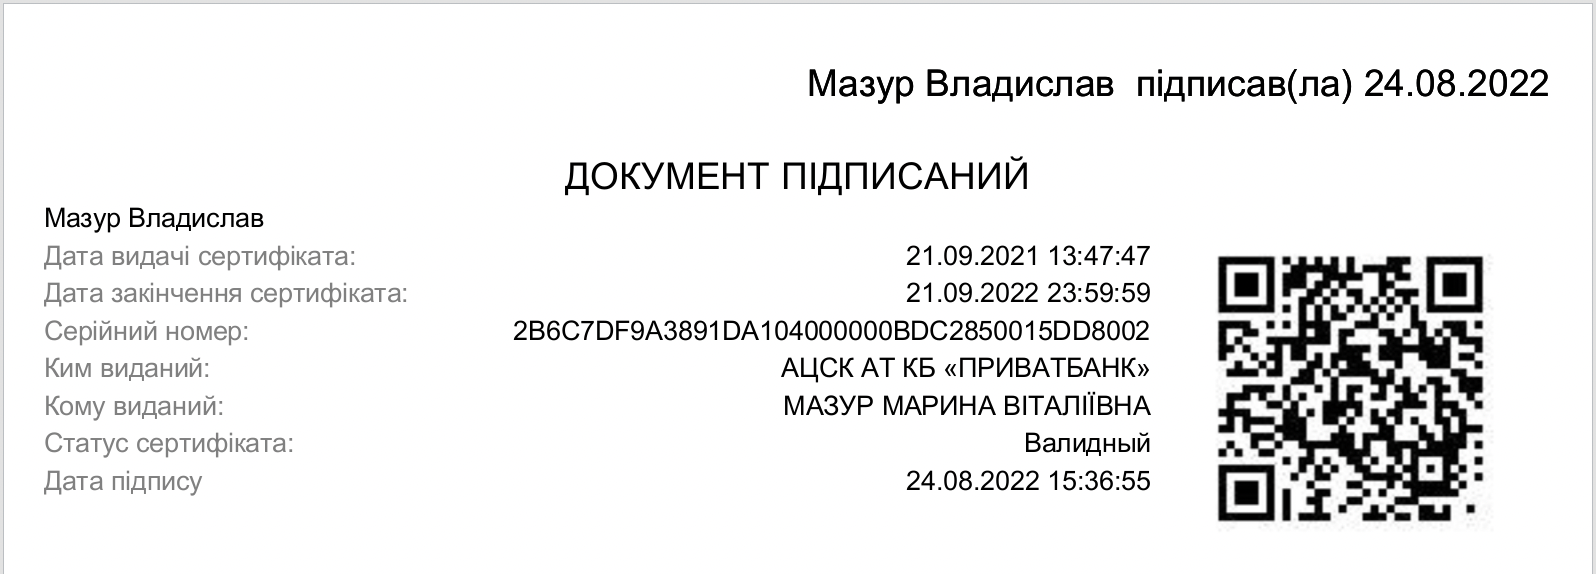
Decorator №2
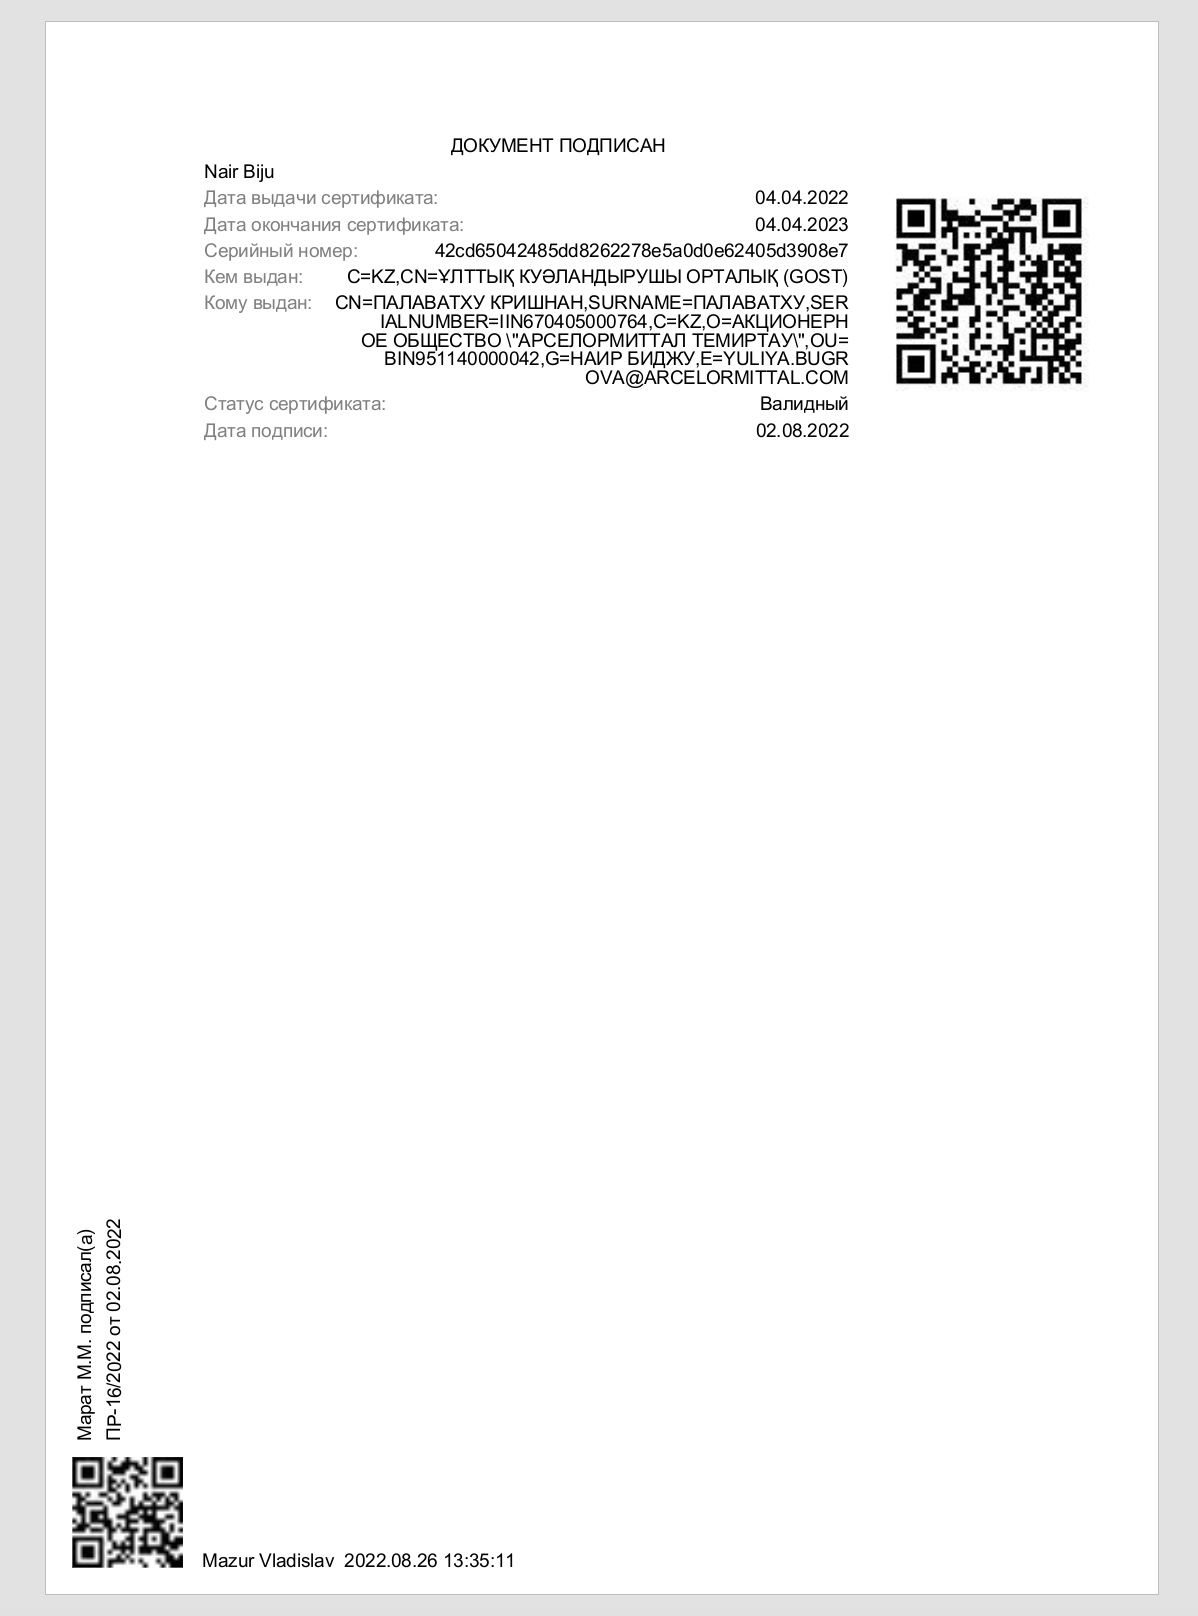
Decorator №3
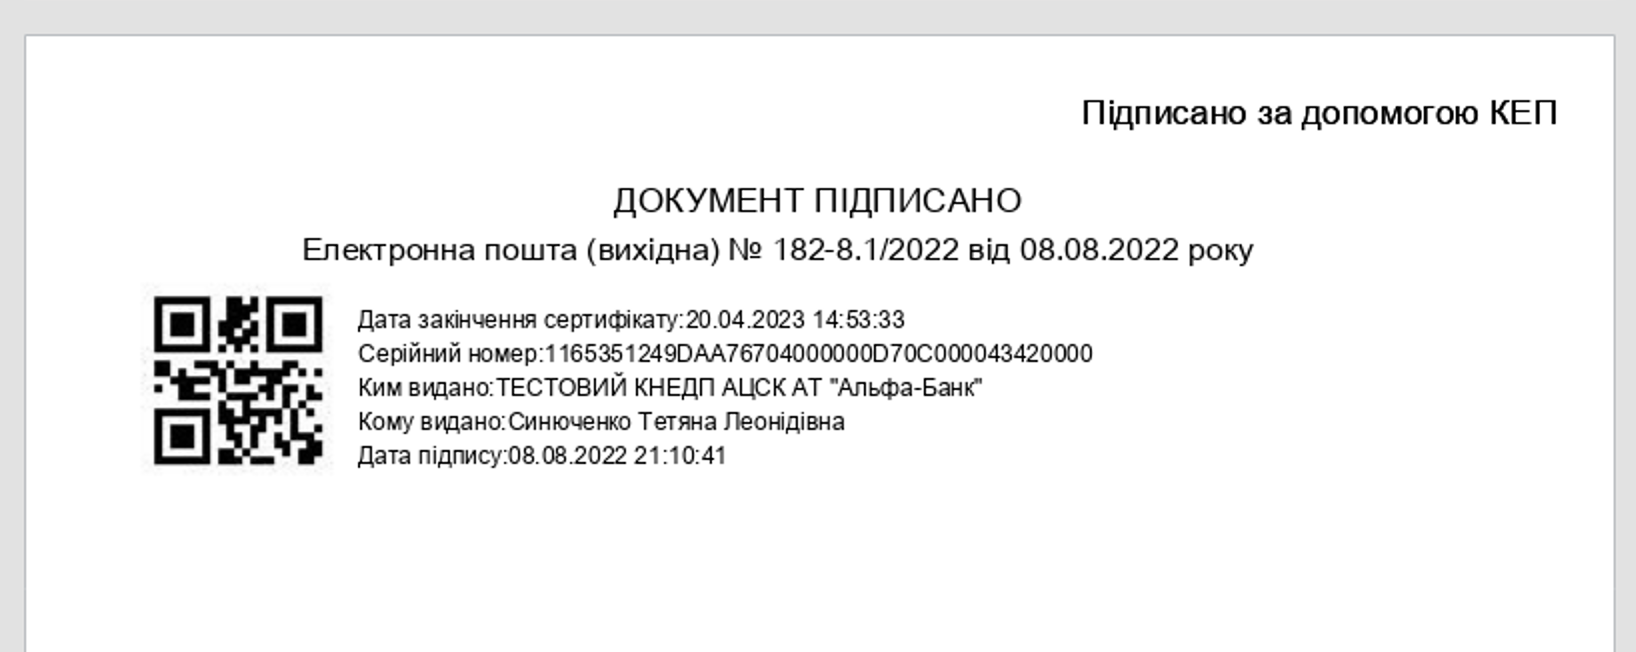
Decorator №4
Decorator №5
If none of the decorators fit, you can order your own decorator for an additional fee.
A watermark is a text or image that is displayed below the text of the document or in the lower left corner.
Three types of watermarks are available in the system:
Watermark №1.
Watermark №2.
Watermark №3.
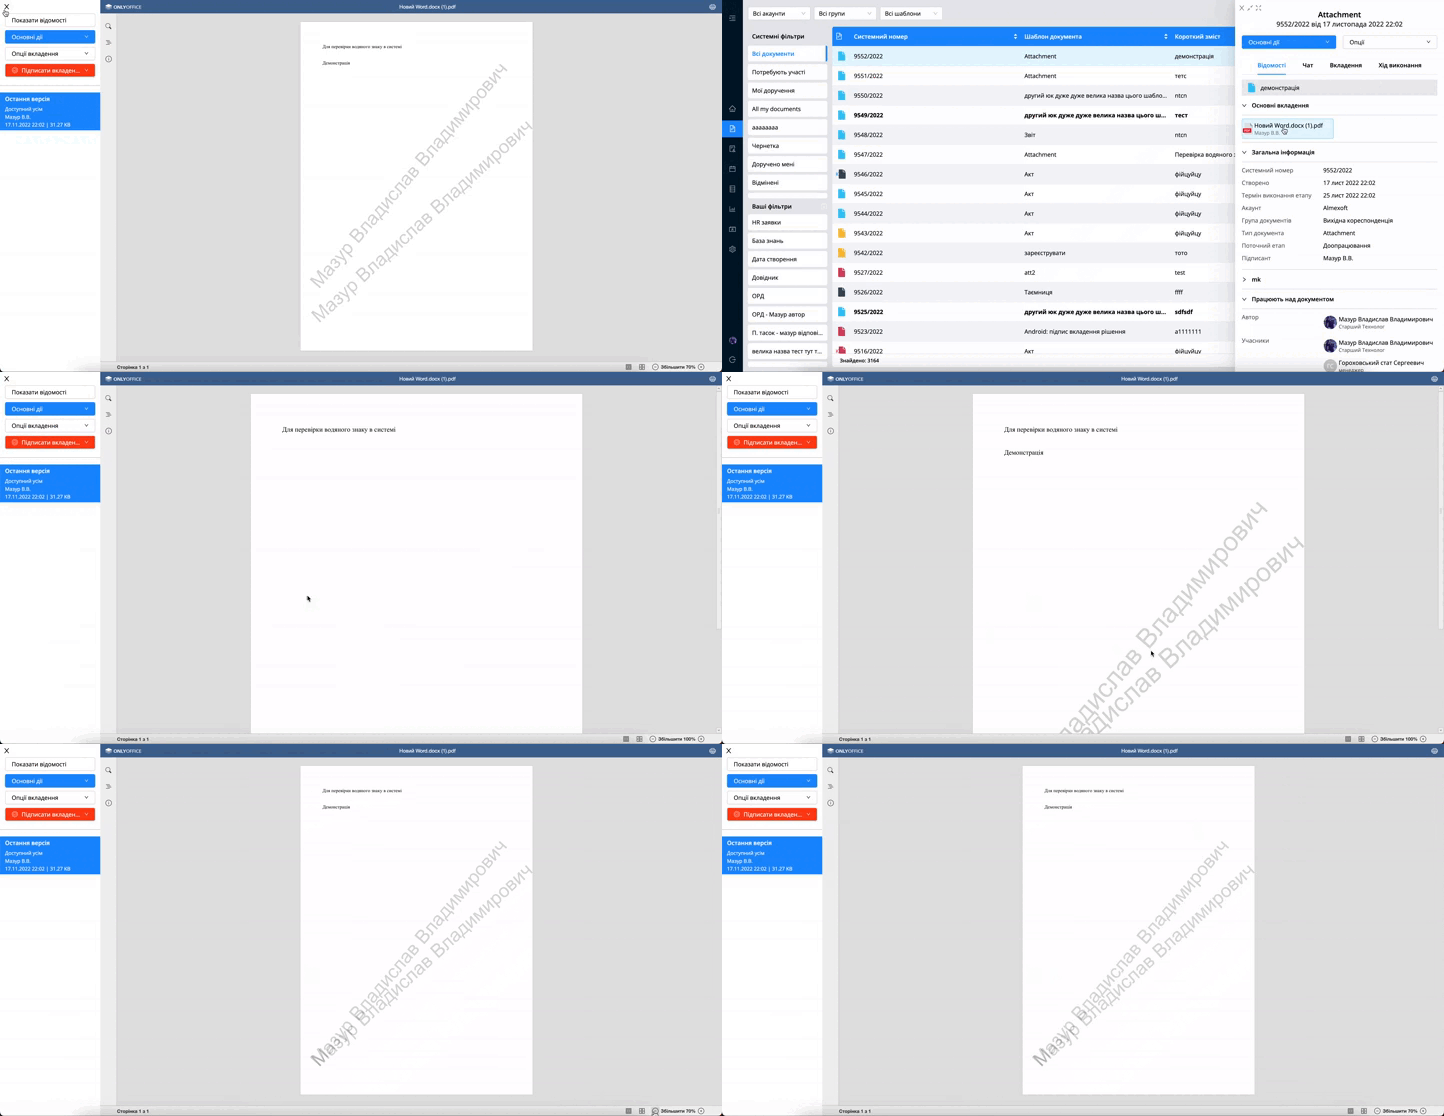
It looks the same as watermark #2, but every time the attachment is opened, the angle of inclination changes. This is done so that 2 watermarks do not overlap each other (in cases where the original attachment was already loaded with a watermark).
Roles
Users and groups
Section Users and Groups (UG)
| № | NAME | ROLE DESCRIPTION | FUNCTION KEY |
|---|---|---|---|
| 1 | USER_INFO_UPDATE | Allows you to change your name, email address, job title and phone number in your profile. | User profile |
| 2 | USER_NOTIF_UPDATE | Allows you to change your list of received messages. | Notifications |
| 3 | USER_PASSWORD_UPDATE | Allows you to change your password. A "Forgot password" button is also displayed on the authorization form. | Authorizations |
| 4 | USER_PUBLIC_KEY_UPDATE | Allows you to download the public EDS key in your profile. Then the admin will need to confirm this key in the appropriate section. | EDS |
| 5 | ADMIN_USER_ PASSWORD_UPDATE |
Allows you to manage the passwords of any users, reset the password, check the box "change password at next login", "password never expires" within the available accounts. See also ADMIN_USER_UPDATE. | Authorizations |
| 6 | ADMIN_USER_GROUPS_UPDATE | Allows you to include and exclude any users from groups within the available accounts. See also ADMIN_USER_UPDATE | User profile |
| 7 | ADMIN_USER_ROLES_UPDATE | Allows you to change the list of roles of any users (or groups of users) within the available accounts. See alsoADMIN_USER_UPDATE. | Roles |
| 8 | ADMIN_USER_SC_UPDATE | Allows you to change the secrecy stamps in the profile of any user (or group of users) within the available accounts. See also ADMIN_USER_UPDATE | Secrecy stamps |
| 9 | ADMIN_USER_ DELEGATE_UPDATE |
Allows you to manage any user's delegates within the available accounts. See also ADMIN_USER_UPDATE | Assignment |
| 10 | ADMIN_USER_NOTIF_UPDATE | Allows you to manage the notifications of any user within the available accounts. See also ADMIN_USER_UPDATE. | Notifications |
| 11 | ADMIN_USER_ACCOUNT_UPDATE | Allows you to change the set of available accounts in a user profile and set the main account within the available account group. See also ADMIN_USER_UPDA | Accounts |
| 12 | USER_SUBORDINATES_DASHBOARD | Allows the user to display the manager's dashboard on the main page of the platform. Also, the user needs to be a manager. | Manager's dashboard |
| 13 | ADMIN_USER_RESTORE | Allows the user to restore a user from the list of deleted users in [Administration]-[Users]-[Users] | Users |
Documents
Stage Document Functions (DF)
| № | NAME | DESCRIPTION | FUNCTION KEY |
|---|---|---|---|
| 1 | USER_DOC_CREATE | Allows you to create documents within BPM templates, as well as delete a document in which the user is the author at the Draft stage. | Creating a document |
| 2 | USER_DOC_DELETE | Allows you to delete a document in which the user is the author or responsible (except for the End stage). | Creating a document |
| 3 | USER_DOC_SC_UPDATE | Allows you to edit secrecy stamps in a document with direct access both when creating/editing the document and as a separate option. Secrecy stamps must be added in the settings of the template by which the document is created (see also ADMIN_DOC_SC_UPDATE) | Secrecy stamps |
| 44444 4 | USER_DOC_SHARE | Allows users to familiarize other users(that are added to the Can Receive template settings) with a document with direct access. | Familiarization |
| 5 | USER_DOC_SHARE_TO_GROUP | Allows users to familiarize groups of users(that are added to [Can Receive] template settings) with a document with direct access. USER_DOC_SHARE. | Familiarization |
| 6 | USER_DOC_REASSIGN_UPDATE | Allows you to assign within the established BPM rules. It does not allow to revoke subsidiary cards, except when the user himself makes a decision on his card. | Assignment |
| 7 | USER_DOC_REASSIGN_DELETE | Allows you to recall a child execution card. | Assignment |
| 8 | USER_DOC_ RESPONSIBLE_UPDATE |
Дозволяє вказати відповідальних осіб для документа, що створюється або редагується, з прямим доступом. Якщо користувач не має цієї ролі, то при створенні/редагуванні документа не показувати блок "Поставити на контроль". Якщо користувач без цієї ролі редагує документ, поставлений кимось раніше на контроль, то не давати користувачеві змінювати дані в цьому блоці (див. також ADMIN_DOC_RESPONSIBLE_UPDATE). | Creating a document |
| 9 | USER_DOC_RELATIONS_UPDATE | Allows you to create a new document based on the selected document from the Documents section within the available accounts (see also ADMIN_DOC_RELATIONS_UPDATE). | Related documents |
| 10 | USER_DOC_RELATIONS_DELETE | Allows the user with direct access to the document to remove the link between the documents (see also ADMIN_DOC_RELATIONS_DELETE). | Related documents |
| 11 | USER_DOC_COMMENT_UPDATE | Allows you to edit comments on your performance card. | Execution card |
| 12 | USER_DOC_COMMENT_DELETE | Allows you to remove comments on your execution card if the iteration does not differ by more than 1 and the comment does not have a resolution status. | Execution card |
| 13 | USER_DOC_ RESOLUTION_UPDATE |
Allows you to change your comment, which has resolution status if the iteration does not differ by more than 1. | Assignment |
| 14 | USER_DOC_ ADD_CONFIRMATION |
Allows you to create an additional approval card from your open execution card in a direct access document within the established BPM rules. | Additional confirmation |
| 15 | USER_DOC_ADD_EXECUTOR | Allows you to add a participant to the current stage of the document with direct access within the established BPM rules. | Actions |
| 16 | USER_DOC_REGISTRATE | Allows you to provide the registration number of a document with direct access. | Options |
| 17 | USER_DOC_EXTEND_DEADLINE | Allows you to extend the control term of the document in which the user is the author or responsible, and also allows you to extend the term of execution of your child cards, but not more than the term of execution of your own card. | Assignment, Options |
| 18 | USER_DOC_ REVOKE_OWN_DECISION |
Allows the root user to override their own decision if the document has not yet progressed to the next stage. If an execution card is given to a user from the root group, that map is also considered root. | Actions |
| 19 | USER_REMINDER | Allows the participant of the document to remind about the open performance card or add. matching level +1. | Execution card |
| 20 | USER_DOC_HISTORY_VIEW | Allows a user without an administrative role to see the history of a document to which the user has direct access. | History |
| 21 | USER_RUN_PERIODICAL | Allows you to specify settings for the periodic stage during document creation | Periodical |
| 22 | USER_DOC_TREE | Allows you to view the dependency tree of related documents | Options |
| 23 | ADMIN_DOC_ SUBSTATUS_UPDATE |
Allows you to change the substatus of any available document, as well as edit the text of the already changed substatus. | Options |
| 24 | ADMIN_DOC_REGISTRATE | Allows you to assign a registration number to any available document. | Options |
| 25 | ADMIN_DOC_SHARE_UPDATE | Allows you to introduce other users who are added to the "Can receive" template settings, as well as revoke the introduction card. | Familiarization |
| 26 | ADMIN_DOC_REASSIGN_UPDATE | Allows you to delete an assignment and all its child document maps whether they are open or not, such maps should not be displayed at runtime. | Assignment |
| 27 | ADMIN_DOC_RELATIONS_UPDATE | Allows you to create a new document based on the selected document from the Registers and Documents section within the available accounts. (see also USER_DOC_RELATIONS_UPDATE) | Related documents |
| 28 | ADMIN_DOC_RELATIONS_DELETE | Allows you to remove the link between any available documents (see also USER_DOC_RELATIONS_DELETE) | Related documents |
| 29 | ADMIN_DOC_ RESPONSIBLE_UPDATE |
Allows you to change the person responsible and the control date in any available document. | Creating a document |
| 30 | ADMIN_DOC_COMMENT_UPDATE | Allows you to edit a comment or resolution in any document within the available accounts. | Execution card |
| 31 | ADMIN_DOC_COMMENT_DELETE | Allows you to delete a comment or resolution in any document within the available accounts. | Execution card |
| 32 | ADMIN_DOC_ ADD_CONFIRMATION |
Allows you to create an additional card. approval for any unclosed performance card of any user in any document within the available accounts and the rules established in BPM. | Additional approval |
| 33 | ADMIN_DOC_ADD_EXECUTOR | Allows you to add an executor to the current stage of any available document within the established BPM rules. | Actions |
| 34 | ADMIN_DOC_EXTEND_DEADLINE | Allows you to extend the due date of any available document or extend the due date of any due dates in the current document stage. | Options |
| 35 | ADMIN_DOC_SC_UPDATE | Allows you to edit secrecy stamps in any available document, both when creating/editing the document and as a separate option. Secrecy stamp must be added in the settings of the template by which the document is created(see also USER_DOC_SC_UPDATE). | Secrecy stamps |
| 36 | ADMIN_DOC_UPDATE | Allows you to edit any available document within the set BPM rules. | Creating a document |
| 37 | ADMIN_DOC_DELETE | Allows you to delete any available document. | Creating a document |
| 38 | ADMIN_CHANGE_PARTICIPANTS | Allows you to add a new member to the current stage of any available document, as well as remove a member who has not yet performed an action. | Options |
| 39 | ADMIN_REMINDER | Allows you to remind any participant of the stage about an open performance card or add. confirmation cards | Assignment, Add. confirmation |
| 40 | ADMIN_RESOLUTION_UPDATE | Allows you to edit the text of the assignment in the open cards of any available document. | Assignment, Add. confirmation |
| 41 | ADMIN_DOC_GET_ANY | Allows you to open a document to which there is no direct access. Does not apply to vultures. Allows you to open related documents and processes via a link from a letter, to which there is no direct access. | Related documents |
| 42 | ADMIN_CHANGE_DOC_TYPE | Allows you to change the document type with the "Change document type" option | Options |
| 43 | ADMIN_RESOLUTION_DELETE | Allows you to delete an already issued decision of any user, if the stage is still open | Execution cards |
| 44 | USER_SHOW_FULL_EXECUTION_TREE | Allows user to see all stage participants in execution tree tab. Without this role, only users who made a decision will be visible. | Execution tree |
Attachments
Section Attachments Functions (AF)
| № | NAME | DESCRIPTION | FUNCTION KEY |
|---|---|---|---|
| 1 | USER_ATTACHMENT_UPDATE | Allows you to create or upload attachments to a document, edit attachments in the online editor within the limits of the established BPM rules. Allows you to load an attachment into your open execution card and edit it until the iteration does not differ by more than 1. Allows you to delete your own attachment if the document iteration has not changed. | Attachments |
| 2 | USER_ATTACHMENT_DELETE | Allows you to delete your own attachment at any type of stage, except END and ARCHIVE, within the rules set in BPM. | Attachments |
| 3 | USER_ATTACHMENT_ORIGINAL | Allows you to download the original attachment with direct access to the document. | Attachments |
| 4 | ADMIN_ATTACHMENT_UPDATE | Allows you to create or upload a new attachment to any available document, edit attachments in the online editor within the set BPM rules. Allows you to upload attachments in any card for any user, except for familiarization cards. | Attachments |
| 5 | ADMIN_ATTACHMENT_DELETE | Allows you to delete any attachment from the available document. | Attachments |
| 6 | ADMIN_ATTACHMENT_ORIGINAL | Allows you to download the original attachment of any available document. | Attachments |
| 7 | ADMIN_HIDE_ATTACHMENT | Allows you to hide attachments in a document. A user without this role will not see the hidden attachment. | Attachments |
BPM
Section Business Process (BP)
| № | NAME | DESCRIPTION | FUNCTION KEY |
|---|---|---|---|
| 1 | ADMIN_PATTERN_UPDATE | Allows you to manage the template within the available accounts. | Templates |
| 2 | ADMIN_PATTERN_ REPORT_UPDATE |
Allows you to control the list of reports available in the settings for this template. | Reports |
| 3 | ADMIN_PATTERN_ CONTENT_UPDATE |
Allows you to manage bookmarks and fields in the template settings. | Fields |
| 4 | ADMIN_PATTERN_SC_UPDATE | Allows you to control the secrecy stamps in the template settings. If there is no role, then the field for editing secrecy stamps in BPM is inactive. | Secrecy stamps |
| 5 | ADMIN_PATTERN_ DROOLS_UPDATE |
Allows you to manage Drools scripts in the settings of transitions and stages, as well as debug a Drools script and download execution logs of Drools scripts in any available document. | Drools |
| 6. | USER_PATTERN_VIEW | Shows the user business processes without the right to edit | Process |
Calendar
section Calendar Functions (CF)
| № | NAME | DESCRIPTION | FUNCTION KEY |
|---|---|---|---|
| 1 | USER_CALENDAR_SHARE | Allows access to your calendar to other users within the available accounts. | Calendar |
| 2 | USER_MEETING_UPDATE | Allows you to manage your own meetings in your own or someone else's calendar. | Events |
| 3 | USER_MEETING_RESOURCES | Allows you to fill the block with the resources of a meeting authored by the user. | Events |
| 4 | USER_MEETING_ ALTERNATIVE_TIME |
Allows you to suggest an alternative time for a meeting in which the user is participating. | Events |
| 5 | ADMIN_CALENDAR_SHARE | Allows access to any user's calendar to other users within the available accounts. | Calendar |
Admin page
Section System Admin page (SA)
| № | NAME | DESCRIPTION | FUNCTION KEY |
|---|---|---|---|
| 1 | ADMIN_HISTORY_VIEW | Allows you to use the "Logs" section in the administrative panel, the history of user actions in the profile and the history of the document. | Logs |
| 2 | ADMIN_PERMISSION_VIEW | Allows you to use the Access Control section. | Access check |
| 3 | ADMIN_RESOURCES_UPDATE | Allows you to manage material resources for events in the "Resources" section. | Events |
| 4 | ADMIN_STORAGE_UPDATE | Allows you to manage file repositories in the File Storage section. | File storage |
| 5 | ADMIN_NEWS_UPDATE | Allows you to manage news on the "Home" page. | News |
| 6 | ADMIN_TRANSLATIONS_UPDATE | Allows you to manage translations in the "Translations" section. | Translations |
| 7 | ADMIN_EXTERNAL_ MODULES_UPDATE |
Allows you to manage external modules in the "BPM-modules" section. | External modules |
| 8 | ADMIN_SCHEDULER_EXECUTE | Allows you to manually run the queued scheduler from the [scheduled tasks] section | Schedulers |
| 9 | ADMIN_SESSION_UPDATE | Allows you to use the "Sessions" section. | Sessions |
| 10 | ADMIN_PUBLIC_KEY_UPDATE | Allows you to approve or reject keys in the [User EDS] section of the "Admin page" menu. | EDS |
| 11 | ADMIN_ACCOUNT_UPDATE | Allows you to edit account information within available account groups. | Accounts |
| 12 | ADMIN_REPORT_UPDATE | Allows you to manage reports in the Reports section. | Reports |
| 13 | ADMIN_SC_UPDATE | Allows you to manage secrecy stamps in the [Secrecy stamp] section. | Secrecy stamp |
| 14 | ADMIN_HANDBOOK_UPDATE | Allows you to manage handbooks, in addition to deleting system handbooks, within the available accounts. | Handbooks |
| 15 | ADMIN_HANDBOOK_ CONTENT_UPDATE |
Allows you to edit the contents of the handbook and see the "Handbooks" section in the administrative panel. It is forbidden to edit the name, description and columns of the handbook. For a role to appear in the list available for adding to a user, you must add the user to the "Can edit" list in handbook settings. | Handbooks |
| 16 | ADMIN_FILTER_UPDATE | Allows you to manage fields and views in the Fields and Views sections. | Fields, Views |
| 17 | ADMIN_DEPARTMENT_UPDATE | Allows you to manage the organizational structure, divisions, change the subordination of the branches of the structure. | Org. structure |
| 18 | ADMIN_REGISTRY_UPDATE | Allows you to manage registries in the "Registries" section. | Registry |
| 19 | ADMIN_USER_UPDATE | Allows you to manage users and user groups in the "Users" and
"Groups" sections, change the name, email, position and phone number in
the profile of any user. Without this role, the user profile Admin page
window and the corresponding section of the Admin page panel are not
displayed. also ADMIN_USER_PASSWORD_UPDATE, ADMIN_USER_GROUPS_UPDATE, ADMIN_USER_ROLES_UPDATE, ADMIN_USER_SC_UPDATE, ADMIN_USER_DELEGATE_UPDATE, ADMIN_USER_NOTIF_UPDATE, ADMIN_USER_ACCOUNT_UP |
User profile |
| 20 | ACCOUNT_GROUP_ADMIN | Allows you to manage accounts within an account group. | Accounts |
| 22 | ADMIN_MOVE_TO_STAGE | Allows you to use the option "Move the document to another stage" | Options |
| 23 | ADMIN_SCHEDULER_EXECUTE | Allows the user to delete a scheduled task if it has not yet run | Planned tasks |
Glossary
Document statuses:

- Document requires your participation.
- Deadline for execution of the document requiring your action is
approaching. This is the status of the document if there is less than
one day left for the stage before the deadline.
- The deadline for the document that needs your action has arrived.


- Document completed.
- Document with an error.
- Document canceled. Stage status end - Canceled.
- Status [Canceled]. Can be set for the current stage via options. More
details in the corresponding section.
- Status [Changes made]. Can be set for the current stage through the
document options. More details in the corresponding section.


Attachment types:
Primary. The main document attachment that can be signed.
In execution card. Added only when a decision is made, or via the user's execution card options.
Secondary. An additional attachment type used to separate some attachments from the main attachment. Also, can be signed
System keys for autosubstitution of information from fields into attachments or parameters of automatic stages
$author
$responsible
$authorChief
$lastExecutorChief
To get additional information from the user profile, the user needs to add a dot to the system keys and use the following words:
.position.
.workPhone.
.email.
.fioShort. Surname with initials
.positionAndFio.
.mobilePhone.
Also, additional information can be obtained by adding these additional settings to the keys from the [User choice] field.
4. Filed. Attachment mask for the Email step.
The attachment mask is used to filter the types of files that will be sent to an email address.
Example, There are 5 attachments in the document: two docx, two pdf and one XLSX. To send only docx - attachments, you need:
Enter (.*)\.docx in the filed [Attachment mask] in the e-mail step.
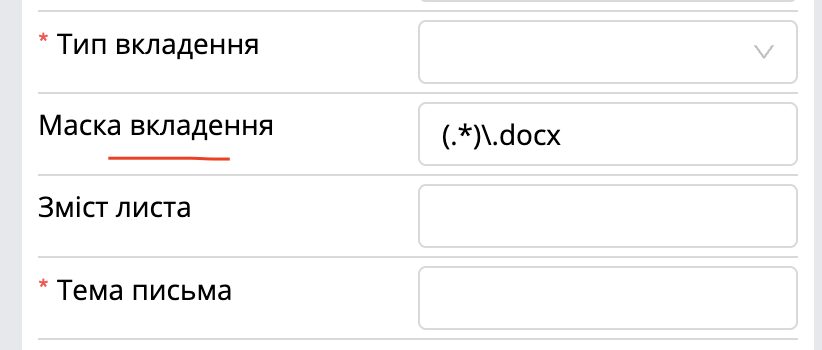
Note! In the [attachment mask] field, the user can enter the full name of the attachment and the email step will send only attachments with that name. |
|---|
5. Rules for downloading the original version of the attachment.
Download original:
If the setting [download original attachment] is enabled on step, then the user can download the original attachment without USER_ATTACHMENT_ORIGINAL, ADMIN_ATTACHMENT_ORIGINAL roles and allowed.file.extension.for.upload.original settings, with direct and indirect access to the document.
If the user has [ADMIN_ATTACHMENT_ORIGINAL], then the user can download the original attachment with direct and indirect access to the document, without configuration on the step and on the server.
If the required extension is available on the server setting - allowed.file.extension.for.upload.original setting, then the user can download the original file with such an extension, without setting the step and the corresponding roles with direct and indirect access to the document.
In the settings at the stage - [download original attachment] - you need to fill in the extensions that will be downloaded - [File extensions].
Downloading an attachment without a watermark:
The option is displayed if the user has the role [ADMIN_ATTACHMENT_ORIGINAL] (indirect access to the document) or has the role [USER_ATTACHMENT_ORIGINAL] (direct access to the document) and the attachment is signed using EDS.
Download the pdf version of the attachment. The user can download whenever there is a pdf version of the attachment (which was converted in the system).
6. p7s file.
A P7S file (full PKCS-7 Signature file) is a file format that is formed after signing in the system, which contains encrypted information about the signature.
The principle of EDS consists in the application of cryptographic algorithms (keys) for secure signing of an attachment.
7. ZIP file.
This file contains the original signed attachment and signatures (p7s envelopes). The ZIP file can be downloaded from a signed attachment in the system.
8. Nomenclature number template.
$num - Sequence number.
$ksp - structural division code.
$ksp_author - the code of the Author's structural unit.
$ksp_sender - code of the structural subdivision of the performer (Step - Signing).
$ksp_receiver - code of the structural subdivision of the performer (Step - Receiving).
$numKsp - Sequence number within the structural division.
$numKsp_author - Sequence number within the Author's structural subdivision.
$numKsp_sender - Sequence number within the structural subdivision of the executor (Step - Signing).
$numKsp_receiver - Sequence number within the structural subdivision of the executor (Step - Receiver).
$sc - secrecy stamps(,).
$yyyy - current year.
$yy - current year.
$date - display the current date, in the format DDMMYYYY (14092020).
$newnum - numeration start from 1 every day.
Also, in the nomenclature number template, the user can use the
key from the document field and output the value from the field to the
registration number.
Example: $num/$yyyy - $text[34] - [34] means that so many characters will be taken from the field and added to the registration number. |
|---|
9. Common errors.
The document got into the error and the following error appears in the history of the document -> Error of transition to the next step - Document document number did not go to the next stage due to an error. Contact an administrator.
Explanation and solution: This means that at the current step there is a script on the post function or on the pre function of the next step, and it worked with an error. In this case, you need to download the log file for the document via the options and check the script in the template (whether it is valid). It is also necessary to check whether the values of the fields used in the script are filled. |
|---|
OR
Explanation and solution: This means that the next step is mandatory and there are no performers on it. This can happen if there is a process role at the step, and it has not been filled by the script (which should fill it according to the process) or the user who was added to the process role is not added to the [can receive] column in the business process template. |
|---|
The template did not pass validation and an error occurred - ["step name" - Process / document number not filled] on the validator.
Explanation and solution: This means that at the step, the setting [register document] was enabled, but the nomenclature number was not set in the template settings. |
|---|
The template did not pass validation and an error occurred - ["template name" - The type of action on the transition is ambiguously defined] on the validator.
Explanation and solution: This means that all transitions that depart from the step have the transition type [Most participants]. The system prohibits such settings. |
|---|
In the system, it is forbidden to use the link transition type - [majority of participants], if a group is added to the step. If such a combination is set, an error will occur during template validation.
When saving the template, an error may appear - [Check the correctness of data entry].
Explanation and solution: This may be due to the fact that a new language was added on the server and the names of steps and transitions were filled for old templates only for old languages, and the name is empty for the new language. The user needs to manually set the names in the new language for all objects in the business process template. |
|---|
When logging in, I get [license reading error].
Explanation and solution: The server has changed processor or other hardware and the old licenses will no longer work on the new hardware. You need to reissue the licenses for a new osKey. |
|---|
10. Additional setting for user search.
In the system settings file, you need to add - user.search.fio.extra.field
Parameters that can be registered - login, position, externalId, email, remark
Business - Process
This section serves for a better understanding how to build business processes in the platform.
Template name: Vacation approval.
Template description: The template is designed to create and coordinate vacations for company employees on the Almexoft platform.
Group: HR service
Availability to create: Employees of the company (Who added to the template).
Nomenclature number: Registration number in the format:
Employee name - Vacation + number + year. For example, Anastasiia - Vacation - 16/2023
Steps of the process
Creating a document
The initiator fills in all fields of the document and sends the document to the manager for approval.
Agreement
The document is approved by the manager
If errors are found in the document during the agreement, or if there is a disagreement with this document, the manager sends the document to the Initiator for correction.
The initiator's chief can reject an application for vacation if he/she doesn't agree with it.
Registration of vacation
Registration is automatic upon successful agreement.
If errors are found in the document or there is a disagreement with this document during the review, the manager sends the document to the Initiator for correction.
During the agreement, the manager can reject the application for vacation.
After that, the document goes to the automatic Compare step. At this step, there is a script that calculates whether the substitute field is filled, if so, then the document go to automatic email steps - one letter for the substitute, and the other for the initiator. And the document goes to the "familiarization" step, where the substitute needs to make a decision about replacing a colleague during vacation. After that, the document goes to step 3
If the substitute is not needed, the document goes to the automatic Email stage, at which a letter will be sent to the initiator, about the vacation registration, and after that the document goes to the "closed" step.
After closing the document, it is possible to extend the vacation, if it is necessary for the initiator.
Document card
| Vacation start date* | It is necessary to specify the start date of the vacation |
|---|---|
| Vacation end date* | It is necessary to specify the end date of the vacation |
| Vacation days | Automatic fill in |
| Vacation replacement required | A drop-down list box. There are two possible values: "Yes". "No". |
| During the vacation, duties will be performed* | This field appears if we have selected the value "Yes" in the "Vacation replacement required" field. |
| Comments | This is the field to add an explanation for vacation (if necessary) |
*The field is mandatory
Document card layout
All document fields are visible to all users who have access to view the document in all viewing modes:
Show in information;
Detailed view;
Block of information.
Process template
After setting
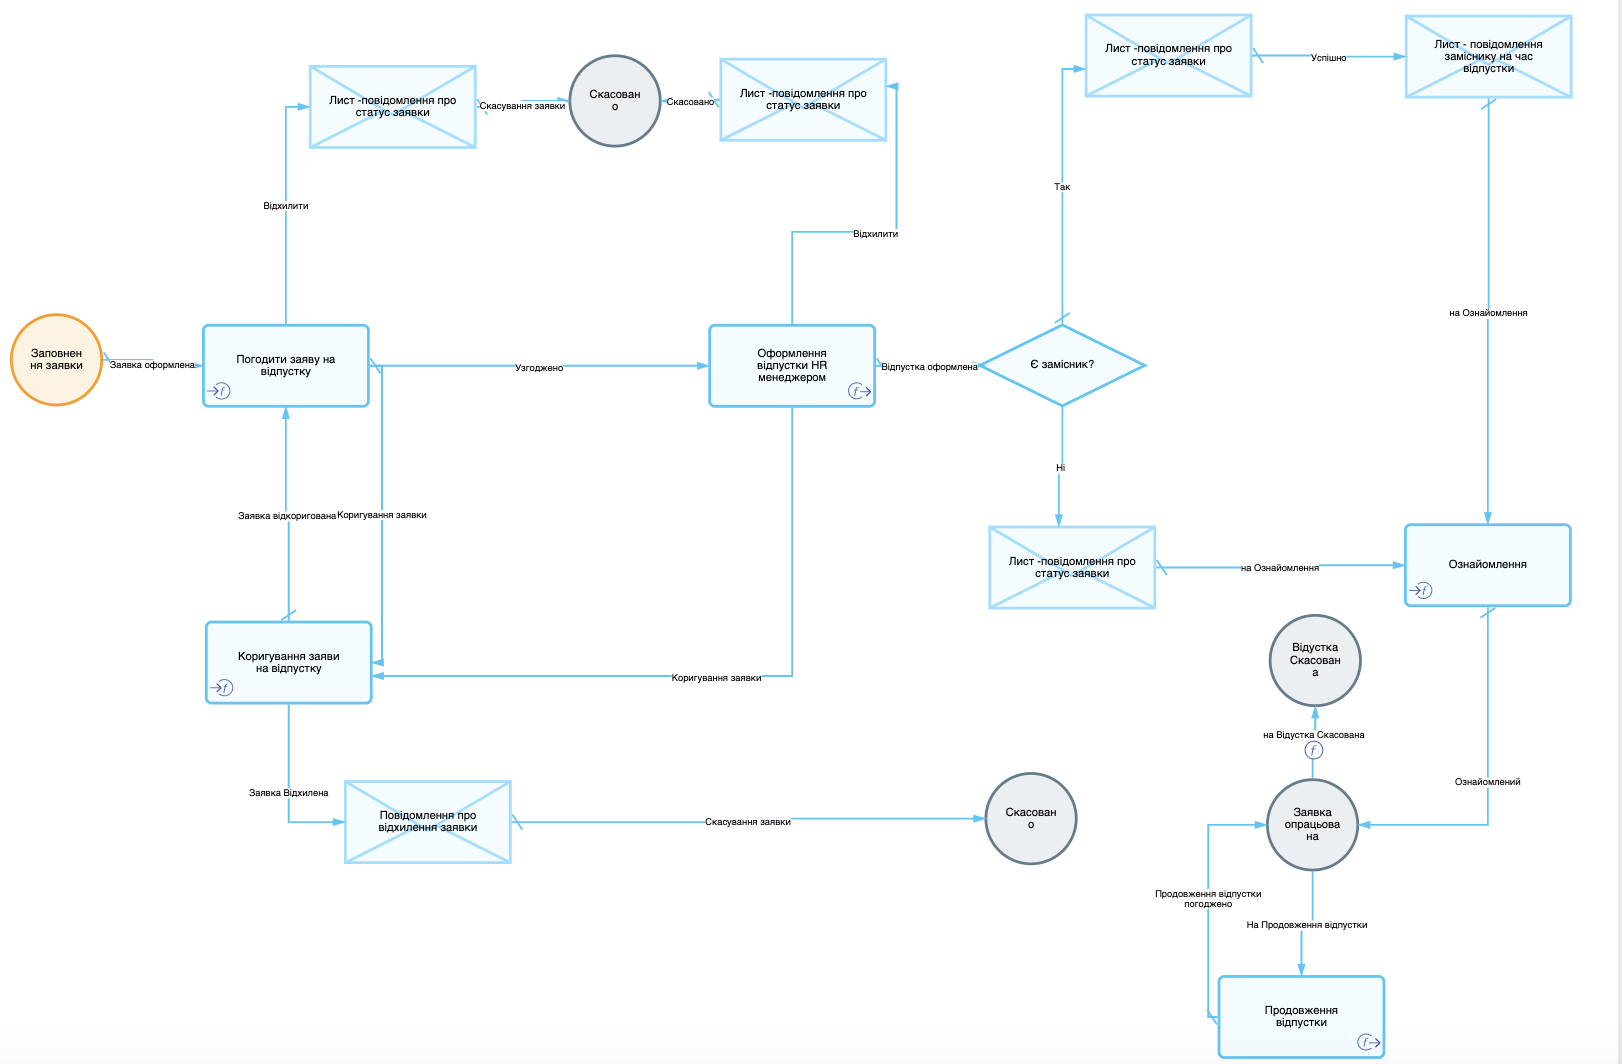
Steps of work
Filling out the application:
Executor: Initiator
The initiator fills out the document card
Available actions for the participant: "Application created"
In the case of the "Application Formed" action, the document moves to the "Approval of vacation application" step;
Approval of vacation application:
Action type «Approvement»
Extended status "On approval";
Available actions for the user:
Approved
To adjust vacation.
Reject the vacation request.
Transition to vacation adjustment: Transition type: immediately with Requires comment.
The document at the "Adjustment of vacation application" step is available to the initiator.
After "Adjustment of vacation application", the document goes to the next step of "Approval of the vacation application".
When switching to "vacation rejected", the document moves to the automatic Email step with the following settings:
The email address is $author.email.
Subject of the letter - Vacation application rejected.
Content of the letter - $author! Your request for vacation was rejected! For clarification, please contact the HR manager! Have a good day!.
Attachment type - ORIGINAL.
Advanced status - In work.
Participants at the "Approval of vacation application" stage - By process role - The author's supervisor.
Additionally - there is Drool at this stage(Pre-function)*
Steps of work
Registration of vacation by the HR manager:
Action type - "Execution"
Advanced status - "In work"
Agreement type - "Parallel"
At this step, the document is registered;
The executor can reject the initiator's application at the "Registration" step.
Transition type "Immediate" with additional comment.
If the vacation application is rejected, the document moves to the automatic "Email" step with the following settings:
The email address is $author.email.
Subject of the letter - Vacation application rejected.
Content of the letter - $author! Your request for vacation was rejected! For clarification, please contact your HR manager! Have a good day!
Attachment type - ORIGINAL.
Advanced status - In work.
A participant at the step of "Registration of vacation application" is the HR manager.
Additionally - at this step, there is Drool (Pre-function)*
Additional information
The initiator can edit the document at the stages "Filling out the application" and "Adjustment of vacation application".
The business process template uses drool - script that takes data from the fields and insert it into the handbook.
Handbook, which is automatically filled by the script.
HR - the manager can transfer the document from the "Application processed" step to the "Continuation of vacation" step.
Created by Anastasiia and Vladyslav